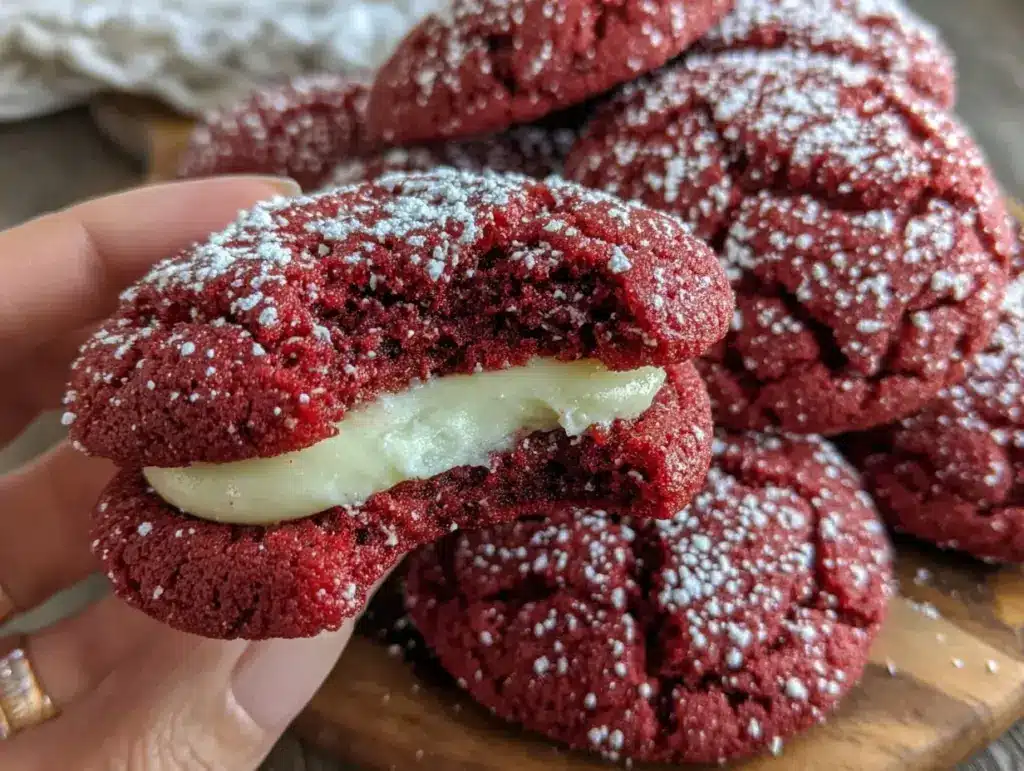
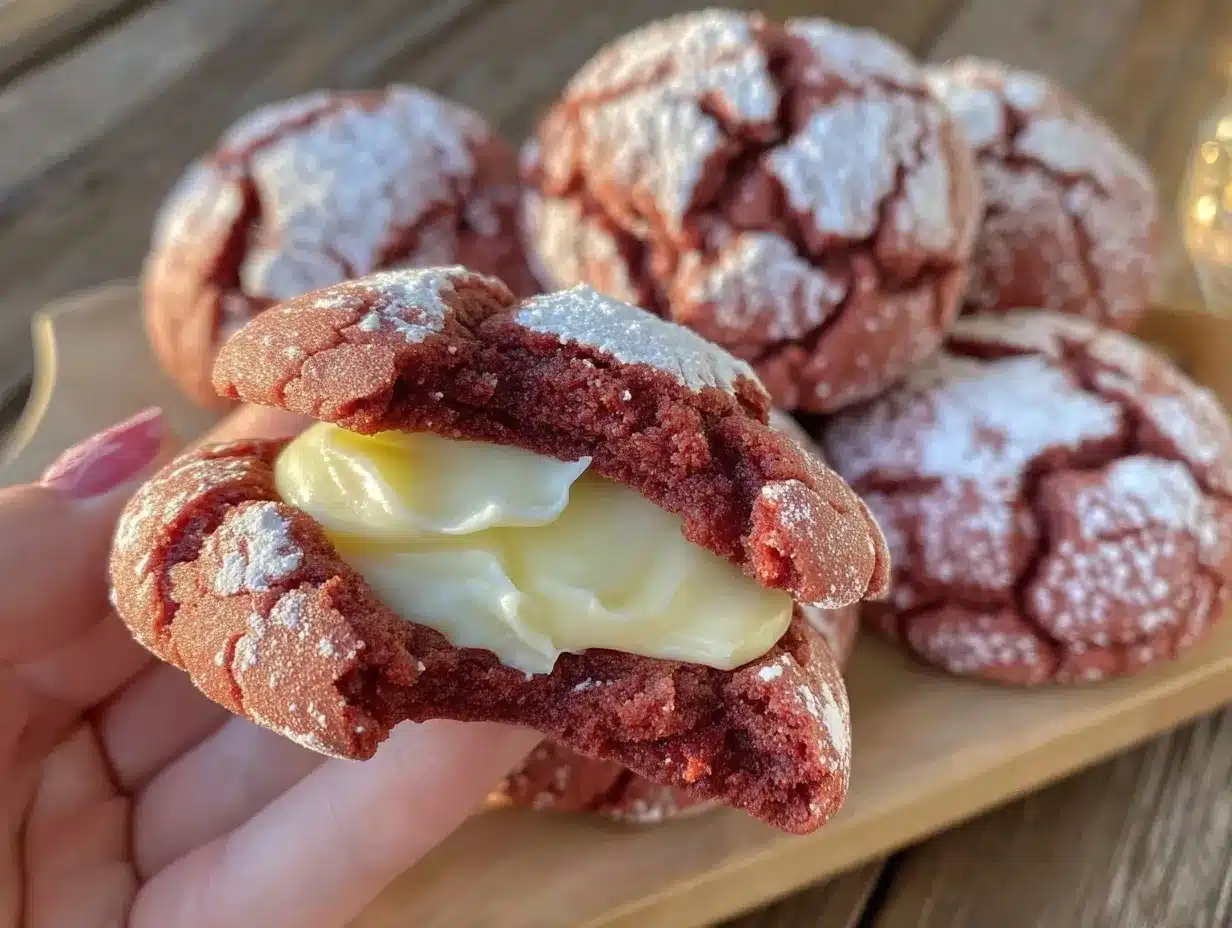
“You sure these are cookies and not mini cakes?” my friend asked, raising an eyebrow as she bit into one of these cozy red velvet crinkle cookies with cream cheese centers. Honestly, I couldn’t blame her—there was something about the way the soft, vibrant red dough cracked open, revealing a luscious cream cheese core, that felt way more indulgent than your average cookie.
It all started during one of those slow, rainy afternoons when I was craving something comforting but didn’t want to commit to a full cake. I rummaged through my pantry, spotting the cocoa powder, cream cheese, and that lonely bottle of red food coloring. I thought, why not try crinkle cookies but with a twist? The result? A batch that vanished faster than I expected, complete with that velvety texture and the subtle tang of cream cheese in every bite.
What I love most about these cookies is how they bring that cozy, warm feeling without requiring hours in the kitchen. Plus, the contrast between the slightly crisp exterior and the fudgy, creamy inside is just something to savor slowly, preferably with a cup of tea or a cozy blanket nearby. This recipe has quietly become my go-to when I want to impress guests—or just treat myself without fuss. And hey, if you’re anything like me, you might even find yourself making them multiple times in one week, just like those fluffy lemon ricotta pancakes that brighten up any brunch.
So, if you’re ready for a cookie that’s as comforting as a warm hug but with a little extra flair, these red velvet crinkle cookies with cream cheese centers have your name all over them. Let’s get into why this recipe has stuck with me and why it might just become your new favorite, too.
Why You’ll Love This Recipe
Trust me, this recipe has been tested, tweaked, and approved by friends, family, and a few cookie skeptics along the way. Here’s what makes these cozy red velvet crinkle cookies with cream cheese centers stand out:
- Quick & Easy: You can have these beauties ready in under 45 minutes, making them perfect for those unexpected sweet cravings or last-minute get-togethers.
- Simple Ingredients: No exotic or hard-to-find items here—just pantry staples and a bit of cream cheese for that dreamy center.
- Perfect for Cozy Occasions: Whether it’s a rainy day treat, holiday baking, or a casual weekend snack, these cookies fit right in.
- Crowd-Pleaser: Kids and adults alike can’t get enough of the soft texture paired with the tangy cream cheese surprise inside.
- Unbelievably Delicious: The smooth red velvet dough with a dusting of powdered sugar cracks just right, revealing that creamy center that makes every bite memorable.
What sets this recipe apart is the way the cream cheese center stays perfectly moist and slightly tangy, balancing the sweet, cocoa-infused red velvet dough. I’ve found that chilling the dough before baking creates that signature crinkle effect and prevents the cream cheese from melting out too much. It’s a little trick I picked up after a few trials (and a few melted messes). This isn’t just another cookie recipe—it’s my best version of what a red velvet crinkle cookie should be.
Honestly, after the first batch, I couldn’t stop myself from making these alongside some champagne cupcakes for a cozy, colorful dessert spread. It’s the kind of recipe that makes you pause and appreciate the simple pleasures—one soft, creamy bite at a time.
What Ingredients You Will Need
This recipe uses simple, wholesome ingredients to deliver bold flavor and that satisfying texture without any fuss. Most of these are pantry staples, and the cream cheese adds that luscious center that makes these cookies a standout.
- For the Cookie Dough:
- All-purpose flour – 2 ½ cups (315 g)
- Unsweetened cocoa powder – ¼ cup (25 g) (use a good quality Dutch-processed cocoa for deeper flavor)
- Baking powder – 1 teaspoon
- Salt – ½ teaspoon
- Granulated sugar – 1 ½ cups (300 g)
- Unsalted butter, softened – ¾ cup (170 g)
- Large eggs – 2 (room temperature)
- Vanilla extract – 1 teaspoon
- Red food coloring – 2 tablespoons (liquid or gel works fine)
- Powdered sugar – for rolling the cookies before baking
- For the Cream Cheese Center:
- Cream cheese, softened – 8 ounces (225 g) (I prefer Philadelphia brand for smoothness)
- Powdered sugar – ½ cup (60 g)
- Vanilla extract – ½ teaspoon
If you want to make these gluten-free, swapping in a 1-to-1 gluten-free baking flour blend works well—it won’t affect the texture much. For a dairy-free version, I’ve tried coconut cream cheese alternatives, and they work okay, though the flavor shifts a bit.
When picking your cocoa powder, I recommend Dutch-processed for a richer, less bitter taste, which pairs nicely with the cream cheese filling. Also, if you don’t have red food coloring on hand, beet powder can be a natural substitute, but the color won’t be quite as vibrant.
Equipment Needed
- Mixing bowls – preferably one large and one medium-sized
- Electric mixer or stand mixer – for creaming butter and sugar smoothly
- Measuring cups and spoons – precise measurements matter here for texture
- Rubber spatula – for folding ingredients gently
- Cookie scoop or tablespoon – to portion the dough and cream cheese filling evenly
- Baking sheets – lined with parchment paper or silicone baking mats
- Cooling racks – to let cookies cool evenly without getting soggy
If you don’t have a stand mixer, a sturdy hand mixer works just fine, though it might take a bit longer to cream the butter and sugar. I’ve even mixed by hand when in a pinch, but my arms definitely felt it afterward! For budget-friendly baking mats, parchment paper works perfectly and keeps cleanup easy.
Preparation Method
- Prepare the Cream Cheese Filling: In a medium bowl, beat 8 ounces (225 g) of softened cream cheese with ½ cup (60 g) powdered sugar and ½ teaspoon vanilla extract until smooth and creamy. Cover and chill while you prepare the cookie dough (about 15 minutes).
- Mix Dry Ingredients: In a separate bowl, whisk together 2 ½ cups (315 g) all-purpose flour, ¼ cup (25 g) unsweetened cocoa powder, 1 teaspoon baking powder, and ½ teaspoon salt. Set aside.
- Cream Butter and Sugar: Using an electric mixer, beat ¾ cup (170 g) softened unsalted butter with 1 ½ cups (300 g) granulated sugar until light and fluffy, about 3–4 minutes. This aeration makes the cookies tender and soft.
- Add Eggs and Vanilla: Beat in 2 large eggs, one at a time, then add 1 teaspoon vanilla extract and 2 tablespoons red food coloring. Mix until fully combined and the dough turns a vibrant red color.
- Combine Wet and Dry Ingredients: Slowly add the dry ingredients to the wet mixture, mixing on low speed until just incorporated. Avoid overmixing to keep cookies tender.
- Chill the Dough: Divide the dough into two portions. Flatten them into discs, wrap tightly with plastic wrap, and chill for at least 2 hours or overnight. This step helps develop the cookie’s flavor and makes them easier to shape.
- Preheat Oven and Prepare Baking Sheets: Heat your oven to 350°F (175°C). Line baking sheets with parchment paper or silicone mats.
- Shape Cookies: Scoop about 1 tablespoon (15 g) of dough and flatten it slightly in your palm. Place about 1 teaspoon (5 g) of cream cheese filling in the center, then wrap the dough around it, sealing completely into a smooth ball. Roll the ball gently to seal any cracks.
- Coat with Powdered Sugar: Roll each cookie ball generously in powdered sugar, ensuring a thick coating. This creates the signature crinkle effect during baking.
- Bake: Arrange cookies 2 inches apart on the baking sheets. Bake for 12–14 minutes until the cookies have puffed up and the powdered sugar is cracked but not burnt.
- Cool: Let cookies cool on the baking sheet for 5 minutes before transferring to a wire rack to cool completely. The cream cheese center will still be soft and slightly gooey—perfect for that cozy bite.
Pro tip: If you notice cream cheese peeking out while shaping, just pinch the dough a bit more to seal it. Also, chilling the dough overnight really improves the crinkle texture and flavor depth. I’ve learned that the first batch usually sets the tone, so keep a close eye on baking time—you want soft centers, not dried-out middles.
Cooking Tips & Techniques
Getting these red velvet crinkle cookies just right can feel a little tricky at first, but a few tricks make it a breeze. Here’s what I’ve learned:
- Chill the Dough Thoroughly: This makes the dough easier to handle and prevents the cream cheese from melting out. I once skipped chilling and ended up with cream cheese puddles on the baking sheet—lesson learned!
- Don’t Overmix: Once you add the flour mixture, mix just until combined. Overworking the dough can lead to tough cookies, and we want soft, tender bites.
- Seal the Cream Cheese Well: When wrapping the dough around the filling, make sure there are no gaps. A smooth ball means no melted filling leaking during baking.
- Generous Powdered Sugar Coating: Don’t be shy rolling the cookie balls in powdered sugar. This helps create the beautiful crinkle cracks as the cookies expand in the oven.
- Watch Baking Time: Cookies continue to firm up as they cool, so pull them out when they still look a bit soft in the center. Overbaking dries them out and dulls that creamy center magic.
- Multitasking Tip: While the dough chills, it’s a perfect time to prep other brunch or dessert dishes—like those Quiche Lorraine or even a batch of lavender lemon bars if you’re feeling fancy.
Variations & Adaptations
These cozy red velvet crinkle cookies with cream cheese centers are pretty versatile. Here are some ways to tweak the recipe to fit your mood or dietary needs:
- Chocolate Lovers’ Variation: Add mini chocolate chips to the red velvet dough for an extra chocolate punch. It pairs beautifully with the cream cheese center.
- Seasonal Twist: Swap the cream cheese filling for a dollop of pumpkin spice cream cheese during fall. It adds a warm, cozy flavor that’s perfect for chilly evenings.
- Gluten-Free Option: Use a gluten-free 1-to-1 baking flour blend. Just watch the dough consistency; you might need to add a tablespoon of milk or water for moisture.
- Dairy-Free Adaptation: Try a dairy-free cream cheese substitute and coconut oil instead of butter. The texture changes slightly but still delivers a tasty treat.
- Spiced Up: Add a pinch of cinnamon or cayenne pepper to the dough for a subtle warmth that surprises the palate.
Once, I tried swapping the cream cheese center with mascarpone mixed with a bit of honey—turned out to be a lovely, slightly sweeter surprise. Feel free to get creative!
Serving & Storage Suggestions
Serve these cookies slightly warm or at room temperature to fully enjoy the creamy center and tender crumb. They’re perfect alongside a cup of hot cocoa, coffee, or even a chilled glass of milk.
If you want to impress at brunch or holiday gatherings, these cookies make a beautiful, festive addition—especially paired with other treats like rose-shaped apple tarts or a fresh fruit salad.
Store leftover cookies in an airtight container at room temperature for up to 3 days. For longer storage, keep them in the fridge for up to a week or freeze for up to 3 months. When reheating, pop them in a 300°F (150°C) oven for 5–7 minutes to revive that soft texture and creamy filling.
Flavors actually mellow and deepen after a day or two, making these cookies even more addictive. I often make extras just to enjoy the “next-day” version with my morning coffee.
Nutritional Information & Benefits
Each cozy red velvet crinkle cookie with cream cheese center contains roughly 180–200 calories, depending on size, with a balanced mix of fats, sugars, and protein thanks to the cream cheese and butter. The cocoa powder offers antioxidants, while the cream cheese adds calcium and a creamy texture without overwhelming fat.
This recipe can fit into most diets with simple swaps, as noted, and makes for a satisfying treat that won’t leave you feeling weighed down. Plus, the combination of moderate sugar and protein from the cream cheese helps avoid that typical sugar crash.
If you’re mindful about allergens, these cookies contain dairy, gluten, and eggs, so adjustments are needed for allergies. Still, they’re a wholesome way to indulge your sweet tooth without artificial fillers or preservatives.
Conclusion
Cozy red velvet crinkle cookies with cream cheese centers are the kind of recipe you come back to again and again—not just for their irresistible taste, but for the comfort they bring with every bite. Whether you’re baking for yourself, friends, or family, these cookies strike a perfect balance between soft, rich, and just a little bit festive.
Feel free to make the recipe your own with the variations and tips shared here. I love how these cookies bring a little warmth to even the coldest days, making me slow down and savor the moment—kind of like my favorite brunch dishes that bring people together.
If you give this recipe a try, I’d love to hear how it turned out or what twist you added! Baking is all about experimentation and joy, after all. So go on, bake a batch, and make your kitchen smell like comfort.
FAQs
Can I make these cookies ahead of time?
Absolutely! The dough can be chilled overnight or even frozen for up to a month. Just thaw in the fridge before baking. Baked cookies keep well for several days at room temperature in an airtight container.
What if I don’t have red food coloring?
You can use natural beet powder or skip the color altogether. The flavor will still be amazing, though the classic red velvet look will be missing.
How do I prevent the cream cheese from leaking out?
Make sure the cream cheese filling is well chilled and completely enclosed by the dough. Rolling into smooth balls and sealing any cracks is key.
Can I freeze the baked cookies?
Yes! Freeze baked cookies in a single layer on a tray, then transfer to an airtight container or freezer bag. Thaw at room temperature and warm slightly before serving.
What’s the best way to get the crinkle effect?
Coating the chilled cookie balls generously in powdered sugar before baking and chilling the dough thoroughly helps create those beautiful cracks.
Pin This Recipe!
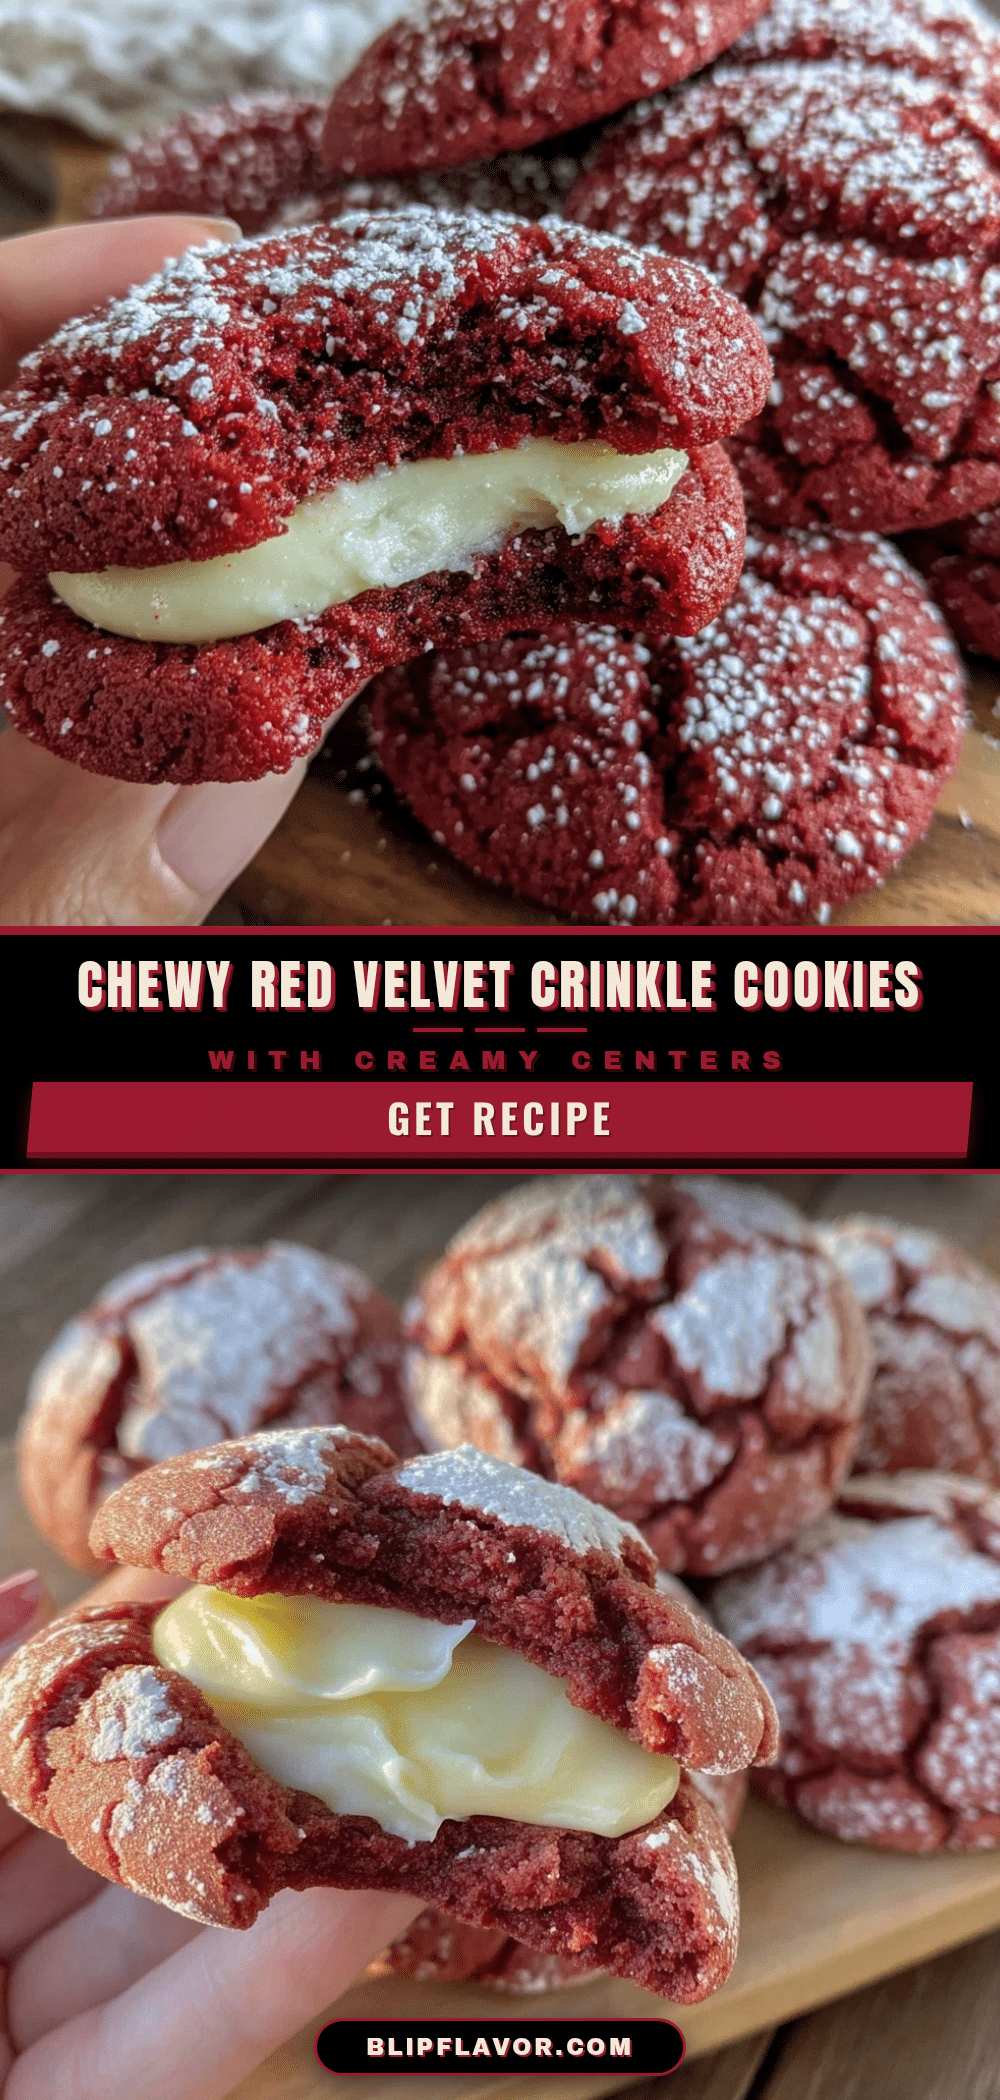
Cozy Red Velvet Crinkle Cookies with Cream Cheese Centers

Soft, vibrant red velvet crinkle cookies with a luscious cream cheese core, offering a cozy and indulgent treat perfect for any occasion.
- Prep Time: 20 minutes
- Cook Time: 14 minutes
- Total Time: 2 hours 34 minutes
- Yield: 24 cookies 1x
- Category: Dessert
- Cuisine: American
Ingredients
- 2 ½ cups (315 g) all-purpose flour
- ¼ cup (25 g) unsweetened cocoa powder (preferably Dutch-processed)
- 1 teaspoon baking powder
- ½ teaspoon salt
- 1 ½ cups (300 g) granulated sugar
- ¾ cup (170 g) unsalted butter, softened
- 2 large eggs (room temperature)
- 1 teaspoon vanilla extract
- 2 tablespoons red food coloring (liquid or gel)
- Powdered sugar (for rolling cookies)
- 8 ounces (225 g) cream cheese, softened
- ½ cup (60 g) powdered sugar (for cream cheese filling)
- ½ teaspoon vanilla extract (for cream cheese filling)
Instructions
- Prepare the Cream Cheese Filling: In a medium bowl, beat 8 ounces (225 g) softened cream cheese with ½ cup (60 g) powdered sugar and ½ teaspoon vanilla extract until smooth and creamy. Cover and chill for about 15 minutes.
- Mix Dry Ingredients: In a separate bowl, whisk together 2 ½ cups (315 g) all-purpose flour, ¼ cup (25 g) unsweetened cocoa powder, 1 teaspoon baking powder, and ½ teaspoon salt. Set aside.
- Cream Butter and Sugar: Using an electric mixer, beat ¾ cup (170 g) softened unsalted butter with 1 ½ cups (300 g) granulated sugar until light and fluffy, about 3–4 minutes.
- Add Eggs and Vanilla: Beat in 2 large eggs, one at a time, then add 1 teaspoon vanilla extract and 2 tablespoons red food coloring. Mix until fully combined and dough is vibrant red.
- Combine Wet and Dry Ingredients: Slowly add dry ingredients to wet mixture, mixing on low speed until just incorporated. Avoid overmixing.
- Chill the Dough: Divide dough into two portions, flatten into discs, wrap tightly with plastic wrap, and chill for at least 2 hours or overnight.
- Preheat Oven and Prepare Baking Sheets: Heat oven to 350°F (175°C). Line baking sheets with parchment paper or silicone mats.
- Shape Cookies: Scoop about 1 tablespoon (15 g) dough, flatten slightly, place about 1 teaspoon (5 g) cream cheese filling in center, wrap dough around filling sealing completely into a smooth ball. Roll gently to seal cracks.
- Coat with Powdered Sugar: Roll each cookie ball generously in powdered sugar for a thick coating.
- Bake: Arrange cookies 2 inches apart on baking sheets. Bake for 12–14 minutes until puffed and powdered sugar is cracked but not burnt.
- Cool: Let cookies cool on baking sheet for 5 minutes, then transfer to wire rack to cool completely. Cream cheese center remains soft and slightly gooey.
Notes
Chill dough thoroughly to prevent cream cheese from leaking and to achieve the signature crinkle effect. Seal cream cheese filling well inside dough balls. Avoid overmixing dough to keep cookies tender. Pull cookies from oven when centers are still slightly soft for best texture. Dough can be chilled overnight or frozen for up to a month before baking.
Nutrition
- Serving Size: 1 cookie
- Calories: 190
- Sugar: 16
- Sodium: 110
- Fat: 9
- Saturated Fat: 5
- Carbohydrates: 26
- Fiber: 1
- Protein: 3
Keywords: red velvet cookies, crinkle cookies, cream cheese center, cozy cookies, holiday baking, easy cookies, soft cookies


