“You’re not seriously going to feed all those hungry teens with just chips, right?” my cousin joked over the phone as I nervously planned the graduation party. Honestly, I was scrambling for something easy, satisfying, and crowd-friendly. That’s when the idea of mini cheeseburger sliders took over my kitchen for a whole week. I kept tweaking the seasoning, swapping cheeses, and testing buns because, let’s face it, feeding a group of picky eaters can feel like a juggling act.
One evening, while flipping sliders on the griddle, the smell of melted cheddar and caramelized onions filled the air, and suddenly it hit me—this little slider recipe wasn’t just a quick fix. It was the kind of bite-sized comfort food that turned casual gatherings into memorable moments. Since then, these flavorful mini cheeseburger sliders have been the unofficial star of every celebration, especially graduation parties where the mix of excitement and hunger runs high.
What I love most is how these sliders bring everyone together—kids, parents, and even that cranky neighbor who usually keeps to himself. They’re easy to customize, just the right size for snacking and satisfying, and honestly, they always disappear before dessert even gets a chance. So, if you’re looking for a no-fuss recipe that packs flavor and melts hearts at your next graduation bash, this one might just become your go-to, too.
Why You’ll Love This Recipe
After testing this mini cheeseburger sliders recipe over several parties and countless hungry guests, I can say with confidence it nails the tricky balance of simplicity and flavor. Here’s why you’ll want to keep this recipe handy:
- Quick & Easy: Ready in under 30 minutes, it’s perfect for last-minute party prep or when you’re juggling a million things.
- Simple Ingredients: No need to hunt for specialty items—everything is likely sitting in your pantry or fridge already.
- Perfect for Graduation Parties: These sliders fit perfectly in busy social settings where guests want to munch while mingling.
- Crowd-Pleaser: From toddlers to adults, everyone loves the juicy, cheesy goodness packed into a neat little bun.
- Unbelievably Delicious: The combination of seasoned beef, melted cheese, and soft buns creates a texture and flavor harmony that’s honestly addictive.
This recipe isn’t just your typical mini burger. The secret? I use a mix of Worcestershire sauce and smoked paprika in the beef for a subtle smoky kick, plus a quick melt technique that keeps the cheese perfectly gooey without drying out the patties. These small details make it stand out from the usual slider crowd and keep folks coming back for more.
Plus, it’s a low-stress recipe that can be made ahead and dressed up with your favorite toppings, making it a reliable choice for impressing guests without breaking a sweat. It’s like comfort food reimagined for celebrations—casual, fun, and totally satisfying.
What Ingredients You Will Need
This mini cheeseburger sliders recipe uses straightforward, wholesome ingredients that come together for bold flavor and that classic slider vibe. Most are pantry staples, and substitutions are simple if needed.
- For the Patties:
- 1 lb (450 g) ground beef, 80/20 for best juiciness
- 1 tsp Worcestershire sauce (adds savory depth)
- 1 tsp smoked paprika (for subtle smoky flavor)
- 1/2 tsp garlic powder
- Salt and pepper to taste
- For the Sliders:
- 12 mini slider buns or dinner rolls, soft and fresh (I prefer King’s Hawaiian for that slight sweetness)
- 6 slices cheddar cheese, halved (sharp or mild depending on preference)
- 12 small dill pickle slices
- 1 cup shredded lettuce, rinsed and dried
- 1 medium tomato, thinly sliced
- 1/4 cup mayonnaise (optional, but adds creaminess)
- Yellow mustard or ketchup for serving
Feel free to swap cheddar with pepper jack for a spicy twist or use turkey or veggie patties for a lighter or vegetarian version. For a gluten-free option, almond flour buns or lettuce wraps work well too.
Equipment Needed
- Large non-stick skillet or griddle – for evenly cooking the patties without sticking
- Spatula – a thin, sturdy one helps flip the small patties easily
- Baking sheet – to keep sliders warm in the oven if prepping ahead
- Sharp knife – for slicing buns, tomatoes, and cheese
- Mixing bowl – to combine beef and seasonings
- Optional: Kitchen scale for precise beef portions (around 1.5 oz / 45 g per patty)
If you don’t have a griddle, a cast-iron skillet works wonders for getting a nice sear. I’ve also used a large electric griddle during bigger parties—it speeds things up and keeps the patties cooking evenly. For budget-friendly options, a non-stick frying pan and a good spatula can do the trick just fine. Just make sure the pan is hot enough before adding patties to avoid sticking.
Preparation Method
- Prepare the beef mixture: In a medium bowl, combine 1 lb (450 g) ground beef with Worcestershire sauce, smoked paprika, garlic powder, salt, and pepper. Mix gently until just combined—overmixing can make the patties tough. (About 3 minutes)
- Form the patties: Divide the mixture into 12 equal portions (about 1.5 oz / 45 g each). Roll each portion into a ball then flatten into a thin, round patty slightly larger than your slider buns since they shrink a bit while cooking. (Approximate diameter: 2.5 inches / 6.5 cm)
- Heat the skillet or griddle: Preheat over medium-high heat, lightly greasing with a bit of oil or non-stick spray. You want a hot surface for a good sear but not so hot that it burns the meat. (Heat for 3-5 minutes)
- Cook the patties: Place patties on the skillet without crowding. Cook for about 2-3 minutes on the first side until nicely browned and edges start to crisp.
- Flip and add cheese: Flip the patties carefully, then immediately place half slices of cheddar on top. Cover the skillet with a lid or foil to help the cheese melt—about 1-2 minutes. The cheese should be gooey but not burned.
- Toast the buns: While patties cook, slice slider buns in half and toast them lightly in a separate pan or oven until golden and slightly crisp (about 3-4 minutes at 350°F / 175°C).
- Assemble the sliders: Spread mayonnaise on the bottom buns, place the cheesy patties on top, add a pickle slice, a few shredded lettuce leaves, and a thin tomato slice. Finish with the top bun.
- Serve immediately: Arrange sliders on a platter and offer ketchup and mustard on the side for dipping or drizzling.
Pro tip: If you’re making ahead, keep the patties warm on a baking sheet in a 200°F (95°C) oven and toast buns just before serving to keep them fresh. Also, pressing down patties slightly before cooking helps them cook evenly without puffing up.
Cooking Tips & Techniques
Getting mini cheeseburger sliders just right can be a bit of a balancing act, but a few tricks from my experience will save you some headaches:
- Don’t overwork the beef: Mixing too much makes the texture dense and less juicy. Handle it gently and keep it loose.
- Use a hot pan: Searing on a hot surface locks in juices and creates that beautiful crust. Make sure your skillet is properly preheated before adding patties.
- Small patties cook fast: Watch closely! They only need a couple of minutes per side. Overcooking makes them dry and tough.
- Cheese melt magic: Adding cheese right after flipping and covering helps it melt perfectly without overcooking the meat.
- Toast buns separately: This keeps them from getting soggy and adds a nice texture contrast to the juicy patties.
- Multitasking tip: While patties cook, prep your toppings and toast buns to streamline the process. It’s a smooth workflow that saves time when hosting.
One time, I left the patties unattended and ended up with a blackened mess (lesson learned!). Now, I stay close and keep an eye on those little guys until they reach that perfect golden-brown stage. Trust me, patience pays off.
Variations & Adaptations
These sliders are super versatile, and I’ve played around with quite a few tasty twists over the years:
- Vegetarian version: Swap beef for black bean patties or store-bought veggie burgers. Add smoky chipotle mayo for a flavor boost.
- Seasonal toppings: In summer, grilled pineapple or fresh avocado slices add a fresh, vibrant touch that really pops.
- Cheese swaps: Try Swiss, pepper jack, or even blue cheese crumbles for a bold flavor kick.
- Cooking methods: These sliders work great on the grill if you want that charred, smoky flavor. Just watch the small patties closely to avoid flare-ups.
- Allergen-friendly: Use gluten-free buns or lettuce wraps if you’re avoiding gluten. Dairy-free cheese and mayo brands are easy to find and don’t skimp on flavor.
Personally, I love adding caramelized onions for a sweet-savory layer, especially for fall gatherings. If you want to impress with a full brunch spread, pairing these sliders with a quiche lorraine can make the celebration feel extra special without extra stress.
Serving & Storage Suggestions
Serve these mini cheeseburger sliders warm, right after assembling, for the best fresh and melty experience. Arrange them on a large platter or tiered tray to make the party spread look inviting and fun.
They pair wonderfully with classic sides like crispy fries, coleslaw, or a fresh salad. For drinks, consider a chilled lemonade or a sparkling mocktail to keep the vibe festive and light.
Leftovers? Wrap sliders individually in foil and store in the refrigerator for up to 2 days. To reheat, unwrap and warm them in a 350°F (175°C) oven for about 10 minutes until heated through and cheese is melty again. Avoid microwaving if you want to keep the buns from getting soggy.
Flavors actually deepen after resting overnight, so these sliders work well for make-ahead parties or potlucks. Just toast buns fresh before serving to keep that perfect texture.
Nutritional Information & Benefits
Each mini cheeseburger slider contains approximately 200 calories, depending on the bun and cheese used. The beef provides a good source of protein and iron, which is essential for energy—perfect for active graduates celebrating big milestones.
Using lean ground beef can reduce fat content without sacrificing flavor. Fresh veggies like lettuce and tomato add fiber and vitamins, while the pickles bring a tangy crunch with minimal calories.
For those watching carbs or gluten, swapping buns for lettuce wraps keeps this recipe light and accessible. You can also opt for lower-fat cheese or dairy-free alternatives without losing the core slider experience.
Honestly, these sliders strike a nice balance between indulgence and practicality—comfort food that doesn’t feel like overdoing it.
Conclusion
Flavorful mini cheeseburger sliders have become my secret weapon for stress-free, crowd-pleasing graduation parties. They’re easy to make, endlessly customizable, and bring that cozy, satisfying feeling everyone seems to crave at celebrations.
Whether you keep it classic or experiment with toppings and cheese, these sliders invite guests to linger, chat, and enjoy every bite. Plus, they pair beautifully with sweet treats like the champagne cupcakes for a festive finish.
Give this recipe a try and see how it fits your party style. I’d love to hear about your favorite variations or any tweaks you make to suit your crowd. Here’s to good food, good company, and plenty of tasty bites to celebrate the big moments.
FAQs
- Can I make these sliders ahead of time? Yes, you can cook the patties and keep them warm in a low oven. Toast buns just before serving for best texture.
- What’s the best cheese for mini cheeseburger sliders? Cheddar is classic, but Swiss, pepper jack, or even provolone work great depending on your taste.
- How do I keep sliders from falling apart? Don’t overfill with toppings, and use buns that are sturdy but soft. Press patties gently to ensure they hold shape.
- Can I grill the sliders instead of cooking on the stove? Absolutely! Just watch them closely as small patties cook quickly on the grill.
- What are good side dishes to serve with these sliders? Crispy fries, coleslaw, or a fresh garden salad all complement sliders beautifully and keep the meal balanced.
Pin This Recipe!
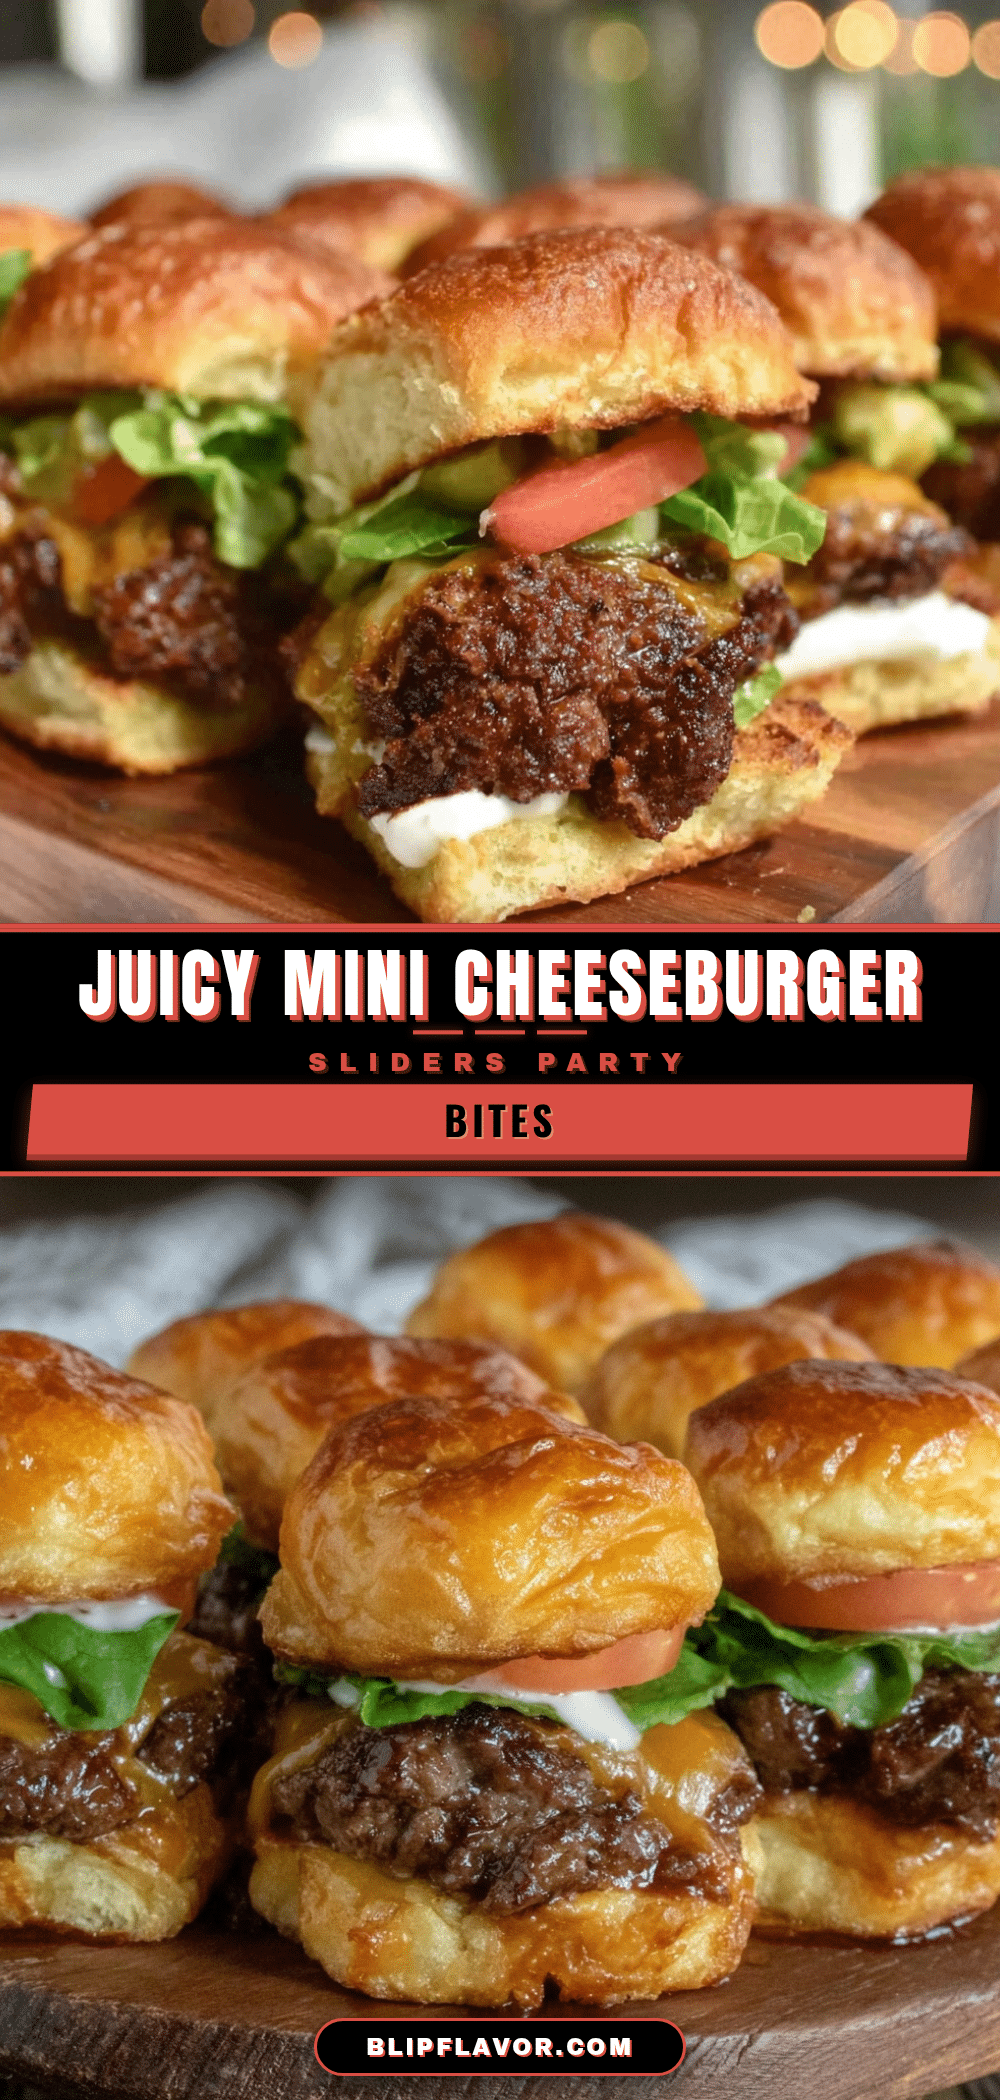
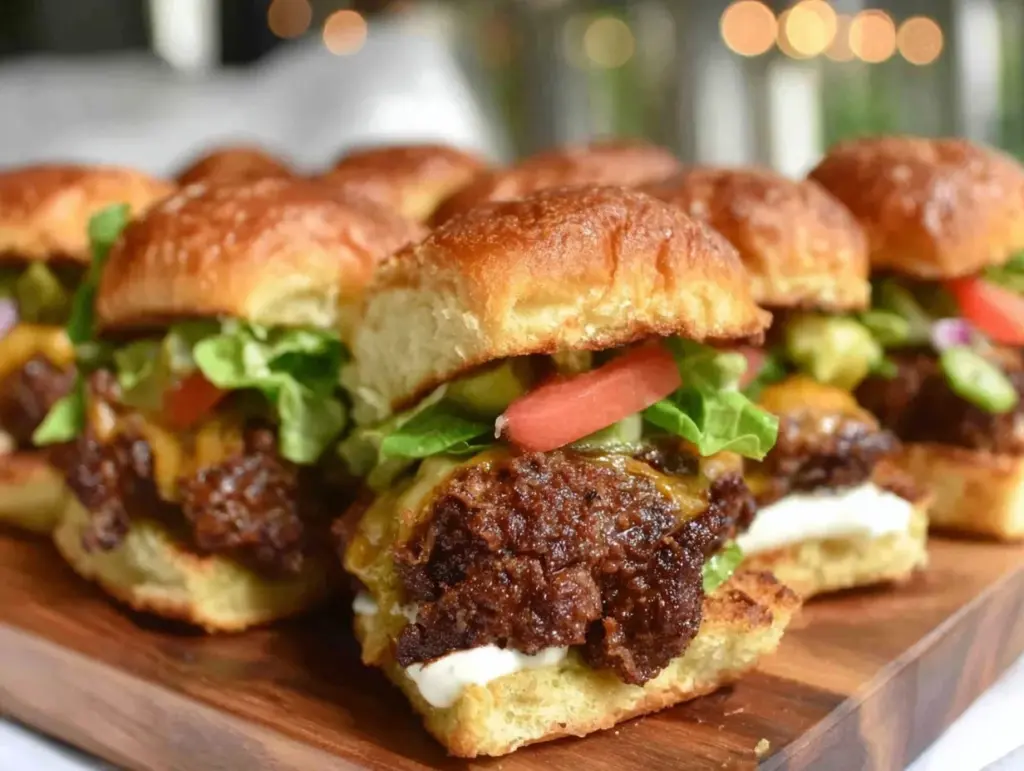
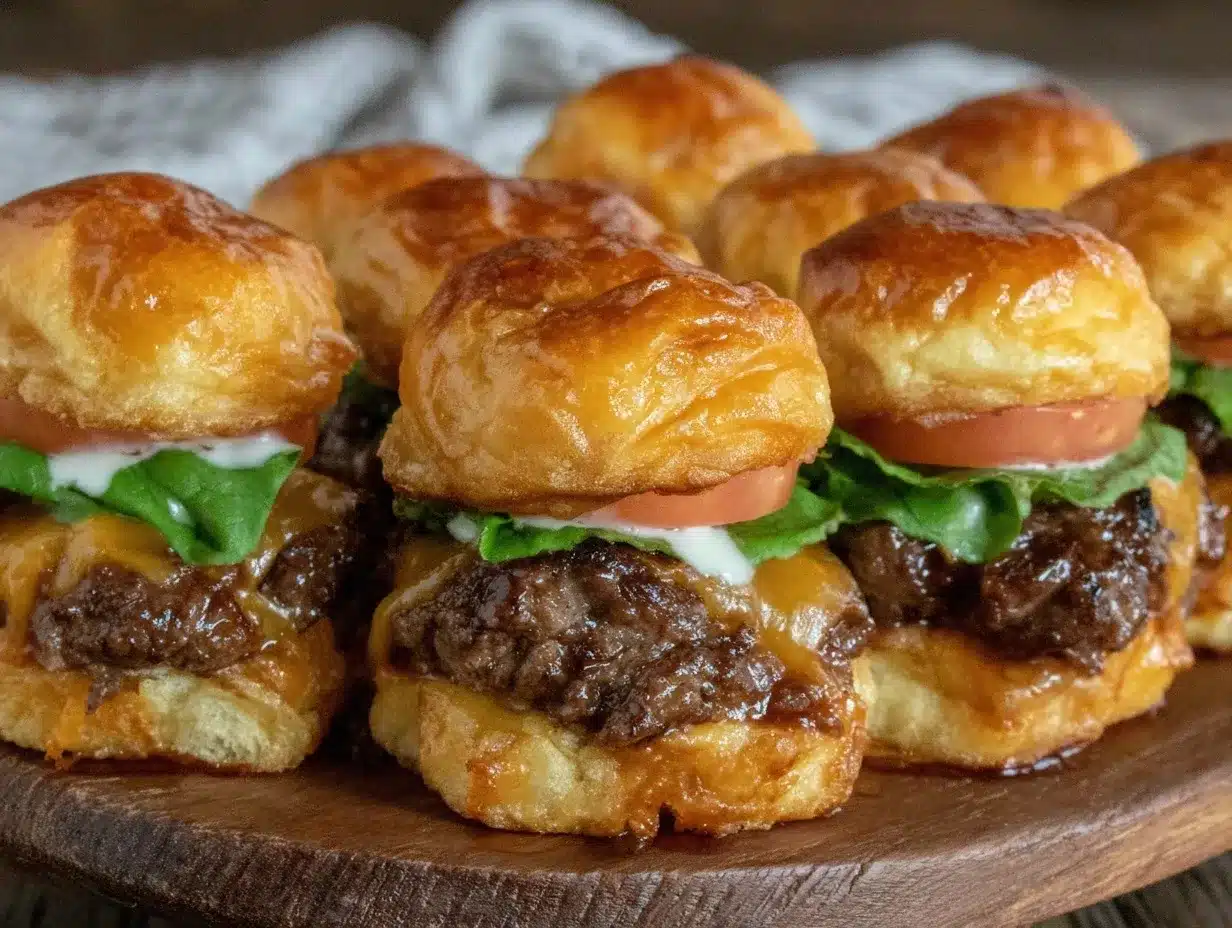
Mini Cheeseburger Sliders
These mini cheeseburger sliders are quick, easy, and perfect for graduation parties or any casual gathering. They feature juicy seasoned beef patties with melted cheddar cheese on soft slider buns, customizable with your favorite toppings.
- Prep Time: 10 minutes
- Cook Time: 15 minutes
- Total Time: 25 minutes
- Yield: 12 sliders 1x
- Category: Main Course
- Cuisine: American
Ingredients
- 1 lb ground beef, 80/20 for best juiciness
- 1 tsp Worcestershire sauce
- 1 tsp smoked paprika
- 1/2 tsp garlic powder
- Salt and pepper to taste
- 12 mini slider buns or dinner rolls, soft and fresh
- 6 slices cheddar cheese, halved
- 12 small dill pickle slices
- 1 cup shredded lettuce, rinsed and dried
- 1 medium tomato, thinly sliced
- 1/4 cup mayonnaise (optional)
- Yellow mustard or ketchup for serving
Instructions
- In a medium bowl, combine ground beef with Worcestershire sauce, smoked paprika, garlic powder, salt, and pepper. Mix gently until just combined.
- Divide the mixture into 12 equal portions (about 1.5 oz each). Roll each portion into a ball then flatten into a thin, round patty slightly larger than your slider buns.
- Preheat a large non-stick skillet or griddle over medium-high heat, lightly greasing with oil or non-stick spray.
- Place patties on the skillet without crowding. Cook for about 2-3 minutes on the first side until browned and edges start to crisp.
- Flip the patties carefully, then immediately place half slices of cheddar on top. Cover the skillet with a lid or foil and cook for 1-2 minutes until cheese melts.
- While patties cook, slice slider buns in half and toast them lightly in a separate pan or oven at 350°F for 3-4 minutes until golden and slightly crisp.
- Spread mayonnaise on the bottom buns, place cheesy patties on top, add a pickle slice, shredded lettuce, and a thin tomato slice. Finish with the top bun.
- Serve immediately with ketchup and mustard on the side.
Notes
Do not overmix the beef to keep patties juicy. Use a hot pan for a good sear. Add cheese after flipping and cover to melt perfectly. Toast buns separately to avoid sogginess. Patties can be kept warm in a 200°F oven if made ahead.
Nutrition
- Serving Size: 1 slider
- Calories: 200
- Sugar: 2
- Sodium: 350
- Fat: 12
- Saturated Fat: 5
- Carbohydrates: 15
- Fiber: 1
- Protein: 12
Keywords: mini cheeseburger sliders, sliders recipe, graduation party food, easy party snacks, cheeseburger sliders


