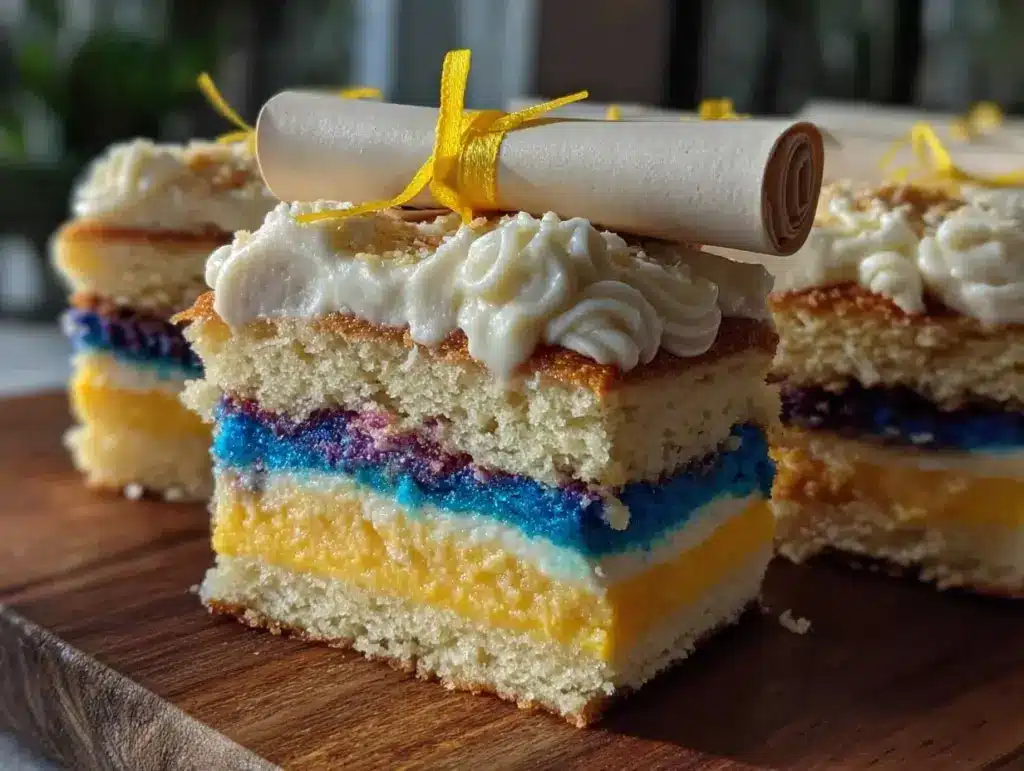
“Wait, can you really make a diploma out of buttercream?” That question came from my niece mid-afternoon while I was in full-on cake-decorating mode, surrounded by piping bags and a swirl of pastel frosting colors. Honestly, I wasn’t sure at first either. But crafting the perfect school colors sheet cake topped with a buttercream diploma turned out to be one of those accidental triumphs that made graduation day extra special. I had been scrambling to put together a celebratory dessert for a last-minute party when the idea hit me—why not celebrate the grad with their school pride front and center, and a sweet diploma as the pièce de résistance?
There’s something comforting about a sheet cake that feels both festive and homemade, especially when it’s decked out in the exact hues of your alma mater. The colors pop, the frosting is just right, and the diploma detail—well, that’s the cherry on top (or rather, the piped masterpiece). It’s been a few graduations now, and I can’t help but smile when I see how the cake draws everyone in, sparking conversations and smiles. The best part? It’s surprisingly simple to make, even if you’re not a seasoned baker or decorator. That buttercream diploma? It’s a bit of a showstopper that’s easier than it looks if you’ve got the right tools and a little patience.
So, here’s how I landed on this recipe that’s now a go-to for celebrations, blending school spirit with something sweet and memorable. It’s not just cake; it’s a little edible celebration wrapped in frosting, perfect for making those moments linger just a bit longer.
Why You’ll Love This Recipe
This perfect school colors sheet cake with buttercream diploma isn’t just another dessert—it’s a celebration in itself, tested and tweaked over several graduations and parties. Here’s why folks keep coming back to it:
- Quick & Easy: The cake comes together in under 45 minutes of hands-on time, making it great for last-minute celebrations or busy weeknights when you want something special without fuss.
- Simple Ingredients: Most ingredients are pantry staples—flour, sugar, eggs, butter—so no need for a special trip to the store.
- Perfect for Graduations & School Events: Show your school pride with colors that match any team or alma mater. It’s a great fit for parties, potlucks, or even classroom celebrations.
- Crowd-Pleaser: This cake gets rave reviews from kids and adults alike—moist, flavorful, with a creamy frosting that’s not too sweet.
- Unbelievably Delicious: The tender crumb paired with silky buttercream and that fun diploma decoration makes it a unique treat that feels thoughtful and festive.
What sets this recipe apart is the buttercream diploma itself—a simple piping technique that adds a personal touch. Whether you’re using school colors for the frosting or customizing the diploma message, it’s a little creative twist that turns a basic sheet cake into a memorable centerpiece. After a few tries, I realized the magic is in balancing the frosting consistency and choosing vibrant, high-quality food colors (I swear by AmeriColor gels for true-to-life shades). Honestly, it’s like the cake quietly promises a little celebration in every bite, and that makes all the difference.
What Ingredients You Will Need
This recipe uses simple, wholesome ingredients to deliver vibrant school colors and a smooth buttercream diploma without any fuss. Most of these are kitchen staples, and you can easily swap or tweak a few depending on your needs.
- For the Cake Batter:
- All-purpose flour – 2 ½ cups (312 g), sifted for smooth texture
- Granulated sugar – 1 ¾ cups (350 g)
- Baking powder – 2 ½ teaspoons
- Baking soda – ½ teaspoon
- Salt – ½ teaspoon
- Unsalted butter – ¾ cup (170 g), softened (I prefer Kerrygold for its creamy richness)
- Whole milk – 1 cup (240 ml), room temperature
- Large eggs – 3, room temperature (helps with better rise and texture)
- Vanilla extract – 2 teaspoons (pure vanilla extract makes a difference here)
- For the Buttercream Frosting:
- Unsalted butter – 1 cup (225 g), softened
- Powdered sugar – 4 cups (480 g), sifted to avoid lumps
- Heavy cream – 3-4 tablespoons (45-60 ml), to adjust consistency
- Vanilla extract – 1 ½ teaspoons
- Food coloring gels – assorted school colors (I recommend AmeriColor gels for vibrant, natural-looking hues)
- For the Buttercream Diploma Decoration:
- Buttercream in white or ivory base (from above frosting)
- Food coloring gel for black or dark brown (for diploma text)
Ingredient Tips: If you want a gluten-free version, swap the flour for a 1:1 gluten-free baking flour blend. For a dairy-free option, use coconut milk instead of whole milk, and vegan butter for the frosting.
Equipment Needed
- 9×13-inch (23×33 cm) sheet cake pan – the classic size for a crowd-pleasing sheet cake
- Mixing bowls – medium and large, preferably glass or metal for easy cleanup
- Electric hand mixer or stand mixer – essential for smooth batter and silky buttercream
- Rubber spatula – for scraping down bowls and folding batter gently
- Wire cooling rack – to cool the cake evenly without sogginess
- Piping bags and small round piping tips (size #1 or #2) – for that detailed buttercream diploma design
- Offset spatula – for smooth frosting application
- Bench scraper or straight edge knife – to cleanly smooth the frosting edges
If you don’t have piping bags, disposable ones work just fine, and you can snip the tip to size. I once used a zip-top bag with a small hole cut in the corner in a pinch, and it worked surprisingly well! For the piping tips, if you don’t have fine round tips, you can form a cone with parchment paper as a budget-friendly alternative.
Preparation Method
- Preheat your oven to 350°F (175°C) and grease your 9×13-inch sheet cake pan with butter or non-stick spray. Line it with parchment paper for easy removal if you like. This step saves you from cake sticking and makes cleanup faster—trust me, it’s worth the extra minute.
- Mix dry ingredients: In a bowl, whisk together 2 ½ cups (312 g) of sifted flour, 1 ¾ cups (350 g) granulated sugar, 2 ½ teaspoons baking powder, ½ teaspoon baking soda, and ½ teaspoon salt until fully combined. This helps even distribution of leavening agents and salt, giving you a consistent rise.
- Cream the butter and eggs: In a stand mixer fitted with the paddle attachment, beat ¾ cup (170 g) softened unsalted butter until pale and fluffy, about 3 minutes. Add eggs one at a time (3 large eggs), mixing well after each addition. Adding eggs slowly helps the batter emulsify better for a tender crumb.
- Add vanilla and milk: Pour in 2 teaspoons pure vanilla extract and 1 cup (240 ml) whole milk alternately with the dry ingredients, starting and ending with the dry mix. Mix on low speed until just combined to avoid overmixing, which can toughen the cake.
- Pour batter into the pan: Scrape the batter into the prepared sheet pan and smooth the top with an offset spatula. You want an even layer—if it’s lumpy, the cake will bake unevenly.
- Bake for 35-40 minutes, or until a toothpick inserted into the center comes out clean. Ovens vary, so start checking at 35 minutes. The cake should be golden and spring back when lightly touched.
- Cool completely: Let the cake cool in the pan on a wire rack for 15 minutes, then carefully flip it out onto the rack to cool fully before frosting. Frosting a warm cake? Instant meltdown—and nobody wants that.
- Make the buttercream: Beat 1 cup (225 g) softened unsalted butter until creamy. Gradually add 4 cups (480 g) powdered sugar, mixing on low to avoid a sugar cloud. Add 3-4 tablespoons (45-60 ml) heavy cream and 1 ½ teaspoons vanilla extract. Beat on high until light and fluffy, about 4-5 minutes. Adjust cream or sugar to get a spreadable, pipe-friendly consistency.
- Color your frosting: Divide the buttercream into bowls for each school color. Use food coloring gels sparingly and mix thoroughly for even color. Remember, a little goes a long way—too much can thin the frosting.
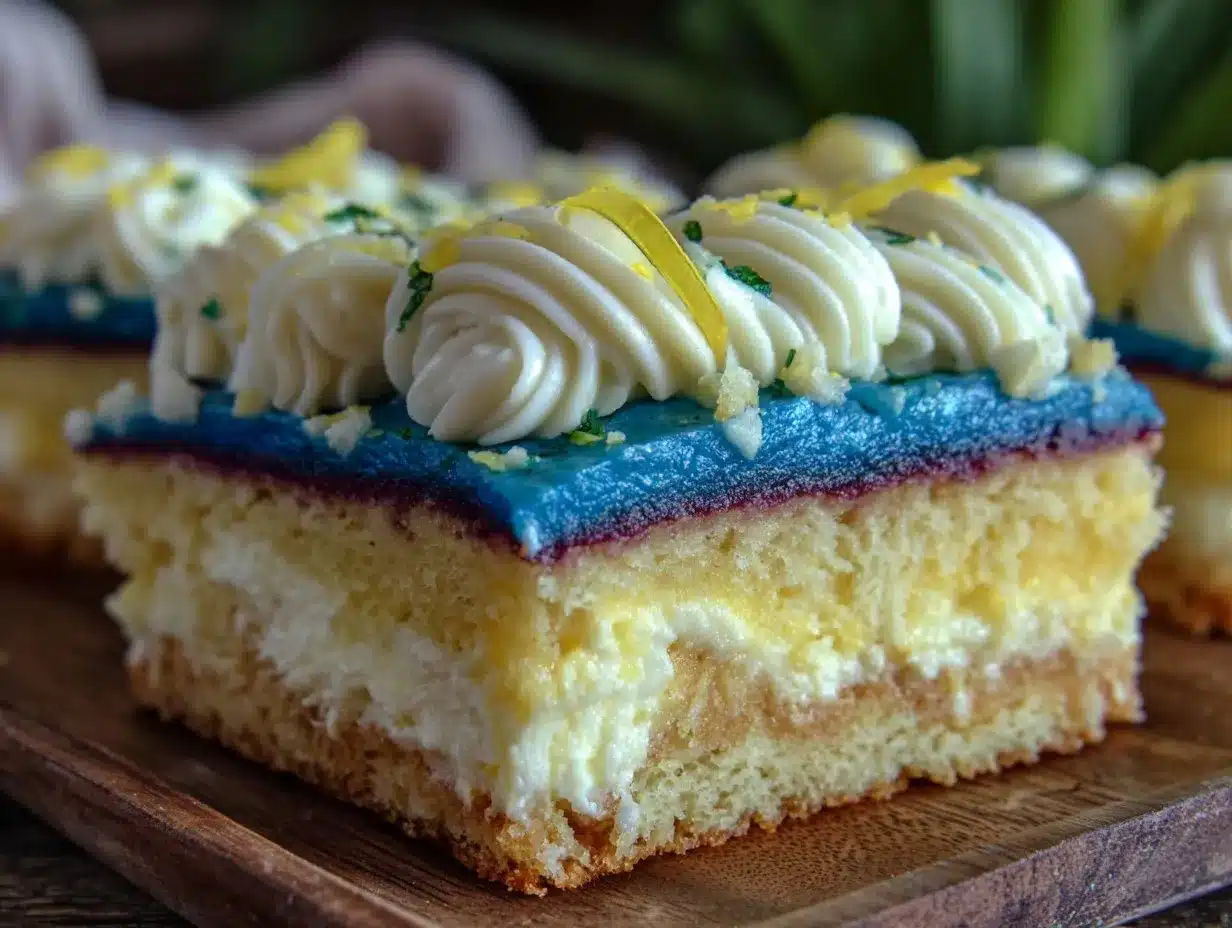
- Frost the cake: Use an offset spatula to apply a thin crumb coat first and chill for 15 minutes. Then add a final smooth layer with your school colors arranged in stripes, blocks, or a pattern that represents the school. This sets the stage for the diploma detail.
- Pipe the buttercream diploma: Fill a piping bag with white or ivory buttercream and outline the diploma shape on the cake’s corner or center. Use a fine round tip to pipe the scroll edges and text. Practice your lettering on parchment paper first to get comfortable. Use a contrasting dark color for the text (name, year, or “Congrats!”) to make it pop.
- Chill and serve: Chill the cake for 20 minutes to set the buttercream, then bring to room temperature before slicing for the best texture and flavor.
Cooking Tips & Techniques
Making this school colors sheet cake with a buttercream diploma was a bit of trial and error, so here’s what I’ve learned to help you nail it every time.
- Buttercream consistency is key: Too soft, and your diploma details will droop; too stiff, and piping becomes a battle. Adjust with heavy cream or powdered sugar, and test by piping a small line on parchment.
- Coloring frosting: Use gel food colors, not liquid, to keep frosting consistency intact. Add colors gradually—frosting darkens a bit as it sits.
- Crumb coat your cake: It traps crumbs and gives you a smooth base for final frosting layers. Don’t skip this step if you want a clean finish.
- Practice piping first: Writing on cakes is intimidating! Use parchment paper to get your hand steady. A steady wrist and light pressure make all the difference.
- Work in a cool environment: Buttercream melts quickly in warm kitchens. If your frosting gets too soft, pop it in the fridge for 10 minutes.
- Timing matters: Bake and cool the cake completely before frosting. Rushing this step leads to melting frosting and a mess.
Once, I tried piping the diploma right after frosting the cake and ended up with a saggy scroll—lesson learned. Also, using a bench scraper to smooth frosting edges helped me get those sharp clean lines that look so professional.
Variations & Adaptations
Feeling adventurous or catering to different needs? Here are some ways to make this cake your own:
- Flavor swaps: Add ½ cup (120 ml) brewed coffee to the batter for a mocha twist or substitute ½ cup (120 ml) of orange juice for milk for a citrusy note.
- Dietary adjustments: Use almond flour or a gluten-free blend to make the cake gluten-free. Swap butter and milk for dairy-free alternatives to accommodate lactose intolerance.
- Seasonal school colors: For fall graduations, try autumnal colors like burnt orange and deep reds. In spring, pastel shades can freshen the look.
- Diploma decoration: Instead of a piped diploma, try edible wafer paper printed with the diploma design for a no-fuss approach. Or try a chocolate transfer for a dramatic effect.
- Alternate shapes: Use two 9-inch (23 cm) round pans for a layered cake version or a half-sheet pan for a smaller crowd.
Personally, I once experimented by adding a layer of raspberry jam between the cake and frosting—it was a hit at a family party, adding a tart contrast that played nicely with the sweet buttercream. For a simpler take without piping, just use school color sprinkles or edible glitter for a festive vibe.
Serving & Storage Suggestions
This sheet cake shines best when served at room temperature, allowing the buttercream to be soft and the cake moist. I like to slice it into generous squares and arrange on a colorful platter that matches the school colors for a festive touch.
Pair it with a simple cup of coffee or a glass of sparkling cider for a celebratory feel. If you’re hosting a brunch, this cake complements savory dishes like quiche or frittata nicely—reminds me of the Quiche Lorraine recipe I love for brunch gatherings.
To store, cover the cake loosely with plastic wrap or an airtight container and refrigerate for up to 4 days. The flavors actually deepen after a day, but bring it to room temperature before serving for the best taste and texture.
If you need to freeze it, wrap the frosted cake tightly in plastic wrap and then foil. Thaw overnight in the fridge and then sit at room temperature before serving. Reheat slices gently in the microwave for about 10 seconds if you want that just-baked warmth.
Nutritional Information & Benefits
Each serving (1 slice, about 1/12th of the cake) contains approximately:
| Nutrient | Amount |
|---|---|
| Calories | 350 kcal |
| Fat | 18 g |
| Saturated Fat | 11 g |
| Carbohydrates | 45 g |
| Sugar | 35 g |
| Protein | 3 g |
While this is definitely a treat, the butter and eggs provide some valuable fats and protein, and the use of real vanilla and whole milk gives the cake a richer flavor without artificial additives. For those with dietary restrictions, the recipe can be adapted to gluten-free and dairy-free versions as mentioned earlier.
From a wellness perspective, I appreciate that this recipe uses real ingredients and avoids artificial colors or preservatives, making it a more wholesome indulgence compared to store-bought alternatives.
Conclusion
This perfect school colors sheet cake with buttercream diploma has become a sweet staple in my celebration toolkit. It’s the kind of recipe that lets you show school pride in a fun and tasty way, without complicated baking skills or hours of prep. I love how the buttercream diploma adds a personal, thoughtful touch that guests always notice and admire. Plus, it’s flexible enough to be customized for any occasion or dietary need.
Whether you’re marking a graduation, a special school event, or just want a festive dessert that stands out, this recipe is a reliable winner. Give it a try, make it your own, and enjoy the smiles it brings around the table.
Feel free to share your own diploma decorating twists or color combos in the comments—I’m always curious to see how others celebrate sweet moments!
FAQs
- Can I make the cake ahead of time? Yes, bake the cake and frost it up to two days in advance. Keep refrigerated and bring to room temperature before serving.
- How do I prevent buttercream from melting while decorating? Work in a cool room and chill the frosting between steps if it gets too soft. Using a fan can help, too.
- What if I don’t have piping bags for the diploma? You can use a zip-top bag with a small corner snipped off or make a parchment cone to pipe the details.
- Can I use different cake flavors? Absolutely! Chocolate or lemon cake bases also pair wonderfully with this buttercream and school colors.
- How do I get vibrant school colors without artificial taste? Gel food colors like AmeriColor are concentrated and flavor-neutral, so they keep colors bright without affecting taste.
For a touch of elegance at your next celebration, pairing this cake with delicate treats like champagne cupcakes with gold sprinkles adds a festive sparkle everyone will love.
Pin This Recipe!
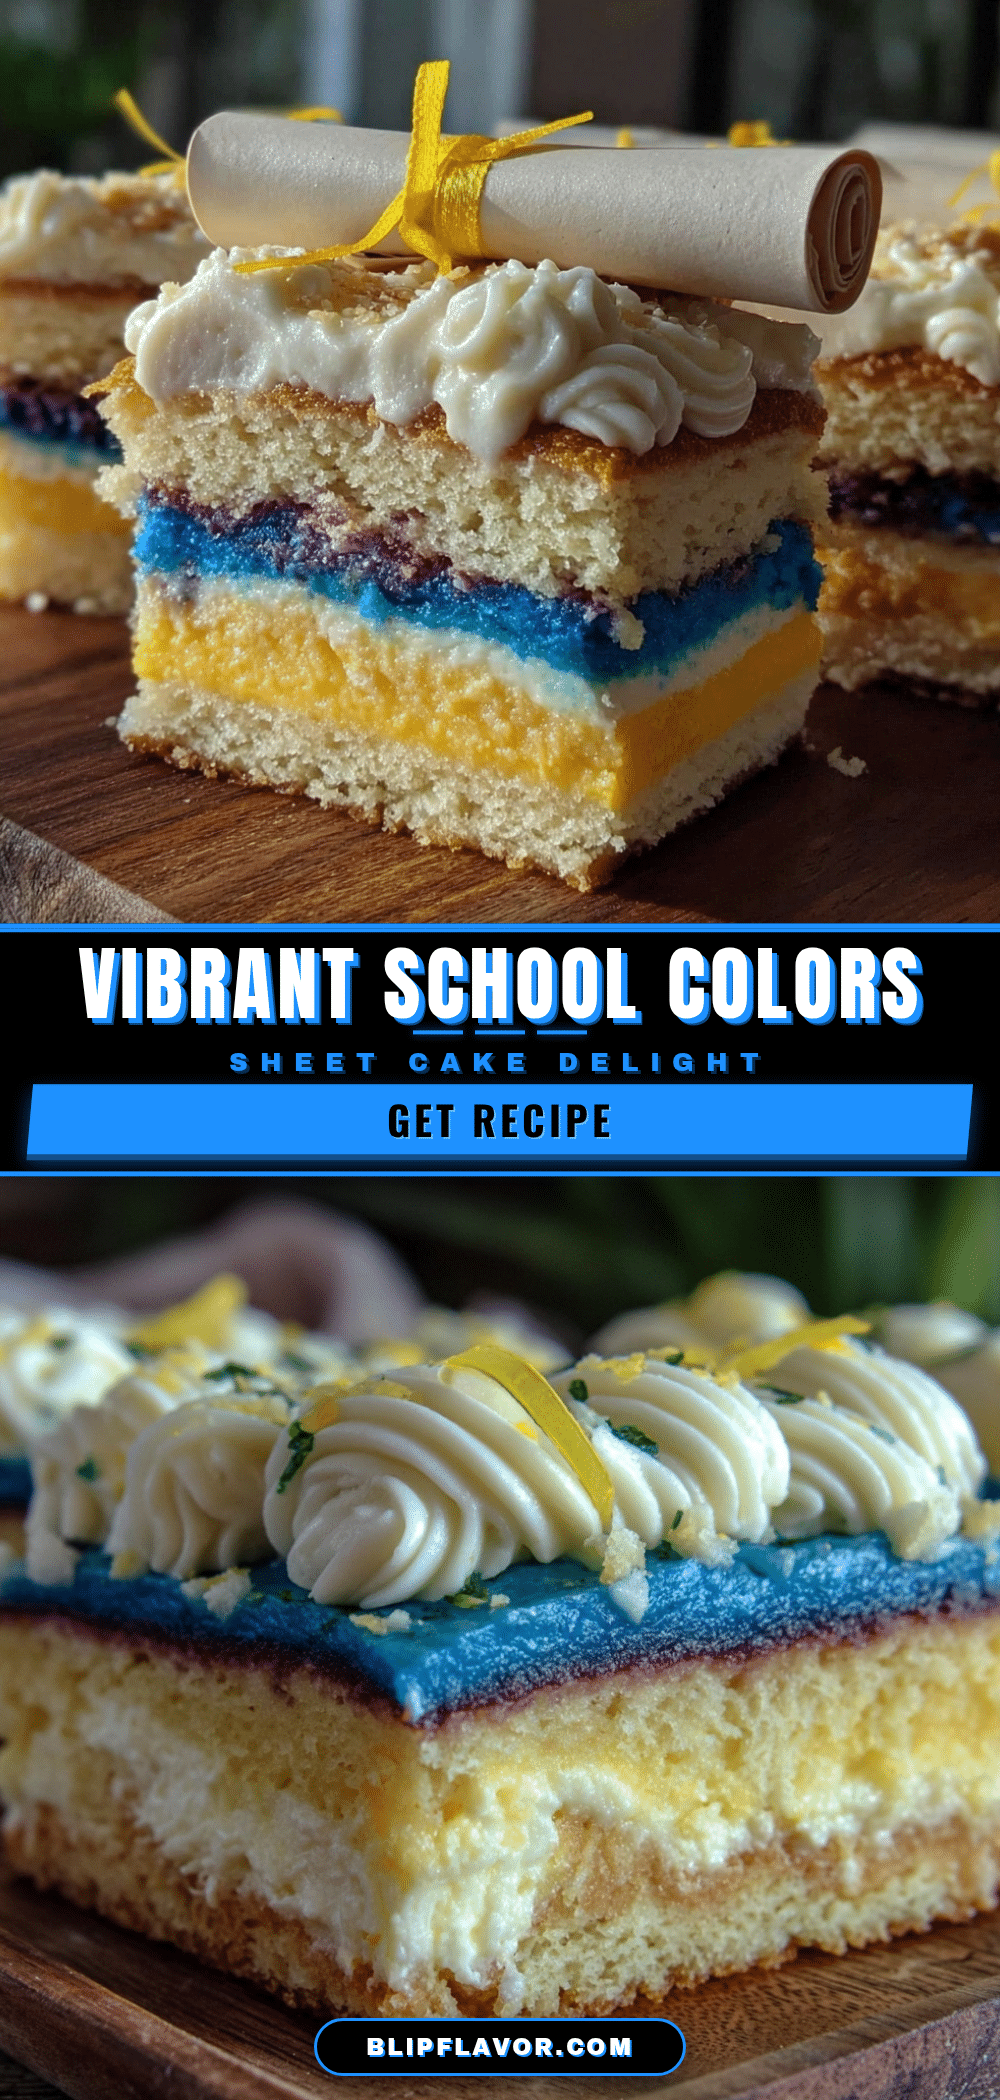
Perfect School Colors Sheet Cake Recipe Easy Buttercream Diploma Tutorial
A festive and moist sheet cake decorated with vibrant school colors and a piped buttercream diploma, perfect for graduations and school events. Easy to make with simple ingredients and customizable for dietary needs.
- Prep Time: 15 minutes
- Cook Time: 40 minutes
- Total Time: 1 hour 15 minutes
- Yield: 12 servings 1x
- Category: Dessert
- Cuisine: American
Ingredients
- 2 ½ cups (312 g) all-purpose flour, sifted
- 1 ¾ cups (350 g) granulated sugar
- 2 ½ teaspoons baking powder
- ½ teaspoon baking soda
- ½ teaspoon salt
- ¾ cup (170 g) unsalted butter, softened
- 1 cup (240 ml) whole milk, room temperature
- 3 large eggs, room temperature
- 2 teaspoons pure vanilla extract
- 1 cup (225 g) unsalted butter, softened (for frosting)
- 4 cups (480 g) powdered sugar, sifted
- 3–4 tablespoons (45–60 ml) heavy cream
- 1 ½ teaspoons vanilla extract (for frosting)
- Food coloring gels in assorted school colors (recommend AmeriColor gels)
- Buttercream in white or ivory base (from above frosting) for diploma decoration
- Food coloring gel for black or dark brown (for diploma text)
Instructions
- Preheat oven to 350°F (175°C) and grease a 9×13-inch sheet cake pan. Line with parchment paper if desired.
- In a bowl, whisk together sifted flour, granulated sugar, baking powder, baking soda, and salt until combined.
- In a stand mixer, beat softened butter until pale and fluffy, about 3 minutes. Add eggs one at a time, mixing well after each addition.
- Add vanilla extract and milk alternately with dry ingredients, starting and ending with dry mix. Mix on low speed until just combined.
- Pour batter into prepared pan and smooth the top with an offset spatula.
- Bake for 35-40 minutes or until a toothpick inserted in the center comes out clean.
- Cool cake in pan on wire rack for 15 minutes, then invert onto rack to cool completely.
- To make buttercream, beat softened butter until creamy. Gradually add powdered sugar on low speed. Add heavy cream and vanilla extract, then beat on high until light and fluffy, about 4-5 minutes. Adjust consistency as needed.
- Divide buttercream into bowls and color with food gels for school colors.
- Apply a thin crumb coat to the cake and chill for 15 minutes.
- Add a final smooth layer of colored frosting arranged in stripes, blocks, or patterns representing the school.
- Fill a piping bag with white or ivory buttercream and pipe the diploma shape on the cake using a fine round tip. Use dark colored buttercream for text and details.
- Chill the cake for 20 minutes to set the buttercream, then bring to room temperature before serving.
Notes
Use gel food colors for vibrant, natural-looking hues without thinning frosting. Practice piping on parchment paper before decorating the cake. Chill frosting if it becomes too soft. Crumb coat the cake for a smooth finish. For gluten-free or dairy-free versions, substitute flour and dairy ingredients accordingly.
Nutrition
- Serving Size: 1 slice (1/12th of c
- Calories: 350
- Sugar: 35
- Fat: 18
- Saturated Fat: 11
- Carbohydrates: 45
- Protein: 3
Keywords: sheet cake, school colors cake, buttercream diploma, graduation cake, easy sheet cake, celebration cake, buttercream frosting, school pride cake


