“You sure you want to try lemon pepper on chicken tenders?” my buddy texted back, skeptical. Honestly, I hadn’t thought much about it myself until that chaotic Friday night when I was staring down an empty fridge and a hungry stomach. I was craving something quick but satisfying—something with a punch of flavor without fussing over complicated steps. The idea of crispy lemon pepper chicken tenders popped into my head like a little rebel recipe whispering, “Just give me a shot.”
The first bite was a surprise. That bright, citrusy zing paired with the peppery crunch was oddly comforting, like a familiar favorite with a lively twist. And I couldn’t stop making them—twice in one week, no less—each time tweaking the seasoning just a bit to get it perfect. What started as a last-minute scramble turned into a recipe I trust to rescue any evening when hunger and tiredness team up.
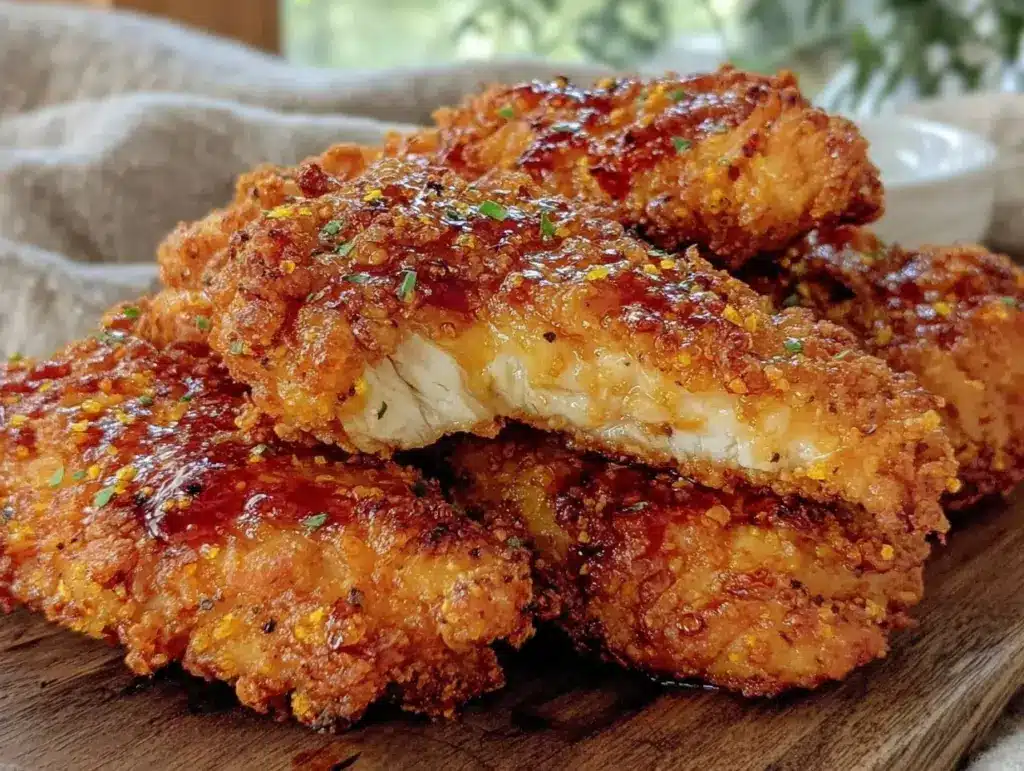
These tenders carry a crisp coating that crackles with every bite, balanced beautifully by the lemon’s fresh, tangy spark. It’s not just the flavor; it’s the way they feel in your hand, warm and inviting, a little messy maybe, but totally worth it. If you ask me, this recipe stuck because it’s honest, no-nonsense food that never lets you down—comfort food with a bright personality. And that’s a combination I keep coming back to.
Why You’ll Love This Recipe
After cooking and testing this crispy lemon pepper chicken tenders recipe over several weeks, I’m convinced it ticks all the boxes for an easy, satisfying meal. You know how some recipes sound good but don’t quite deliver? This one really does. Here’s why I keep going back:
- Quick & Easy: These chicken tenders come together in about 30 minutes total, making them perfect for busy weeknights or those unexpected cravings.
- Simple Ingredients: No need to hunt down fancy spices or rare ingredients. You probably have everything in your pantry right now, including that trusty lemon pepper seasoning.
- Perfect for Casual Gatherings: Whether it’s a casual dinner or a weekend hangout, these tenders work great as a main dish or finger food—just like the crispy air fryer buffalo wings I love to make for game days.
- Crowd-Pleaser: Kids, adults, picky eaters—this one gets rave reviews every time. The crispy exterior and zesty flavor combo is just plain addictive.
- Unbelievably Delicious: The lemon pepper seasoning isn’t just a sprinkle—it’s the star here, giving the chicken tenders a lively, fresh flavor that brightens the whole dish.
What makes this recipe stand out? It’s the simple trick of using a double coating technique with a touch of cornstarch for extra crunch and blending lemon zest right into the breading. This creates a vibrant crust that holds the lemon’s brightness without getting soggy. I also like finishing with a squeeze of fresh lemon right before serving—that final pop of citrus is the secret that keeps me hooked.
What Ingredients You Will Need
This recipe calls for straightforward ingredients that come together to create bold flavor and that signature crispy texture. Most are pantry staples, and the lemon pepper seasoning is the real MVP here. Here’s the breakdown:
- For the Chicken Tenders:
- 1 ½ pounds (680g) chicken tenders (fresh or thawed from frozen)
- 1 cup (120g) all-purpose flour (or almond flour for gluten-free)
- 2 large eggs, beaten (room temperature for better coating)
- 1 cup (100g) panko breadcrumbs (I prefer Japanese-style for extra crispiness)
- 1 tablespoon cornstarch (adds that extra crunch)
- 2 teaspoons lemon pepper seasoning (look for a brand with real lemon zest pieces)
- 1 teaspoon garlic powder (for subtle depth)
- ½ teaspoon salt (adjust based on your seasoning)
- Freshly ground black pepper, to taste
- 1 lemon, zested and juiced (zest goes into the breading; juice for finishing)
- Vegetable oil or avocado oil (for frying, use a neutral oil with a high smoke point)
You can swap out regular flour for gluten-free flour blends if needed, and if you’re keeping an eye on carbs, almond flour works well but expect a slightly different texture. The lemon pepper seasoning is key—if you want to DIY, mix freshly ground black pepper with dried lemon zest and a pinch of salt. I once used a lemon-poppy-seed muffin crumble topping as a playful twist, but the classic combo always wins.
Equipment Needed
- Large shallow bowls or plates for dredging the chicken tenders in flour, egg, and breadcrumb mixtures
- Heavy skillet or cast-iron pan (about 10-12 inches) for frying – I find cast iron gives the best even heat and golden crust
- Tongs or a slotted spoon for flipping and removing tenders from hot oil
- Cooling rack set over a baking sheet to drain excess oil and keep tenders crisp (don’t skip this—it’s a game changer)
- Microplane or fine grater (for zesting the lemon)
- Instant-read thermometer (optional but helpful to check oil temperature around 350°F / 175°C)
If you don’t have a cast-iron skillet, a heavy-bottomed stainless steel or nonstick pan will do. Just keep an eye on the heat so the oil doesn’t burn. For a lighter option, you can try baking these tenders or cooking in an air fryer (similar to what I do for my crispy air fryer buffalo wings), though the texture will be a bit different from pan-frying.
Preparation Method
- Prep the chicken: Pat the chicken tenders dry with paper towels. This helps the coating stick better. Set aside.
- Mix the dry coating: In a shallow bowl, combine the flour, cornstarch, garlic powder, salt, black pepper, lemon pepper seasoning, and lemon zest. Stir well to distribute the flavors evenly.
- Prepare the wet dip: Beat the eggs in a separate shallow bowl until smooth.
- Set up the breadcrumb bowl: In a third shallow bowl, place the panko breadcrumbs.
- Dredge the tenders: Working one at a time, coat each chicken tender in the flour mixture, shaking off excess. Then dip into the beaten eggs, allowing the excess to drip off. Finally, press into the panko breadcrumbs, ensuring an even coating. Set each coated tender on a plate or tray.
- Heat the oil: Pour about ½ inch of vegetable or avocado oil into your skillet. Heat over medium heat to around 350°F (175°C). If you don’t have a thermometer, test by dropping a small breadcrumb into the oil—it should sizzle immediately but not burn.
- Fry the tenders: Carefully place the chicken tenders in the hot oil, working in batches so you don’t overcrowd the pan. Fry for about 3-4 minutes per side, until golden brown and cooked through (internal temperature should reach 165°F / 74°C). Flip once during cooking.
- Drain and rest: Use tongs or a slotted spoon to transfer the tenders to a cooling rack set over a baking sheet. This keeps them crispy—don’t just toss onto paper towels, or they’ll steam and get soggy.
- Finish with lemon: Right before serving, squeeze fresh lemon juice over the hot tenders for that final zesty punch.
- Serve immediately: These are best enjoyed fresh and hot. Pair with your favorite dipping sauces or a crisp side salad.
Pro tip: If your breading starts to get soggy or fall off while frying, it usually means the oil isn’t hot enough or you overcrowded the pan. Keep the oil temperature steady, and give the tenders room to crisp up nicely.
Cooking Tips & Techniques
Getting those chicken tenders perfectly crispy and bursting with lemon pepper flavor takes a few little tricks I’ve picked up through trial and error. First, drying the chicken well before breading is a must (wet chicken means soggy coating). I’ve also learned that mixing cornstarch with flour in the dredging stage adds that extra crunch that makes the tenders so addictive.
The oil temperature is a delicate dance—too hot and the coating burns before the inside cooks, too cool and the breading soaks up oil like a sponge. Using an instant-read thermometer made a huge difference for me. If you don’t have one, just keep an eye out for steady, lively sizzling without smoke.
When coating the tenders, press the breadcrumbs firmly onto the chicken to help them adhere better. Sometimes I double-dip in the egg and breadcrumbs for an extra-thick crust if I’m craving that crunch. Also, frying in small batches keeps the oil temperature consistent and prevents the pieces from sticking together.
Lastly, I always let the tenders rest briefly on a wire rack instead of paper towels. It keeps them crispy all around instead of getting soggy underneath—trust me, it’s worth the extra step. These little habits turned the recipe from “good enough” into a favorite in my kitchen.
Variations & Adaptations
While the classic crispy lemon pepper chicken tenders are a winner, I like mixing it up occasionally to suit different moods or dietary needs. Here are a few variations I’ve tried and loved:
- Air Fryer Version: Skip the frying and cook the tenders in an air fryer at 400°F (200°C) for about 10-12 minutes, flipping halfway through. Less oil without losing all the crunch.
- Spicy Kick: Add ½ teaspoon cayenne pepper or smoked paprika to the breadcrumb mix for a smoky heat that pairs surprisingly well with the lemon zest.
- Gluten-Free: Use almond flour and gluten-free panko breadcrumbs. The texture changes a bit but still tasty and crisp.
- Herbed Twist: Incorporate dried thyme or rosemary into the flour mixture for an earthy note that plays nicely with lemon.
- Oven-Baked Option: Place breaded tenders on a greased baking sheet and bake at 425°F (220°C) for 15-20 minutes, flipping once, until golden and cooked through. Less mess, still delicious.
Once, I tried swapping panko with crushed crispy prosciutto bits for a salty crunch—unexpected but a fun experiment. Feel free to adjust based on what you have or how adventurous you’re feeling.
Serving & Storage Suggestions
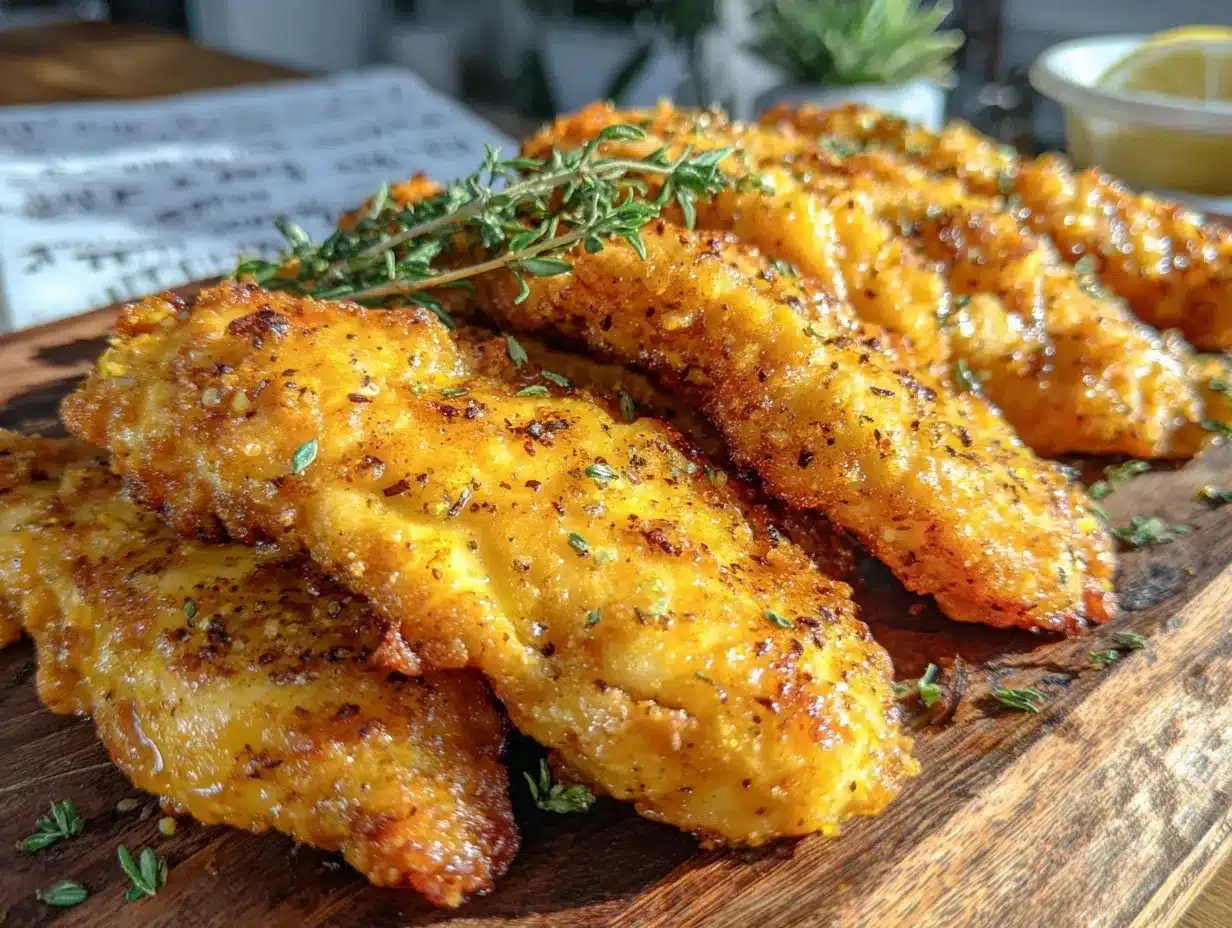
These crispy lemon pepper chicken tenders shine best served hot and fresh from the pan with a wedge of lemon on the side for extra zing. I usually pair them with a simple green salad or some roasted veggies for an easy weeknight dinner. They also work great as finger food for casual gatherings or game nights.
Dipping sauces? I’m partial to a garlicky aioli or a creamy ranch to balance the zesty brightness. You might also enjoy them alongside a citrusy slaw or even a light pasta dish for a more filling meal.
To store leftovers, let the tenders cool completely, then place them in an airtight container in the refrigerator for up to 3 days. Reheating is best done in a 375°F (190°C) oven or toaster oven for 8-10 minutes to bring back crispiness. Microwaving works but can make the coating a bit soggy.
Flavors actually deepen after a day or two, making these tenders a tasty option for next-day lunches or quick snacks. Just remember to refresh that lemon juice squeeze before serving again—it keeps everything bright and lively.
Nutritional Information & Benefits
This recipe offers a balanced meal option with lean protein from the chicken, a boost of vitamin C from the fresh lemon, and a satisfying crunch that keeps you coming back. Each serving (about 4 tenders) contains roughly 350 calories, 25 grams of protein, and moderate fat from the frying oil and breading.
Using avocado oil or vegetable oil provides a neutral, heart-healthier fat choice, while fresh lemon zest and juice add antioxidants and a refreshing citrus burst without calories. Swapping all-purpose flour for almond flour reduces carbs and adds healthy fats for those watching their intake.
Be mindful of allergens: this recipe contains eggs, wheat (gluten), and breadcrumbs. For gluten-free or egg-free adaptations, see the variations section above.
Conclusion
There’s something about these crispy lemon pepper chicken tenders that keeps me reaching for them whenever I want a simple, flavorful meal that doesn’t ask for a lot of effort. They’re crunchy, zesty, and just the right amount of tangy—enough to brighten up any dinner table. I hope you find them as reliable and satisfying as I do, whether it’s a hectic weeknight or a laid-back weekend snack.
Feel free to play around with the seasonings or cooking methods to make this recipe your own. And if you try it, I’d love to hear what you think or how you changed it up. Sharing little kitchen wins like this makes the whole cooking adventure even better.
Here’s to many crispy, lemony bites ahead!
FAQs About Crispy Lemon Pepper Chicken Tenders
Can I bake these lemon pepper chicken tenders instead of frying?
Yes! Bake at 425°F (220°C) for 15-20 minutes, flipping halfway through. This method is less messy and healthier but may have slightly less crunch.
What can I use instead of panko breadcrumbs?
You can use regular breadcrumbs, crushed cornflakes, or even crushed crackers. Panko gives the best crispiness, but substitutes still work.
How do I keep the chicken tenders crispy after cooking?
Place them on a wire rack instead of paper towels to drain excess oil. This prevents sogginess by letting air circulate around the tenders.
Is lemon pepper seasoning necessary?
It’s the key flavor in this recipe, but you can make your own by mixing freshly ground black pepper with dried lemon zest and salt if you don’t have a store-bought blend.
Can I use frozen chicken tenders for this recipe?
Yes, but make sure to thaw and pat them dry thoroughly before breading to get a crispy coating.
Pin This Recipe!

Crispy Lemon Pepper Chicken Tenders
These crispy lemon pepper chicken tenders feature a zesty, bright flavor with a crunchy coating, perfect for a quick and satisfying meal.
- Prep Time: 10 minutes
- Cook Time: 20 minutes
- Total Time: 30 minutes
- Yield: 4 servings 1x
- Category: Main Course
- Cuisine: American
Ingredients
- 1 ½ pounds (680g) chicken tenders (fresh or thawed from frozen)
- 1 cup (120g) all-purpose flour (or almond flour for gluten-free)
- 2 large eggs, beaten (room temperature for better coating)
- 1 cup (100g) panko breadcrumbs (Japanese-style preferred)
- 1 tablespoon cornstarch
- 2 teaspoons lemon pepper seasoning
- 1 teaspoon garlic powder
- ½ teaspoon salt
- Freshly ground black pepper, to taste
- 1 lemon, zested and juiced
- Vegetable oil or avocado oil (for frying)
Instructions
- Pat the chicken tenders dry with paper towels and set aside.
- In a shallow bowl, combine flour, cornstarch, garlic powder, salt, black pepper, lemon pepper seasoning, and lemon zest; stir well.
- Beat the eggs in a separate shallow bowl until smooth.
- Place panko breadcrumbs in a third shallow bowl.
- Coat each chicken tender in the flour mixture, shaking off excess, then dip into beaten eggs, allowing excess to drip off, and press into panko breadcrumbs evenly. Set aside on a plate or tray.
- Pour about ½ inch of oil into a skillet and heat over medium heat to around 350°F (175°C).
- Fry chicken tenders in batches for 3-4 minutes per side until golden brown and cooked through (internal temperature 165°F / 74°C). Flip once during cooking.
- Transfer tenders to a cooling rack set over a baking sheet to drain excess oil and keep crisp.
- Squeeze fresh lemon juice over hot tenders before serving.
- Serve immediately with preferred dipping sauces or sides.
Notes
Dry chicken tenders well before breading to ensure crispiness. Maintain oil temperature around 350°F to avoid soggy or burnt coating. Use a cooling rack to drain excess oil and keep tenders crispy. Double-dip in egg and breadcrumbs for extra crunch. Avoid overcrowding the pan while frying.
Nutrition
- Serving Size: About 4 chicken tend
- Calories: 350
- Sugar: 1
- Sodium: 450
- Fat: 18
- Saturated Fat: 3
- Carbohydrates: 20
- Fiber: 1
- Protein: 25
Keywords: lemon pepper chicken tenders, crispy chicken tenders, easy chicken recipe, lemon chicken, fried chicken tenders, quick dinner, zesty chicken


