“You really think this will work without baking?” my friend texted me, skeptically, as I shared a quick snap of my latest kitchen experiment. Honestly, I was half as unsure. That night, I was juggling a million things and didn’t have the energy to fire up the oven, but I craved something indulgent and fuss-free. The idea of a no-bake cheesecake bar filled with crushed Oreos seemed almost too good to be true.
I threw together a few simple ingredients, shoved the pan in the fridge, and tried to keep my expectations low. But when I finally took that first bite, the creamy texture, the perfect Oreo crunch, the just-right sweetness—it all surprised me. That simple, almost accidental recipe became my go-to dessert for nights when I wanted comfort without the hassle. I’ve now made these creamy no-bake Oreo cheesecake bars so many times, they’ve practically become a staple in my recipe collection.
There’s something about the cool, velvety filling paired with the chocolatey cookie base that feels like a little moment of quiet joy amid the chaos. It’s the kind of dessert that makes you pause and smile, not because it’s fancy or complicated, but because it’s reliably delicious and easy. And if you’re looking for a sweet treat that doesn’t demand hours in the kitchen, this might just be the one you’ll come back to again and again.
Why You’ll Love This Recipe
These no-bake Oreo cheesecake bars have become a favorite in my kitchen for lots of reasons. After testing and tweaking a few versions, I landed on this recipe that’s honestly just right—creamy, chocolatey, and perfectly sweet without being too heavy. Here’s why I think you’ll enjoy them as much as I do:
- Quick & Easy: Ready in about 15 minutes of prep, then just chill. Perfect for those nights you want dessert but not the stress.
- Simple Ingredients: No fancy or hard-to-find items here—just classic Oreos, cream cheese, and a few pantry staples.
- Perfect for Any Occasion: Whether it’s a last-minute gathering, a cozy movie night, or just a sweet pick-me-up, these bars fit right in.
- Crowd-Pleaser: Kids, adults, picky eaters—they all ask for seconds. It’s a dessert that gets everyone smiling.
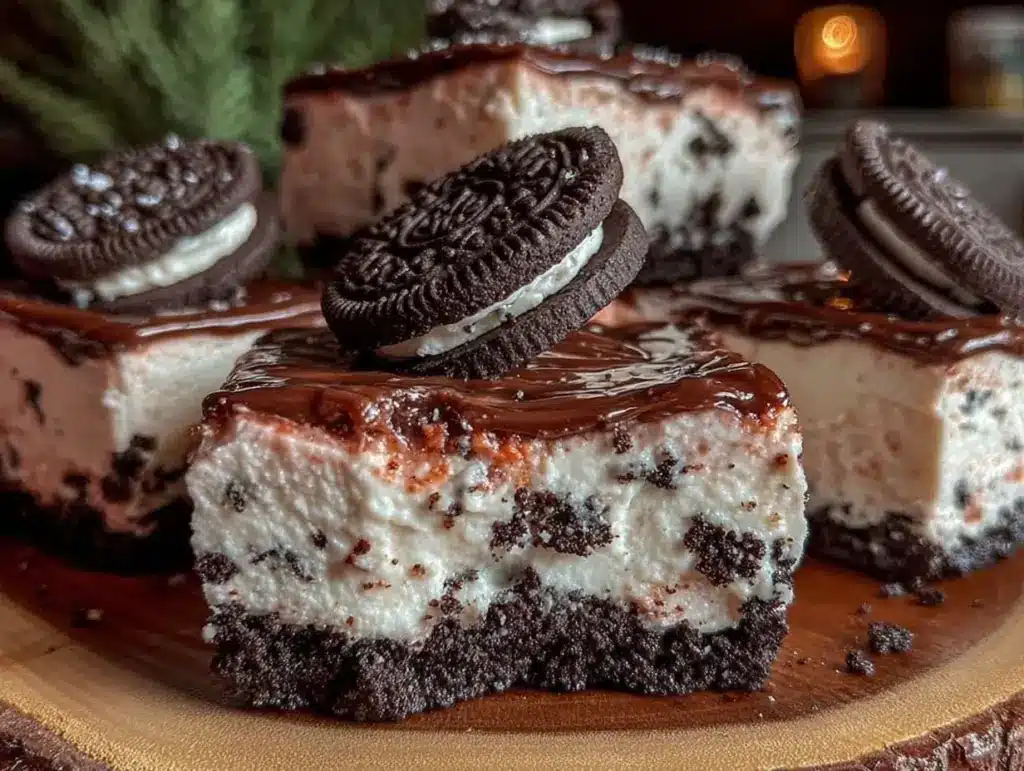
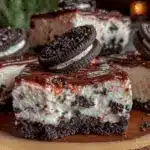
- Unbelievably Delicious: The smooth, creamy filling contrasted with crunchy Oreo crust is pure comfort food magic.
This isn’t just any Oreo cheesecake bar. I blend the cream cheese until ultra-smooth and fold in crushed Oreos for texture without losing that signature creaminess. Plus, skipping the baking keeps the filling light and fresh, which feels especially great on warm days or when you want a break from the oven heat. Honestly, it’s the kind of recipe that makes you close your eyes at the first bite and think, “Yep, this is exactly what dessert should taste like.”
What Ingredients You Will Need
For these bars, I stick to straightforward, easy-to-find ingredients that come together to create big flavor and creamy texture without fuss. Most of these are pantry staples, and if you’ve got a favorite brand of Oreo cookies or cream cheese, go with it! Here’s what you’ll need:
- Oreo Cookies: About 24 cookies, crushed roughly (I like to keep some bigger chunks for crunch). Use classic Oreos or try the Golden Oreos for a twist.
- Unsalted Butter: 6 tablespoons (85g), melted. This binds the crust and adds richness.
- Cream Cheese: 16 ounces (450g), softened to room temperature. I prefer a full-fat cream cheese for the creamiest results.
- Powdered Sugar: ¾ cup (90g), for just the right touch of sweetness without graininess.
- Vanilla Extract: 1 teaspoon, pure if possible—it makes a subtle but important flavor difference.
- Heavy Whipping Cream: 1 cup (240ml), cold. This whips up to add lightness and airiness to the filling.
- Optional: A pinch of salt to balance sweetness, or mini chocolate chips folded into the filling for extra texture.
If you want a gluten-free option, you can find gluten-free Oreos or substitute with another chocolate sandwich cookie. For dairy-free, swapping cream cheese and heavy cream for coconut-based alternatives works pretty well, though texture changes slightly. When I make these in summer, I sometimes add fresh berries on top after chilling—it adds a nice bright contrast.
Equipment Needed
Luckily, this recipe doesn’t require anything fancy. Here’s what you’ll want on hand:
- 8×8 inch (20×20 cm) baking pan: I use a glass one for easy slicing, but a metal pan works too.
- Mixing bowls: At least two—one for the crust, one for the filling.
- Electric mixer or stand mixer: For whipping the cream and beating the cream cheese smooth. Hand mixing is possible but less effortless.
- Food processor or heavy-duty zip bag and rolling pin: For crushing Oreos. I prefer a food processor for even crumbs, but smashing in a bag works fine.
- Rubber spatula: To fold ingredients gently and scrape the bowl clean.
If you don’t have a stand mixer, a handheld electric mixer will do just fine. For budget-friendly options, a sturdy plastic mixing bowl and a rolling pin for crushing cookies work well. After making these bars a bunch of times, I recommend cleaning your mixer promptly to keep it in good shape—cream cheese can be sticky!
Preparation Method

- Prepare the crust: Crush 20 of your Oreos into fine crumbs, leaving some small chunks if you like extra texture. Mix crumbs with the melted butter until evenly coated. Press this mixture firmly into the bottom of your 8×8 inch pan. Use the back of a spoon or a flat glass to compact it tightly. Chill in the fridge while you make the filling. (This step takes about 10 minutes including chilling prep.)
- Make the filling: In a large bowl, beat the softened cream cheese with an electric mixer until smooth and creamy—no lumps! Add powdered sugar and vanilla extract, then continue mixing until fully combined and fluffy. (About 3 minutes.)
- Whip the cream: In a separate chilled bowl, whip the heavy cream until soft peaks form. This means when you lift the whisk, the cream holds a gentle peak that folds over at the tip. Don’t over-whip or it will turn grainy.
- Combine filling and cream: Gently fold the whipped cream into the cream cheese mixture using a spatula. Be careful not to deflate the air you just whipped in. The filling should look light and cloud-like.
- Add crushed Oreos: Roughly crush the remaining 4 Oreos and fold them into the filling for that signature cookie crunch throughout.
- Assemble the bars: Spread the filling evenly over the chilled crust, smoothing the top with a spatula. Cover the pan with plastic wrap and refrigerate for at least 4 hours, preferably overnight, for the bars to set firmly.
- Serve: Once set, use a sharp knife to cut into bars. For cleaner cuts, dip the knife in hot water and dry between slices. Enjoy chilled for the best texture.
If your filling seems too soft after chilling, a little extra refrigeration usually does the trick. Also, I learned the hard way that rushing the chilling step leads to messy bars, so patience pays off here!
Cooking Tips & Techniques
Making no-bake desserts sounds easy until you realize how important texture and temperature are. Here are some tips that helped me nail the perfect creamy no-bake Oreo cheesecake bars:
- Softened cream cheese is key: If it’s too cold, lumps will form and the filling won’t be silky. Let it sit out for 30 minutes or microwave in 5-second bursts if in a pinch.
- Whip the cream just right: Soft peaks hold air and lighten the filling, but overwhipping leads to butter and graininess.
- Crush Oreos carefully: You want a mix of fine crumbs to hold the crust and some chunkier bits in the filling for texture contrast.
- Pressing the crust firmly: This prevents crumbling when slicing, so don’t skip compacting it well.
- Chill times matter: These bars need time to set. Overnight is ideal but a minimum of 4 hours works for a firmer, sliceable bar.
I once tried to speed this up by freezing the bars and ended with a crumbly mess. So, trust the fridge! Also, multitasking works well here—you can prep the crust while the kids unwind or start your favorite creamy mint Oreo truffles for a sweet snack marathon.
Variations & Adaptations
This basic no-bake Oreo cheesecake bar recipe is like a canvas—easy to tweak and make your own. Here are some of the ways I’ve adjusted it over time:
- Chocolate Lovers’ Delight: Add ¼ cup (30g) cocoa powder to the filling for a richer chocolate cheesecake experience.
- Berry Twist: Fold in fresh raspberries or strawberries into the filling or top the bars with a berry compote before serving for a fresh contrast.
- Gluten-Free Option: Use gluten-free chocolate sandwich cookies to make it safe for gluten-sensitive friends and family.
- Dairy-Free Version: Swap cream cheese and cream with coconut-based alternatives. The texture changes slightly but still delicious.
- Mini Cheesecake Bites: Pour filling into silicone muffin cups and freeze for quick grab-and-go treats.
Personally, I once added a swirl of peanut butter into the filling and it was surprisingly good—a fun twist if you want to mix up the classic Oreo flavor. And if you enjoy brunch treats, these bars make a sweet ending after something like the Quiche Lorraine, balancing savory with just the right touch of indulgence.
Serving & Storage Suggestions
These creamy no-bake Oreo cheesecake bars are best served well-chilled. I like to pull them out of the fridge 10 minutes before eating so they soften slightly, making every bite melt in your mouth. For presentation, a dusting of crushed Oreos or a drizzle of melted chocolate adds a nice touch.
Pair these bars with a hot cup of coffee or a cold glass of milk for a classic combo. They’re also a perfect sweet finish after a brunch spread, especially alongside lighter fare like fluffy lemon ricotta pancakes.
Store leftovers tightly covered in the fridge for up to 4 days. The flavors actually deepen with time, so don’t hesitate to make them ahead. For longer storage, the bars freeze well—just wrap them individually in plastic wrap and place in an airtight container. Thaw in the fridge overnight before serving, and you’ll get nearly the same creamy texture.
Nutritional Information & Benefits
Each bar is roughly 250-300 calories depending on size and ingredient brands. While this dessert is definitely a treat, it also offers some small perks. Cream cheese provides calcium and protein, and Oreos add a bit of fun crunch and chocolate flavor we all crave.
These bars are naturally gluten-free if made with gluten-free cookies, and can be adapted for dairy-free diets. Keep in mind they do contain allergens like dairy and gluten by default. Moderation is key, but honestly, a little indulgence is part of a balanced lifestyle.
From a wellness perspective, I like that this recipe skips baking and heavy sugars, making it feel lighter than traditional cheesecakes. Plus, the portion-controlled bars help with mindful eating.
Conclusion
These creamy no-bake Oreo cheesecake bars have quickly become one of those recipes I rely on when I want something effortlessly delicious. They’re simple, quick, and bring a bit of joy with every bite. Whether you want a last-minute dessert or a make-ahead treat, these bars fit the bill.
Feel free to play around with mix-ins or toppings to make them your own. I love how forgiving the recipe is, giving you plenty of room to experiment. Honestly, they’ve made me appreciate the magic of no-bake desserts—creamy, rich, and totally satisfying without the oven heat.
If you give them a try, I’d love to hear what variations you came up with or how they turned out for your crowd. There’s something special about sharing a recipe that’s easy enough for weeknights but impressive enough to bring to a party.
Here’s to sweet moments and simple pleasures!
FAQs About Creamy No-Bake Oreo Cheesecake Bars
Can I use different cookies instead of Oreos?
Absolutely! Chocolate sandwich cookies work best for that classic flavor, but you can try golden Oreos, chocolate chip cookies, or even gluten-free options to suit your taste or dietary needs.
How long do these bars need to chill before serving?
At least 4 hours in the fridge to set properly, but overnight chilling is best for the creamiest texture and easiest slicing.
Can I make these bars ahead of time?
Yes, they keep well in the fridge for up to 4 days and freeze nicely for longer storage. Just thaw in the fridge before serving.
What if I don’t have heavy cream? Can I use something else?
Heavy cream is best for whipping, but you can try chilled coconut cream for a dairy-free alternative or use a whipped topping for a shortcut, though texture may vary.
Is it possible to make these bars vegan?
With dairy-free cream cheese, coconut cream, and vegan cookies, you can create a vegan version. Just make sure all ingredients are certified vegan for best results.
Pin This Recipe!
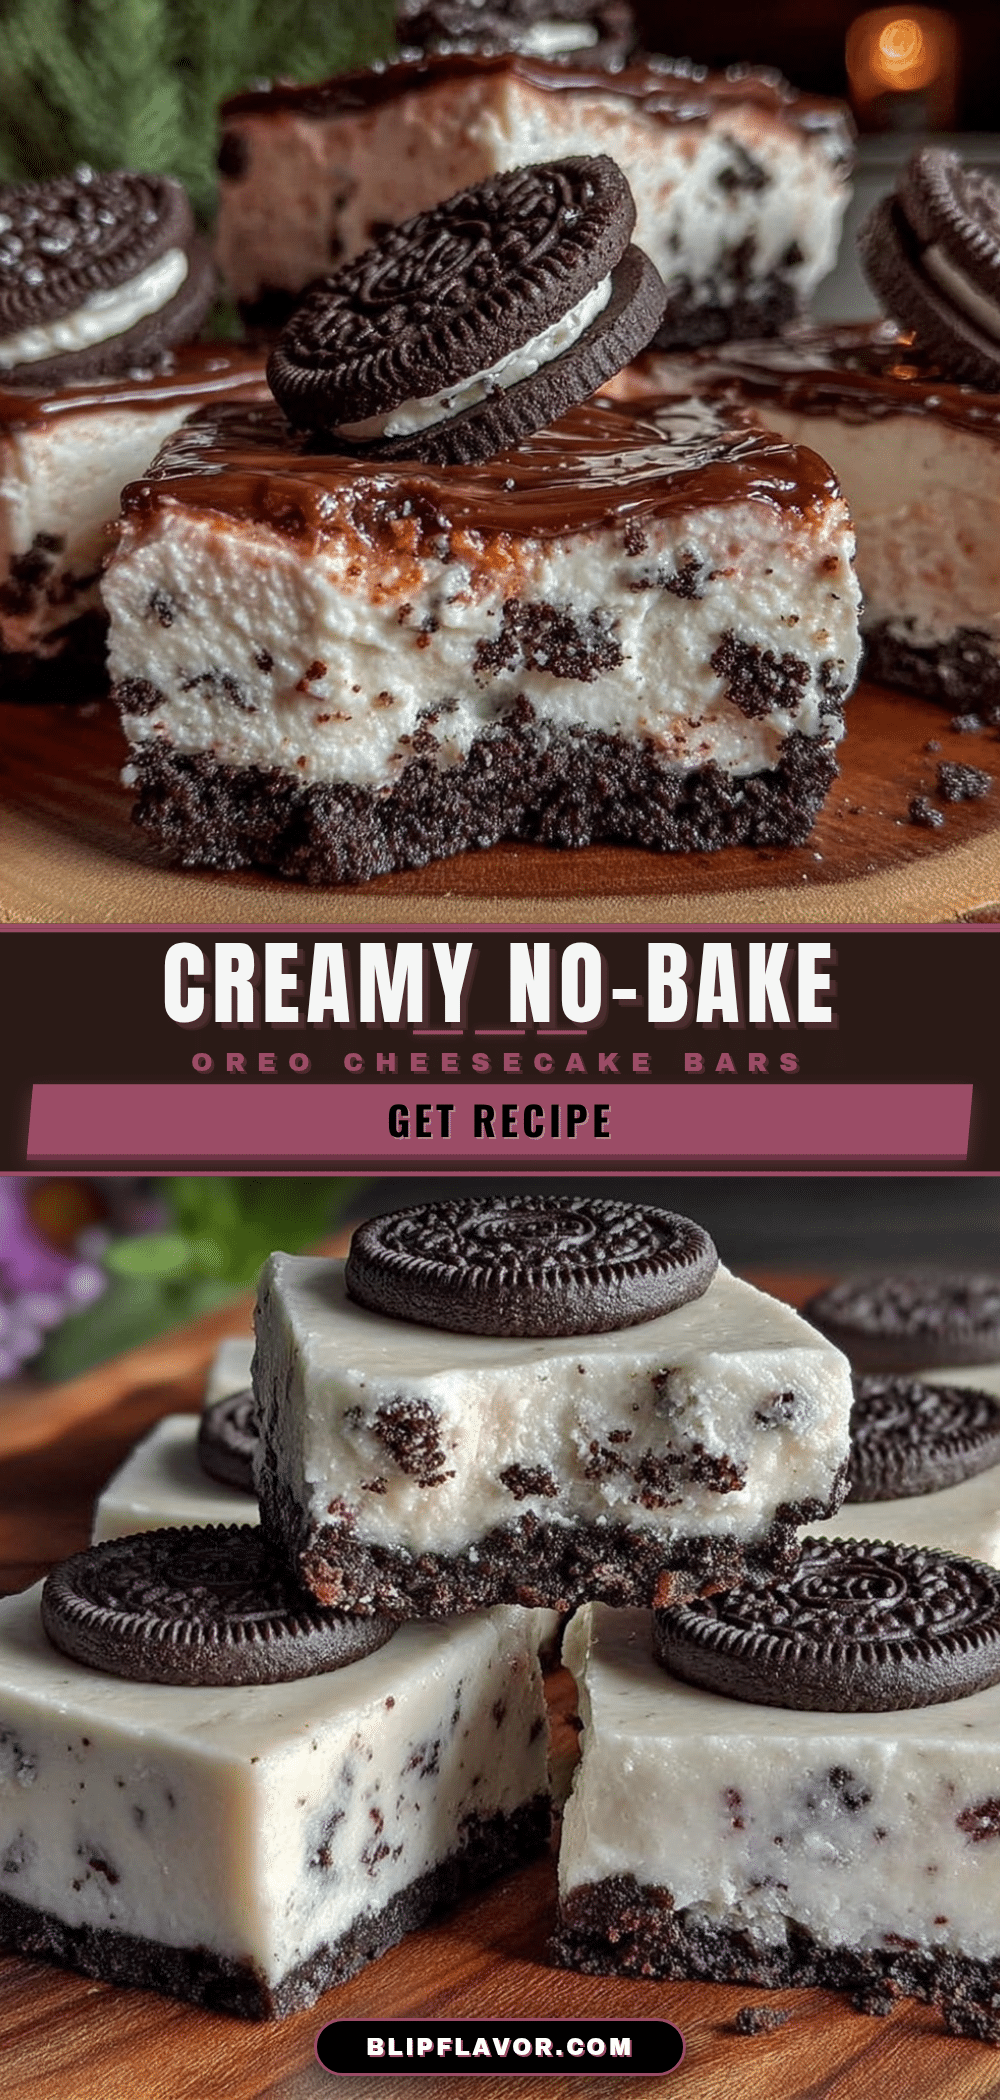
Creamy No-Bake Oreo Cheesecake Bars
These creamy no-bake Oreo cheesecake bars are a quick and easy dessert with a velvety filling and crunchy Oreo crust, perfect for any occasion without the hassle of baking.
- Prep Time: 15 minutes
- Cook Time: 0 minutes
- Total Time: 4 hours 15 minutes
- Yield: 16 servings 1x
- Category: Dessert
- Cuisine: American
Ingredients
- 24 Oreo Cookies, crushed roughly
- 6 tablespoons (85g) unsalted butter, melted
- 16 ounces (450g) cream cheese, softened to room temperature
- ¾ cup (90g) powdered sugar
- 1 teaspoon vanilla extract
- 1 cup (240ml) heavy whipping cream, cold
- Optional: pinch of salt
- Optional: mini chocolate chips
Instructions
- Prepare the crust: Crush 20 Oreos into fine crumbs, leaving some small chunks. Mix crumbs with melted butter until evenly coated. Press firmly into the bottom of an 8×8 inch pan. Chill in the fridge.
- Make the filling: Beat softened cream cheese with an electric mixer until smooth. Add powdered sugar and vanilla extract, mix until fluffy.
- Whip the cream: In a separate chilled bowl, whip heavy cream until soft peaks form.
- Combine filling and cream: Gently fold whipped cream into cream cheese mixture without deflating.
- Add crushed Oreos: Roughly crush remaining 4 Oreos and fold into filling.
- Assemble bars: Spread filling evenly over chilled crust. Cover and refrigerate at least 4 hours or overnight.
- Serve: Cut into bars using a sharp knife dipped in hot water for clean slices. Serve chilled.
Notes
Softened cream cheese is key for a smooth filling. Whip cream to soft peaks to avoid graininess. Press crust firmly to prevent crumbling. Chill bars at least 4 hours or overnight for best texture. For cleaner cuts, dip knife in hot water between slices.
Nutrition
- Serving Size: 1 bar (assuming 16 b
- Calories: 275
- Sugar: 18
- Sodium: 180
- Fat: 18
- Saturated Fat: 10
- Carbohydrates: 25
- Fiber: 1
- Protein: 4
Keywords: no-bake, Oreo, cheesecake bars, dessert, easy recipe, creamy, quick dessert, Oreo cheesecake


