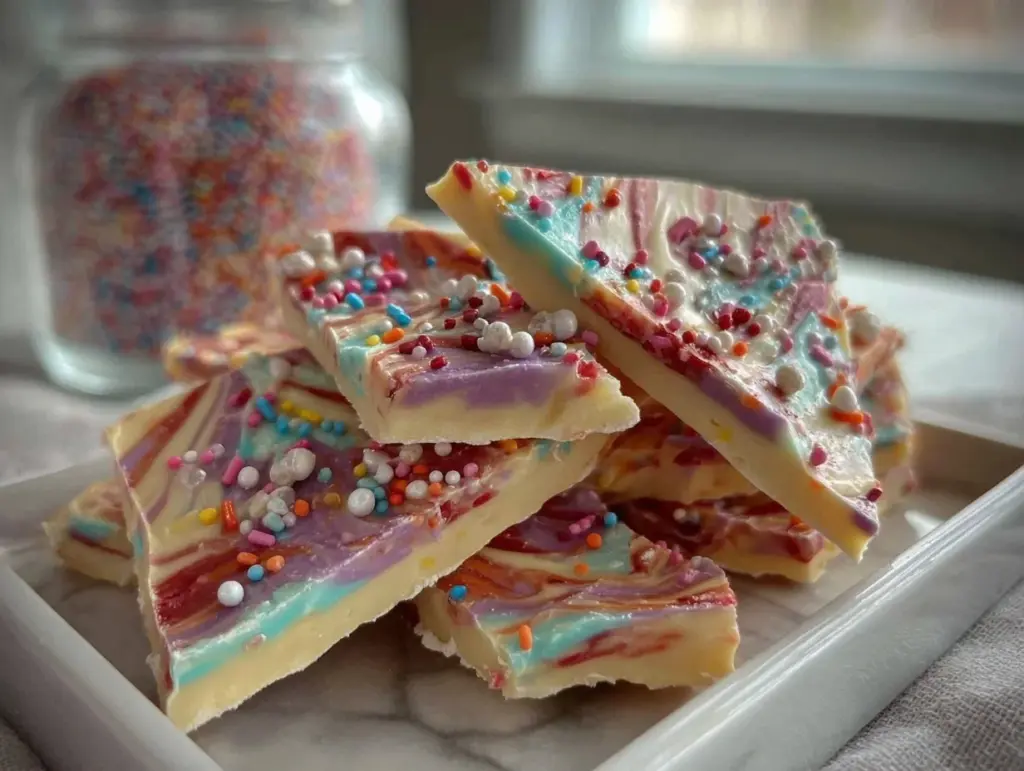
The soft crackle as you snap a piece, the glossy sheen of pastel swirls, and the playful crunch of sprinkles—there’s just something magical about Whimsical Pastel Candy Bark with Sprinkles. I’ll never forget the first time I made this: the kitchen smelled like sweet vanilla and melted chocolate (the kind of aroma that makes your whole house feel like a candy shop). My hands were sticky, the counters were a bit of a mess, but I was grinning ear to ear. The colors were so cheerful, and honestly, there’s a joy in swirling candy melts that makes you feel like a kid again.
The first batch happened on a rainy Saturday, back when I was knee-high to a grasshopper and determined to create something special for my best friend’s birthday. I dug through my mom’s baking cupboard, discovered a stash of pastel candy melts, and the rest was history. You know what? That was the kind of moment where you pause, take a deep breath, and just smile because you know you’re onto something truly special.
Since then, Whimsical Pastel Candy Bark with Sprinkles has become a staple in my kitchen. My family can’t stop sneaking pieces off the tray, and when I bring it to potlucks, it disappears before I can even blink. It’s the kind of treat that brightens up any dessert table or Pinterest board—it’s dangerously easy, pure nostalgic comfort, and honestly, I wish I’d stumbled upon this recipe even sooner. From baby showers to Easter brunches, it’s always a hit. I’ve probably made this more than a dozen times (in the name of research, of course), and it never fails to bring out smiles. If you’re looking for a dessert that feels like a warm hug wrapped in pastel colors, you’re going to want to bookmark this one.
Why You’ll Love This Whimsical Pastel Candy Bark Recipe
If you’re anything like me, you appreciate a recipe that looks impressive but doesn’t tie you to the stove for hours. After countless batches (and a few chocolatey mishaps), I can safely say this candy bark is a foolproof crowd-pleaser. It’s been tested on kids, grown-ups, and even the most skeptical “I-don’t-eat-sweets” folks. And guess what? They’ve all gone back for seconds.
- Quick & Easy: Ready in under 30 minutes—no oven required. Perfect for last-minute dessert emergencies and spontaneous sweet cravings.
- Simple Ingredients: You probably have most of these in your pantry or local grocery store. No fancy shopping trips needed.
- Perfect for Any Occasion: Dress it up for holidays, birthdays, or baby showers. It’s just as at home on a kids’ party table as it is on a sophisticated dessert tray.
- Crowd-Pleaser: Kids love the colors and the sprinkles, adults love the creamy crunch. It’s a universal favorite (and allergy-friendly to boot).
- Unbelievably Delicious: The sweet, creamy texture with a gentle snap—plus a little salty crunch if you add pretzels or nuts—makes it next-level comfort food.
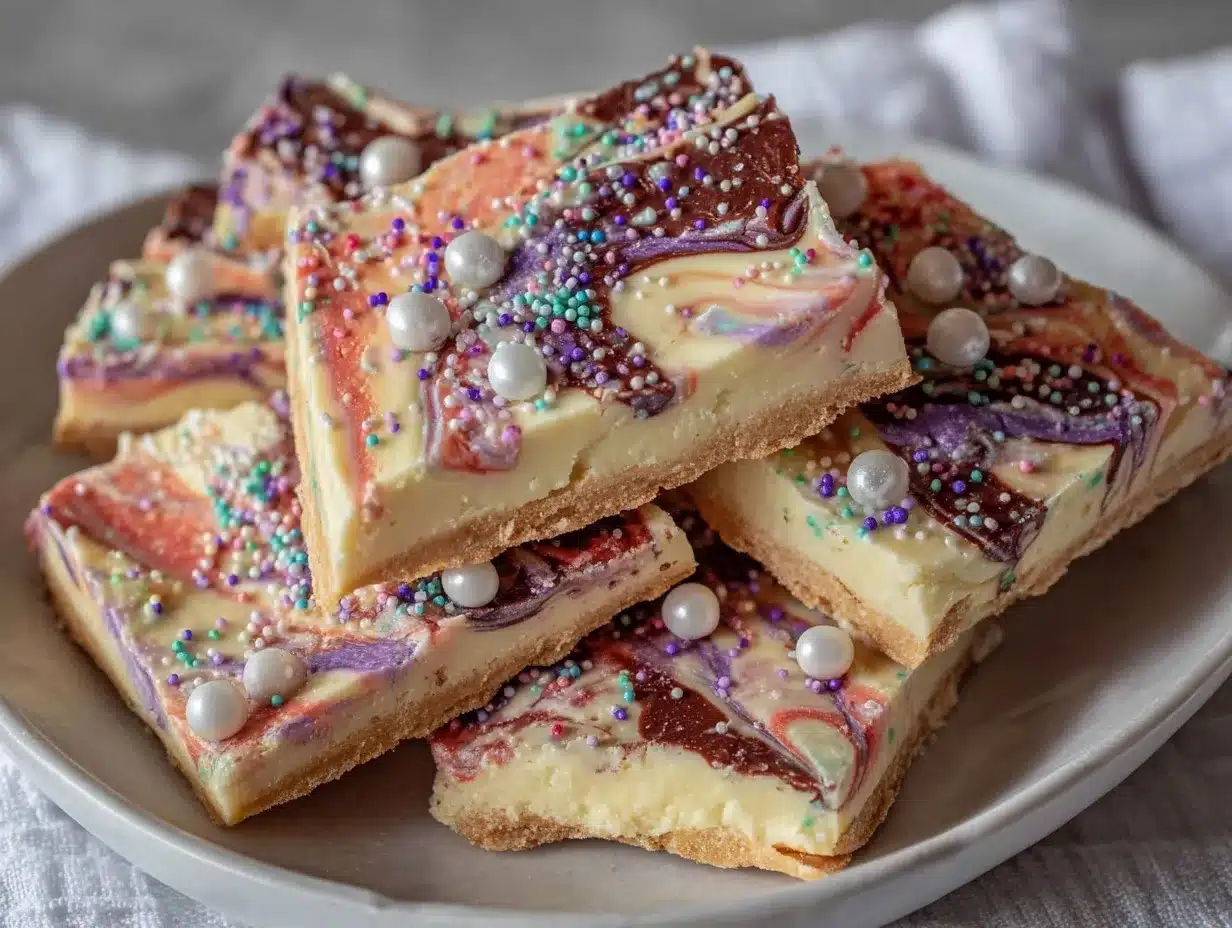
What sets this whimsical pastel candy bark apart is the swirl technique. By using several colors of candy melts and gently marbling them, you get an eye-catching treat that looks far more complicated than it actually is. The sprinkles? That’s the finishing touch—like edible confetti. I use a mix of pastel jimmies, sugar pearls, and even edible glitter for extra pizzazz.
This isn’t just another candy bark—it’s the one that makes people pause, close their eyes, and savor. It’s the recipe I whip up when I want to add a pop of color and fun to an otherwise ordinary day. Whether you’re making it for a holiday, gifting it in treat bags, or just sneaking a piece after dinner, this candy bark promises happiness in every bite. It’s comfort food reimagined: faster, brighter, and guaranteed to spark joy. And isn’t that what the best recipes are all about?
What Ingredients You Will Need
Whimsical Pastel Candy Bark with Sprinkles is all about simplicity and creativity. The basic ingredients are easy to find, and you can customize the add-ins and toppings to make it your own. Here’s what you’ll need:
- Candy Melts (pastel colors): Pick your favorites—think soft pink, lavender, mint green, baby blue, and pale yellow. I usually go for Wilton or Ghirardelli melts because they melt smoothly and have a nice vanilla flavor. You’ll need about 1 1/2 cups (255 g) of each color.
- White Chocolate Chips (or bars): About 2 cups (340 g) for the base layer. Go for a good-quality white chocolate for the creamiest texture. If you’re dairy-free, Enjoy Life makes a solid vegan white chocolate chip.
- Sprinkles (assorted pastel): Jimmies, nonpareils, sugar pearls, and even edible glitter if you’re feeling extra. About 1/2 cup (60 g) total. Use what makes you smile—no rules!
- Mini Pretzels or Chopped Nuts (optional): For a salty crunch. About 1/2 cup (30 g). I like to break the pretzels into pieces so they’re easier to eat.
- Mini Marshmallows (optional): About 1/2 cup (25 g). These add a fun chewy texture, and kids especially love them.
That’s it! No eggs, no flour, nothing fussy. If you want to get creative:
- Substitute candy melts: You can use colored almond bark or tint white chocolate with oil-based food coloring (avoid water-based—trust me, it’ll seize up and you’ll have a sad, clumpy mess).
- Make it nut-free: Skip the nuts, or use pretzels or freeze-dried fruit for crunch.
- Swap in dark or milk chocolate: For a richer flavor, layer some dark or milk chocolate under the white chocolate before swirling on the pastels.
- Use seasonal colors: For spring, think pinks and greens; for Halloween, go with purple, orange, and black; for winter, use icy blue and silver sprinkles.
A quick note on brands: I tend to stick with Wilton for candy melts, Ghirardelli for white chocolate, and Sweetapolita or Fancy Sprinkles for toppings (the colors are so vibrant). But honestly, use what you have—this recipe is forgiving and all about fun.
Equipment Needed
- Baking Sheet (large, rimmed): A standard half-sheet (13×18 inches / 33×46 cm) is perfect.
- Parchment Paper or Silicone Baking Mat: For easy release. If you’re out, wax paper works in a pinch—but parchment is sturdier.
- Microwave-Safe Bowls: You’ll need one bowl per color of candy melt. Glass or ceramic bowls work best (they retain heat and melt evenly).
- Silicone Spatula or Spoon: For stirring the melts and swirling the colors.
- Toothpick or Skewer: For marbling the colors. I’ve also used the handle of a spoon when desperate.
- Measuring Cups and Spoons: To portion out your chocolate and toppings.
- Chef’s Knife (optional): For chopping chocolate, nuts, or breaking up the bark later.
If you don’t have a microwave, a double boiler works for melting the chocolate—just keep the water at a gentle simmer and don’t let any steam or water splash into the chocolate (been there, seized that). If you’re making a big batch, line two pans and rotate them in the fridge. I’ve used dollar-store silicone mats and they work just fine—no need for fancy equipment. Just don’t skip the parchment, or you’ll be chiseling bark off your tray!
How to Make Whimsical Pastel Candy Bark with Sprinkles
-
Prep the pan: Line a large rimmed baking sheet (13×18 inches / 33×46 cm) with parchment paper or a silicone baking mat. This helps the bark release easily once set.
Tip: Use a tiny dab of melted chocolate in each corner to “glue” the parchment down—no sliding while you spread. -
Melt the white chocolate: In a microwave-safe bowl, add 2 cups (340 g) of white chocolate chips. Microwave on 50% power for 30 seconds, stir, then continue in 15-second bursts until smooth and just melted. Take care not to overheat—it scorches fast.
Warning: If it seizes, add 1/2 teaspoon coconut oil to loosen it up. -
Pour and spread: Immediately pour the melted white chocolate onto the center of your prepared pan. Use a spatula to spread it into a rough rectangle about 1/4 inch (0.6 cm) thick.
Note: Don’t worry about perfect edges—swirls cover a multitude of sins. -
Melt pastel candy melts: In separate bowls, melt 1 1/2 cups (255 g) of each pastel color. Microwave in 20-second intervals, stirring after each, until smooth and pourable.
Tip: If the melts are stubborn, add 1/2 teaspoon vegetable oil. -
Spoon and swirl: Spoon blobs of each colored melt randomly over the white chocolate. Use a toothpick or skewer to gently swirl the colors together. Don’t overmix—you want distinct swirls, not a muddy blend.
Sensory cue: It should look like a pastel marble painting—shiny, glossy, and streaky. -
Add toppings: While the chocolate is still wet, scatter on 1/2 cup (60 g) pastel sprinkles, plus mini pretzels, marshmallows, or nuts if using. Press gently so they stick.
Warning: Work quickly—once the chocolate sets, nothing will adhere. -
Chill to set: Transfer the pan to the fridge for 20-30 minutes, or until completely firm. If your kitchen is cool, you can leave it at room temp (takes about an hour).
Tip: Don’t stack anything on top or you’ll dent the surface. -
Break and serve: Use your hands or a chef’s knife to break the bark into pieces (about 2-inch/5-cm chunks). Store in an airtight container.
Sensory cue: The pieces should snap cleanly and the toppings should stay put.
If your bark feels soft or sticky, it may need more chilling time. Don’t try to speed it up by freezing—rapid temperature changes can make the chocolate bloom (those weird white streaks).
Cooking Tips & Techniques for the Best Pastel Candy Bark
After more than a few sticky fingers and chocolate mishaps, I’ve picked up a few tricks for flawless candy bark every time:
- Use dry, clean tools: Even a drop of water can make chocolate seize (turn grainy and lumpy), so always dry your bowls and spatulas thoroughly.
- Microwave carefully: Candy melts and chocolate scorch easily. Always use medium power and short bursts, stirring often. If you see lumps, keep stirring—the residual heat usually smooths them out.
- Don’t over-swirl: Less is more! Over-mixing blends the colors together. A few gentle swirls with a toothpick make the prettiest patterns.
- Work quickly: Have all your toppings and colors ready before you start. Once the chocolate is poured, you have about 5 minutes before it starts to set.
- Layer for texture: If you love a chunky bark, sprinkle on pretzels, marshmallows, or even freeze-dried fruit before adding the sprinkles.
- Trouble with toppings sticking? Press them gently into the wet chocolate. If it’s already begun to set, use a warm spoon to re-melt spots and add your toppings.
- Storing tips: Keep the bark in a cool, dry place. Humidity or heat will soften it, and the color on your sprinkles can bleed (I’ve learned this the hard way!).
The most common mistake? Pouring candy melts directly onto a cold sheet pan—they set up instantly and don’t swirl well. Always pour onto room-temperature parchment. And if your bark looks a little dull, try adding a drizzle of melted white chocolate on top for a glossy finish.
I’ve ruined a batch or two by getting impatient, but every time, the next one turns out even better. The best part: even imperfect bark tastes amazing—so don’t stress about perfection!
Variations & Adaptations for Whimsical Pastel Candy Bark
This candy bark is all about creativity—change it up to match any mood, season, or dietary need. Here are a few of my favorite twists:
- Gluten-Free: Use gluten-free pretzels or skip them altogether. Most candy melts and sprinkles are gluten-free, but always double-check labels.
- Dairy-Free/Vegan: Swap in dairy-free white chocolate (like Enjoy Life) and check your sprinkles for hidden dairy. Use coconut oil to help the melts smooth out if needed.
- Seasonal Colors: For Halloween, use purple, orange, and black melts with candy eyes. For Christmas, use red, green, and gold with peppermint bits. For spring, stick with pastels and add edible flower petals for a garden vibe.
- Nutty Crunch: Toasted chopped almonds or pistachios add a lovely flavor. For nut allergies, try roasted pumpkin seeds (pepitas) for crunch without the risk.
- Chocolate Lovers’ Version: Add a base layer of dark or milk chocolate, then swirl the pastels on top. The double layer looks gorgeous and tastes extra rich.
One of my favorite customizations? Adding freeze-dried berries for a tangy pop that cuts the sweetness. I’ve also tried swirling in a touch of flavored extract (like almond or orange)—just remember, a little goes a long way!
If you don’t have candy melts, oil-based food coloring works with melted white chocolate. And for a really fun twist, let kids sprinkle their own toppings—everyone gets a unique piece. The possibilities are endless, so have fun playing!
Serving & Storage Suggestions
Serve Whimsical Pastel Candy Bark with Sprinkles at room temperature, broken into rustic shards and piled onto a pretty platter or tucked into cellophane bags for gifting. It’s a showstopper centerpiece for dessert tables, birthday parties, or holiday brunches.
Pair with lemonade, hot cocoa, or even a festive mimosa for grown-up celebrations. It’s lovely alongside fresh fruit, mini cupcakes, or tea sandwiches for a pastel-themed party.
For storage, place the bark in an airtight container, separating layers with parchment paper. Store at room temperature for up to a week, or in the fridge for up to two weeks (if you live somewhere humid, the fridge is best). Avoid the freezer—frozen bark can sweat and the colors may bleed when thawed.
To refresh the bark, let it come to room temperature before serving (the texture is best when not too cold). Over time, the flavors mellow and the crunch stays crisp—just keep it away from heat and sun, or you’ll have a gooey, pastel mess!
Nutritional Information & Benefits
A typical serving (about 1 oz/28 g) of Whimsical Pastel Candy Bark with Sprinkles contains roughly 140 calories, 7g fat, 18g carbohydrates, and 14g sugar. The numbers can vary depending on your toppings and the type of chocolate used.
White chocolate offers a little calcium and a touch of antioxidants (especially if you opt for a dark chocolate base). Add-ins like nuts or seeds provide extra crunch, healthy fats, and fiber.
This treat is naturally gluten-free if you skip or swap the pretzels. For dairy-free or vegan diets, use plant-based white chocolate and check your sprinkles. Allergens may include dairy, soy, and tree nuts depending on brands—always read labels if you’re gifting to others.
While not exactly a health food, this pastel bark delivers pure joy in moderation. My wellness philosophy? Life’s too short not to savor a little sweetness now and then, especially when it’s as pretty as this!
Conclusion
If you’re craving a dessert that’s as fun to make as it is to eat, Whimsical Pastel Candy Bark with Sprinkles is your answer. It’s the kind of recipe that invites creativity, brings people together, and never fails to make you smile.
Whether you follow the classic version or add your own personal spin, this candy bark is proof that easy treats can be the most memorable. I love it for its simplicity, its color, and the way it turns even an ordinary day into a celebration.
Go ahead—gather your favorite colors and toppings, let your inner artist loose, and share your results in the comments below! Did you try a new flavor or a wild sprinkle combo? I’d love to hear about your creations. Bookmark this recipe, pin it for later, and remember: a little whimsy goes a long way (especially when there’s chocolate involved).
FAQs: Whimsical Pastel Candy Bark with Sprinkles
Can I make Whimsical Pastel Candy Bark ahead of time?
Absolutely! It keeps well for up to two weeks in an airtight container, making it perfect for prepping before parties or holidays.
Can I use regular chocolate instead of candy melts?
Yes, you can swap candy melts for white chocolate and tint it with oil-based food coloring. Just avoid water-based coloring, which can make the chocolate seize.
Are there any nut-free options for toppings?
Of course. Use pretzels, mini marshmallows, or even freeze-dried fruit for crunch. Always check your sprinkles for cross-contamination if allergies are a concern.
What’s the best way to break the bark into pieces?
Once fully set, use your hands for rustic shards or a sharp chef’s knife for clean squares. If it’s too hard, let it sit at room temperature for 5 minutes before breaking.
Can kids help make this recipe?
Definitely! Kids love swirling colors and adding sprinkles—just supervise the chocolate melting and keep an eye out for sticky fingers. It’s a wonderful recipe for family kitchen fun.
Pin This Recipe!
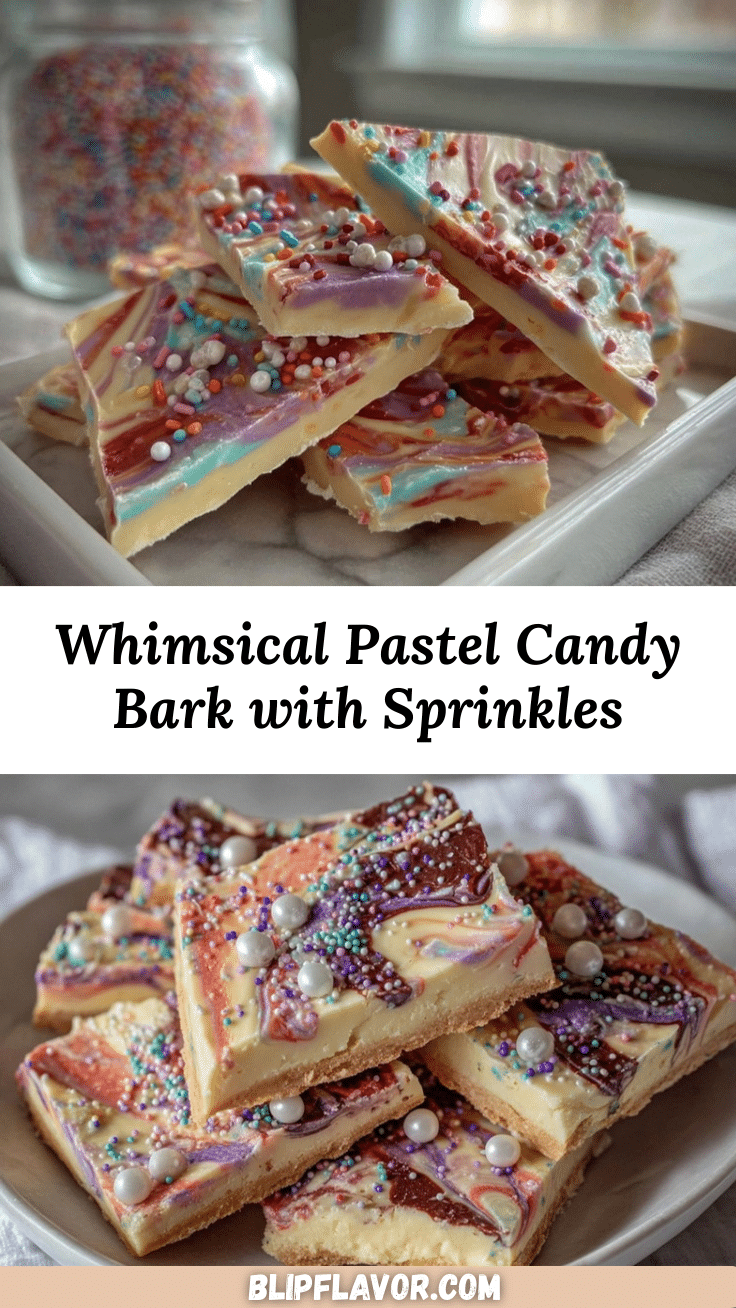
Whimsical Pastel Candy Bark with Sprinkles
This easy, no-bake pastel candy bark is a whimsical treat featuring swirled candy melts, creamy white chocolate, and playful sprinkles. Perfect for parties, gifting, or a fun family kitchen project, it’s a colorful dessert that brings joy to any occasion.
- Prep Time: 10 minutes
- Cook Time: 5 minutes
- Total Time: 30 minutes
- Yield: 16 servings 1x
- Category: Dessert
- Cuisine: American
Ingredients
- 1 1/2 cups pastel candy melts (soft pink, lavender, mint green, baby blue, pale yellow)
- 2 cups white chocolate chips or bars
- 1/2 cup assorted pastel sprinkles (jimmies, nonpareils, sugar pearls, edible glitter)
- 1/2 cup mini pretzels or chopped nuts (optional)
- 1/2 cup mini marshmallows (optional)
Instructions
- Line a large rimmed baking sheet (13×18 inches) with parchment paper or a silicone baking mat.
- In a microwave-safe bowl, melt 2 cups white chocolate chips on 50% power for 30 seconds, stir, then continue in 15-second bursts until smooth.
- Pour the melted white chocolate onto the prepared pan and spread into a rough rectangle about 1/4 inch thick.
- In separate bowls, melt 1 1/2 cups of each pastel candy melt color in 20-second intervals, stirring after each, until smooth.
- Spoon blobs of each colored melt randomly over the white chocolate. Use a toothpick or skewer to gently swirl the colors together.
- While the chocolate is still wet, scatter on pastel sprinkles, mini pretzels, marshmallows, or nuts if using. Press gently so they stick.
- Transfer the pan to the fridge for 20-30 minutes, or until completely firm. Alternatively, let set at room temperature for about 1 hour.
- Break the bark into pieces (about 2-inch chunks) using your hands or a chef’s knife. Store in an airtight container.
Notes
Use dry, clean tools to prevent chocolate from seizing. Work quickly when swirling and adding toppings, as chocolate sets fast. For nut-free, use pretzels or freeze-dried fruit. Store in a cool, dry place; avoid freezing to prevent color bleeding. Kids can help with swirling and decorating.
Nutrition
- Serving Size: 1 oz (28 g) piece
- Calories: 140
- Sugar: 14
- Sodium: 40
- Fat: 7
- Saturated Fat: 4
- Carbohydrates: 18
- Protein: 1
Keywords: candy bark, pastel dessert, no-bake, sprinkles, party treat, easy dessert, kid-friendly, chocolate bark, whimsical, colorful


