
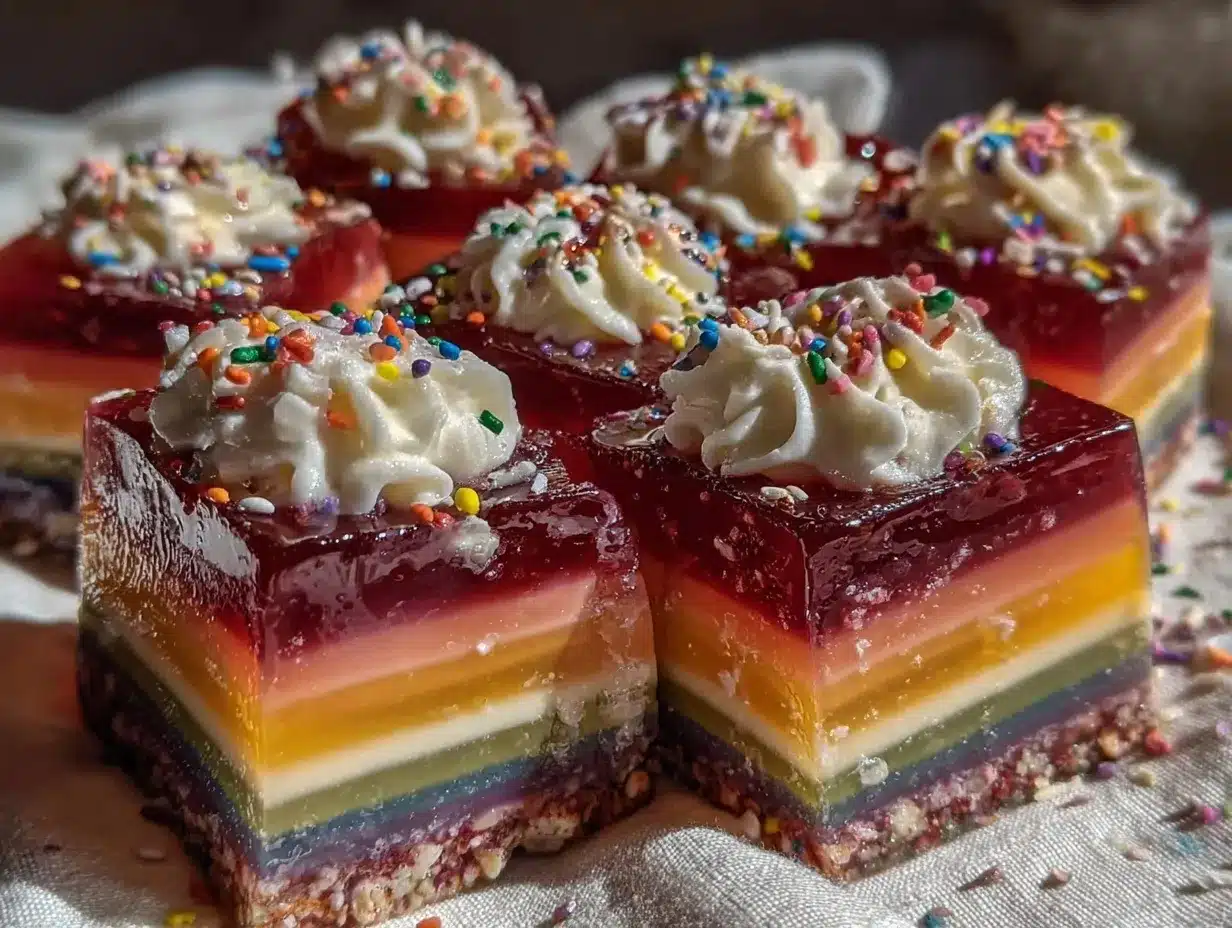
Bright, wiggly, and bursting with color—nothing quite grabs your eye (or your taste buds!) like a tray of rainbow Jello cups. Picture this: you open the fridge and are met with rows of clear cups, each one stacked with shimmering layers of red, orange, yellow, green, blue, and purple. The sunlight catches them just right, and it’s like a stained-glass window, but edible! The scent of sweet, fruity gelatin drifts through the kitchen, and every time you jiggle a cup, it’s like laughter bottled up in dessert form.
The first time I made these fun rainbow Jello cups, I was a teenager babysitting my wild pack of cousins on a rainy Saturday. We needed something to do—something messy and magical. I remember standing over the kitchen counter, carefully spooning in each colored layer, feeling like some kind of culinary artist. When we finally peeled back the plastic wrap and dug in, it was the kind of moment you pause for—a little sigh, a big smile—because you just know you’ve created a memory.
This recipe quickly became a tradition at our house. My grandma would request them for her birthday (she loved the blue layer best), and my mom would sneak a cup or two before the party even started. Honestly, I wish I’d figured out sooner that making something this colorful could be so dangerously easy! Whether you’re prepping for a preschool party, a unicorn-themed sleepover, or just want to brighten up your Pinterest boards, rainbow Jello cups are pure, nostalgic comfort in a cup. My family can’t resist sneaking off with them, and I get requests for the “wobbly rainbow” every holiday. After testing this recipe more times than I’d care to admit (all in the name of research, of course), it’s become a staple for gatherings, gifts, and those “just because” afternoons. It feels like a warm hug in technicolor—and you’re going to want to bookmark this one for sure!
Why You’ll Love This Rainbow Jello Cups Recipe
If you’re searching for a treat that’s as fun to make as it is to eat, these rainbow Jello cups are the answer. Over the years, I’ve made countless batches for everything from birthday parties to classroom celebrations, and I can honestly say: they never fail to steal the show. Here’s why you’ll be hooked, too:
- Quick & Easy: Each colorful layer sets in about 20-30 minutes, and you can prep the next one while you wait—perfect for busy parents or last-minute party planners.
- Simple Ingredients: Just grab a few boxes of flavored gelatin and some whipped topping—no specialty store runs required. Most of these are pantry staples.
- Perfect for Kids’ Parties: These cups are a guaranteed hit for birthdays, school events, or any special celebration. They’re mess-free and easy for little hands to hold.
- Crowd-Pleaser: Kids and grown-ups alike go wild for the bright colors and bouncy texture. I always have to make extra because someone’s bound to sneak one before dessert time.
- Unbelievably Delicious: The fruity flavors meld together in a way that’s sweet but not overwhelming. Add a dollop of whipped topping and, wow—it’s next-level fun food.
What makes this rainbow Jello cups recipe stand out is the layering technique. Instead of dumping all the flavors together, you let each one shine in its own band of color. No rushed, muddy layers here! Whether you tweak the colors to match your child’s favorite cartoon or go full-on rainbow, these cups look like you spent hours (when you really didn’t). And honestly, with a bit of patience and a steady hand, they turn out picture-perfect every time.
I’ve tested these with different brands, swapped in sugar-free options, and even tried adding fresh fruit between the layers for an extra surprise. The result? Kids squeal, adults reminisce about their own childhoods, and you become the hero of the potluck. These rainbow Jello cups aren’t just dessert—they’re a little slice of happiness, ready to brighten any day.
What Ingredients You Will Need for Rainbow Jello Cups
This recipe uses simple, everyday ingredients to create a dazzling effect. There’s no need for fancy add-ons—just a bit of patience and an eye for color.
- For the Jello Layers:
- 1 (3 oz / 85 g) box red flavored gelatin (strawberry, cherry, or raspberry)
- 1 (3 oz / 85 g) box orange flavored gelatin
- 1 (3 oz / 85 g) box yellow flavored gelatin (lemon)
- 1 (3 oz / 85 g) box green flavored gelatin (lime)
- 1 (3 oz / 85 g) box blue flavored gelatin (berry blue)
- 1 (3 oz / 85 g) box purple flavored gelatin (grape; sometimes you need to blend blue and red if you can’t find it)
- 6 cups (1.4 L) boiling water
- 6 cups (1.4 L) cold water
- For the Creamy Layers (optional, but so good!):
- 1 1/2 cups (355 mL) whipped topping (like Cool Whip or a homemade version)
- 6 Tbsp (90 mL) plain Greek yogurt or vanilla yogurt (adds creamy tang)
- For Assembly:
- 8-10 clear plastic or glass cups (8 oz / 240 mL each)
- Extra whipped topping for garnish
- Festive sprinkles or fresh fruit (optional—kids love these!)
Ingredient Tips: I usually grab the classic Jell-O brand for reliability, but store brands work fine too. If you prefer all-natural dyes, look for specialty brands at health food stores. You can use sugar-free gelatin if needed—just follow package directions for liquid amounts. For dairy-free, swap coconut whipped topping and a plant-based yogurt for the creamy layers. If you can’t find purple gelatin, mix equal parts blue and red. These are all easy-to-find, kid-friendly ingredients that you can adapt for dietary needs or color preferences.
Equipment Needed for Rainbow Jello Cups
- Clear plastic or glass cups: 8 oz (240 mL) size works best for visible layers (I use reusable ones for less waste, but party cups are fine too).
- Measuring cups and spoons: For precise water and yogurt/whipped topping measurements.
- Small mixing bowls: You’ll need at least two—one for mixing gelatin and another for the creamy layer (if using).
- Whisk or spoon: For dissolving gelatin completely (a whisk prevents clumps).
- Small ladle or squeeze bottle: Makes pouring layers easy and mess-free. I sometimes use a turkey baster for fun—it really helps with control!
- Plastic wrap: To cover cups while chilling in the fridge, keeping other odors out.
- Baking sheet or tray: For transporting the cups in and out of the fridge without spills.
If you don’t have a ladle or squeeze bottle, a regular spoon works—just go slow. I’ve used everything from tiny shot glasses to mason jars for these, depending on the party. If you’re prepping for a crowd, you can even use a muffin tin to steady lots of cups at once. Keep your tools clean between layers so you don’t mix colors! And if you’re on a budget, dollar store cups do the trick—just be gentle when unmolding, if you try to pop them out.
How to Make Rainbow Jello Cups: Step-by-Step Method
-
Prep Your Workspace (5 minutes)
Clear space in your fridge for a baking sheet with 8-10 cups. Set your cups on the tray for easy transport. Gather all ingredients and tools—you’ll thank yourself later. -
Prepare the First Gelatin Layer (10 minutes active, 20-30 minutes chilling)
In a small bowl, mix 1 box of red gelatin powder with 1 cup (240 mL) boiling water. Stir with a whisk until fully dissolved (about 2 minutes; no gritty bits left). Add 1 cup (240 mL) cold water and stir again.
Pour a thin layer (about 2 Tbsp / 30 mL) into the bottom of each cup. Chill in the fridge for 20-30 minutes, until just set but not firm. Don’t rush—if it’s too soft, the next layer will mix.
Tip: To test, gently touch the surface—it shouldn’t stick to your finger. -
Add the Creamy Layer (optional) (5 minutes active, 15 minutes chilling)
If you want pretty opaque stripes, mix 3 Tbsp (45 mL) whipped topping + 1 Tbsp (15 mL) yogurt into the next color of prepared gelatin (orange). Let the mixture cool slightly so it doesn’t melt the red layer.
Gently ladle or spoon a layer (about 2 Tbsp / 30 mL) over the set red. Chill 15 minutes.
Warning: If you pour too fast, layers may bleed. -
Repeat for All Colors (same steps as above)
Alternate clear and creamy layers in the following order: red, orange, yellow, green, blue, purple. Each time, let the previous layer set before adding the next. The whole process takes 3-4 hours, but most of it is hands-off chilling time!
Tip: If you forget which color’s next, just remember the rainbow: Red, Orange, Yellow, Green, Blue, Purple (ROYGBP). -
Top and Serve (5 minutes)
Once all layers are set (firm to touch), cover each cup with plastic wrap and chill until ready to serve.
Right before serving, add a swirl of whipped topping and a few rainbow sprinkles or fresh berries.
Troubleshooting: If colors bleed, your previous layer wasn’t set enough—pop back in the fridge for 10 minutes. If you forget a layer, don’t worry! Just add the next color and keep going. For extra vibrant colors, use clear cups and avoid over-mixing whipped topping into the gelatin.
Personal Note: I’ve found that prepping all the gelatin boxes at once (then chilling them in separate bowls) saves time. Just don’t pour hot liquid onto a set layer—always let it cool to room temperature first.
Cooking Tips & Techniques for Perfect Rainbow Jello Cups
Here’s where experience really shines. After making these rainbow Jello cups more times than I can count, I’ve picked up a few tricks (and learned from a few kitchen messes):
- Chill, Don’t Freeze: Always let each layer set in the fridge, not the freezer. Freezing makes gelatin grainy and ruins the smooth texture.
- Be Patient: Rushing the process is the most common mistake. If you add a new layer too soon, colors bleed and layers get messy. I used to try to speed things up—trust me, it’s not worth it!
- Use a Squeeze Bottle or Turkey Baster: This gives you more control and prevents splashes. I once spilled blue Jello down the side of every cup—lesson learned.
- Clear Cups Make the Rainbow Pop: Glass is prettiest, but plastic is safest for kids. If you want to unmold the cups, lightly oil the inside before pouring in gelatin.
- Timing is Everything: Start your first layer early in the day, then do other things while each layer chills. I set a phone timer for each round—no more “oops, I forgot!” moments.
- Consistency is Key: Try to keep each layer the same thickness for that classic striped look. If you’re off by a little, don’t stress—imperfections are part of the charm.
- Keep Tools Clean: Rinse your spoon or ladle between colors to avoid muddying your bright hues.
- Don’t Overmix Creamy Layers: Stir whipped topping and yogurt in gently. Overmixing causes bubbles and a weirdly foamy look.
Honestly, the first time you make rainbow Jello cups, you’ll probably have a few lopsided stripes or wobbly layers. That’s perfectly okay—the kids will still cheer, and you’ll learn something for next time. Over the years, I’ve found that these little cups are just as much about the process as the result. Take your time, enjoy the colors, and don’t fret over small mistakes (they actually make for great stories later)!
Variations & Adaptations for Rainbow Jello Cups
One of the best parts about this recipe is how easy it is to tweak for any occasion or dietary need. Here are my favorite ways to change things up:
- Allergy-Friendly Swaps: Use sugar-free or all-natural gelatin for dye sensitivities. For dairy-free, choose coconut whipped topping and a plant-based yogurt for the creamy layers (I’ve done this for a vegan friend—worked great!).
- Seasonal Themes: Switch up the colors for holidays—red, white, and blue for the 4th of July; orange, purple, and black for Halloween; or pastels for Easter. You can even do just two or three layers if you’re short on time.
- Fresh Fruit Surprise: Add diced fruit between layers—think strawberries with red, orange segments with orange, or blueberries with blue. This gives a sweet bite and a bit more texture (plus, it feels a tad healthier!).
- Unmolded Jello Cups: Want to wow the crowd? Lightly oil the inside of the cups, set the layers, then dip the cup in warm water and invert onto a plate. Kids go wild for a rainbow “tower.”
- Flavor Twists: Mix and match gelatin flavors—peach, pineapple, or even watermelon layers are fun. If your kid has a favorite color, double it up for a custom treat.
Personally, my favorite variation is to add a thin creamy layer between each color for extra richness. I’ve even used vanilla pudding in place of the whipped topping once—total hit at a bake sale! The possibilities are endless, so don’t be afraid to get creative. Sometimes, the best results come from happy little kitchen accidents.
Serving & Storage Suggestions for Rainbow Jello Cups
Rainbow Jello cups are best served cold, straight from the fridge. The colors are brightest and the texture is perfect when chilled. I like to arrange them on a white platter for maximum “wow” factor—seriously, they light up the whole dessert table.
For parties, top each cup with a swirl of whipped topping and a sprinkle of rainbow nonpareils or a cherry. If you’re feeling fancy, add a mini paper umbrella or a fruit skewer for extra pizzazz. These cups pair well with simple snacks like popcorn, cheese sticks, or mini sandwiches—making them a perfect all-in-one treat for little hands.
To store, cover each cup with plastic wrap and keep in the fridge for up to 5 days. Stack them carefully on a baking sheet to avoid tipping. If you want to prep in advance, make the cups up to 2 days ahead and add toppings just before serving. Freezing isn’t recommended (the texture gets weirdly icy), but they do hold up well in the fridge. If they last that long, the flavors meld together even more, and the colors stay bright!
Nutritional Information & Benefits
Each rainbow Jello cup (with whipped topping) is about 80-100 calories, depending on cup size and toppings. If you use sugar-free gelatin and light whipped topping, you can bring that down to about 40-50 calories per cup.
- Low Fat & Allergy-Friendly: Naturally low in fat and gluten-free (just check your gelatin brand to be sure). Easy to make dairy-free or sugar-free with simple swaps.
- Hydration Bonus: Gelatin desserts are mostly water, so they’re a fun way to keep kids hydrated at parties.
- Kid-Approved Portion: Small cups help with portion control, and the bright colors make it more appealing than store-bought candy or cake.
Allergen Note: Contains gelatin (not vegetarian/vegan unless you use a substitute), and dairy if you add the creamy layers. Always double-check ingredients for sensitive eaters. Personally, I love these as a lighter treat option—no heavy frosting, just sweet, fruity fun. They’re a “sometimes food,” but a happy one!
Conclusion
If you’re looking for a treat that’s guaranteed to make kids (and adults) smile, these rainbow Jello cups are the way to go. They’re easy, colorful, endlessly customizable, and—let’s face it—just plain fun to make and eat. Whether you stick with the classic rainbow or mix up your own palette, you’ll get that “wow” moment every time the tray hits the table.
I love this recipe because it’s both a creative project and a delicious dessert. Plus, the smiles and sticky fingers afterward are absolutely worth it! Feel free to swap flavors, add fruit, or experiment with your own twists. If you try these rainbow Jello cups, let me know your favorite combos in the comments—share your party pics or tag me on social media. I can’t wait to see your creations!
Here’s to brightening your next party, one wobbly, wonderful cup at a time. Happy jiggling!
FAQs about Rainbow Jello Cups
How far in advance can I make rainbow Jello cups?
You can make these up to 2-3 days ahead of your party. Just keep them covered in the fridge and add toppings right before serving for the freshest look and taste.
Can I use vegetarian or vegan gelatin for this recipe?
Yes! Use agar-agar or a vegan gelatin substitute, but follow the package instructions for setting times and liquid amounts. The process is similar, but layers may set a little faster.
What if my layers blend together or look messy?
That usually means the previous layer wasn’t set enough. Give each layer at least 20-30 minutes to chill, and make sure the next layer is at room temperature before pouring. A few swirly lines are okay—kids love the “tie dye” look!
Can I make these without dairy?
Absolutely! Skip the creamy layers or use coconut whipped topping and plant-based yogurt. The rainbow Jello cups still turn out beautiful and tasty.
How do I unmold the Jello cups for a plated presentation?
Lightly oil the inside of your cups before pouring in the first layer. Once all layers are set, dip the bottom of the cup in warm water for 5-10 seconds, then gently run a butter knife around the edge and invert onto a plate. Give it a little shake if needed. Kids love watching the rainbow tower “plop” onto the plate!
Pin This Recipe!
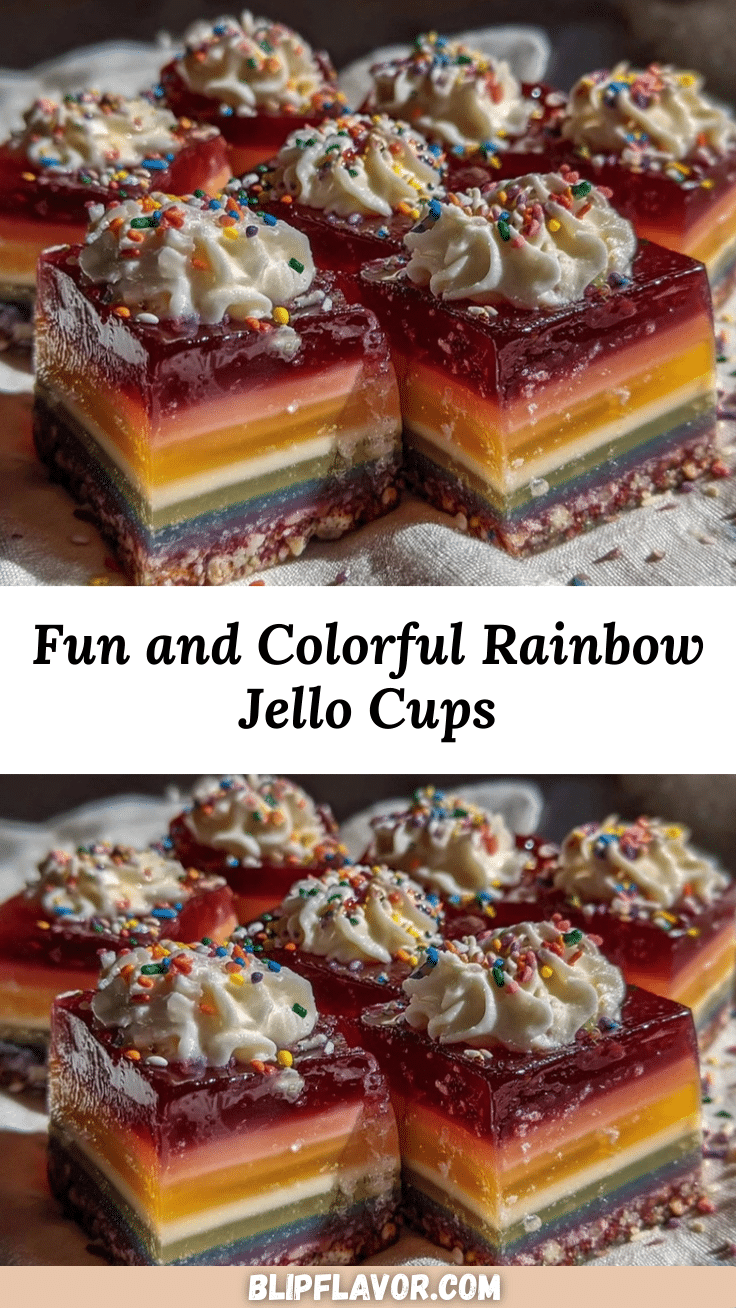
Rainbow Jello Cups Recipe: Easy Kids’ Party Treats to Make
Bright, wiggly, and bursting with color, these rainbow Jello cups are a fun and eye-catching treat perfect for kids’ parties, birthdays, or any festive gathering. With shimmering layers of fruity gelatin and optional creamy stripes, they’re easy to make, endlessly customizable, and guaranteed to bring smiles.
- Prep Time: 20 minutes
- Cook Time: 0 minutes
- Total Time: 3-4 hours
- Yield: 8-10 servings 1x
- Category: Dessert
- Cuisine: American
Ingredients
- 1 (3 oz) box red flavored gelatin (strawberry, cherry, or raspberry)
- 1 (3 oz) box orange flavored gelatin
- 1 (3 oz) box yellow flavored gelatin (lemon)
- 1 (3 oz) box green flavored gelatin (lime)
- 1 (3 oz) box blue flavored gelatin (berry blue)
- 1 (3 oz) box purple flavored gelatin (grape; or mix equal parts blue and red if unavailable)
- 6 cups boiling water
- 6 cups cold water
- 1 1/2 cups whipped topping (like Cool Whip or homemade)
- 6 Tbsp plain Greek yogurt or vanilla yogurt (optional, for creamy layers)
- Extra whipped topping for garnish
- Festive sprinkles or fresh fruit (optional)
- 8–10 clear plastic or glass cups (8 oz each)
Instructions
- Clear space in your fridge for a baking sheet with 8-10 cups. Set cups on the tray for easy transport. Gather all ingredients and equipment.
- In a small bowl, mix 1 box of red gelatin powder with 1 cup boiling water. Stir until fully dissolved (about 2 minutes). Add 1 cup cold water and stir again.
- Pour a thin layer (about 2 Tbsp) into the bottom of each cup. Chill in the fridge for 20-30 minutes, until just set but not firm.
- For creamy layers (optional): Mix 3 Tbsp whipped topping and 1 Tbsp yogurt into the next color of prepared gelatin (orange). Let cool slightly, then gently ladle or spoon a layer (about 2 Tbsp) over the set red. Chill 15 minutes.
- Repeat the process for all colors, alternating clear and creamy layers in the order: red, orange, yellow, green, blue, purple. Let each layer set before adding the next. The whole process takes 3-4 hours, mostly chilling time.
- Once all layers are set, cover each cup with plastic wrap and chill until ready to serve.
- Right before serving, add a swirl of whipped topping and a few rainbow sprinkles or fresh berries.
Notes
For best results, let each layer set fully before adding the next to prevent colors from bleeding. Use clear cups for maximum visual impact. Sugar-free and dairy-free swaps are easy—use coconut whipped topping and plant-based yogurt. Add diced fruit between layers for extra flavor and texture. Do not freeze; always chill in the fridge. If unmolding, lightly oil cups before pouring gelatin.
Nutrition
- Serving Size: 1 cup (8 oz)
- Calories: 80100
- Sugar: 17
- Sodium: 60
- Fat: 2
- Saturated Fat: 1.5
- Carbohydrates: 18
- Protein: 2
Keywords: rainbow jello cups, kids party dessert, layered gelatin, easy jello recipe, colorful treats, birthday party snacks, gluten-free dessert, dairy-free option, party food, fun food


