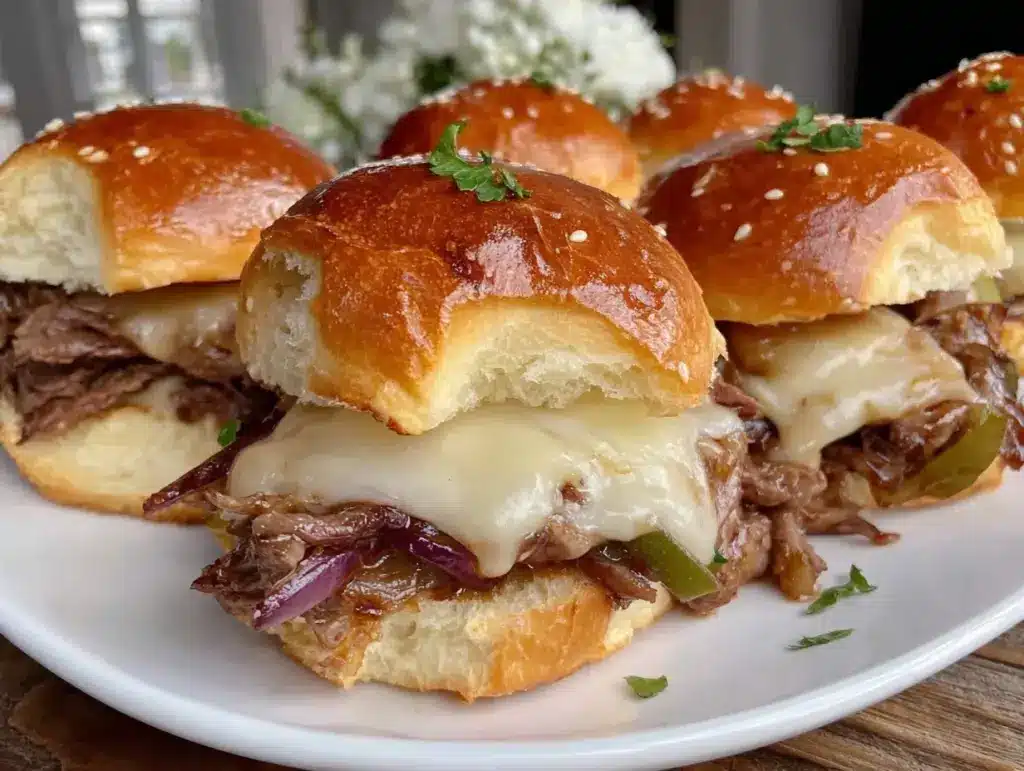
Let me set the scene: imagine your kitchen filling up with the savory aroma of seasoned steak sizzling on the skillet, mingling with sweet onions and bell peppers. There’s a hint of toasty, buttery rolls in the air, and then—oh, the cheese!—gooey provolone bubbling and stretching as you pull apart a tray of Philly Cheesesteak Sliders, the kind that makes everyone in the house come running. The first time I whipped up these sliders, it was on a rainy Sunday when cabin fever had us all itching for comfort food. I remember the moment I took that first bite, the flavors all melded together, and I paused—just grinning, because I knew I’d stumbled onto something special.
Growing up, cheesesteaks were a treat reserved for special occasions, but these sliders feel like a shortcut to that same magic—just in a miniature, party-ready package. My dad, who’s a Philly native, took one bite, nodded, and muttered, “Now that’s a proper cheesesteak,” which, believe me, is high praise. I wish I’d discovered this trick years ago—how a humble pack of slider buns could deliver so much flavor and nostalgia in just a few bites.
Honestly, these Philly Cheesesteak Sliders are dangerously easy to make. My kids can’t keep their hands off them (watching little hands sneak slider after slider off the tray is practically sport around here). These are the sliders that disappear first at game day parties, make rainy afternoons brighter, and are my go-to for potlucks or quick weeknight cravings. If you’re looking for a way to wow your family or brighten your Pinterest boards with something both comforting and crowd-pleasing, this is the recipe. I’ve tested these sliders more times than I care to admit (all in the name of research, of course), and they’ve earned a permanent spot at our family table. Trust me—this is one you’ll want to bookmark for every gathering, snack attack, or cozy night in. It’s like a warm hug, and you’re going to love it.
Why You’ll Love This Philly Cheesesteak Sliders Recipe
If you’re searching for an easy, cheesy appetizer that truly delivers, you’ve hit the jackpot with these Philly Cheesesteak Sliders. As someone who’s made a lot (and eaten even more) of these over the years, let me tell you why you should try this version first. I’ve tweaked, tested, and taste-tested more batches than I can count, so you’re getting all my best secrets right here.
- Quick & Easy: These sliders come together in under 40 minutes, making them perfect for busy weeknights or when you need a last-minute party appetizer. No marathon cooking session here—just big flavor, fast!
- Simple Ingredients: You probably already have most of the basics on hand. No need to hunt down fancy cheeses or specialty rolls. It’s all about bringing out the best in everyday ingredients.
- Perfect for Parties: These are built for sharing. Whether it’s game day, a birthday, or just Tuesday night, sliders are always a hit with both kids and grownups.
- Crowd-Pleaser: I’ve never seen a tray of these last more than ten minutes at a get-together. There’s something about gooey provolone and buttery buns that’s just irresistible.
- Unbelievably Delicious: The combination of tender steak, caramelized onions, sweet peppers, and melty cheese is next-level comfort food. It’s like Philly in every bite, but with less mess and all the flavor.
What sets this Philly Cheesesteak Sliders recipe apart? For starters, I use a quick marinade for the steak to amp up the flavor and keep it tender. Sautéing the onions and peppers just long enough to get a little caramelization (without turning them to mush) makes all the difference. And the provolone? I layer it on thick, so you get that glorious cheese pull with every bite. Unlike other recipes, I brush the tops of the slider buns with garlic butter for that bakery-fresh finish (trust me, don’t skip this step!).
This isn’t just another slider—this is my go-to, “bring a tray and watch it disappear” recipe. It’s comfort food that doesn’t make you work too hard, but still feels special. Whether you’re impressing guests or just feeding a hungry crew, you’ll love how simple, fun, and satisfying these sliders are. And you know what? There’s nothing better than seeing everyone reach for seconds… and thirds. That’s when you know you’ve got a keeper.
What Ingredients You Will Need
This Philly Cheesesteak Sliders recipe is all about big flavor with simple, honest ingredients. Most of these are probably already in your kitchen, and if not, you’ll find them at any grocery store—nothing fancy, just the classics done right. Here’s what you’ll need for the perfect batch of sliders:
- For the Steak Filling:
- 1 lb (450 g) thinly sliced ribeye steak or sirloin (look for pre-sliced “shaved steak” or ask your butcher to slice it super thin—this makes all the difference for tenderness)
- 1 tbsp (15 ml) Worcestershire sauce (adds that classic savory punch)
- 1 tsp (5 g) kosher salt
- 1/2 tsp (2 g) freshly ground black pepper
- 1 tsp (5 g) garlic powder
- 1/2 tsp (2 g) onion powder
- For the Veggies:
- 1 large yellow onion, thinly sliced
- 1 large green bell pepper, thinly sliced (or use red/yellow for a sweeter touch)
- 1 tbsp (15 ml) olive oil or avocado oil (for sautéing)
- For Assembly:
- 12 slider rolls or Hawaiian rolls, sliced in half horizontally (I love King’s Hawaiian for their slight sweetness, but any soft dinner roll works!)
- 8 slices provolone cheese (about 6 oz / 170 g, or enough to cover the sliders generously—feel free to add extra if you’re a cheese lover)
- For the Garlic Butter Topping:
- 4 tbsp (56 g) unsalted butter, melted
- 1 clove garlic, minced or grated
- 1/2 tsp (2 g) dried parsley (optional, for color and a little herby note)
- Pinch of kosher salt
Ingredient Notes & Tips:
- Steak: If you can’t find ribeye or sirloin, you can use roast beef from the deli in a pinch—just chop it up and warm it with the peppers and onions. For a leaner option, try thinly sliced chicken breast.
- Cheese: Provolone is traditional, but mozzarella or white American cheese also works well. For a sharper flavor, try a little smoked provolone.
- Rolls: Soft, pull-apart rolls are best for that buttery slider vibe. If you’re gluten-free, switch in your favorite GF buns.
- Vegetables: Feel free to add mushrooms or swap peppers for what’s in season (roasted poblanos are delicious in the fall!).
I like to use Kerrygold butter for its rich flavor, and I always grab sliders from the bakery section if possible—they’re fresher and hold up better to all those juicy fillings. The best part? You can easily substitute or swap ingredients based on what you’ve got, and it’ll still taste amazing. No stress—just good eating.
Equipment Needed
You don’t need a bunch of fancy gadgets to make these Philly Cheesesteak Sliders—just a few trusty kitchen tools. Here’s what I use every time:
- Large Skillet or Sauté Pan: Cast iron is my favorite for getting a good sear on the steak, but any sturdy skillet works. Nonstick is fine too—just get it nice and hot.
- Sharp Knife & Cutting Board: For slicing onions and peppers super thin. A mandoline is handy for uniform slices, but not essential.
- Baking Sheet or Casserole Dish: 9×13-inch (23×33 cm) works perfectly for 12 sliders. I’ve even used a rimmed cookie sheet in a pinch.
- Small Mixing Bowl: For stirring together the garlic butter topping.
- Pastry Brush: Makes spreading the garlic butter easy, but a spoon works if that’s what you’ve got.
- Aluminum Foil: To cover the sliders while baking and keep them extra gooey.
No need for a fancy griddle—your trusty skillet does the trick. If you’re making a double batch, use two pans or cook the steak and veggies in batches. Budget tip: Pick up a basic nonstick or cast iron pan at your local discount store; they last forever if you keep them dry and rub with a little oil after cleaning. And remember, don’t stress if you’re missing a pastry brush—just get a little creative and use clean fingers or the back of a spoon. The results are just as tasty!
How to Make Philly Cheesesteak Sliders
Let’s get into the nitty-gritty! Here’s how you make the best Philly Cheesesteak Sliders, step by step. I promise, it’s easier than you think—and I’ve added all my best tips to make sure you nail it on the first try.
-
Prep the Steak:
Place your thinly sliced steak in a large mixing bowl. Add 1 tbsp (15 ml) Worcestershire sauce, 1 tsp (5 g) kosher salt, 1/2 tsp (2 g) black pepper, 1 tsp (5 g) garlic powder, and 1/2 tsp (2 g) onion powder. Toss everything to coat the meat evenly. Let it marinate while you prep the veggies—about 10 minutes is plenty. -
Slice the Veggies:
Thinly slice 1 large onion and 1 green bell pepper. Aim for strips about 1/4-inch (0.6 cm) thick. This helps them cook quickly and evenly (and no one wants big chunks in a slider). -
Cook the Veggies:
Heat 1 tbsp (15 ml) olive oil in a large skillet over medium-high heat. Add the sliced onions and peppers. Sauté for 5-7 minutes, stirring often, until they’re soft and just starting to turn golden at the edges. If they brown too fast, lower the heat a bit. You want soft and slightly caramelized, not burnt. -
Cook the Steak:
Push the veggies to the side of the skillet, or remove them to a plate if your pan is small. Add the marinated steak in a single layer (work in batches if needed). Cook for 2-3 minutes, stirring occasionally, until just cooked through—don’t overcook or it can get tough. Return the veggies to the pan, toss everything together, and turn off the heat. -
Prep the Buns:
Preheat your oven to 350°F (175°C). Slice your slider rolls in half horizontally (keeping the bottoms and tops attached as one piece). Place the bottom halves in a greased or parchment-lined 9×13-inch (23×33 cm) baking dish. -
Layer the Cheese:
Lay half the provolone slices (about 4) over the bottom buns. This acts as a little barrier so the juices don’t make the bread soggy (a trick I learned after a few too many “mushy bottom” slider batches). -
Add the Steak Filling:
Evenly spread the steak, onions, and peppers over the cheese. Try to get every slider covered, but no need to fuss if it’s a little uneven—rustic is good! -
Top with More Cheese:
Place the remaining provolone slices over the steak mixture. If you like things super cheesy, add an extra slice or two here. -
Finish with the Bun Tops:
Carefully lay the top halves of the slider buns over the cheese. -
Make the Garlic Butter:
In a small bowl, stir together 4 tbsp (56 g) melted butter, 1 minced garlic clove, 1/2 tsp dried parsley, and a pinch of salt. Use a pastry brush (or spoon) to generously brush this mixture all over the tops of the buns. Be sure to get into all the corners! -
Bake:
Cover the sliders loosely with foil and bake for 15 minutes. Remove the foil and bake another 5-7 minutes, until the tops are golden and the cheese is bubbling. -
Serve:
Let the sliders cool for 5 minutes (if you can wait!), then use a sharp knife to cut between the rolls. Serve warm and watch them disappear!
Troubleshooting Tips:
- If the cheese isn’t fully melted after baking, pop the sliders back in for another 2-3 minutes uncovered.
- If the tops are browning too quickly, tent loosely with foil.
- Soggy bottoms? Make sure you layer cheese under the steak filling and don’t overfill with juices from the pan.
And don’t worry if things get a little messy—sliders are meant to be fun and finger-licking good. The best part? No one will mind a little cheese escaping here and there. That’s the sign of a great batch!
Cooking Tips & Techniques
Over the years, I’ve picked up a few tricks for making Philly Cheesesteak Sliders taste just right. Here’s what I always do—and what I learned the hard way not to do:
- Use Thinly Sliced Steak: The thinner, the better. If your steak is too thick, it won’t get that classic cheesesteak texture. I’ve tried slicing at home, but it’s much easier (and safer) to ask the butcher. If you must slice it yourself, freeze the steak for 30 minutes first—it makes slicing easier and less slippery.
- Don’t Overcook the Steak: It cooks fast! One time I got distracted and ended up with tough, chewy pieces. As soon as it’s no longer pink, it’s done. Remember, it’ll cook a little more in the oven too.
- Get the Right Cheese Melt: Covering the sliders with foil for the first part of baking helps the cheese melt evenly without drying out the buns. When you remove the foil, the tops get golden and a little crispy—perfection.
- Let the Sliders Rest: Give them a few minutes out of the oven before you cut. It helps the cheese set just enough so the sliders stay together (and you don’t lose all the filling on the first bite—been there, wiped up that mess!).
- Multitask Like a Pro: Slice your veggies while the steak is marinating. Melt the butter while the sliders are assembling. A little overlap in your workflow makes these come together even faster.
- Don’t Skimp on the Garlic Butter: It’s the secret to that bakery-style slider top. If you love garlic, double up!
Common mistakes? Forgetting to layer cheese under the steak (soggy buns!), using thick-cut steak (chewy instead of tender), or not preheating the oven (sliders take longer and can dry out). Stick with these tips and you’ll get the same cheesy, gooey, savory results every time. And if all else fails, just remember: melted cheese covers a multitude of kitchen sins!
Variations & Adaptations
There’s no one “right” way to make Philly Cheesesteak Sliders—so feel free to play with flavors or adjust for dietary needs. Here are a few of my favorite twists:
- Low-Carb or Gluten-Free: Swap the slider buns for gluten-free rolls or even halved sweet potatoes (roasted until soft). For a true low-carb version, use thick-cut roasted portobello mushroom caps instead of bread.
- Spicy Kick: Add sliced pickled jalapeños to the steak mixture or sprinkle crushed red pepper flakes in with the garlic butter. Pepper jack cheese also gives a nice heat.
- Veggie Version: Replace the steak with sautéed mushrooms (portobello or cremini work great) and add extra peppers and onions. Even non-meat eaters will want seconds!
- Chicken Cheesesteak Sliders: Substitute thinly sliced chicken breast for steak. Marinate and cook the same way—just watch the cooking time; chicken cooks even faster.
- Dairy-Free: Use your favorite dairy-free cheese slices and plant-based butter for the topping. I’ve made these with Violife cheese and Earth Balance—it works!
- Holiday Twist: Add a little horseradish mayo or grainy mustard to the buns before assembling for a festive, tangy bite (my brother-in-law swears by this at Christmas parties).
One time, I made these with leftover roast beef and caramelized onions for a “day after the holiday” slider, and honestly, they were just as popular. Don’t be afraid to get creative—use what you have, and make it your own. That’s what makes sliders so much fun!
Serving & Storage Suggestions
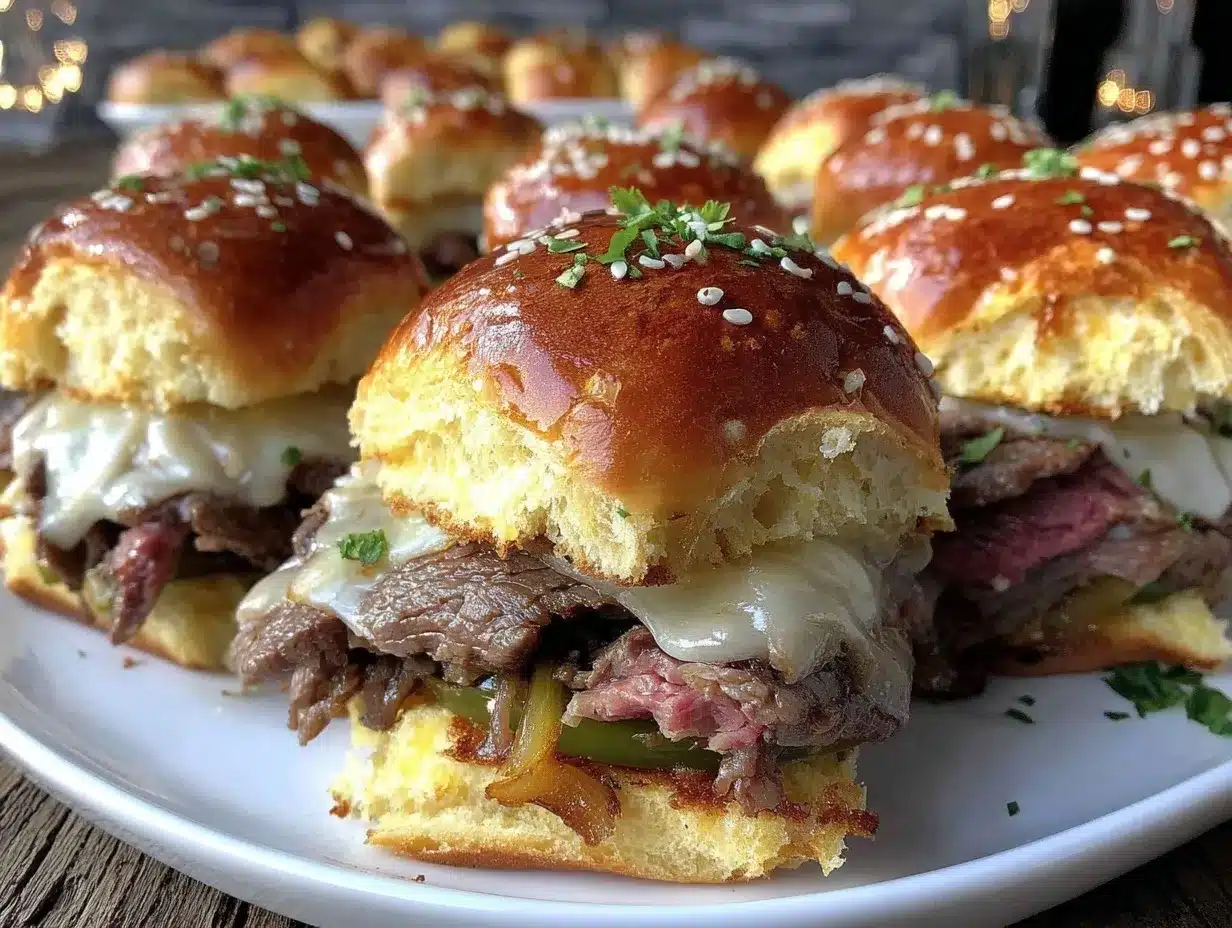
Philly Cheesesteak Sliders are best served warm, right out of the oven when the cheese is still gooey and the buns are golden. I like to line up the sliders on a wooden board for easy grabbing—perfect for parties or casual family dinners. A little sprinkle of fresh parsley on top looks pretty and adds a pop of color.
For a full meal, pair the sliders with crunchy potato chips, a simple green salad, or a bowl of tomato soup. For drinks, cold beer, sparkling water, or lemonade all hit the spot.
To store leftovers, let the sliders cool to room temperature, then wrap tightly in foil or place in an airtight container. They’ll keep in the refrigerator for up to 3 days. For freezing, wrap each slider individually in foil and place in a zip-top bag—freeze for up to 2 months. To reheat, pop in a 350°F (175°C) oven, covered, for 10-12 minutes, or until heated through. The cheese melts right back to gooey perfection.
Pro tip: The flavors get even deeper after a night in the fridge, so don’t worry if you’re making them ahead. Just reheat before serving and enjoy all over again!
Nutritional Information & Benefits
Each Philly Cheesesteak Slider (out of 12) is approximately 230 calories, with 12g fat, 16g protein, and 15g carbohydrates. The ribeye provides satisfying protein and iron, while peppers and onions add vitamin C, antioxidants, and a little fiber.
For those watching carbs, swap in low-carb buns or a veggie base. To make it lower in fat, use lean sirloin and a lighter cheese. This recipe is naturally nut-free, and can easily be adapted to be gluten-free or dairy-free as needed. Allergens to note: wheat (in buns), dairy (in cheese and butter).
From a wellness perspective, I love how these sliders feel indulgent but are made with real, simple ingredients. They’re satisfying, packed with flavor, and way better than anything you’ll find at a stadium concession stand. Enjoy every bite—guilt-free!
Conclusion
There’s a reason these Philly Cheesesteak Sliders fly off the tray at every gathering—they’re irresistibly cheesy, savory, and just plain fun to eat. You get all the classic flavors of a Philly cheesesteak, but in the perfect party-sized package. Whether you stick with the classic or try one of my twists, you can make this recipe your own and wow your friends and family every single time.
Personally, these sliders are my favorite kind of comfort food—easy to make, even easier to eat, and always a crowd-pleaser. If you give them a try, let me know how it goes! Drop a comment, share your favorite adaptation, or tag your photos so everyone can get in on the cheesy goodness. Bookmark this recipe, because once you try it, you’ll be making it on repeat. Happy cooking—and happy snacking!
FAQ – Philly Cheesesteak Sliders
Can I make Philly Cheesesteak Sliders ahead of time?
Absolutely! Assemble the sliders up to the garlic butter step, cover tightly, and refrigerate for up to 24 hours. When ready to bake, add a couple extra minutes to the baking time to make sure everything’s hot and melty.
What kind of steak works best for these sliders?
Thinly sliced ribeye or sirloin is ideal for tenderness and classic flavor. Deli roast beef works in a pinch, but fresh steak is best for that authentic Philly taste.
What’s a good cheese substitute if I don’t have provolone?
Mozzarella or white American cheese both melt well and taste great. For a smoky twist, use smoked provolone or even cheddar.
How do I keep the sliders from getting soggy?
Layer cheese on the bottom before adding the steak mixture, and avoid using too much juice from the pan. Baking uncovered at the end also helps keep the tops crisp.
Can I make these sliders gluten-free?
Yes! Use your favorite gluten-free slider buns, and double-check your Worcestershire sauce is gluten-free. The rest of the ingredients are naturally GF.
Pin This Recipe!

Philly Cheesesteak Sliders
These Philly Cheesesteak Sliders are a gooey, savory, and crowd-pleasing appetizer featuring tender steak, caramelized onions and peppers, and melty provolone cheese on buttery slider buns. Perfect for parties, game days, or cozy family dinners, they deliver all the classic Philly cheesesteak flavors in a fun, shareable package.
- Prep Time: 15 minutes
- Cook Time: 22 minutes
- Total Time: 37 minutes
- Yield: 12 sliders 1x
- Category: Appetizer
- Cuisine: American
Ingredients
- 1 lb thinly sliced ribeye steak or sirloin
- 1 tbsp Worcestershire sauce
- 1 tsp kosher salt
- 1/2 tsp freshly ground black pepper
- 1 tsp garlic powder
- 1/2 tsp onion powder
- 1 large yellow onion, thinly sliced
- 1 large green bell pepper, thinly sliced
- 1 tbsp olive oil or avocado oil
- 12 slider rolls or Hawaiian rolls, sliced in half horizontally
- 8 slices provolone cheese (about 6 oz)
- 4 tbsp unsalted butter, melted
- 1 clove garlic, minced or grated
- 1/2 tsp dried parsley (optional)
- Pinch of kosher salt
Instructions
- Place thinly sliced steak in a large mixing bowl. Add Worcestershire sauce, kosher salt, black pepper, garlic powder, and onion powder. Toss to coat and let marinate for about 10 minutes.
- Thinly slice the onion and bell pepper into 1/4-inch strips.
- Heat olive oil in a large skillet over medium-high heat. Add onions and peppers; sauté for 5-7 minutes until soft and slightly caramelized.
- Push veggies to the side or remove from pan. Add marinated steak in a single layer; cook for 2-3 minutes until just cooked through. Return veggies to pan, toss together, and turn off heat.
- Preheat oven to 350°F. Slice slider rolls in half horizontally, keeping bottoms and tops attached. Place bottom halves in a greased or parchment-lined 9×13-inch baking dish.
- Lay half the provolone slices over the bottom buns.
- Evenly spread steak, onions, and peppers over the cheese.
- Top with remaining provolone slices.
- Place top halves of slider buns over the cheese.
- In a small bowl, mix melted butter, minced garlic, dried parsley, and a pinch of salt. Brush mixture over tops of buns.
- Cover sliders loosely with foil and bake for 15 minutes. Remove foil and bake another 5-7 minutes until tops are golden and cheese is bubbling.
- Let sliders cool for 5 minutes, then cut between rolls and serve warm.
Notes
Use thinly sliced steak for tenderness. Layer cheese under the steak to prevent soggy buns. Cover with foil while baking for even cheese melt, then uncover to crisp the tops. Substitute chicken, mushrooms, or gluten-free buns as needed. Let sliders rest before cutting for best results.
Nutrition
- Serving Size: 1 slider
- Calories: 230
- Sugar: 3
- Sodium: 420
- Fat: 12
- Saturated Fat: 6
- Carbohydrates: 15
- Fiber: 1
- Protein: 16
Keywords: Philly cheesesteak sliders, party appetizer, game day, steak sliders, provolone cheese, easy sliders, comfort food, finger food, crowd pleaser


