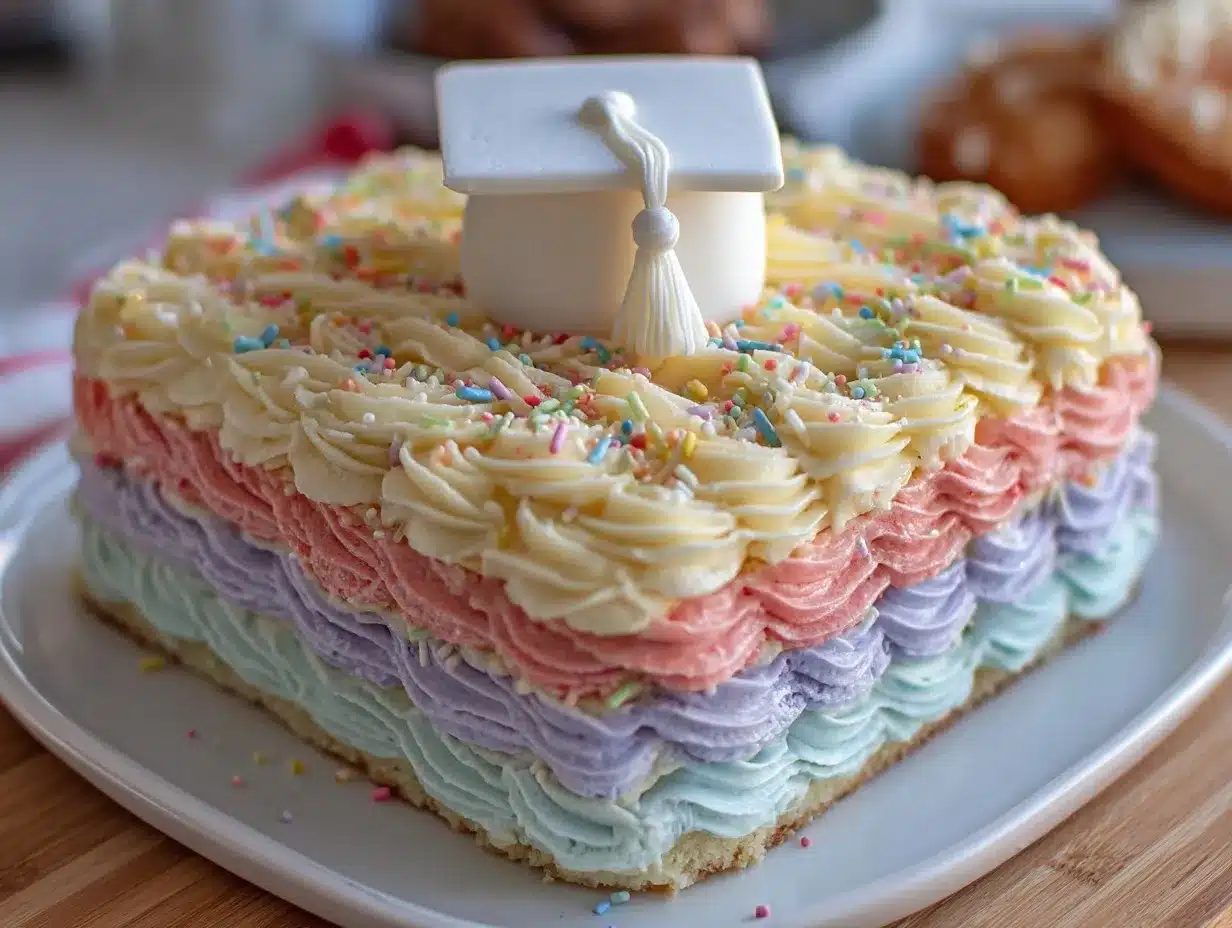
“You really think you can pull off an ombre buttercream cake with a fondant topper by tomorrow?” my sister asked, eyes wide with a mix of doubt and excitement. The graduation party was less than 24 hours away, and honestly, I wasn’t sure I had the patience or time. But the way she said it—like I was about to attempt some impossible cake wizardry—made me chuckle. This Perfect Ombre Buttercream Graduation Sheet Cake with Fondant Topper was born out of that tight deadline and a sprinkle of stubbornness.
At first, I was skeptical about layering those soft pastel hues seamlessly on a sheet cake, let alone crafting a fondant topper that wouldn’t look like a kindergarten art project. But somehow, the colors blended like a gentle sunset, and the topper brought just the right touch of celebration without overdoing it. The whole process felt like a sweet rush, with buttercream-covered fingers and the smell of vanilla filling the kitchen late into the night.
What surprised me most was how approachable this cake became—something I could whip up without a bakery’s worth of tools or a PhD in cake decorating. Since then, it’s become my go-to for any milestone that calls for a little extra flair, and it sticks with me because it captures that feeling of proud accomplishment (and a little relief) in every bite.
And so, here’s my story and recipe for this not-so-intimidating ombre buttercream graduation cake that makes the day feel a little sweeter, no matter how last-minute the plans.
Why You’ll Love This Recipe
This Perfect Ombre Buttercream Graduation Sheet Cake with Fondant Topper isn’t just a pretty face—there’s a lot going on beneath that smooth, colorful exterior that makes it a standout for your celebration.
- Quick & Easy: From start to finish, it comes together in about 3 hours, including cooling and decorating, which is perfect when you’re balancing party prep with everything else life throws at you.
- Simple Ingredients: You won’t need to hunt down exotic items. Basic pantry staples like all-purpose flour, butter, sugar, and eggs shine here—plus a few easy-to-find essentials for the buttercream and fondant.
- Perfect for Graduation Parties: The ombre effect adds a festive, modern look without screaming “over-the-top,” so it fits just right with both casual and formal celebrations.
- Crowd-Pleaser: Every time I’ve brought this cake to a party, kids and adults alike vanish the slices quickly, and there’s always someone asking for the recipe.
- Unbelievably Delicious: The buttercream is silky and not too sweet, balancing the tender crumb of the cake, while the fondant topper adds a fun, sturdy finish that lasts through the party.
- Unique Technique: I use a layering method for the buttercream that creates a smooth gradient without fuss or expensive tools. Plus, the fondant topper tutorial is beginner-friendly but looks professionally done.
This cake isn’t just something pretty to look at—it’s that kind of treat that makes you pause, savor, and smile, bringing a little extra joy to the milestone it celebrates. And if you enjoy crafting special brunch dishes, you might appreciate the way this cake pairs with flavorful bites like the Quiche Lorraine or a light fruit salad.
What Ingredients You Will Need
The magic of this cake starts with simple, reliable ingredients that come together to create that dreamy ombre look and the perfect texture for a celebration dessert. Here’s a quick overview before the detailed list:
We’re working with a classic vanilla sheet cake base, a smooth buttercream that’s easy to tint, and a fondant topper that adds an elegant finishing touch. Most of these ingredients are pantry staples, and substitutions are straightforward.
- For the Cake:
- 2 ½ cups (312g) all-purpose flour (sifted for a tender crumb)
- 2 ½ tsp baking powder (for lift and fluffiness)
- ½ tsp salt (balances sweetness)
- 1 cup (226g) unsalted butter, softened (use quality like Kerrygold for richness)
- 1 ¾ cups (350g) granulated sugar
- 4 large eggs, room temperature (helps with emulsion and structure)
- 1 tbsp pure vanilla extract (real vanilla makes a difference)
- 1 cup (240ml) whole milk, room temperature (can swap almond milk for dairy-free option)
- For the Ombre Buttercream:
- 1 ½ cups (340g) unsalted butter, softened
- 5 cups (600g) powdered sugar, sifted (for smooth texture)
- 2 tsp vanilla extract
- 3-4 tbsp heavy cream or milk (adjust for consistency)
- Gel food coloring in 3-4 shades of your choice (I prefer AmeriColor for vibrant, true-to-tone colors)
- Pinch of salt (to cut sweetness)
- For the Fondant Topper:
- Ready-to-roll white fondant (Wilton brand works well and is easy to shape)
- Gel food coloring or edible markers (for details)
- Edible glue or water (to attach fondant pieces)
- Optional: Edible glitter or dust for subtle sparkle
If you’re aiming for a gluten-free version, substitute the flour with a 1-to-1 gluten-free baking blend. For a lighter buttercream, try swapping half the butter for cream cheese, which also adds a slight tang that pairs beautifully with vanilla.
Equipment Needed
This recipe doesn’t call for any fancy gadgets, but having the right tools makes the process smoother and the results prettier.
- 9×13-inch (23×33 cm) sheet cake pan – a good non-stick pan helps with easy release
- Electric mixer (stand or hand) – whipping the buttercream without one is a workout!
- Mixing bowls – at least two for batter and frosting
- Offset spatula and bench scraper – for smooth buttercream application and creating the ombre effect
- Rubber spatulas – great for folding and scraping batter
- Fondant tools: small rolling pin, shaping tools, and cookie cutters (or a sharp knife for freeform shapes)
- Cooling rack – to cool the cake evenly
- Parchment paper – lining the cake pan keeps things tidy
If you don’t have a bench scraper, the edge of a large ruler or a flat metal spatula can work in a pinch. When working with fondant, a little cornstarch dusted on your surface prevents sticking without drying it out. I once tried using a regular rolling pin without cornstarch, and let’s just say the fondant turned into a sticky mess (lesson learned!).
Preparation Method
- Preheat your oven to 350°F (175°C). Grease your 9×13-inch pan and line it with parchment paper for easy removal.
- Mix dry ingredients: In a medium bowl, whisk together the sifted flour, baking powder, and salt. Set aside.
- Cream butter and sugar: Using your electric mixer on medium speed, beat the softened butter and sugar for about 3-5 minutes until light and fluffy. This is key for a tender cake crumb.
- Add eggs and vanilla: Beat in eggs one at a time, mixing well after each addition. Stir in the vanilla extract.
- Alternate adding dry ingredients and milk: With mixer on low, add the dry ingredients in three parts, alternating with the milk in two parts. Begin and end with the dry ingredients. Mix just until combined to avoid tough cake.
- Pour batter into prepared pan: Spread evenly with a spatula. Tap the pan gently on the counter to release air bubbles.
- Bake for 35-40 minutes: Check doneness with a toothpick inserted in the center; it should come out clean or with a few moist crumbs.
- Cool completely: Let the cake cool in the pan for 10 minutes, then transfer to a wire rack to cool fully before frosting.
- Prepare the buttercream: Beat softened butter on medium speed until creamy, about 2 minutes. Gradually add powdered sugar, alternating with heavy cream, vanilla, and salt. Beat on high for 3-4 minutes until fluffy.
- Divide and tint buttercream: Separate the frosting into 3-4 bowls. Add gel colors to each, starting with the lightest shade and progressing to the darkest. Mix until you reach smooth, even colors.
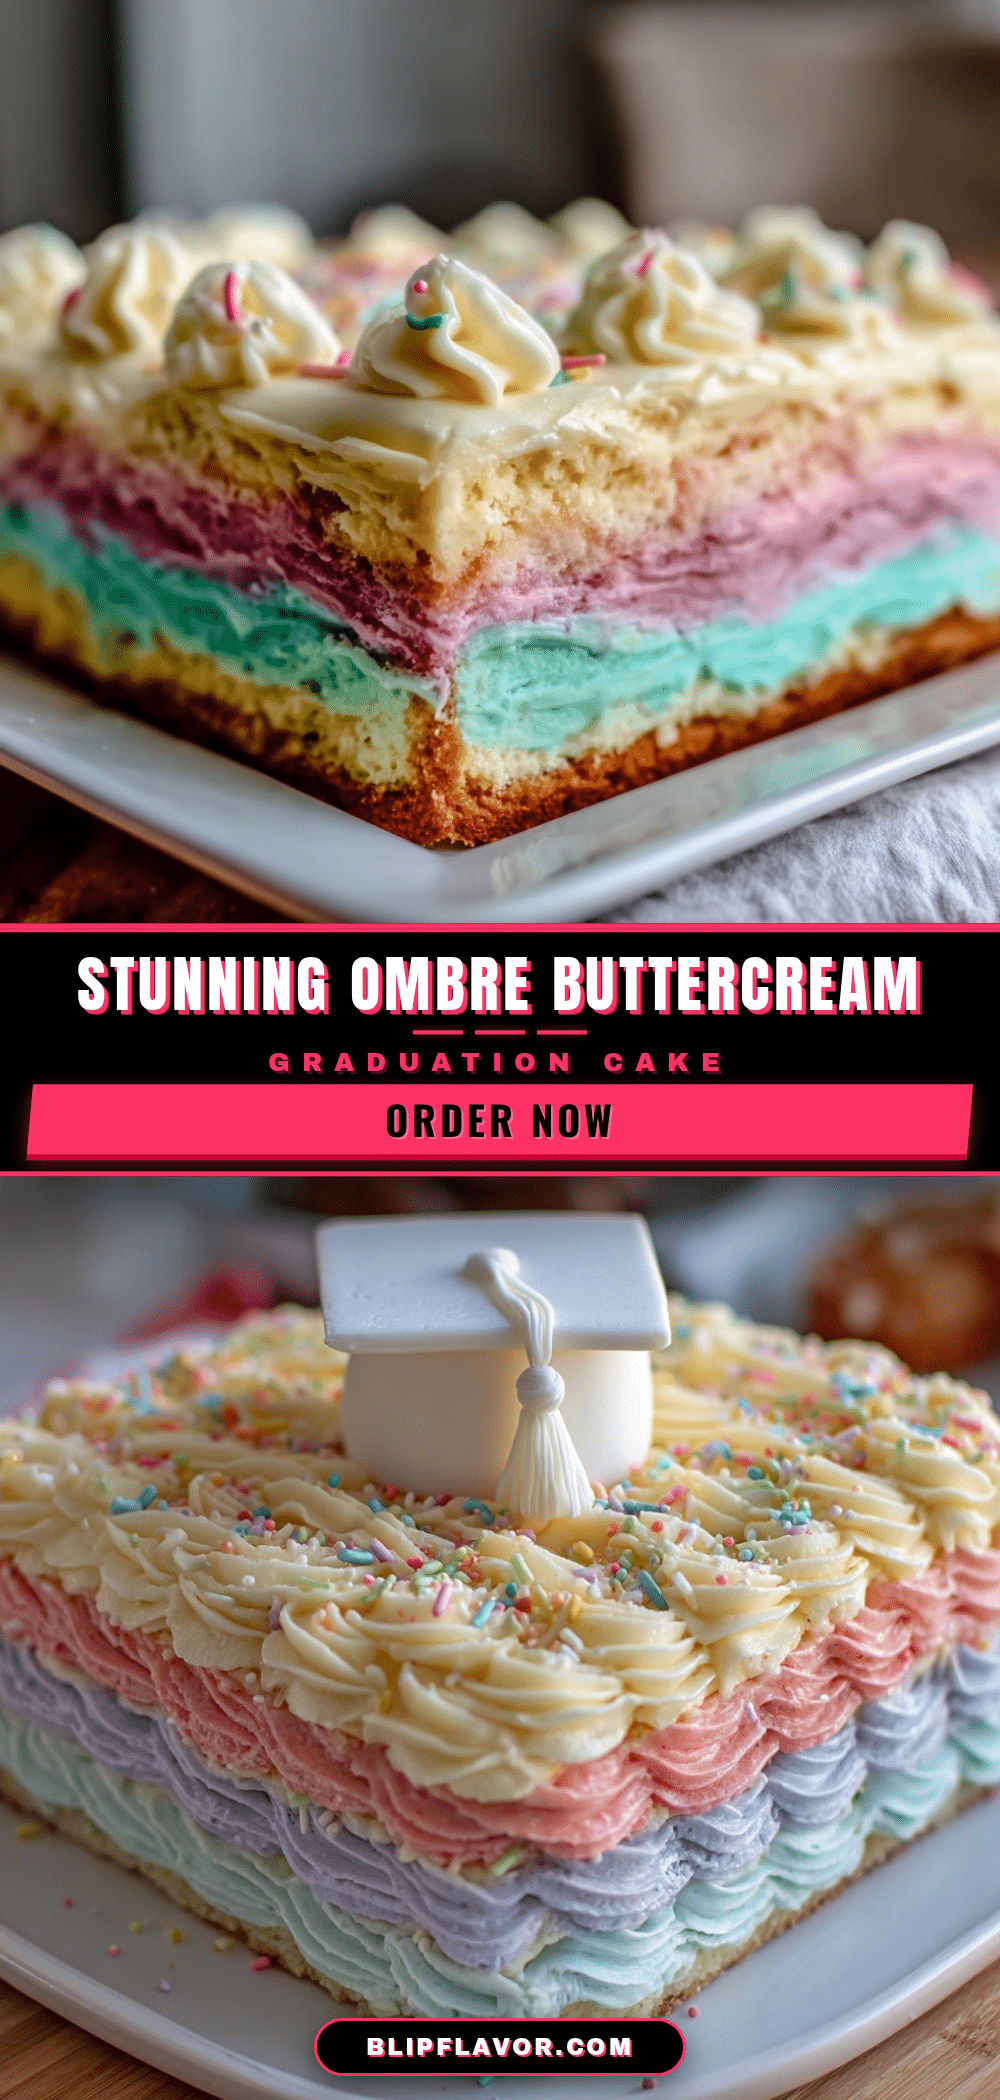
- Apply the ombre buttercream: Starting with the darkest shade at the bottom edge of the cake, spread a thick band around the sides. Move upward, layering the next lighter shade, slightly overlapping. Finish with the lightest shade near the top edge and on the top surface. Use your bench scraper to smooth the sides vertically, blending the colors to create a soft ombre effect.
- Chill the cake: Refrigerate for 20-30 minutes to set the buttercream before adding the fondant topper.
- Create the fondant topper: Roll out white fondant on a lightly dusted surface. Cut out shapes like graduation caps, stars, or letters to spell the grad’s name. Use edible glue or water to attach smaller pieces. Add details with edible markers or dust for a subtle shimmer.
- Place the topper on the chilled cake: Arrange carefully to avoid smudging the buttercream. Refrigerate again if needed until serving.
When smoothing the buttercream, don’t rush—the key to a gorgeous ombre is patience and gentle strokes. If the frosting feels too soft, a quick chill helps firm it up for easier handling.
Cooking Tips & Techniques
Working with a buttercream ombre and fondant topper can feel intimidating, but here are some tips to keep you on track:
- Butter temperature matters: Softened butter should be cool to the touch, not melted, for the best buttercream texture. If it’s too warm, the frosting becomes runny and tricky to spread.
- Sift powdered sugar: This prevents lumps and gives you that silky smooth buttercream everyone loves.
- Gel colors over liquid: Liquid food coloring waters down your frosting, affecting texture. Gel colors provide vibrant hues without compromise.
- Layer your colors strategically: Apply thick bands of each shade before smoothing to avoid blending the colors prematurely.
- Use a bench scraper for clean edges: It’s the unsung hero for smooth sides. Hold it steady at a slight angle and rotate the cake slowly for best results.
- Fondant handling: Keep fondant covered when not in use to prevent drying. Dust your work surface lightly with cornstarch to avoid sticking.
- Practice makes perfect: Don’t be discouraged if your first topper isn’t flawless. I’ve learned the hard way that small imperfections add charm!
- Multitask by chilling: Use cake chill time to prep your fondant or clean up—makes the whole process more efficient.
Variations & Adaptations
This cake is a great canvas for your creativity, and I’ve tried several tweaks that you might like to experiment with:
- Flavor swaps: Add lemon zest and a touch of lemon juice to the buttercream for a bright citrus twist. Or swap vanilla extract with almond for a subtle nutty note.
- Color palette: Change the ombre shades seasonally—think pastel pinks and purples for spring, or rich jewel tones for a fall graduation.
- Dietary adaptations: Use a gluten-free flour blend for the cake and dairy-free butter and milk alternatives in the frosting for allergy-friendly options.
- Fondant alternatives: If fondant isn’t your thing, try modeling chocolate or edible wafer paper for your topper—both are easier to work with and taste better.
- Smaller tiers: This ombre buttercream technique works beautifully on smaller cakes too, like for an intimate party or a cupcake tower to complement your main dessert.
One personal favorite variation is pairing this cake with the light, fluffy texture of fluffy lemon ricotta pancakes at a graduation brunch for a full day of celebrations with consistent bright flavors.
Serving & Storage Suggestions
This cake is best served at room temperature, allowing the buttercream to soften slightly and the flavors to shine. Let it sit out for about 30 minutes before slicing.
For presentation, a simple cake board wrapped in a coordinating ribbon or a scattering of edible flowers around the base adds elegant charm without stealing the spotlight from the ombre effect.
Store any leftovers tightly covered in the refrigerator for up to 4 days. The buttercream firms up when chilled, so warm slices gently in the microwave for 10-15 seconds to bring back that creamy texture.
For longer storage, wrap cake slices in plastic wrap and freeze for up to 2 months. Thaw overnight in the fridge and allow to come to room temperature before serving.
Flavors actually mellow and deepen a bit after resting, so if you can wait a few hours, the cake will reward you with richer notes.
Nutritional Information & Benefits
Each generous slice of this ombre buttercream cake offers approximately:
| Calories | 420 |
|---|---|
| Fat | 22g |
| Saturated Fat | 13g |
| Carbohydrates | 54g |
| Sugar | 38g |
| Protein | 4g |
While this cake is a treat, it’s made with real butter and whole ingredients—no artificial shortcuts. The vanilla extract and fresh eggs add a natural depth of flavor without relying on heavy additives.
For those watching gluten or dairy intake, the substitutions suggested help make this dessert more inclusive without sacrificing taste or texture. Just a little indulgence that feels like a celebration rather than a splurge, you know?
Conclusion
The Perfect Ombre Buttercream Graduation Sheet Cake with Fondant Topper has been a sweet part of many celebrations in my kitchen, and I hope it finds a place in yours too. It’s a recipe that welcomes creativity without intimidating complexity, making it ideal for those special days when you want something beautiful and delicious without fuss.
Feel free to tweak the colors, flavors, or topper designs to suit your grad’s personality. I love how this cake turns a simple sheet cake into a stunning centerpiece, and honestly, it’s become one of my personal favorites for marking milestones.
If you try it, I’d love to hear how you made it your own—comments and stories always make my day. Here’s to many joyful celebrations with cake that feels as good as it tastes.
FAQs
- Can I make this cake ahead of time? Yes! You can bake the cake layers a day ahead and keep them wrapped at room temperature. Assemble and decorate on the day of the event for best results.
- How do I prevent the buttercream from melting in warm weather? Keep the cake refrigerated until about 30 minutes before serving. Use chilled butter and cream when making the frosting to help it hold up better.
- Is it possible to color the fondant instead of buying pre-colored? Absolutely! Knead gel food coloring into white fondant until the color is even. Use gloves to avoid staining your hands.
- Can I use this ombre buttercream technique on cupcakes? Yes! The layering and smoothing method works great on cupcakes for a coordinated look at your party.
- What if I don’t have a bench scraper? A large offset spatula or even the edge of a stiff ruler can help smooth the sides, though it might take a bit more patience.
Pin This Recipe!
Perfect Ombre Buttercream Graduation Sheet Cake with Fondant Topper
A quick and easy vanilla sheet cake with a smooth ombre buttercream and a festive fondant topper, perfect for graduation celebrations.
- Prep Time: 45 minutes
- Cook Time: 40 minutes
- Total Time: 3 hours
- Yield: 12 servings 1x
- Category: Dessert
- Cuisine: American
Ingredients
- 2 ½ cups (312g) all-purpose flour (sifted)
- 2 ½ tsp baking powder
- ½ tsp salt
- 1 cup (226g) unsalted butter, softened
- 1 ¾ cups (350g) granulated sugar
- 4 large eggs, room temperature
- 1 tbsp pure vanilla extract
- 1 cup (240ml) whole milk, room temperature
- 1 ½ cups (340g) unsalted butter, softened (for buttercream)
- 5 cups (600g) powdered sugar, sifted
- 2 tsp vanilla extract (for buttercream)
- 3–4 tbsp heavy cream or milk (for buttercream)
- Gel food coloring in 3-4 shades
- Pinch of salt (for buttercream)
- Ready-to-roll white fondant
- Gel food coloring or edible markers (for fondant details)
- Edible glue or water (to attach fondant pieces)
- Optional: Edible glitter or dust
Instructions
- Preheat oven to 350°F (175°C). Grease a 9×13-inch pan and line with parchment paper.
- Whisk together sifted flour, baking powder, and salt in a medium bowl; set aside.
- Beat softened butter and sugar on medium speed for 3-5 minutes until light and fluffy.
- Add eggs one at a time, mixing well after each addition, then stir in vanilla extract.
- With mixer on low, alternate adding dry ingredients in three parts and milk in two parts, beginning and ending with dry ingredients. Mix just until combined.
- Pour batter into prepared pan and spread evenly. Tap pan gently to release air bubbles.
- Bake for 35-40 minutes or until a toothpick inserted in the center comes out clean or with a few moist crumbs.
- Cool cake in pan for 10 minutes, then transfer to a wire rack to cool completely.
- Beat softened butter for buttercream on medium speed until creamy, about 2 minutes.
- Gradually add powdered sugar, alternating with heavy cream, vanilla, and salt. Beat on high for 3-4 minutes until fluffy.
- Divide buttercream into 3-4 bowls and tint each with gel food coloring from lightest to darkest shade.
- Apply the ombre buttercream starting with the darkest shade at the bottom edge, layering lighter shades upward and smoothing with a bench scraper to blend colors.
- Refrigerate cake for 20-30 minutes to set buttercream.
- Roll out white fondant on a lightly dusted surface and cut out shapes like graduation caps, stars, or letters.
- Attach fondant pieces with edible glue or water and add details with edible markers or dust.
- Place fondant topper carefully on chilled cake and refrigerate again if needed until serving.
Notes
Use softened butter that is cool to the touch for best buttercream texture. Sift powdered sugar to avoid lumps. Use gel food coloring instead of liquid for vibrant colors. Chill cake if buttercream feels too soft. Dust fondant work surface lightly with cornstarch to prevent sticking. If no bench scraper, use a large offset spatula or ruler edge.
Nutrition
- Serving Size: 1 slice
- Calories: 420
- Sugar: 38
- Fat: 22
- Saturated Fat: 13
- Carbohydrates: 54
- Protein: 4
Keywords: ombre buttercream cake, graduation cake, sheet cake, fondant topper, vanilla cake, easy celebration cake