“Are you sure this will work?” my sister asked, peering skeptically over the rim of her coffee cup, watching me mix what looked like a handful of powdered sugar and egg whites into a thick glossy paste. Honestly, I wasn’t entirely sure myself. It was an impulsive afternoon attempt to whip up something special for Easter Sunday, and the idea of decorating sugar cookies with royal icing felt, well, a bit intimidating. The kitchen was quiet except for the hum of the mixer and the occasional clink of cookie cutters. I wasn’t really a baker — more of a last-minute fixer-upper — but the smell of vanilla and butter wafting from the oven pulled me in, and before I knew it, the cookies were ready for their icing debut.
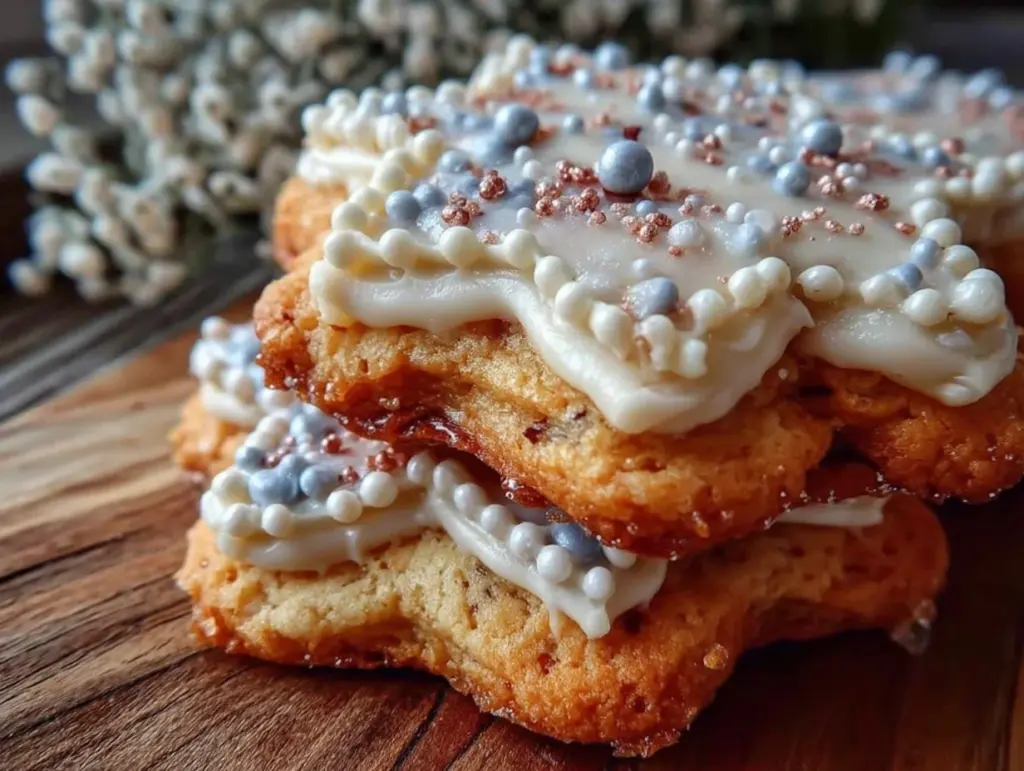
What started as a “let’s just try and see” moment turned into a surprisingly calming ritual. I found myself focused on steady hands piping delicate crosses on each cookie, the icing drying to that perfect matte finish you’d see in fancy bakeries. The best part? These decorated cross sugar cookies weren’t just pretty — they tasted fantastic. Crisp edges, soft centers, and that sweet royal icing balance made them a hit with everyone, including my most critical taster: my dad.
There’s something quietly satisfying about making these cookies. No flashy tricks or complicated steps, just a few thoughtful ingredients and a bit of patience. They’ve become my go-to for occasions when I want to feel connected, whether it’s a reflective Easter morning or a casual brunch with friends. I guess what stuck with me is how this simple recipe, with its classic cross design, brings a little peace and joy — a sweet reminder in cookie form that some traditions are worth holding on to.
Why You’ll Love This Perfect Decorated Cross Sugar Cookies Recipe
After making these decorated cross sugar cookies with royal icing several times, I can honestly say they’ve become a staple in my baking rotation. Here’s why this recipe stands out:
- Quick & Easy: The dough comes together in under 15 minutes, and the royal icing dries firm enough to stack in just a couple of hours, perfect for busy weekend bakers.
- Simple Ingredients: You likely have everything in your pantry — basic flour, butter, sugar, and a few pantry staples you can trust like Domino powdered sugar.
- Perfect for Special Occasions: These cookies shine at Easter brunches, church gatherings, or even as thoughtful gifts for neighbors and friends.
- Crowd-Pleaser: Kids love the sweet icing, and adults appreciate the buttery cookie base — it’s a win-win.
- Unbelievably Delicious: The texture is spot on — crisp but tender, with that melt-in-your-mouth icing that isn’t too sweet.
What makes this version different? I’ve tweaked the royal icing to have just the right consistency for both flooding and delicate piping. Instead of the usual stiff icing, this recipe produces a smooth, creamy finish that dries matte and crack-free. Plus, the cross design isn’t just traditional — it’s a subtle detail that adds meaning without overwhelming the cookie’s flavor. Honestly, after trying many recipes, this one’s the best I’ve found for combining ease, taste, and that Pinterest-worthy look.
Whether you’re a seasoned baker or just someone who wants a simple way to add a handmade touch to your holiday table, these cookies promise a little moment of calm, sweetness, and maybe even a bit of pride when you see those perfect crosses lined up like little works of art.
What Ingredients You Will Need for Perfect Decorated Cross Sugar Cookies
This recipe uses simple, wholesome ingredients to deliver bold flavor and satisfying texture without the fuss. Most of these are pantry staples, and you can easily swap a few to suit your preferences.
- For the Cookie Dough:
- 2 ¾ cups (345g) all-purpose flour, sifted (King Arthur brand works great for consistent texture)
- 1 teaspoon baking powder
- ½ teaspoon salt
- 1 cup (227g) unsalted butter, softened (room temperature is key for proper mixing)
- 1 ½ cups (300g) granulated sugar
- 1 large egg, room temperature
- 1 ½ teaspoons pure vanilla extract (adds that warm, inviting flavor)
- 2 tablespoons whole milk (for tender crumb and moisture)
- For the Royal Icing:
- 3 cups (360g) powdered sugar, sifted (I prefer Domino for smoothness)
- 2 large egg whites (or 4 tablespoons pasteurized meringue powder with 6 tablespoons water for safety)
- ½ teaspoon cream of tartar (helps stabilize the icing)
- 1 teaspoon pure vanilla extract or lemon juice (for flavor)
- Food coloring gels (optional, if you want to add color to the cross or background)
Substitutions: For a gluten-free option, swap the all-purpose flour with a 1:1 gluten-free baking flour blend. If you prefer dairy-free, use vegan butter and a plant-based milk alternative. For egg allergies, meringue powder replaces egg whites safely in the royal icing.
In summer, you might swap vanilla for almond extract or add a touch of lemon zest in the dough for a bright twist, but the classic vanilla is what makes these cross cookies so comforting and nostalgic.
Equipment Needed
- Mixing bowls (preferably glass or stainless steel)
- Electric mixer or stand mixer (a hand mixer works fine too)
- Rolling pin with adjustable rings or guide sticks for consistent dough thickness
- Cross-shaped cookie cutters (various sizes if you want to mix it up)
- Baking sheets lined with parchment paper or silicone mats
- Cooling racks (essential for even cooling and icing drying)
- Piping bags with fine round tips (sizes #1 or #2 are perfect for royal icing details)
- Squeeze bottles (optional, but great for flooding icing sections smoothly)
- Small bowls or cups for dividing and coloring royal icing
If you don’t have a stand mixer, no worries — I’ve made these with just a hand mixer and some elbow grease. For rolling, if you don’t have guide sticks, using two wooden spoons on either side of your dough works as a quick hack. Also, keeping your cookie cutters clean between cuts prevents dough sticking and helps keep edges crisp.
Preparation Method
- Mix Dry Ingredients: In a medium bowl, whisk together 2 ¾ cups all-purpose flour, 1 teaspoon baking powder, and ½ teaspoon salt. Set aside. (This only takes about 3 minutes.)
- Cream Butter and Sugar: In your mixer bowl, beat 1 cup softened unsalted butter with 1 ½ cups granulated sugar on medium speed until fluffy and pale, about 3-4 minutes. You’ll notice it lightens in color and feels airy — that’s your cue it’s ready.
- Add Egg and Vanilla: Beat in 1 large egg and 1 ½ teaspoons vanilla extract until fully combined. Scrape down the bowl once or twice to keep everything even.
- Incorporate Dry Ingredients: Gradually add the flour mixture in three batches, alternating with 2 tablespoons whole milk, starting and ending with the flour. Mix on low speed just until combined. (Avoid overmixing to keep the cookies tender.)
- Chill the Dough: Divide dough in half, flatten into disks, wrap with plastic wrap, and refrigerate for at least 1 hour (or overnight). This helps prevent spreading and makes rolling easier.
- Roll and Cut: Preheat oven to 350°F (175°C). On a lightly floured surface, roll one dough disk to about ¼ inch (6 mm) thickness using guide sticks for evenness. Use your cross cookie cutter to cut shapes, placing them 1 inch apart on parchment-lined baking sheets.
- Bake: Bake for 8-10 minutes until edges are just turning golden. Watch closely — they can go from perfect to overdone quickly. Remove from oven and cool on sheets for 5 minutes, then transfer to cooling racks.
- Prepare Royal Icing: While cookies cool, whisk 3 cups powdered sugar, 2 egg whites (or meringue substitute), ½ teaspoon cream of tartar, and 1 teaspoon vanilla until stiff peaks form — about 7-10 minutes with a mixer. Adjust thickness with a few drops of water to get the right piping consistency (think toothpaste for outlines, thinner for flooding).
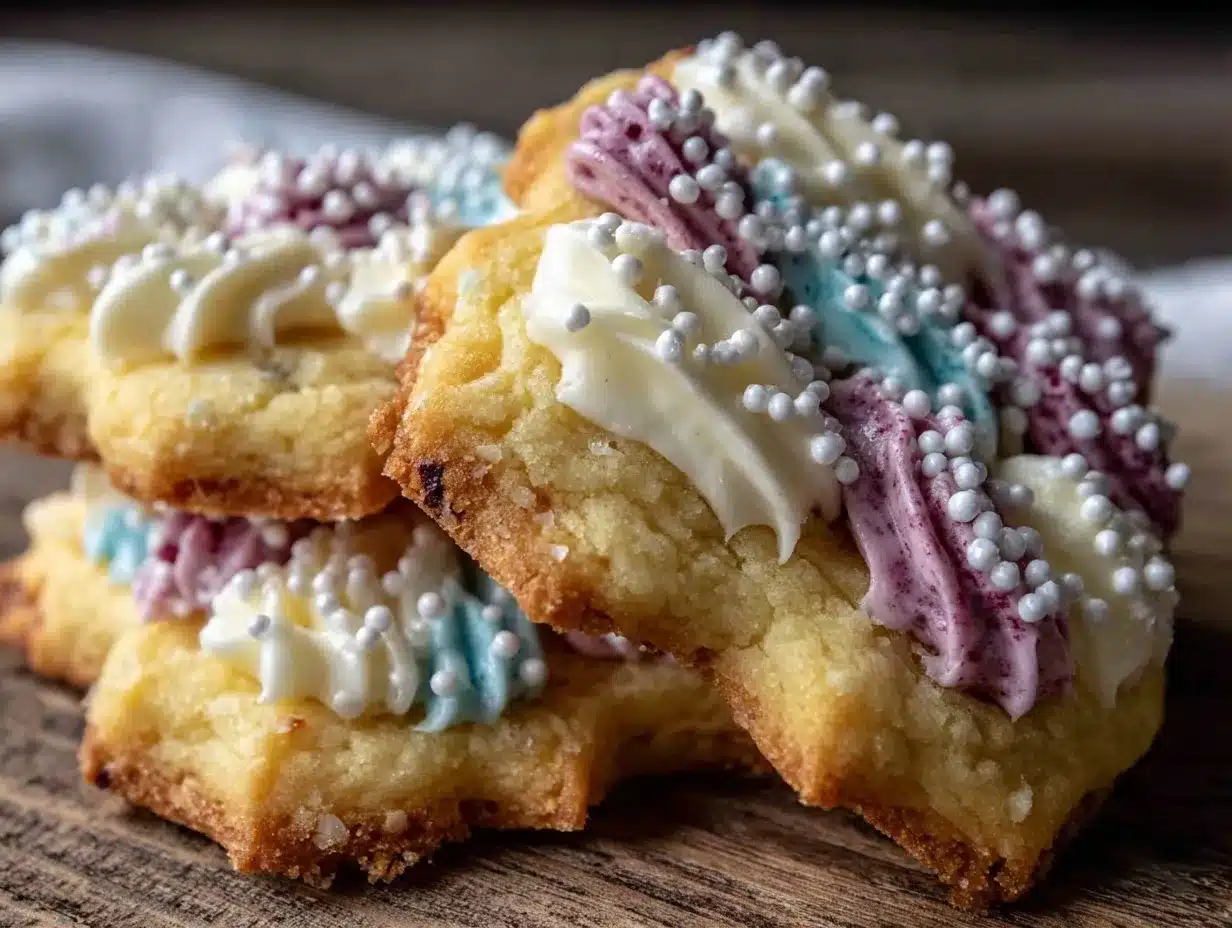
- Decorate: Fill piping bags fitted with fine tips. Outline each cookie’s edges with thicker icing, then flood the center with thinner icing. Let the base dry for 20 minutes, then pipe delicate crosses on top. (Try to keep your hand steady — I used to wobble a lot!)
- Dry Completely: Allow decorated cookies to dry at room temperature for 3-4 hours or overnight before stacking or packaging.
Cooking Tips & Techniques for Royal Icing and Sugar Cookies
Royal icing can be fickle if you’re new to it, but a few tips make all the difference. First, always sift your powdered sugar to avoid lumps — it’s the secret to smooth icing. When mixing, start slow to prevent sugar clouds in your kitchen (been there, made a mess!). Patience is key: let each layer dry before adding details to prevent colors from bleeding.
One mistake I made early on was piping too quickly. Slowing down helped me control the flow and keep those crosses neat and consistent. If you find your icing too thick, add water a few drops at a time; too thin, add powdered sugar gradually. Keep a damp cloth over your piping bags when not in use to prevent drying out.
For the cookies, chilling the dough is non-negotiable. I once skipped this step, and the cookies spread into sad blobs. Also, rolling to an even thickness means your cookies bake uniformly, so invest in guide sticks or a rolling pin with thickness rings if you can. When cutting, dip your cutter in flour between uses to avoid sticking and tearing.
Finally, let the decorated cookies dry completely in a draft-free spot. I learned the hard way that humidity can cause the icing to stay tacky or crack. If you live in a humid climate, a small fan nearby helps speed drying without blowing dust onto your masterpiece.
Variations & Adaptations
While the classic cross design and vanilla flavor are timeless, this recipe is flexible enough to personalize:
- Flavor Twists: Add a teaspoon of almond or lemon extract to the dough for a subtle flavor change. I once swapped vanilla with orange zest and it added a fresh note perfect for spring.
- Color Variations: Use natural food coloring like beet juice powder or spirulina to tint your royal icing for a softer, more organic look.
- Dietary Adaptations: For gluten-free, substitute flour with a blend like Bob’s Red Mill 1-to-1. For vegan royal icing, try aquafaba (chickpea water) instead of egg whites — it whips up surprisingly well.
- Alternative Designs: Instead of crosses, try floral or heart shapes for different occasions. Pairing this sugar cookie dough with the frosting technique used in my whimsical pastel candy bark recipe can make delightful party platters.
Serving & Storage Suggestions
These decorated cross sugar cookies are best served at room temperature, allowing the buttery flavor and royal icing to shine without being too firm or sticky. Display them on a pretty platter alongside a pot of tea or coffee for a cozy gathering. They pair nicely with light brunch dishes, like the Quiche Lorraine, offering a sweet balance to savory flavors.
Store cookies in an airtight container at room temperature for up to 5 days. If you want to keep them longer, freeze undecorated cookies for up to 3 months and decorate after thawing. Decorated cookies freeze best if layered between parchment paper inside an airtight container.
To reheat, just let frozen cookies thaw at room temp — avoid microwaving, as it can soften the royal icing. Over time, the flavor develops a deeper richness, so making them a day ahead often makes for the most satisfying bite.
Nutritional Information & Benefits
Each decorated cross sugar cookie (about 3-inch diameter) contains approximately:
| Calories | 150 |
|---|---|
| Fat | 7g |
| Carbohydrates | 22g |
| Sugar | 12g |
| Protein | 1g |
These cookies are a treat rather than a health food, but using real butter and pure vanilla adds wholesome flavor without artificial additives. The egg whites in the royal icing provide a bit of protein, and you can adjust sugar levels slightly to suit your preferences. For dietary needs, this recipe can be made gluten-free or dairy-free with simple swaps.
From a wellness perspective, I like to think of these cookies as moments of joy and connection — a reminder that food is about more than nutrition; it’s about sharing, tradition, and creating memories.
Conclusion
These perfect decorated cross sugar cookies with royal icing have quietly become one of my favorite ways to mark special moments. They’re approachable, visually charming, and genuinely delicious, making them a recipe worth having in your baking arsenal. I encourage you to make them your own — whether that means changing up the colors, tweaking the flavors, or experimenting with different shapes.
For me, they’re more than cookies. They’re a peaceful afternoon spent in a quiet kitchen, a shared smile with family, and a beautiful touch of sweetness to any occasion. If you give this recipe a try, I’d love to hear how your decorating went or what personal touches you added. Baking is better when it’s shared, even if just through stories.
Happy baking, and may your kitchen smell of vanilla and fresh-baked memories.
Frequently Asked Questions
Can I make the cookie dough ahead of time?
Yes! The dough can be refrigerated for up to 3 days before rolling and baking, or frozen for up to 3 months. Just thaw overnight in the fridge before using.
Is royal icing safe to eat with raw egg whites?
Raw egg whites carry a small risk of salmonella. To avoid this, you can use pasteurized meringue powder instead, which is safe and works just as well for royal icing.
How do I fix royal icing that’s too runny?
Add more powdered sugar a tablespoon at a time until it reaches the desired thickness. Be careful not to add too much at once to avoid overly stiff icing.
What’s the best way to store decorated sugar cookies?
Keep them in an airtight container at room temperature for up to 5 days. Place parchment paper between layers to prevent sticking. For longer storage, freeze undecorated cookies and decorate after thawing.
Can I use these cookies for other holidays?
Absolutely! Swap out the cross cutter for seasonal shapes like hearts, stars, or flowers, and change up the royal icing colors to suit any occasion. The dough and icing technique remain the same.
Pin This Recipe!
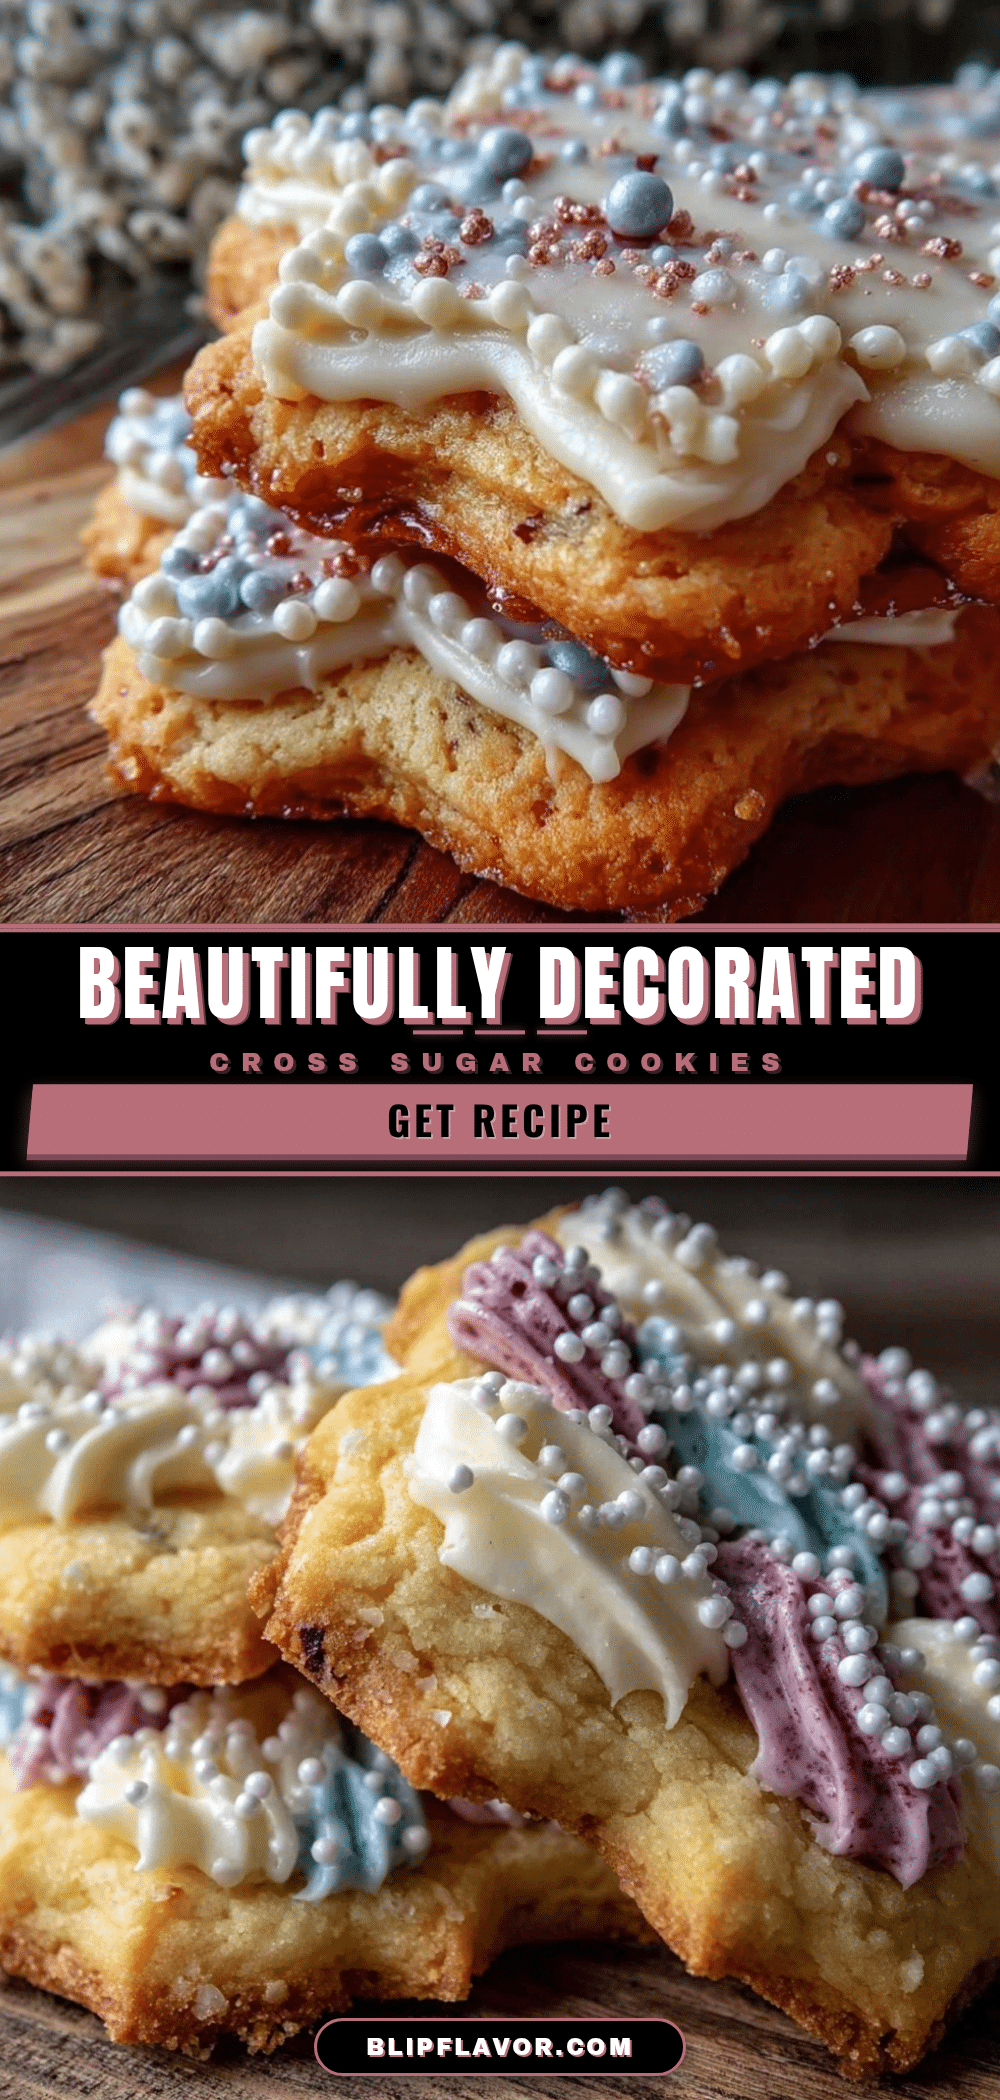
Perfect Decorated Cross Sugar Cookies Recipe Easy Royal Icing Tutorial
These decorated cross sugar cookies feature a crisp yet tender buttery base topped with smooth, matte royal icing. Perfect for Easter or any special occasion, they combine ease, taste, and beautiful decoration.
- Prep Time: 15 minutes
- Cook Time: 10 minutes
- Total Time: 1 hour 30 minutes
- Yield: 24 cookies 1x
- Category: Dessert
- Cuisine: American
Ingredients
- 2 ¾ cups (345g) all-purpose flour, sifted
- 1 teaspoon baking powder
- ½ teaspoon salt
- 1 cup (227g) unsalted butter, softened (room temperature)
- 1 ½ cups (300g) granulated sugar
- 1 large egg, room temperature
- 1 ½ teaspoons pure vanilla extract
- 2 tablespoons whole milk
- 3 cups (360g) powdered sugar, sifted
- 2 large egg whites (or 4 tablespoons pasteurized meringue powder with 6 tablespoons water)
- ½ teaspoon cream of tartar
- 1 teaspoon pure vanilla extract or lemon juice
- Food coloring gels (optional)
Instructions
- Mix Dry Ingredients: In a medium bowl, whisk together 2 ¾ cups all-purpose flour, 1 teaspoon baking powder, and ½ teaspoon salt. Set aside.
- Cream Butter and Sugar: In your mixer bowl, beat 1 cup softened unsalted butter with 1 ½ cups granulated sugar on medium speed until fluffy and pale, about 3-4 minutes.
- Add Egg and Vanilla: Beat in 1 large egg and 1 ½ teaspoons vanilla extract until fully combined. Scrape down the bowl once or twice.
- Incorporate Dry Ingredients: Gradually add the flour mixture in three batches, alternating with 2 tablespoons whole milk, starting and ending with the flour. Mix on low speed just until combined.
- Chill the Dough: Divide dough in half, flatten into disks, wrap with plastic wrap, and refrigerate for at least 1 hour or overnight.
- Roll and Cut: Preheat oven to 350°F (175°C). Roll one dough disk to about ¼ inch thickness using guide sticks. Use cross cookie cutter to cut shapes and place 1 inch apart on parchment-lined baking sheets.
- Bake: Bake for 8-10 minutes until edges just turn golden. Cool on sheets for 5 minutes, then transfer to cooling racks.
- Prepare Royal Icing: Whisk 3 cups powdered sugar, 2 egg whites (or meringue substitute), ½ teaspoon cream of tartar, and 1 teaspoon vanilla until stiff peaks form (7-10 minutes). Adjust thickness with water for piping consistency.
- Decorate: Outline cookie edges with thicker icing, flood centers with thinner icing. Let base dry 20 minutes, then pipe delicate crosses on top.
- Dry Completely: Allow decorated cookies to dry at room temperature for 3-4 hours or overnight before stacking or packaging.
Notes
Always sift powdered sugar to avoid lumps in royal icing. Chill dough to prevent spreading. Use guide sticks or rolling pin rings for even thickness. Dip cookie cutter in flour between cuts to avoid sticking. Let decorated cookies dry completely in a draft-free spot to prevent tackiness or cracking. Use pasteurized meringue powder instead of raw egg whites for safety. Store cookies in airtight container at room temperature up to 5 days or freeze undecorated cookies up to 3 months.
Nutrition
- Serving Size: 1 cookie (about 3-in
- Calories: 150
- Sugar: 12
- Fat: 7
- Carbohydrates: 22
- Protein: 1
Keywords: sugar cookies, royal icing, decorated cookies, Easter cookies, cross cookies, easy sugar cookies, holiday baking


