Introduction
Let’s be real—the aroma of melted chocolate and cool peppermint swirling together in my kitchen is what holiday dreams are made of. Every December, when the air is just crisp enough, I find myself craving the kind of Christmas cookies that pair perfectly with twinkling lights and a mug of cocoa. The first time I made these Peppermint Chocolate Chunk Cookies in a Jar, it was on one of those snowy afternoons where you can hear the wind whistling outside and the only answer is to bake something comforting. I was instantly hooked—the smell alone was enough to make me pause, close my eyes, and grin like a kid spotting the cookie plate at Grandma’s house.
Honestly, these cookies carry a bit of my childhood inside each bite. My grandma used to make a similar version every year, and she’d let me crush the peppermints with a rolling pin until the kitchen was filled with laughter and peppermint dust. I stumbled upon the “cookies in a jar” idea at a holiday market years ago, and I remember thinking, “Why didn’t I try this sooner?” It’s dangerously easy and perfect for gifting. You know what? My family can’t keep their hands off these—especially when they’re fresh out of the oven. There’s always someone sneaking a warm cookie off the cooling rack (and I can’t really blame them).
These Peppermint Chocolate Chunk Cookies in a Jar are pure, nostalgic comfort—ideal for potlucks, holiday swaps, or just to brighten up your Pinterest cookie board. They’ve become a staple for family gatherings, teacher gifts, and those “just because” moments. I’ve tested them more times than I care to admit (in the name of research, of course), and every batch feels like a warm hug. If you’re searching for an easy homemade Christmas treat that screams “festive,” you’re going to want to bookmark this one.
Why You’ll Love This Recipe
You know, after years of fussing with complicated holiday treats, I can say with confidence that Peppermint Chocolate Chunk Cookies in a Jar are a total game-changer. Here’s why these cookies deserve a spot on your Christmas baking list (and maybe your Pinterest board too):
- Quick & Easy: You can prep the jars in under 15 minutes (and the cookies bake up in just about 10-12 minutes). Perfect for busy holiday schedules and last-minute gifts.
- Simple Ingredients: No need for fancy specialty shops—everything you need is probably already in your pantry. I’ve even whipped these up when my fridge looked a little sad.
- Perfect for Gifting: These jars look adorable with a ribbon and handwritten tag, and they’re a hit at cookie swaps, classroom parties, and office Secret Santas. People love the homemade touch.
- Crowd-Pleaser: Kids, adults, even picky eaters rave about the combo of rich chocolate chunks and cool peppermint. I’ve never seen one left behind at a party.
- Unbelievably Delicious: The texture is chewy, the chocolate melty, and the peppermint gives it that fresh, wintery zing. It’s comfort food in cookie form, dressed up for the holidays.
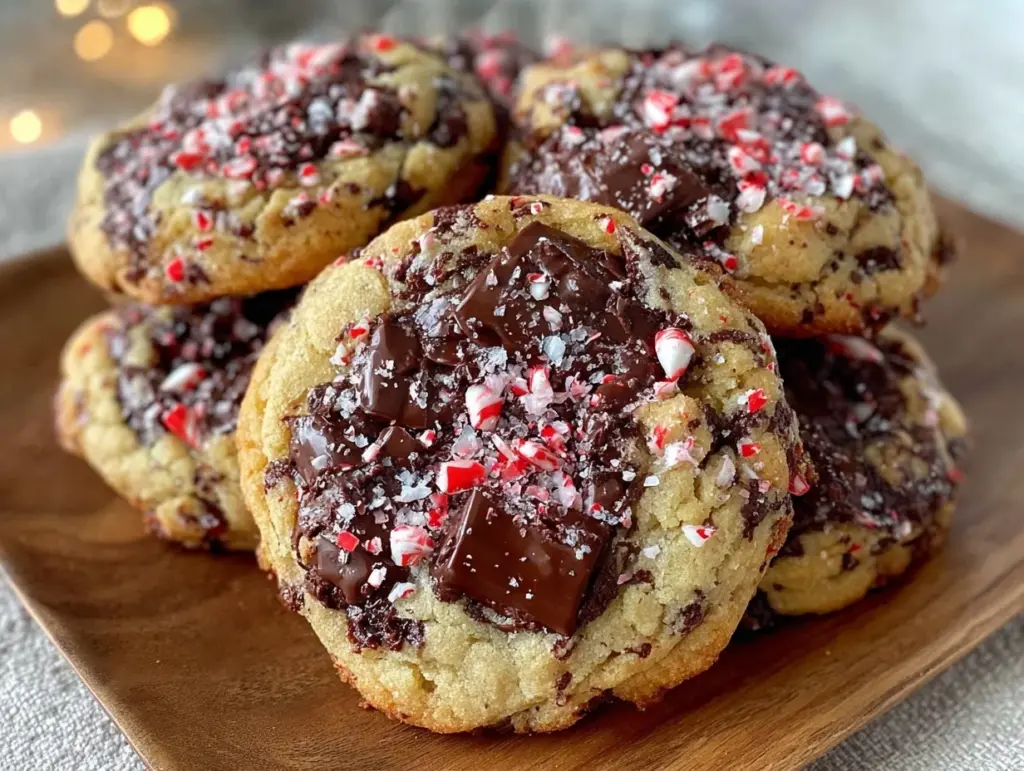
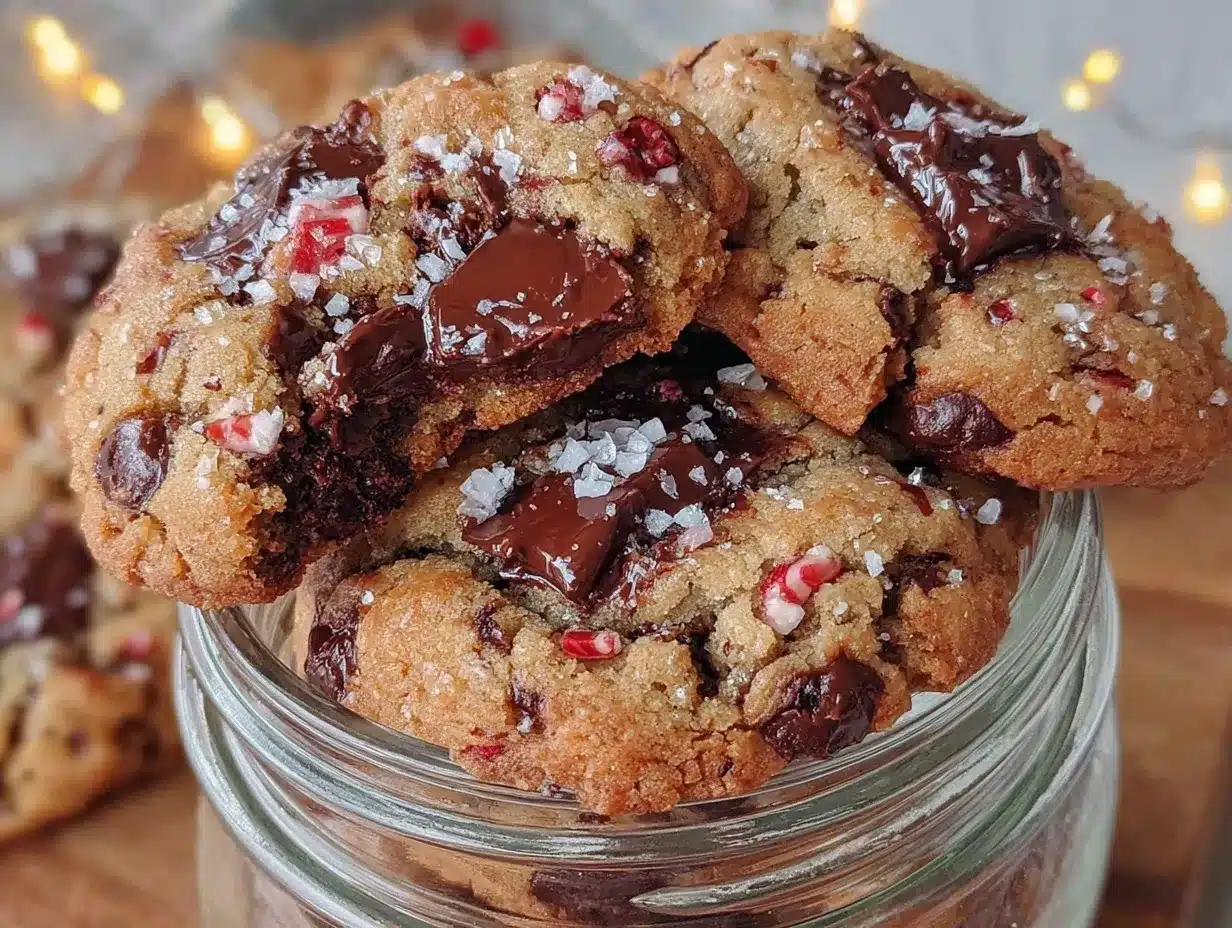
What makes these stand out from the rest? For starters, I use big chocolate chunks (not those tiny chips) for a truly decadent bite. The crushed peppermint candies melt just enough to create pockets of minty goodness, but don’t turn the cookies pink or sticky. I’ve tried loads of cookie recipes, and honestly, this one nails the balance—sweet, rich, and just the right amount of festive flavor.
To me, this isn’t just another Christmas cookie—it’s the kind that makes you close your eyes after the first bite and savor the moment. It’s a little healthier than some (less butter, more real chocolate), but you’d never guess. Whether you’re looking to impress guests with minimal effort or just want to make your family smile, these Peppermint Chocolate Chunk Cookies in a Jar deliver every time.
What Ingredients You Will Need
This recipe uses simple, wholesome ingredients to deliver bold flavor and a satisfying texture without the fuss. Most are pantry staples, and the best part? The jar presentation lets you layer everything beautifully for a Pinterest-worthy look. Here’s what you’ll need:
- For the Cookie Mix Jar:
- 1 1/4 cups (150g) all-purpose flour (for structure—use gluten-free blend if needed)
- 1/2 teaspoon baking soda (for a soft rise)
- 1/4 teaspoon salt (balances the sweetness)
- 1/2 cup (100g) packed light brown sugar (adds chewiness)
- 1/4 cup (50g) granulated sugar (for crisp edges)
- 3/4 cup (120g) chocolate chunks (I love Ghirardelli bittersweet—it melts beautifully)
- 1/3 cup (35g) crushed peppermint candies (or candy canes—gives the holiday zing)
- Wet Ingredients to Add When Baking:
- 1/2 cup (115g) unsalted butter, melted and cooled (substitute coconut oil for dairy-free)
- 1 large egg (room temperature—makes mixing easier)
- 1 teaspoon pure vanilla extract (Madagascar vanilla gives a deeper flavor)
Ingredient tips from my kitchen:
- If you want to switch things up, swap chocolate chunks for white chocolate or even dark chocolate chips.
- For a low-sugar version, use coconut sugar instead of brown sugar—it gives a subtle caramel note.
- Crushed peppermint: If you’re like me and always have leftover candy canes after Christmas, they work perfectly! Just pop them in a zip-top bag and smash with a rolling pin.
- For gluten-free cookies, Bob’s Red Mill 1-to-1 Baking Flour is my go-to—it holds up well and doesn’t get gritty.
- Dairy-free? Substitute coconut oil for butter, and use a flax egg (1 tablespoon flaxseed meal + 2.5 tablespoons water) in place of the egg.
Honestly, these ingredients are flexible—if you’re short on something, there’s almost always a swap. The magic really happens when you layer them in a jar: flour first, then sugars, then chocolate, then peppermint. It looks like a little snow globe, and people always “ooh” and “ahh” when they see it.
Equipment Needed
Here’s what you’ll need to whip up these Peppermint Chocolate Chunk Cookies in a Jar (and actually bake the cookies when you’re ready):
- 1-quart (32 oz/950 ml) glass mason jars with lids (for gifting—Ball or Kerr work well)
- Mixing bowl (medium-sized—glass or stainless steel)
- Wooden spoon or silicone spatula (for mixing the dough)
- Baking sheet (standard half-sheet pan—lined with parchment for easy cleanup)
- Wire cooling rack (helps cookies set evenly)
- Measuring cups and spoons (accurate measurements are key)
- Rolling pin (optional—for crushing peppermint candies)
If you don’t have mason jars, recycled pasta sauce jars or even large coffee mugs can work in a pinch (I’ve used both when I ran out of jars last December). For baking, parchment paper is your best friend—it keeps the cookies from sticking and makes cleanup a breeze. I’ve found that silicone spatulas are gentler for mixing chunky dough, and they last forever if you hand-wash them. If you’re on a budget, don’t sweat the fancy gear—just use what you’ve got, and these cookies will still turn out great.
Preparation Method
How to Assemble the Cookie Mix Jar:
- Layer the dry ingredients: In a clean 1-quart (32 oz/950 ml) mason jar, add 1 1/4 cups (150g) all-purpose flour first. Tap gently to settle it.
- Sprinkle 1/2 teaspoon baking soda and 1/4 teaspoon salt over the flour.
- Carefully add 1/2 cup (100g) packed brown sugar, followed by 1/4 cup (50g) granulated sugar. Press each layer lightly with the back of a spoon for neat, distinct layers.
- Add 3/4 cup (120g) chocolate chunks, then 1/3 cup (35g) crushed peppermint candies on top. Seal the jar tightly with the lid.
- Attach a tag or note with baking instructions (see below)—makes gifting easy!
How to Bake the Cookies:
- Preheat your oven: Set to 350°F (175°C). Line a baking sheet with parchment paper.
- Empty the jar: Pour contents of the jar into a medium mixing bowl. Stir to combine.
- Add wet ingredients: In a small bowl, whisk together 1/2 cup (115g) melted unsalted butter, 1 large room-temperature egg, and 1 teaspoon pure vanilla extract.
- Mix the dough: Pour wet ingredients into dry and stir until just combined. Don’t overmix—stop when you see no flour streaks. Dough will be thick and chunky.
- Scoop the cookies: Use a tablespoon or cookie scoop to drop balls of dough (about 1.5 inches/4cm) onto your prepared sheet, spaced 2 inches (5cm) apart.
- Bake: Bake for 10-12 minutes, until edges are golden and centers look just set. They’ll firm up as they cool, so don’t wait for full browning.
- Cool: Let cookies sit on the baking sheet for 2 minutes, then transfer to a wire rack. Cool completely before storing—if you can resist!
Troubleshooting: If your dough is crumbly, add a splash (1 tablespoon) of milk. If cookies spread too much, chill dough for 20 minutes before baking. Cookie texture should be chewy with melty chocolate and crispy peppermint bits.
Personal tip: For extra festive flair, press a few extra chocolate chunks and peppermint pieces into each dough ball before baking. It makes the cookies look picture-perfect for Pinterest and beyond.
Cooking Tips & Techniques
After baking more batches of Peppermint Chocolate Chunk Cookies than I care to admit, I’ve picked up a few tricks that make all the difference:
- Don’t overmix: Once the wet and dry ingredients meet, stir just until combined. Overmixing can make the cookies tough instead of chewy.
- Chill the dough: If you have a few extra minutes, pop the dough in the fridge for 20 minutes. Chilled dough helps the cookies hold their shape and enhances flavor.
- Crushing peppermint: Use a zip-top bag and rolling pin—don’t use a food processor, or the candies will turn to dust. You want chunky bits for texture.
- Size matters: A medium cookie scoop (about 1.5 tablespoons) gives perfectly uniform cookies. If you go much bigger, watch the baking time.
- Oven temp check: Every oven runs a little differently. If your cookies are browning too fast, drop the temp by 10°F (5°C). I learned this the hard way after a batch went “extra crispy.”
- Multitasking: While the cookies bake, clean up the mixing bowl or prep another batch of jars. Makes holiday baking feel less chaotic!
And one more thing—don’t skip the wire rack for cooling. It prevents soggy bottoms (yep, learned that the hard way). These little details might seem small, but they add up to consistent, delicious cookies every time.
Variations & Adaptations
You know how it goes—sometimes you want to put your own spin on a classic. Here are my favorite ways to customize Peppermint Chocolate Chunk Cookies in a Jar:
- Dietary swaps: Use gluten-free flour (like Bob’s Red Mill) and dairy-free chocolate chunks for a cookie everyone can enjoy. A flax egg works well for egg-free baking.
- Seasonal twist: Swap crushed peppermint for toffee bits or dried cranberries when you want something less minty. White chocolate chunks also make these cookies pop.
- Flavor boost: Add 1/4 teaspoon espresso powder to the dry mix for a mocha vibe—it brings out the chocolate flavor.
- Cooking methods: Air fryer cookies? Yep! Scoop dough onto parchment rounds and bake at 325°F (160°C) for about 7 minutes. I tried this last year and was surprised how well it worked.
- Allergen tip: If nuts aren’t an issue, toss in 1/3 cup chopped walnuts or pecans for crunch.
Personally, my favorite variation is swapping half the chocolate for white chocolate chunks—it looks like snow in the cookies and tastes amazing. Make these your own, and don’t be afraid to experiment. After all, some of the best recipes happen by accident!
Serving & Storage Suggestions
These cookies are best enjoyed fresh and slightly warm—honestly, nothing beats the gooey chocolate and crisp peppermint right out of the oven. For gatherings, I like to pile them high on a festive platter lined with a bit of parchment or a bright napkin. They look beautiful on cookie trays for Christmas parties or tucked into a gift bag with a mug and hot cocoa mix.
Complementary treats? Serve alongside a big mug of peppermint mocha, classic eggnog, or even a scoop of vanilla ice cream. They’re also perfect with a handful of holiday nuts or fresh berries on the side.
To store, let cookies cool completely, then keep in an airtight container at room temperature for up to 5 days. For longer storage, freeze in a zip-top bag for up to 2 months—just thaw at room temp, then reheat in a low oven (300°F/150°C) for 3-5 minutes if you want that “just baked” feel. Flavors tend to deepen after a day, so don’t worry if you’re making ahead for a party or gift.
Nutritional Information & Benefits
Each Peppermint Chocolate Chunk Cookie (about 36g) contains roughly:
- Calories: 140
- Fat: 6g
- Carbohydrates: 20g
- Protein: 2g
- Sugar: 13g
These cookies offer some perks thanks to the real chocolate chunks (rich in antioxidants) and peppermint, which can aid digestion. With the option to use gluten-free flour or coconut oil, they can fit a variety of dietary needs. Be aware—these do contain dairy, eggs, and wheat unless you use the swaps above. Personally, I love knowing exactly what’s inside my holiday treats, and these cookies are far better than store-bought mixes for taste and wellness.
Conclusion
So, why should you try Peppermint Chocolate Chunk Cookies in a Jar? Honestly, they’re the kind of easy homemade Christmas treat that brings together festive flavors, effortless gifting, and cozy comfort—all in one little jar. You can tweak them to suit your taste, fit any dietary need, and make them as fancy or simple as you like. I love them because they remind me of Christmases past, but also because they make new holiday memories every time I bake a batch.
Give them a whirl, play with the flavors, and make them your own. If you do, let me know in the comments—share your twists or who you gifted a jar to! There’s nothing better than spreading a little holiday cheer, one cookie at a time. Wishing you a season filled with sweetness and memories (and maybe a few extra cookies hidden in the pantry).
Frequently Asked Questions
Can I use chocolate chips instead of chocolate chunks?
Absolutely! Chocolate chips work just fine, but I find that chocolate chunks melt a bit more and give a richer bite.
How do I crush peppermint candies without making a mess?
Place them in a zip-top bag and use a rolling pin to crush. It’s quick, and cleanup is a breeze.
Can I make the jars ahead of time for gifting?
Yes! Assembled jars keep for up to 2 months at room temperature. Just add a tag with baking instructions.
What’s the best way to make these cookies gluten-free?
Use a trusted 1-to-1 gluten-free flour blend. I like Bob’s Red Mill—it keeps the cookies chewy and delicious.
How do I keep cookies soft after baking?
Store them in an airtight container with a slice of bread—it helps maintain moisture and keeps cookies soft longer.
Pin This Recipe!
Peppermint Chocolate Chunk Cookies in a Jar

These festive cookies combine rich chocolate chunks and cool peppermint for a chewy, melty holiday treat. Perfect for gifting or cozy family gatherings, they’re easy to assemble in a jar and bake up in minutes.
- Prep Time: 15 minutes
- Cook Time: 12 minutes
- Total Time: 27 minutes
- Yield: 18 cookies 1x
- Category: Dessert
- Cuisine: American
Ingredients
- 1 1/4 cups all-purpose flour (or gluten-free blend)
- 1/2 teaspoon baking soda
- 1/4 teaspoon salt
- 1/2 cup packed light brown sugar
- 1/4 cup granulated sugar
- 3/4 cup chocolate chunks (bittersweet recommended)
- 1/3 cup crushed peppermint candies or candy canes
- 1/2 cup unsalted butter, melted and cooled (or coconut oil for dairy-free)
- 1 large egg (room temperature, or flax egg for vegan)
- 1 teaspoon pure vanilla extract
Instructions
- Layer the dry ingredients in a clean 1-quart mason jar: add flour first, then sprinkle baking soda and salt over the flour.
- Add brown sugar, followed by granulated sugar, pressing each layer lightly for neatness.
- Add chocolate chunks, then crushed peppermint candies on top. Seal the jar tightly.
- To bake, preheat oven to 350°F (175°C) and line a baking sheet with parchment paper.
- Empty jar contents into a medium mixing bowl and stir to combine.
- In a separate bowl, whisk together melted butter, egg, and vanilla extract.
- Pour wet ingredients into dry and stir until just combined. Do not overmix.
- Scoop dough into balls (about 1.5 inches) and place 2 inches apart on the baking sheet.
- Bake for 10-12 minutes, until edges are golden and centers look just set.
- Let cookies cool on the baking sheet for 2 minutes, then transfer to a wire rack to cool completely.
Notes
For gluten-free or dairy-free adaptations, use a 1-to-1 gluten-free flour blend and coconut oil or a flax egg. Chill dough for 20 minutes for thicker cookies. Press extra chocolate chunks and peppermint pieces into dough balls before baking for a festive look. Store cookies in an airtight container with a slice of bread to keep them soft.
Nutrition
- Serving Size: 1 cookie (about 36g)
- Calories: 140
- Sugar: 13
- Sodium: 70
- Fat: 6
- Saturated Fat: 3
- Carbohydrates: 20
- Fiber: 1
- Protein: 2
Keywords: peppermint cookies, chocolate chunk cookies, Christmas cookies, cookies in a jar, holiday baking, edible gifts, easy cookie recipe


