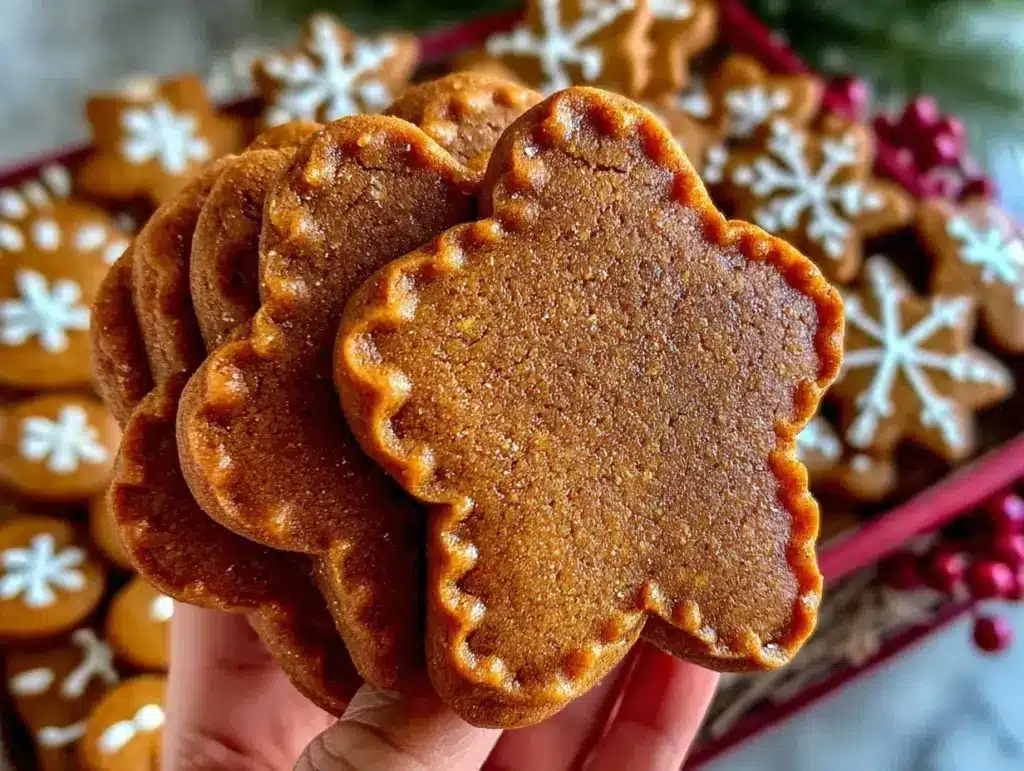
Let me tell you, the scent of warm spices—ginger, cinnamon, and cloves—wafting through my kitchen is pure holiday magic. When gingerbread cookie cutouts are baking, the whole house feels wrapped in a cozy hug. The first time I made these, I was knee-high to a grasshopper, helping my grandma roll out dough on her old wooden table. She let me press out the shapes—stars, bells, snowmen—while she hummed carols. I was instantly hooked. It’s the kind of moment where you pause, take a deep breath, and just smile because you know you’re onto something truly special.
Years ago, I tried recreating that feeling on a rainy December weekend, determined to capture the nostalgia. Honestly, I wish I’d discovered this exact gingerbread cookie cutouts recipe sooner (it would’ve saved me from a few crumbly disasters). My family couldn’t stop sneaking cookies off the cooling rack (and I can’t really blame them). Even now, my kids race to decorate their own, piling on sprinkles and colored icing. That’s the charm—these cookies bring people together, sparking laughter and a little friendly competition over who made the cutest snowman.
Whether you’re looking for a sweet treat for your kids, something to brighten up your Pinterest cookie board, or a festive gift for neighbors, gingerbread cookie cutouts fit the bill perfectly. They’re dangerously easy, provide pure, nostalgic comfort, and honestly, they look as good as they taste. I’ve tested this recipe more times than I care to admit—in the name of research, of course. It’s become a staple for family gatherings, holiday gifting, and those chilly afternoons where you just need something special. If you’re after a recipe that feels like a warm hug and never fails to impress, you’re going to want to bookmark this one.
Why You’ll Love This Recipe
After years of baking, testing, and tweaking, I can confidently say these gingerbread cookie cutouts hit all the right notes for festive holiday baking. Here’s why you’ll fall in love with them (and why they’re now my go-to for every December):
- Quick & Easy: Comes together in under an hour (plus chill time). Perfect for busy weeknights or last-minute holiday parties.
- Simple Ingredients: No fancy grocery trips needed; you likely already have everything in your pantry—flour, spices, molasses, and butter.
- Perfect for Holiday Gatherings: These cookie cutouts shine at potlucks, cookie swaps, and holiday brunches. They’re a must for Christmas Eve snacking or gifting.
- Crowd-Pleaser: Rave reviews from kids and adults alike. Even picky eaters get excited to decorate (and eat) these cookies.
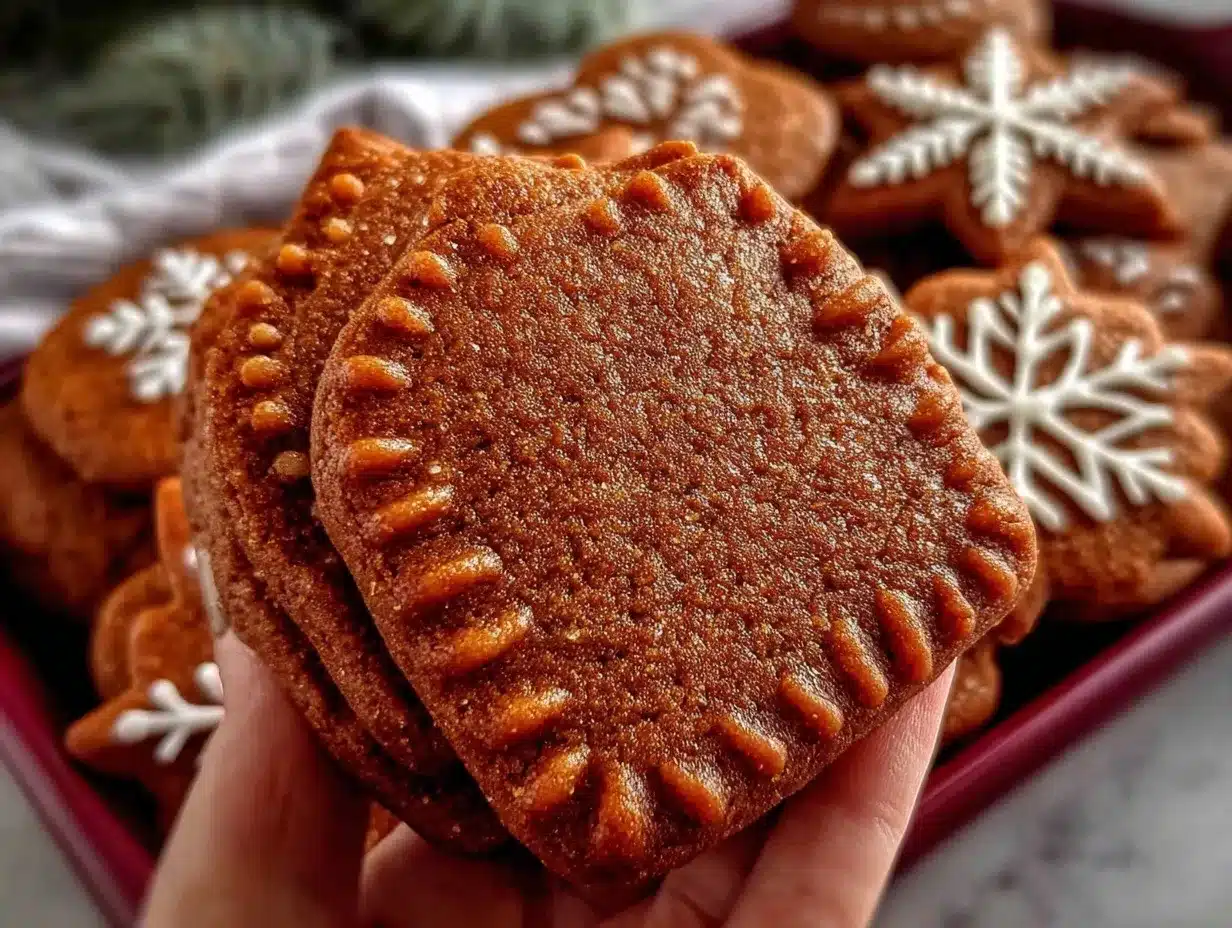
- Unbelievably Delicious: Soft, chewy centers with crisp edges. The spice blend makes each bite cozy and festive.
What sets this gingerbread cookie cutouts recipe apart? I use a slightly higher ratio of brown sugar to molasses for balanced sweetness and a softer bite. A dash of black pepper adds a subtle warmth you might not expect, but trust me—it’s a game-changer. The dough is forgiving (not too sticky, not crumbly), so rolling and cutting is a breeze, even for little hands. Plus, you can make the dough ahead and freeze it, saving time when the holiday rush hits.
This isn’t just another gingerbread recipe—it’s my best version, born from years of family traditions and countless taste tests. It’s comfort food, but with a little extra care for modern bakers. You know what? These cookies are the kind that make you close your eyes after the first bite, savoring the cozy flavors. There’s something magical about turning simple ingredients into a batch of edible art, perfect for impressing guests without stress or turning a simple afternoon into a memorable family tradition. That’s why I keep coming back to this recipe every year.
What Ingredients You Will Need
This gingerbread cookie cutouts recipe uses simple, wholesome ingredients to deliver bold flavor and satisfying texture—without any fuss. Most are pantry staples (so no need to run out in the snow for something fancy), and you can swap or substitute as needed.
- For the Dough:
- 2 3/4 cups (345g) all-purpose flour (I like King Arthur for a sturdy dough)
- 1/2 teaspoon baking soda
- 1/2 teaspoon salt
- 1 tablespoon ground ginger (freshly opened spice for max flavor)
- 2 teaspoons ground cinnamon
- 1/2 teaspoon ground cloves
- 1/4 teaspoon ground nutmeg
- 1/4 teaspoon ground black pepper (optional, adds subtle warmth)
- 3/4 cup (170g) unsalted butter, softened
- 3/4 cup (150g) packed light brown sugar
- 1 large egg, room temperature
- 1/2 cup (120ml) unsulfured molasses (Grandma’s brand works well)
- 1 teaspoon pure vanilla extract
- For Decorating:
- Royal icing or simple glaze (powdered sugar + milk + vanilla)
- Assorted sprinkles, colored sugar, or candy pearls
- Mini chocolate chips or cinnamon candies (for buttons or eyes)
You can swap the all-purpose flour for a gluten-free blend (Bob’s Red Mill 1-to-1 works nicely). If you need dairy-free, use plant-based butter. For a richer molasses flavor, try dark molasses—but note, it’ll be a bit more robust. If nutmeg’s not your thing, leave it out. The spices can be adjusted for your taste—want it spicier? Add a little extra ginger. For a milder cookie, reduce the cloves.
I recommend fresh spices—seriously, it makes a world of difference. If you want to go all out, grind your own cloves and nutmeg. When it comes to decorating, let your creativity shine! You can use store-bought royal icing or whip up a simple glaze at home. The toppings are totally customizable and, let’s face it, make the cookies pop on any Pinterest feed.
In summer, swap out the classic shapes for flowers or hearts—gingerbread isn’t just for December! For allergen concerns, avoid nuts in toppings and use certified gluten-free flour if needed. These ingredients are forgiving, so don’t stress if you have to make a quick swap. That’s the beauty of a well-loved holiday recipe.
Equipment Needed
- Rolling pin (wooden or silicone; I use a classic wooden one, but any will work)
- Cookie cutters (assorted holiday shapes—stars, bells, trees; metal cutters give cleaner edges)
- Baking sheets (two or more; lined with parchment for easy cleanup)
- Parchment paper or silicone baking mats (prevents sticking and helps with even baking)
- Mixing bowls (large and medium)
- Electric mixer (stand or hand mixer; you can mix by hand, but it takes longer)
- Spatula and wooden spoon (for scraping and mixing)
- Wire cooling racks (for perfect crisping)
- Small offset spatula or butter knife (for lifting cookies)
- Plastic wrap or reusable dough covers (for chilling the dough)
- Pastry bags or zip-top baggies (for piping icing)
If you don’t have fancy cookie cutters, you can use a drinking glass for round cookies or make your own stencils out of cardboard. I’ve tried silicone baking mats and parchment—both work, but parchment makes cleanup a breeze. For rolling pins, the classic wooden kind is sturdy and lasts years (just keep it dry and avoid soaking). Budget-friendly tools work just as well—no need to splurge on anything special.
Maintenance tip: Wash cookie cutters right away, especially if they have narrow details. Wooden rolling pins appreciate a light oiling once a year to stay smooth. Honestly, I’ve used mismatched bowls and thrift-store racks for years, and it never hurt the cookies (just adds to the charm).
Preparation Method
- Whisk the dry ingredients: In a large bowl, combine 2 3/4 cups (345g) flour, 1/2 teaspoon baking soda, 1/2 teaspoon salt, 1 tablespoon ginger, 2 teaspoons cinnamon, 1/2 teaspoon cloves, 1/4 teaspoon nutmeg, and 1/4 teaspoon black pepper (if using). Stir until well mixed and fragrant. Set aside. (Sensory cue: The dry blend should smell warm and spicy.)
- Cream butter and sugar: In another large bowl, beat 3/4 cup (170g) softened butter and 3/4 cup (150g) brown sugar on medium speed for about 2-3 minutes, until light and fluffy. Scrape down the sides as needed. (Tip: Proper creaming keeps cookies tender.)
- Add wet ingredients: Beat in 1 large egg, 1/2 cup (120ml) molasses, and 1 teaspoon vanilla extract. Mix until smooth and glossy. (Troubleshooting: If the mixture looks separated, don’t worry—it’ll come together with the flour.)
- Combine wet and dry: Gradually add the dry mixture to the wet, about 1/3 at a time, mixing on low speed. Dough will get thick; switch to a wooden spoon if needed. (Warning: Overmixing can toughen cookies—stop when just combined.)
- Chill the dough: Divide dough in half, flatten each into a disk, and wrap in plastic wrap. Chill in the fridge at least 1 hour (or up to 2 days). (Tip: Chilling firms up the dough for easy rolling.)
- Preheat oven: Set oven to 350°F (175°C). Line baking sheets with parchment paper.
- Roll and cut: On a lightly floured surface, roll one disk of dough to about 1/4 inch (6mm) thick. Dust rolling pin and cutters to prevent sticking. Cut out shapes and transfer to prepared sheets, spacing about 2 inches (5cm) apart. (Sensory cue: Dough should feel cool, not sticky. If it warms up, pop it in the fridge for 10 minutes.)
- Bake: Bake cookies for 8-10 minutes, until edges are firm but centers are slightly soft. (Time varies by size; small shapes bake faster, so watch closely.)
- Cool: Let cookies sit on the baking sheet for 2 minutes, then transfer to wire racks to cool completely. (Tip: Warm cookies are fragile, so use a spatula.)
- Decorate: Once cool, pipe icing or spread glaze. Add sprinkles, candies, or whatever your heart desires. Let icing set before stacking or storing. (Tip: For crisp designs, use a small tip or snip off a tiny corner of a zip-top bag.)
If dough cracks while rolling, knead gently to soften. For extra efficiency, roll dough between parchment sheets—less flour, less mess. If cookies puff too much, chill shapes on the baking sheet for 10 minutes before baking. When decorating, set cookies on parchment for easy cleanup. I like to batch-bake, icing half and saving the rest for quick snacks. These gingerbread cookie cutouts are forgiving, so don’t stress over perfection—the homemade look is part of their charm.
Cooking Tips & Techniques
After countless batches of gingerbread cookie cutouts, I’ve picked up a few tricks (and learned from some hilarious cookie fails along the way). Here’s how you can nail it every time:
- Chill is key: Always chill the dough—skipping this step leads to sticky, hard-to-roll cookies and shapes that spread in the oven. If you’re short on time, pop the dough in the freezer for 20 minutes (just don’t forget it!).
- Even thickness matters: Roll dough to a consistent 1/4 inch (6mm). Thinner cookies bake faster but risk burning; thicker ones stay soft and chewy. Use rolling pin guides or two chopsticks as rails for perfect height.
- Don’t overbake: Gingerbread cookie cutouts firm up as they cool. Take them out when the edges are set but the centers still look slightly soft—about 8-10 minutes. Overbaked cookies get hard.
- Multitasking: While one batch bakes, roll and cut the next. This keeps things moving and minimizes downtime (especially handy if little helpers are impatient!).
- Decorating strategy: For crisp, detailed icing, let cookies cool fully—warm cookies make icing runny. Use a piping bag for outlines and a spoon for flooding.
- Consistency is everything: If your dough is too crumbly, add a teaspoon of milk. If it’s sticky, chill longer or dust with flour. Adjust spices to taste—there’s no one-size-fits-all for holiday flavor.
- Personal lesson: One year, I tried doubling the molasses for extra flavor—result: sticky dough and cookies that glued themselves to the sheet. Stick to the ratios, and you’ll be golden.
Keep your workspace floured, but not overly so; too much flour toughens cookies. If you want soft gingerbread cookie cutouts, shorten bake time by a minute. For crispier ones, bake a minute longer. The magic is in the details, and a little patience makes all the difference.
Variations & Adaptations
Gingerbread cookie cutouts are endlessly customizable. Here are a few favorite twists that keep things fresh and festive:
- Gluten-Free: Swap all-purpose flour for a 1-to-1 gluten-free blend. Bob’s Red Mill and King Arthur both work well. Chill dough a little longer for easier rolling.
- Vegan Option: Use plant-based butter and replace the egg with a “flax egg” (1 tablespoon ground flaxseed mixed with 3 tablespoons water, let sit 5 minutes).
- Spice It Up: Add an extra teaspoon of ginger and a pinch of cayenne for a warming kick. Or, toss in orange zest for a bright, citrusy note.
- Seasonal Shapes: Not just for Christmas! Use heart or flower cutters for Valentine’s or springtime treats. (Honestly, gingerbread in July feels rebellious—and tastes great!)
- Flavor Adaptations: Replace molasses with maple syrup for a lighter, caramel-y cookie. Or, use almond extract instead of vanilla for a nutty twist.
- Allergen Substitutions: For nut allergies, avoid almond extract and toppings containing nuts. For dairy-free, use vegan butter and check your sprinkles for milk ingredients.
- Personal favorite: I once added tiny chocolate chips to the dough—kids went wild, and the gooey chocolate pockets were a fun surprise.
Feel free to experiment with icing colors or edible glitter for an extra festive touch. If decorating is your jam, set up a decorating station with bowls of toppings and let everyone create their own masterpiece. These cookies adapt to any taste, occasion, or dietary need—just tweak and enjoy!
Serving & Storage Suggestions
Gingerbread cookie cutouts taste best at room temperature, with crisp edges and soft centers. Arrange them on a festive platter or stack in a clear jar for a Pinterest-worthy presentation. I love pairing these with hot cocoa, spiced tea, or even eggnog for a true holiday treat.
For parties, set out bowls of icing and toppings so guests can decorate their own. These cookies also make adorable gift bundles—just place in a cellophane bag and tie with ribbon.
To store, keep cookies in an airtight container at room temperature for up to 1 week. If stacked, separate layers with parchment to prevent sticking. For longer storage, freeze undecorated cookies for up to 2 months. Thaw at room temperature and decorate as needed. Reheat gently in a low oven (300°F/150°C) for 2-3 minutes to refresh texture, but don’t overbake.
Over time, the spices mellow and the cookies become even more flavorful. If you like your gingerbread cookie cutouts extra tender, store with a slice of apple or bread in the container—it adds moisture without making things soggy. Honestly, I often stash a secret batch in the freezer for late-night cravings!
Nutritional Information & Benefits
Each gingerbread cookie cutout (medium size, undecorated) contains approximately:
- Calories: 90
- Fat: 3g
- Carbohydrates: 14g
- Protein: 1g
- Sugar: 7g
Molasses is a good source of iron and calcium, while the spices (ginger, cinnamon, cloves) offer antioxidants and anti-inflammatory benefits. If you use whole wheat flour, you’ll get a bit more fiber. This recipe can be adapted for gluten-free and dairy-free diets, making it inclusive for most holiday gatherings.
Allergens to watch out for: gluten (unless using GF flour), dairy (from butter), eggs. Always check toppings if there are allergy concerns. From a wellness perspective, I see these cookies as an occasional treat—more about joy and tradition than numbers. I love knowing the spices add a little extra goodness to our holiday baking.
Conclusion
Gingerbread cookie cutouts are more than just cookies—they’re little bites of holiday happiness that spark memories and make new ones. With simple ingredients and easy steps, this recipe brings festive cheer to any kitchen (even if you’re baking with toddlers or tackling a last-minute cookie swap).
I love how flexible this recipe is—swap ingredients, switch up shapes, or pile on as much icing as you like. Every batch is a chance to put your own spin on a classic. For me, these cookies are a yearly tradition that never gets old. There’s something special about the way spicy-sweet gingerbread brings people together.
If you try these gingerbread cookie cutouts, I’d love to hear how they turned out! Drop a comment, share your decorating ideas, or tag me on social media with your cookie creations. Happy baking, and may your holidays be cozy, sweet, and full of gingerbread joy!
FAQs
How far in advance can I make gingerbread cookie cutouts?
You can make the dough up to two days ahead and keep it chilled before rolling and baking. Baked cookies stay fresh in an airtight container for up to a week, or freeze for up to two months.
Can I use honey instead of molasses?
You can, but the flavor won’t be traditional. Molasses gives gingerbread its deep, rich taste; honey results in a lighter, sweeter cookie. If you swap, use the same amount.
Why did my cookies spread too much?
This usually happens if the dough wasn’t chilled long enough or if the baking sheets were warm. Chill the dough and use cooled sheets for best results.
Can I make these cookies gluten-free?
Absolutely! Use a 1-to-1 gluten-free flour blend. Chill the dough a bit longer and roll gently, as GF dough can be more delicate.
What’s the best way to decorate gingerbread cookie cutouts?
Let cookies cool completely, then use royal icing or a simple glaze. Pipe outlines, flood centers, and add sprinkles or candies before the icing sets. Get creative—the messier, the merrier!
Pin This Recipe!
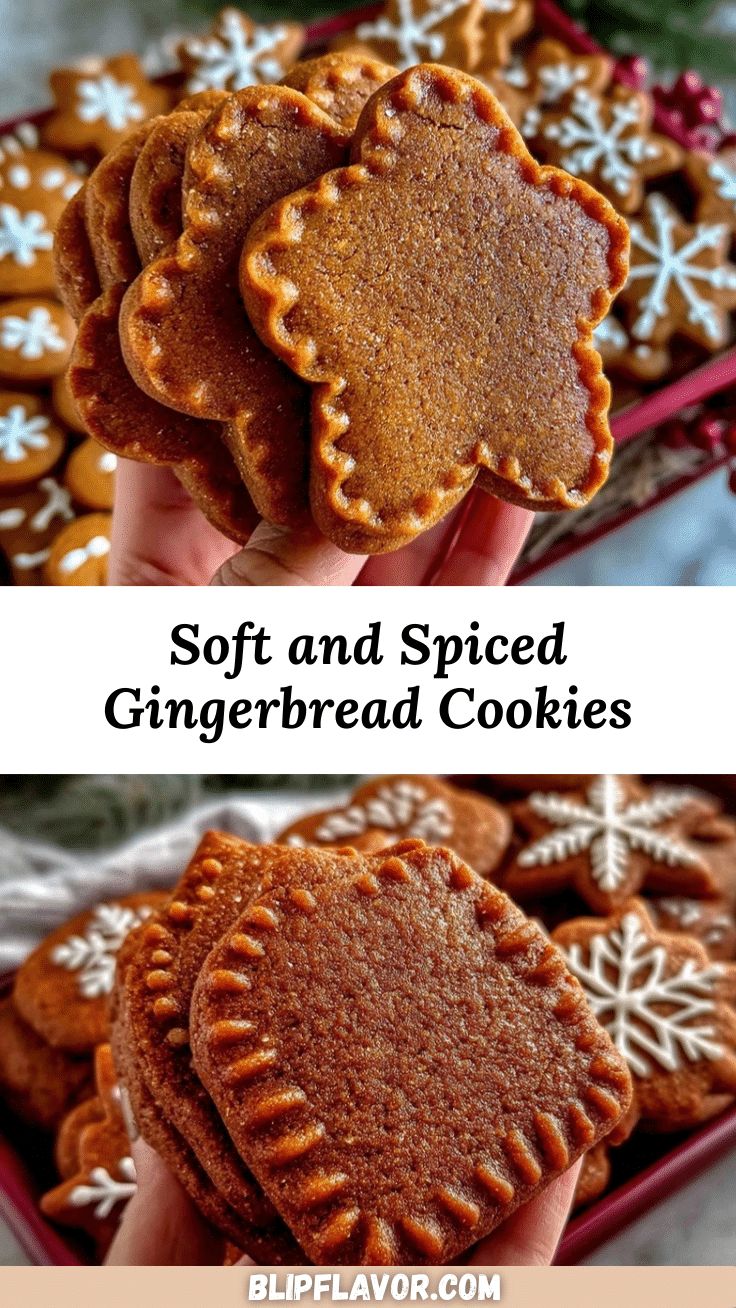
Gingerbread Cookie Cutouts: Easy Festive Holiday Baking Guide

These gingerbread cookie cutouts are soft, chewy, and full of warm holiday spices. Perfect for festive gatherings, decorating with kids, or gifting, this easy recipe delivers nostalgic comfort and crowd-pleasing flavor.
- Prep Time: 20 minutes
- Cook Time: 8-10 minutes per batch
- Total Time: 1 hour 30 minutes (includes chilling)
- Yield: 36 medium cookies 1x
- Category: Dessert
- Cuisine: American
Ingredients
- 2 3/4 cups all-purpose flour
- 1/2 teaspoon baking soda
- 1/2 teaspoon salt
- 1 tablespoon ground ginger
- 2 teaspoons ground cinnamon
- 1/2 teaspoon ground cloves
- 1/4 teaspoon ground nutmeg
- 1/4 teaspoon ground black pepper (optional)
- 3/4 cup unsalted butter, softened
- 3/4 cup packed light brown sugar
- 1 large egg, room temperature
- 1/2 cup unsulfured molasses
- 1 teaspoon pure vanilla extract
- Royal icing or simple glaze (powdered sugar + milk + vanilla)
- Assorted sprinkles, colored sugar, or candy pearls
- Mini chocolate chips or cinnamon candies (for buttons or eyes)
Instructions
- In a large bowl, whisk together flour, baking soda, salt, ginger, cinnamon, cloves, nutmeg, and black pepper (if using) until well mixed.
- In another large bowl, beat softened butter and brown sugar on medium speed for 2-3 minutes until light and fluffy.
- Beat in the egg, molasses, and vanilla extract until smooth and glossy.
- Gradually add the dry mixture to the wet ingredients, mixing on low speed until just combined. Switch to a wooden spoon if dough becomes thick.
- Divide dough in half, flatten each into a disk, and wrap in plastic wrap. Chill in the fridge for at least 1 hour (or up to 2 days).
- Preheat oven to 350°F (175°C). Line baking sheets with parchment paper.
- On a lightly floured surface, roll one disk of dough to about 1/4 inch thick. Cut out shapes and transfer to prepared sheets, spacing about 2 inches apart.
- Bake cookies for 8-10 minutes, until edges are firm but centers are slightly soft.
- Let cookies sit on the baking sheet for 2 minutes, then transfer to wire racks to cool completely.
- Once cool, decorate with icing, sprinkles, and candies as desired. Let icing set before stacking or storing.
Notes
Chill dough for best results and easy rolling. Adjust spices to taste. For gluten-free, use a 1-to-1 GF flour blend. Decorate with royal icing or glaze and assorted toppings. Store cookies in an airtight container for up to a week, or freeze undecorated cookies for up to 2 months.
Nutrition
- Serving Size: 1 medium cookie
- Calories: 90
- Sugar: 7
- Sodium: 60
- Fat: 3
- Saturated Fat: 2
- Carbohydrates: 14
- Fiber: 0.5
- Protein: 1
Keywords: gingerbread cookies, holiday baking, Christmas cookies, cookie cutouts, festive dessert, easy gingerbread, decorated cookies, kid-friendly, molasses cookies


