“Are you sure you didn’t buy these at the store?” my niece asked, eyeing the vibrant layers in my popsicle mold with suspicion. Honestly, I was half convinced myself just moments before. It all started one sticky summer afternoon when I realized the freezer was packed with leftover fruit from a weekend brunch (kind of like the fresh berries I used for those fresh strawberry pie I made last month). Instead of tossing the extras or letting them go bad, I thought, why not make something fun and colorful? I was skeptical at first because layering fruit juices and purees seemed like a fussy job, but I gave it a go with whatever was on hand—strawberries, kiwi, mango, blueberries, and even a splash of fresh lime juice to brighten things up.
The surprise? These rainbow popsicles were not only easy to make but turned out way better than I expected—real fruit flavors shining through every colorful bite. The kitchen smelled like summer, and I found myself sneaking tastes well past the kids’ bedtime. It’s funny how a simple impulse to avoid waste became this little obsession; I ended up making them several times that week, testing different fruit combos and textures.
Those rainbow popsicles stuck with me because they’re the kind of treat that brings a quiet little joy—no artificial colors, no weird aftertaste, just fresh fruit and natural sweetness. Plus, they’re perfect for cooling off after a long, busy day or adding a cheerful splash to a casual backyard hangout. Something about seeing the layers set perfectly in the mold made me realize that sometimes the best recipes come from just playing around with what you have. If you’re wondering why these might become your new summer staple, well, you’re about to find out.
Why You’ll Love This Fresh Homemade Rainbow Popsicles Recipe
I’ve been making these popsicles on repeat, and here’s why they’ve earned a permanent spot in my freezer:
- Quick & Easy: You can whip these up in about 15 minutes of active time, plus freezing. No complicated steps or hard-to-find ingredients.
- Simple Ingredients: Only real, fresh fruit and a touch of natural sweetener if you like. No artificial colors or preservatives—just pure goodness.
- Perfect for Summer Gatherings: Whether it’s a casual BBQ or a family brunch, these popsicles bring instant fun and color (they even make a great addition to a mimosa bar setup!).
- Crowd-Pleaser: Kids adore the bright layers, and adults appreciate the fresh fruit flavor combo—something that’s both nostalgic and refreshing.
- Unbelievably Delicious: The layers aren’t just for show. Each popsicle offers a juicy burst of natural sweetness with a hint of tartness, balancing perfectly.
What sets this recipe apart is how it brings out the natural vibrancy of each fruit without needing artificial dyes or complicated syrups. I like to blend some fruits lightly for a smooth layer and leave others chunkier for texture—plus, adding just a splash of fresh lime juice or a hint of mint can make each layer pop with brightness. This isn’t just your run-of-the-mill popsicle; it’s a fresh take that feels homemade with care but looks like a treat you’d find in a boutique shop.
Honestly, it’s the kind of recipe that makes you smile after the first bite and want to share with friends, knowing it’s a little celebration of summertime fun in every stick.
What Ingredients You Will Need
This recipe relies on fresh, wholesome ingredients that come together to create bold, natural flavors. Most are pantry staples or common fresh produce, making these popsicles easy to prepare whenever the mood strikes. Feel free to swap fruits based on seasonality or personal preference.
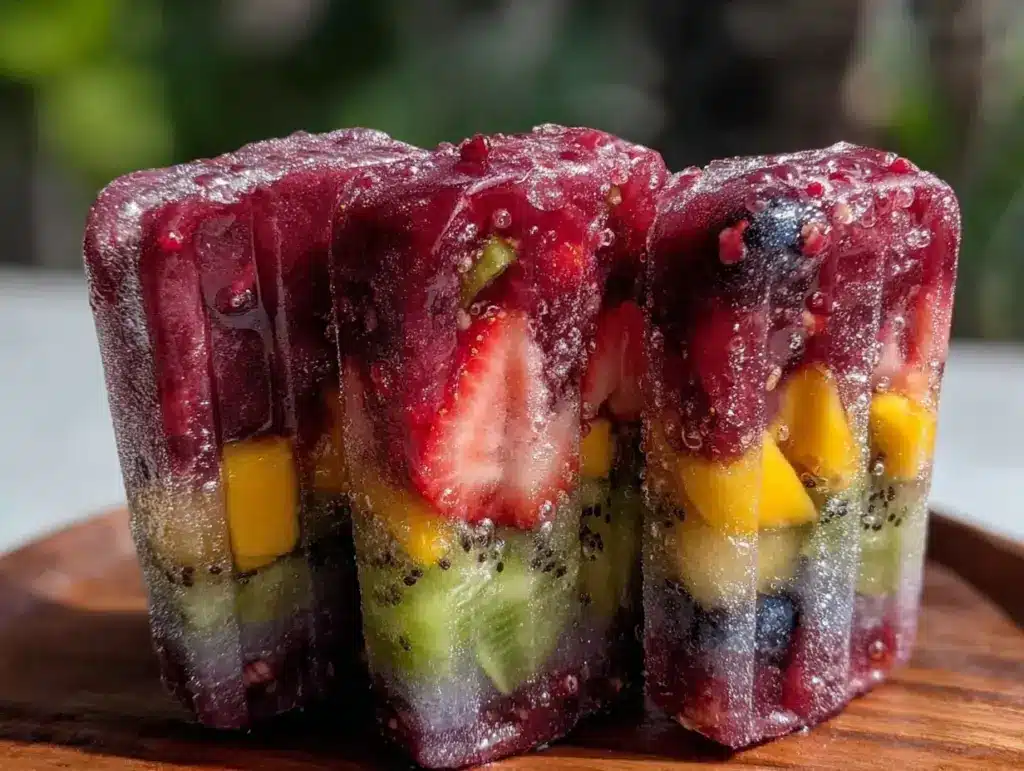
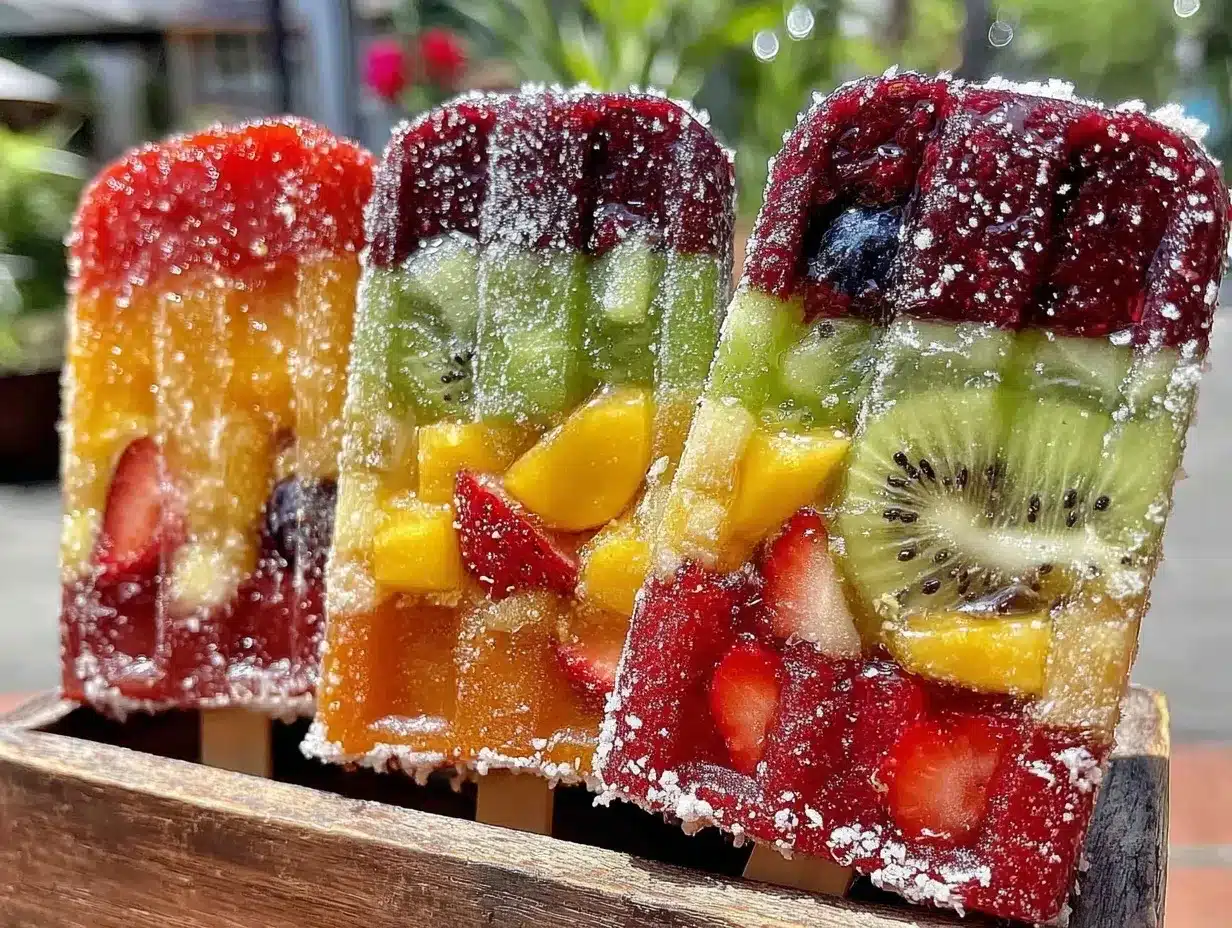
- Strawberries: Fresh, hulled, and sliced (or frozen if fresh aren’t available)—adds a sweet and slightly tart red layer.
- Mango: Peeled and diced or pureed—brings a tropical, sunny yellow hue and creamy texture.
- Kiwi: Peeled and sliced or blended—adds a bright green color with a tangy punch.
- Blueberries: Fresh or frozen—provides a deep purple-blue layer packed with antioxidants.
- Lime juice: Freshly squeezed, just a tablespoon—brightens the fruit flavors and balances sweetness naturally.
- Honey or Maple Syrup (optional): Just a teaspoon or two to gently sweeten if your fruit needs a little boost (I prefer local honey for its flavor).
- Water or Coconut Water: About 1/4 cup (60 ml) per fruit layer, to thin purees for easy pouring and freezing.
For the best results, choose ripe, flavorful fruit—nothing too underripe or overly mushy. If you want a dairy twist, a little Greek yogurt swirled in one layer can add creaminess without overpowering the fresh fruit taste. I’ve found using a blend of fresh and frozen fruit works well too, especially for off-season pops.
Depending on availability, you might swap mango for peaches or papaya, and kiwi for green grapes or honeydew melon. If you need a gluten-free or vegan option, rest assured this recipe is naturally free of gluten and animal products (unless you add yogurt, which you can skip or replace with coconut yogurt).
Equipment Needed
Making these rainbow popsicles requires just a few straightforward kitchen tools—nothing fancy or expensive. Here’s what you’ll want close at hand:
- Popsicle molds: Standard plastic or silicone molds work perfectly. I prefer silicone for easier unmolding, but plastic molds with removable sticks do the job fine.
- Blender or food processor: For pureeing fruit quickly and evenly. A good-quality blender like a Ninja or Vitamix makes smoother layers, but a simple countertop blender is fine too.
- Mixing bowls: To combine fruit puree with liquids or sweeteners before layering.
- Measuring cups and spoons: For accuracy, especially with sweeteners and lime juice.
- Spatula or spoon: For scraping down the blender and spreading layers evenly.
Don’t worry if you don’t have specialized popsicle molds—small paper cups with wooden sticks work in a pinch. Just be sure to cover the cups with foil and poke the sticks through before freezing. After trying both plastic and silicone molds over the years, I find silicone molds give you that clean pop-out feeling every time without cracking or sticking.
Preparation Method
- Prepare your fruit: Wash, peel, and slice or dice the strawberries, mango, kiwi, and blueberries as needed. For a smoother layer, puree each fruit separately in a blender with about 1/4 cup (60 ml) of water or coconut water until smooth.
- Sweeten and balance: Add 1 teaspoon of honey or maple syrup and about 1 teaspoon of fresh lime juice to each fruit puree. Taste and adjust sweetness or acidity as needed. Remember, freezing dulls flavors slightly, so a little extra brightness helps.
- Layer the popsicles: Pour the strawberry puree evenly into the bottom of each mold, filling about 1/5 of the way. Freeze for about 30 minutes until the layer is firm but not rock solid.
- Repeat with each fruit: Add mango puree for the second layer, freeze again for 30 minutes. Follow with kiwi and then blueberry, freezing between each layer. This slow freezing helps keep the layers distinct and prevents colors from mixing.
- Add sticks and final freeze: After the last layer, insert the popsicle sticks if your molds don’t have built-in holders. Freeze for at least 4 hours or overnight until fully set.
Tip: If you notice any cracks forming in the layers, it usually means the puree was too thick or frozen too long between layers; adding a little more water or thinning the puree helps keep popsicles smooth and less brittle. When unmolding, run the molds briefly under warm water to loosen the popsicles for an easy release.
This method might seem like a bit of patience is involved, but honestly, it’s fun to watch those vibrant layers build up. I often make these alongside other brunch favorites like my fluffy lemon ricotta pancakes for a bright, fresh spread.
Cooking Tips & Techniques
Getting perfect rainbow popsicles isn’t rocket science, but a few little tricks make a big difference:
- Use ripe fruit for natural sweetness: That means bright colors and full flavor without needing too much added sugar.
- Thin your purees: Adding a bit of water or coconut water lets the fruit layers freeze smoothly and pour easily, which helps avoid those icy, hard popsicles.
- Freeze in stages: Don’t rush the layering process; letting each layer set firm but not frozen solid helps the colors stay separated and pretty.
- Mind the sweetness: Freezing dulls flavors, so err slightly on the side of more lime juice or honey, but don’t overdo it or the popsicles will be too sweet.
- Unmold with warm water: A quick dip of the mold’s exterior in warm water loosens the popsicle for a clean release without melting the popsicle itself.
One time, I tried pouring all the layers at once (impatient, I know). The result was a beautiful mess of colors blending into a muted swirl—still tasty but not that crisp rainbow effect. Lesson learned! Also, blending some chunks of fruit into one layer adds a fun texture contrast that my niece absolutely loved.
Variations & Adaptations
Feel free to get creative with your rainbow popsicles based on what you like or what’s in season:
- Dairy option: Mix a layer of Greek yogurt or coconut yogurt with a bit of honey for creamy, tangy contrast.
- Herbal twist: Add fresh mint or basil leaves blended into a fruit layer for an herbal note that’s surprisingly refreshing.
- Seasonal fruits: Swap strawberries for raspberries in spring, peaches for mango in summer, or pomegranate juice in fall for a richer color.
- Lower sugar: Skip sweeteners altogether if your fruit is very ripe, or try using stevia or monk fruit for a keto-friendly version.
- Juice-based layers: Use fresh-squeezed juices like orange, watermelon, or grape for more translucent, icy layers that contrast nicely with purees.
I once tried a tropical version with pineapple, passionfruit, and coconut water that was a hit at a weekend pool party. You can also experiment with layering texture—puree some fruits smooth, chop others chunky—just to keep things interesting.
Serving & Storage Suggestions
These popsicles are best served straight from the freezer, especially on a hot day when they’re at their most refreshing. They look stunning on a platter, making them fun for parties or as a colorful finish to a weekend brunch.
To store, keep them in the popsicle molds or transfer to a freezer-safe container layered with parchment paper to prevent sticking. They keep well for up to 2 weeks without losing flavor or texture.
For quick reheating (if you can call it that), run the molds briefly under warm water to loosen the popsicles before serving again. The flavors actually mellow a bit after a day or two, which some people prefer for a softer, less sweet bite.
Nutritional Information & Benefits
Each popsicle is naturally low in calories (around 50-70 calories per serving depending on fruit and sweetener used) and packed with vitamins and antioxidants from the fresh fruit. Key benefits include:
- Vitamin C from strawberries, kiwi, and mango supports immune health.
- Fiber from the fruit helps digestion and keeps you feeling satisfied.
- Hydration from water and coconut water helps cool you down naturally.
This recipe is gluten-free, dairy-free (unless you add yogurt), and can easily be made vegan and low-sugar. It’s a wholesome summer snack that tastes indulgent without guilt, perfect for those who want a fresh treat without artificial ingredients or added junk.
Conclusion
Making homemade rainbow popsicles with real fruit is one of those simple kitchen joys that turns out to be more rewarding than expected. They’re bright, fresh, and a little playful—a perfect way to enjoy fresh fruit in a fun, kid-friendly format that adults won’t mind stealing. Plus, the layering process is oddly satisfying, and the flavor combos can be endlessly customized to your tastes.
If you’ve been on the lookout for a refreshing, no-fuss summer treat, these popsicles might just become your go-to. I love that they bring a bit of color and happiness to the table without any complicated prep or weird ingredients. Give it a try, and let me know how you remix the layers or what fruit combos you find irresistible!
And hey, if you’re inspired by fresh fruit recipes, you might really enjoy my fresh rainbow fruit salad, which shares a similar love for seasonal produce and bright flavors.
Frequently Asked Questions About Fresh Homemade Rainbow Popsicles
Can I use frozen fruit instead of fresh?
Yes! Frozen fruit works well, especially when fresh isn’t available. Just thaw and drain any excess liquid before blending to avoid overly watery layers.
How long do these popsicles last in the freezer?
They stay delicious for up to 2 weeks. After that, the texture might start to degrade, but they’re still safe to eat longer.
Can I make these without a popsicle mold?
Absolutely. Use small paper cups or silicone muffin liners and insert wooden sticks. Cover the top with foil to hold the sticks upright while freezing.
What if my popsicles are too icy or hard?
Try adding a bit more water or coconut water to thin the purees. Also, avoid freezing layers too long before adding the next to keep texture smooth.
Can I make these ahead for a party?
Yes! Making them a day or two in advance works great, just keep them well-covered in the freezer to prevent freezer burn.
Pin This Recipe!
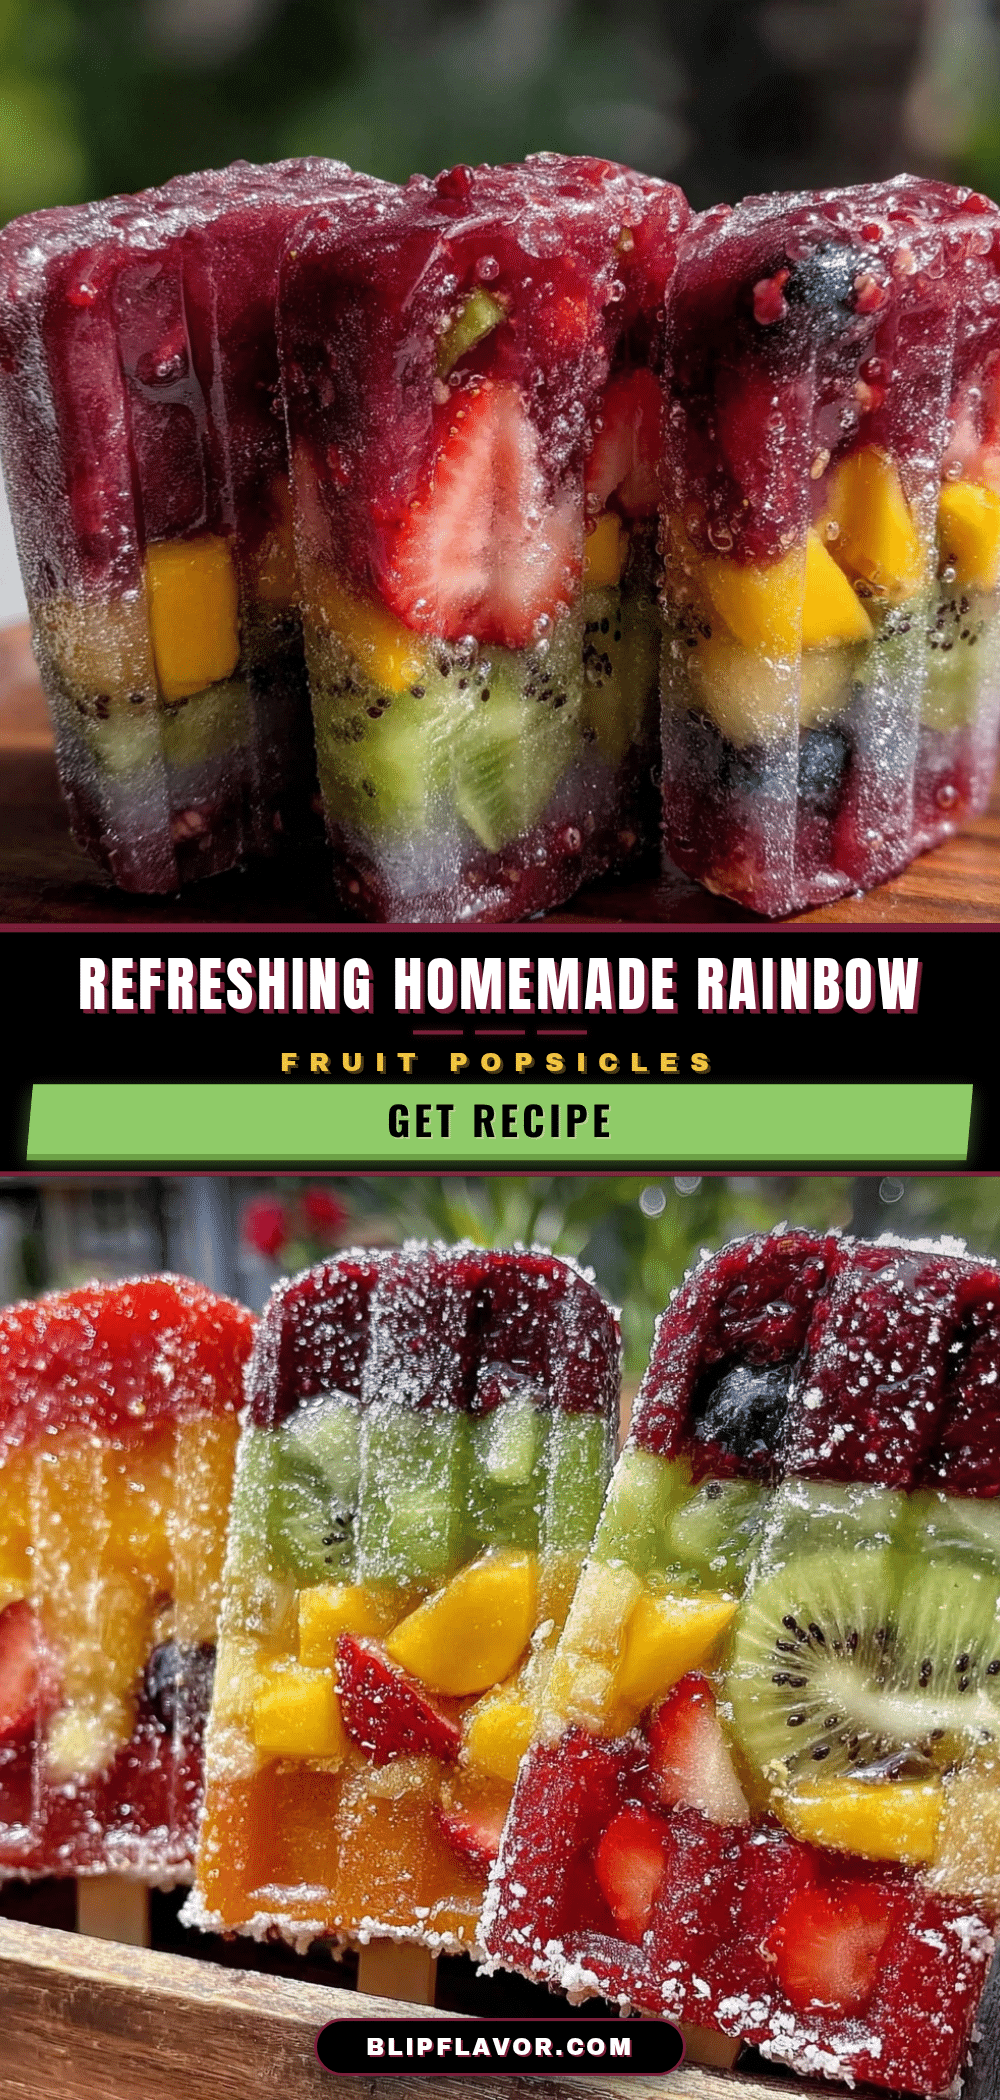
Fresh Homemade Rainbow Popsicles
These vibrant rainbow popsicles are made with real fresh fruit and natural sweeteners, perfect for a refreshing summer treat that’s easy to make and fun to eat.
- Prep Time: 15 minutes
- Cook Time: 5 hours (including freezing time)
- Total Time: 5 hours 15 minutes
- Yield: 6 popsicles 1x
- Category: Dessert
- Cuisine: American
Ingredients
- Fresh strawberries, hulled and sliced (or frozen)
- Mango, peeled and diced or pureed
- Kiwi, peeled and sliced or blended
- Blueberries, fresh or frozen
- 1 tablespoon fresh lime juice
- 1–2 teaspoons honey or maple syrup (optional)
- 1/4 cup (60 ml) water or coconut water per fruit layer
Instructions
- Wash, peel, and slice or dice the strawberries, mango, kiwi, and blueberries as needed.
- Puree each fruit separately in a blender with about 1/4 cup (60 ml) of water or coconut water until smooth.
- Add 1 teaspoon of honey or maple syrup and about 1 teaspoon of fresh lime juice to each fruit puree. Taste and adjust sweetness or acidity as needed.
- Pour the strawberry puree evenly into the bottom of each popsicle mold, filling about 1/5 of the way. Freeze for about 30 minutes until the layer is firm but not rock solid.
- Repeat with mango puree for the second layer, freeze again for 30 minutes.
- Follow with kiwi and then blueberry purees, freezing between each layer.
- After the last layer, insert the popsicle sticks if molds don’t have built-in holders.
- Freeze for at least 4 hours or overnight until fully set.
- To unmold, run the molds briefly under warm water to loosen the popsicles.
Notes
Use ripe fruit for natural sweetness and bright colors. Thin purees with water or coconut water to ensure smooth freezing. Freeze layers until firm but not rock solid to keep colors distinct. Run molds under warm water to easily unmold popsicles. Optional: add Greek or coconut yogurt for creaminess or fresh mint for herbal notes.
Nutrition
- Serving Size: 1 popsicle
- Calories: 5070
- Sugar: 12
- Sodium: 2
- Fat: 0.2
- Carbohydrates: 15
- Fiber: 2
- Protein: 1
Keywords: rainbow popsicles, homemade popsicles, fresh fruit popsicles, summer treats, healthy popsicles, natural sweetener, gluten-free, vegan


