Introduction
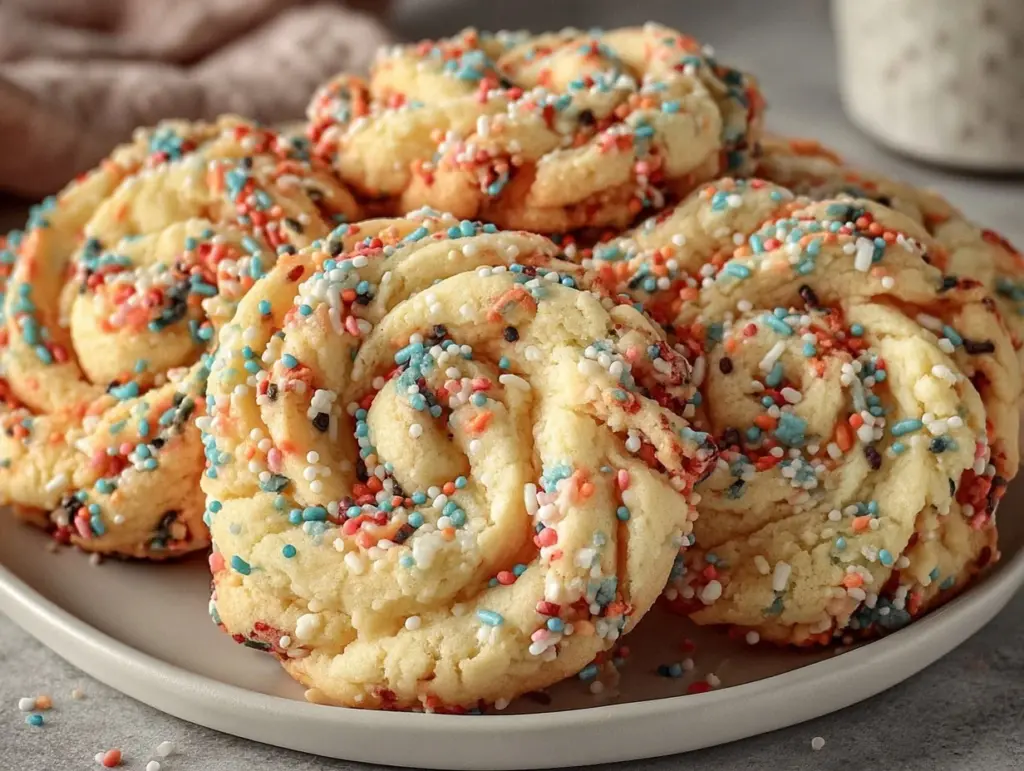
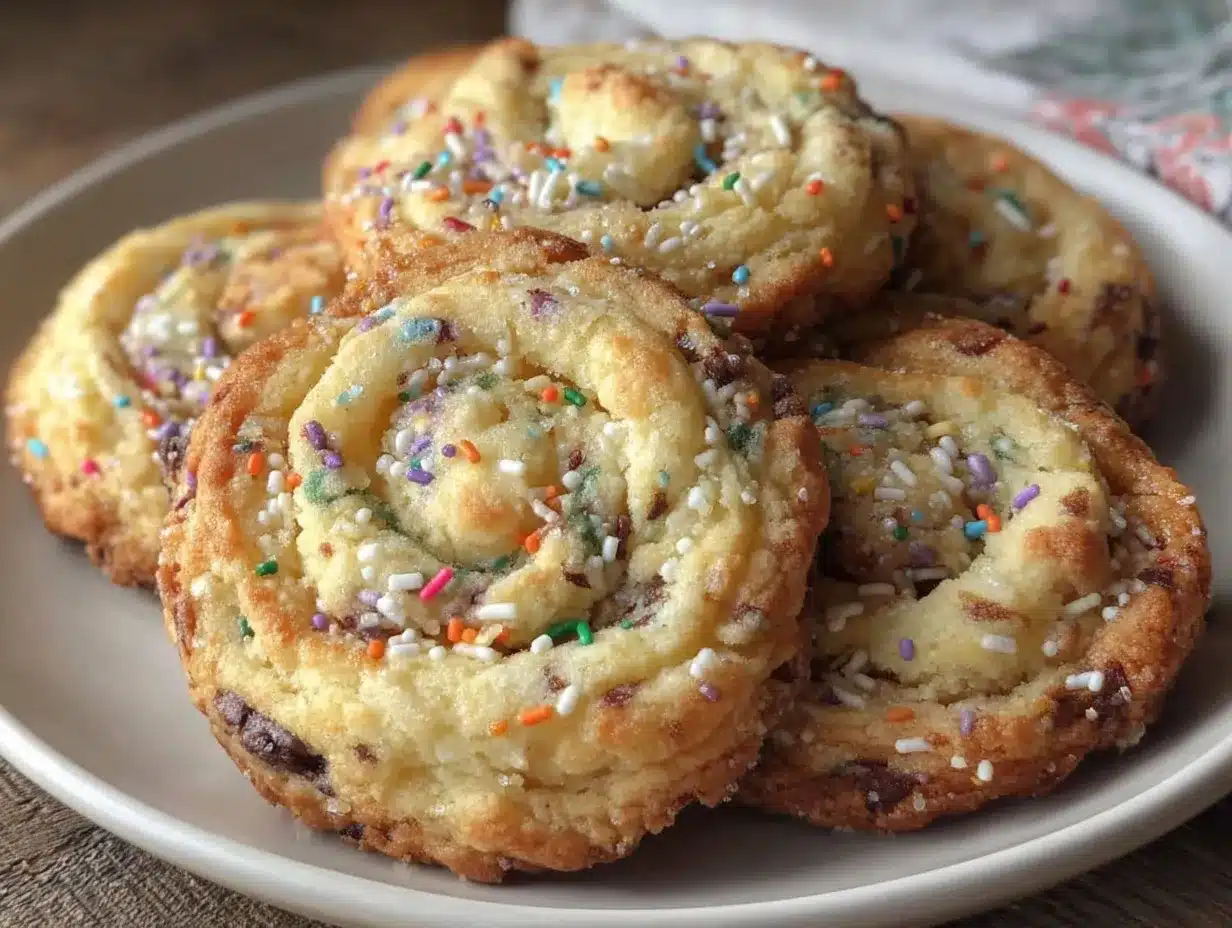
Picture this: you walk into the kitchen, and the scent of sweet, buttery goodness mixed with a hint of vanilla dances through the air. There’s a confetti of colors peeking out from golden, pillowy cookies cooling on the rack. You know those magical moments when the holidays feel close enough to touch? That’s exactly what these Fluffy Funfetti Swirled Butter Cookies bring to your home—especially when you’re craving some Christmas baking cheer.
The first time I made these cookies, it was one of those chilly December afternoons where the sky looked just a little bit grayer than usual. I wanted to whip up something that would make my kitchen feel warm and alive (and give my kids a reason to abandon their screens for a while). I was instantly hooked after the first batch—soft, fluffy, and full of rainbow sprinkles, the kind of moment where you pause, take a deep breath, and just smile because you know you’re onto something truly special.
This recipe has roots in our family’s holiday traditions. Years ago, my grandma used to make classic butter cookies, and let’s face it, they were good—but these? They’re dangerously easy and just so much fun. I stumbled upon the idea to swirl in funfetti on a rainy weekend, half trying to recreate those bakery-style cookies you see on Pinterest, half just wanting to add a little sparkle to our Christmas cookie tray. My family couldn’t stop sneaking them off the cooling rack (and I can’t really blame them). Now, these Fluffy Funfetti Butter Cookies have become a staple for family gatherings, last-minute gifting, and even those cozy nights when you just need a sweet treat.
Honestly, if you love pure, nostalgic comfort and a recipe that feels like a warm hug, you’re going to want to bookmark this one. I’ve tested it more times than I care to admit (all in the name of research, of course), and it’s perfect for potlucks, cookie exchanges, or just brightening up your Pinterest feed. Get ready to find your new favorite Christmas baking recipe—trust me, your holiday season is about to get a whole lot fluffier and more colorful!
Why You’ll Love This Recipe
When it comes to holiday cookies, I’ve baked my way through dozens of recipes, and these Fluffy Funfetti Butter Cookies truly stand out. Years of tweaking and testing in my own kitchen (and a few hilarious fails along the way) have led to this cozy masterpiece. Whether you’re a seasoned baker or just dipping your toes into Christmas baking, here’s why you’ll want this recipe in your rotation:
- Quick & Easy: Ready in under 35 minutes, these cookies are perfect for busy weeknights or when you realize you forgot to make something for the school bake sale.
- Simple Ingredients: No fancy grocery trips here—you probably already have everything you need in your pantry.
- Perfect for Christmas: These cookies look festive and bright, making them ideal for holiday parties, cookie swaps, or even as edible gifts.
- Crowd-Pleaser: My kids, neighbors, and even picky relatives rave about the soft texture and playful sprinkles. They disappear fast—sometimes before they even cool!
- Unbelievably Delicious: The combination of butter, vanilla, and those cheerful funfetti swirls creates a classic flavor with a whimsical twist. It’s comfort food at its fluffiest.
What sets this recipe apart? Honestly, it’s the technique. Creaming the butter until it’s truly light and fluffy (don’t rush this step!) gives you cookies with an airy, cake-like texture. Swirling in funfetti instead of just mixing means every bite is a celebration. If you’re looking for a Christmas baking recipe that’s easy, stunning, and just plain fun, these are your best bet.
This is the kind of cookie that makes you close your eyes after the first bite. It’s Christmas nostalgia mixed with a little Pinterest magic—healthier than some versions, faster than you’d expect, and still packed with all the soul-soothing satisfaction you crave. If you want to impress guests without stress or turn a simple moment into something memorable, this recipe is your ticket.
What Ingredients You Will Need
This recipe uses simple, wholesome ingredients to deliver bold flavor and satisfying texture without the fuss. Most of what you’ll need are pantry staples, and there’s plenty of room to play with substitutions if you’re baking for different diets or just running low on something.
- For the cookie dough:
- 1 cup (226g) unsalted butter, softened (adds richness and that classic buttery flavor)
- 1 cup (200g) granulated sugar (for sweetness and structure)
- 2 large eggs, room temperature (make sure they’re not cold for better mixing)
- 2 1/2 cups (315g) all-purpose flour (King Arthur is my go-to for consistent results)
- 1/2 teaspoon baking powder (for a hint of lift)
- 1/4 teaspoon baking soda (helps keep things fluffy)
- 1/2 teaspoon salt (balances the sweetness)
- 2 teaspoons pure vanilla extract (McCormick is a solid choice; it makes a difference!)
- For the funfetti swirl:
- 1/2 cup (80g) rainbow sprinkles (look for “jimmies” style—they hold up best in baking)
- Optional: 1 tablespoon holiday-themed sprinkles (for extra Christmas flair)
- For decorating:
- Additional sprinkles, colored sanding sugar, or edible glitter (to make them Pinterest-perfect)
- Substitution tips:
- Use gluten-free all-purpose flour blend for a GF version (Bob’s Red Mill is reliable)
- Swap in plant-based butter for a dairy-free option—Earth Balance works well
- If you’re out of vanilla, try almond extract for a twist (just use half the amount)
- Egg allergy? Replace with 1/4 cup unsweetened applesauce per egg
- Ingredient notes:
- Sprinkles matter! Nonpareils tend to bleed color, so stick to larger jimmies for a true funfetti effect
- Don’t skimp on real butter if you want that classic flavor
- Fresh eggs make the fluffiest cookies—trust me, I’ve tried it with older ones and the difference is real
Equipment Needed
You don’t need fancy gadgets for these Fluffy Funfetti Butter Cookies, but a few tried-and-true tools will make your baking smoother. Here’s what I always reach for, plus a few alternatives:
- Electric mixer: Stand mixer or hand mixer—creaming butter by hand is possible, but an electric mixer saves your arms and produces a fluffier texture
- Mixing bowls: At least two—one for wet, one for dry ingredients
- Rubber spatula: For scraping down the sides and swirling in sprinkles (wooden spoons work too)
- Baking sheets: Lined with parchment paper or silicone baking mats for easy removal and cleanup
- Cookie scoop: Medium-sized scoop ensures even cookies; you can use two spoons if you don’t own one
- Wire cooling rack: For perfect cooling—don’t skip this step, or your cookies may get soggy underneath
- Measuring cups & spoons: For accuracy—baking is a science!
- Optional: Sifter for flour (if you want super light cookies)
I’ve used budget-friendly mixing bowls and a hand mixer for years. If you’re investing in just one specialty item, a cookie scoop is worth it—it makes portioning so much easier and less messy. For parchment paper, I usually buy the bulk rolls; they last all season and are a lifesaver for sticky dough. If you have silicone mats, that’s even better—they’re reusable and help the cookies bake evenly. Just remember to wipe down your mixer after every batch (I learned the hard way when sprinkles got stuck in the gears last Christmas!).
Preparation Method
- Prep your ingredients and workspace: Take out the butter and eggs ahead of time so they reach room temperature. Line two baking sheets with parchment paper or silicone mats. Preheat the oven to 350°F (175°C).
- Cream the butter and sugar: In a large mixing bowl, beat 1 cup (226g) unsalted butter and 1 cup (200g) granulated sugar with an electric mixer on medium speed for about 3–4 minutes. The mixture should become pale, fluffy, and noticeably lighter in texture. (If it looks grainy, keep mixing.)
- Add eggs and vanilla: Crack in 2 large eggs, one at a time, mixing well after each addition. Pour in 2 teaspoons vanilla extract and beat until combined. The dough will look creamy and smooth (if it splits a little, don’t worry—it’ll come together with flour).
- Combine dry ingredients: In a separate bowl, whisk together 2 1/2 cups (315g) all-purpose flour, 1/2 teaspoon baking powder, 1/4 teaspoon baking soda, and 1/2 teaspoon salt. (I always sift my flour for extra fluffiness, but it’s optional.)
- Mix dry into wet: Gradually add the dry ingredients to the butter mixture, beating on low speed. Scrape down the sides as needed. Mix until just combined—overmixing can make cookies tough.
- Swirl in the funfetti: Pour in 1/2 cup (80g) rainbow sprinkles and, using a spatula, gently swirl them through the dough. Don’t stir too much; you want visible streaks and pockets of color. If you want extra Christmas cheer, add 1 tablespoon holiday sprinkles.
- Shape the cookies: Use a medium-sized cookie scoop (about 1.5 tablespoons/25g) to drop dough onto your prepared baking sheets, spacing them about 2 inches (5cm) apart. If desired, sprinkle a pinch of colored sugar or edible glitter on top for sparkle.
- Bake: Place the sheets in the preheated oven and bake for 10–12 minutes. The edges should just start to turn golden, and the centers will look soft and slightly puffy. Don’t overbake—these are meant to be fluffy, not crispy!
- Cool: Let cookies sit on the baking sheet for 3–4 minutes before transferring to a wire rack. They’ll firm up as they cool. (If you rush this step, you risk breakage—trust me, I’ve made that mistake far too often.)
- Optional decorating: While cookies are still slightly warm, add extra sprinkles or drizzle a bit of melted white chocolate for a Pinterest-worthy finish. Let them set completely before storing.
Notes: If your dough feels sticky, chill it for 15–20 minutes before scooping. For extra fluff, try doubling the baking powder (but reduce the baking soda to just a pinch). You want the cookies to look pale and puffy, with bursts of color throughout—when they smell sweet and buttery, and the kitchen feels warm, you’re done!
Cooking Tips & Techniques
Years of cookie baking (and a few flops) have taught me a lot about what really makes these Fluffy Funfetti Butter Cookies shine. Here are some hard-earned tips and tricks you’ll want to keep handy:
- Creaming matters: Don’t rush the butter and sugar step! If you cut corners here, your cookies won’t be nearly as airy or soft. Let the mixer do its thing—give it 3–4 full minutes.
- Room temperature ingredients: Cold eggs or butter can cause your dough to split or bake unevenly. I sometimes set mine on the stovetop (not too close to the heat!) while I prep everything else.
- Sprinkle selection: Use jimmies, not nonpareils. Nonpareils bleed into the dough and turn it muddy. Jimmies keep their color and shape, giving you that classic funfetti look.
- Don’t overbake: It’s tempting to wait for a deep golden edge, but these cookies are best when just barely set. The centers will firm up as they cool.
- Batch baking: If you’re making a double batch (which, honestly, you probably should), bake one sheet at a time in the center of the oven. Rotate halfway for even browning.
- Chilling the dough: If your kitchen is warm or the dough feels too soft, a quick chill helps the cookies hold their shape. Fifteen minutes is usually enough.
- Decorating: For sharp, Instagram-worthy sprinkles, add extra on top right after baking while the cookies are still soft. They’ll stick better and look more festive.
Common mistakes? Overmixing after adding flour (makes cookies tough), using melted butter (leads to flat cookies), and forgetting to line your baking sheets (they’ll stick like crazy). If you end up with flat or crunchy cookies once, don’t sweat it—just adjust your mixing or oven time next round. Multitasking? I usually whip up a batch while dinner is simmering—just keep an eye on the timer!
Consistency is key. Measure your ingredients carefully (I use a kitchen scale for flour now, and it’s a game-changer). When in doubt, err on the side of underbaking—these cookies are meant to be soft, fluffy, and just a little bit gooey in the center.
Variations & Adaptations
No two holiday seasons are exactly alike, and these Fluffy Funfetti Butter Cookies are endlessly customizable. Here are a few ways I’ve switched things up over the years—some out of necessity, some just for fun:
- Gluten-free: Swap the all-purpose flour for a gluten-free blend (Bob’s Red Mill or Cup4Cup). They come out just as fluffy, though maybe a bit more delicate.
- Dairy-free: Use plant-based butter and dairy-free sprinkles. Earth Balance works great, and the flavor stays rich.
- Seasonal flavors: Stir in 1/2 teaspoon cinnamon and a pinch of nutmeg for a warm, wintery twist. Or add 1/4 teaspoon peppermint extract with the vanilla for a cool Christmas vibe.
- Chocolate lovers: Mix in 1/3 cup mini chocolate chips with the sprinkles, or drizzle cooled cookies with melted chocolate.
- Different shapes: Use cookie cutters for stars, trees, or hearts—just chill the dough longer so it holds its form.
- Allergen swaps: For egg-free cookies, use unsweetened applesauce (1/4 cup per egg) or a flaxseed egg. They’ll be a bit chewier but still delicious.
- My favorite variation: Last Christmas, I added red and green sanding sugar on top and a drop of almond extract. The flavor was festive, and they looked like they belonged on a holiday card.
Don’t be afraid to customize these cookies for your own taste or dietary needs. The base dough is forgiving, and a little experimentation goes a long way. Honestly, some of my best batches came from “let’s just see what happens” moments!
Serving & Storage Suggestions
These cookies are best served fresh and slightly warm, when their fluffiness is at peak. I like to pile them high on a festive plate, sprinkle with extra funfetti, and pair with a mug of hot cocoa or spiced tea. They make a gorgeous centerpiece for any Christmas dessert table or cookie exchange.
- Serving temperature: Room temp is ideal, but a quick 10-second microwave zap brings back their bakery-fresh softness.
- Presentation: Arrange on a tiered stand or in a rustic basket lined with parchment paper—add a sprig of holly or a few candy canes for extra holiday flair.
- Pairings: Goes wonderfully with mulled cider, peppermint lattes, or even a scoop of vanilla ice cream for dessert.
- Storage: Store in an airtight container at room temperature for up to 5 days. They’ll stay soft, though the sprinkles may bleed a bit over time (not a big deal, just less Instagram-worthy).
- Freezing: Freeze baked cookies for up to 2 months—layer with parchment between. Thaw at room temp, then reheat for 10 seconds in the microwave.
- Reheating tips: If you like extra gooey centers, just microwave a cookie for a few seconds. For crispier edges, pop in the oven at 300°F (150°C) for 2–3 minutes.
Honestly, the flavors deepen a little after a day or two—if you can resist eating them all right away. Perfect for prepping ahead for parties or holiday gifting!
Nutritional Information & Benefits
Each Fluffy Funfetti Butter Cookie is estimated to have about 110 calories, 6g fat, 14g carbs, and 1g protein (based on a batch of 28 cookies). They’re indulgent, but not over-the-top—perfect for a holiday treat that won’t leave you feeling weighed down.
Key ingredients like butter and eggs provide healthy fats and a little protein, while the sprinkles add joy and color (okay, not much nutrition, but plenty of holiday spirit). If you use gluten-free flour or swap out dairy, the cookies remain friendly for common dietary needs. Just keep in mind they do contain wheat, eggs, and dairy (unless you make substitutions).
From my own wellness perspective, I think it’s all about balance. These cookies are special—made for celebrating, sharing, and making memories. Enjoy a few, savor the moment, and know you’re nourishing your soul as much as your taste buds.
Conclusion
If you’re searching for a Christmas baking recipe that’s easy, fun, and guaranteed to get rave reviews, look no further than these Fluffy Funfetti Butter Cookies. They’re everything you want in a holiday treat—soft, buttery, and bursting with cheerful color. You can stick to the classic version or try one of the many variations to make them your own.
I love these cookies because they bring people together. Whether you’re baking with family, gifting to friends, or just sneaking one for yourself with a cup of tea, they’re pure joy in every bite. So go ahead—make a batch, share your twists, and let me know in the comments how you customized them for your crew.
Here’s wishing you a holiday filled with laughter, good eats, and the kind of cookies that make you smile. Happy baking!
FAQs
Can I make these Fluffy Funfetti Butter Cookies ahead of time?
Absolutely! You can bake them a day or two in advance—just store in an airtight container at room temperature, and they’ll stay soft and delicious.
Can I freeze the cookies or the dough?
Yes, both freeze well. Freeze the baked cookies in layers with parchment paper for up to 2 months. For dough, scoop onto trays, freeze, and then store in freezer bags until ready to bake.
What kind of sprinkles are best for funfetti cookies?
Jimmies-style sprinkles hold up best in baking. Nonpareils tend to bleed and can make the dough look muddy, so stick with larger, colorful jimmies for that classic funfetti look.
How do I make these cookies gluten-free?
Just swap the all-purpose flour for a gluten-free blend like Bob’s Red Mill or Cup4Cup. The cookies will turn out fluffy, though a bit more delicate.
Can I use margarine or vegan butter instead of regular butter?
Definitely! Plant-based butters like Earth Balance work well. The flavor will be slightly different, but you’ll still get soft, fluffy cookies—perfect for dairy-free baking.
Pin This Recipe!

Fluffy Funfetti Butter Cookies
These soft, fluffy butter cookies are swirled with colorful funfetti sprinkles, making them a festive and easy treat for Christmas baking. Perfect for holiday parties, cookie exchanges, or cozy nights in, they come together quickly with simple pantry ingredients.
- Prep Time: 15 minutes
- Cook Time: 12 minutes
- Total Time: 27 minutes
- Yield: 28 cookies 1x
- Category: Dessert
- Cuisine: American
Ingredients
- 1 cup (226g) unsalted butter, softened
- 1 cup (200g) granulated sugar
- 2 large eggs, room temperature
- 2 1/2 cups (315g) all-purpose flour
- 1/2 teaspoon baking powder
- 1/4 teaspoon baking soda
- 1/2 teaspoon salt
- 2 teaspoons pure vanilla extract
- 1/2 cup (80g) rainbow sprinkles (jimmies style)
- Optional: 1 tablespoon holiday-themed sprinkles
- Additional sprinkles, colored sanding sugar, or edible glitter for decorating
Instructions
- Take out the butter and eggs ahead of time so they reach room temperature. Line two baking sheets with parchment paper or silicone mats. Preheat the oven to 350°F (175°C).
- In a large mixing bowl, beat unsalted butter and granulated sugar with an electric mixer on medium speed for about 3–4 minutes until pale and fluffy.
- Add eggs one at a time, mixing well after each addition. Pour in vanilla extract and beat until combined.
- In a separate bowl, whisk together flour, baking powder, baking soda, and salt. (Sift flour for extra fluffiness, optional.)
- Gradually add the dry ingredients to the butter mixture, beating on low speed until just combined. Scrape down the sides as needed.
- Gently swirl in rainbow sprinkles and optional holiday sprinkles with a spatula, being careful not to overmix.
- Use a medium-sized cookie scoop (about 1.5 tablespoons) to drop dough onto prepared baking sheets, spacing about 2 inches apart. Decorate tops with extra sprinkles or edible glitter if desired.
- Bake in preheated oven for 10–12 minutes, until edges are just golden and centers are soft and puffy. Do not overbake.
- Let cookies sit on the baking sheet for 3–4 minutes before transferring to a wire rack to cool completely.
- Optional: While cookies are still slightly warm, add extra sprinkles or drizzle with melted white chocolate. Let set before storing.
Notes
For extra fluffiness, chill dough for 15–20 minutes if sticky. Use jimmies-style sprinkles for best color. Do not overmix after adding flour. Cookies are best when just barely set and will firm up as they cool. Store in an airtight container for up to 5 days or freeze for up to 2 months.
Nutrition
- Serving Size: 1 cookie
- Calories: 110
- Sugar: 8
- Sodium: 60
- Fat: 6
- Saturated Fat: 4
- Carbohydrates: 14
- Protein: 1
Keywords: funfetti cookies, butter cookies, Christmas cookies, holiday baking, easy cookie recipe, festive cookies, sprinkles, kid-friendly, party dessert, cookie exchange


