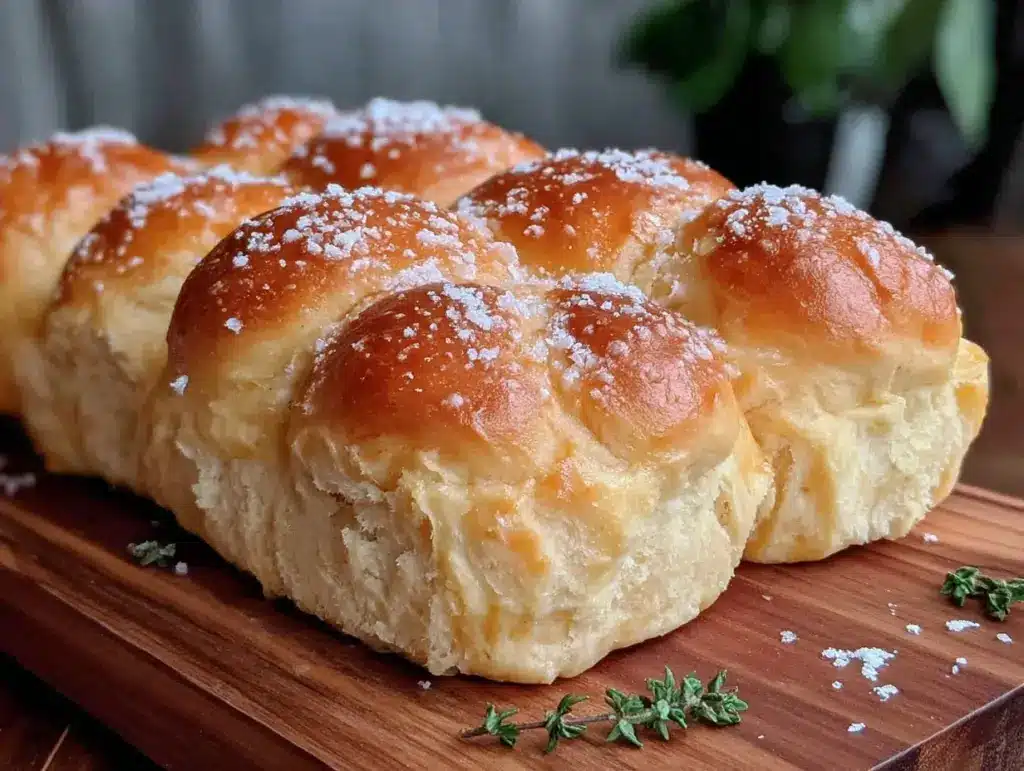
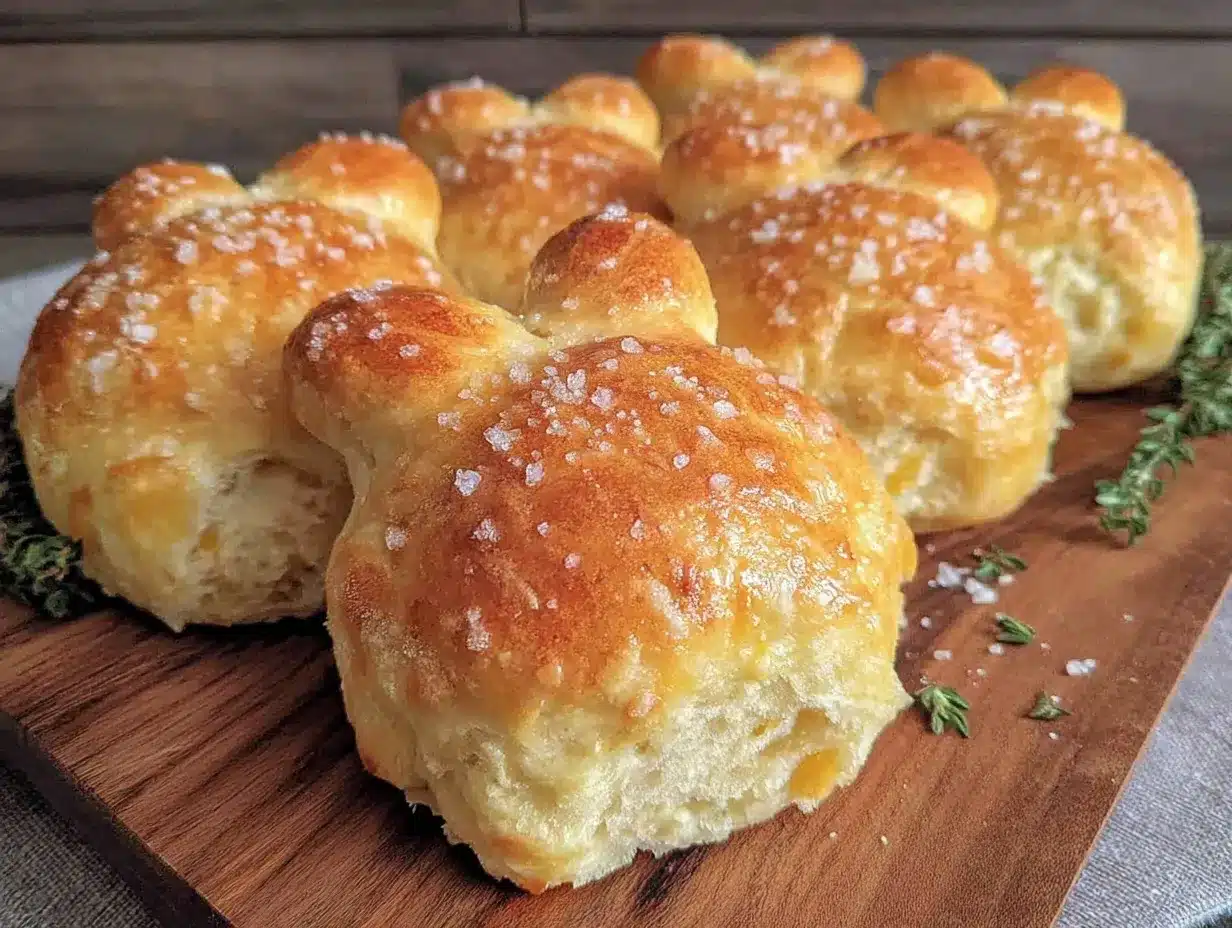
Picture this: the kitchen is filled with the cozy aroma of freshly baked bread, warm and sweet, with that barely-toasted scent that makes your stomach rumble. There’s a golden glow coming from the oven, and when you open the door, you’re greeted by the most adorable, fluffy bunny shaped dinner rolls you’ve ever seen. Their little “ears” have risen and browned just so, and you can almost hear their soft, pillowy crumb calling your name. These rolls aren’t just bread—they’re pure, whimsical joy on a tray, perfect for any springtime celebration (especially Easter, but honestly, you don’t need a holiday as an excuse).
The first time I shaped dough into bunnies, I was just trying to keep my kids entertained on a rainy afternoon. We ended up giggling at our lopsided creations, sneaking bites before they’d even cooled. That was the moment I realized these dinner rolls were about so much more than taste—they’re about creating memories, laughing with flour-dusted hands, and pausing in the middle of a busy day to just…smile. That’s the kind of moment you want to bottle up and keep forever.
Growing up, my grandma made the softest, fluffiest white bread, and I swear the memory of those loaves is baked right into my DNA. These bunny rolls are a sweet nod to her—simple ingredients, gentle kneading, and a little imagination. I wish I’d thought of this years ago for Easter brunches and spring potlucks. My family can’t resist them, and I’ve caught more than one person plucking an ear off a bunny while “checking if they’re cool enough.” (Who could blame them?)
Honestly, these fluffy bunny shaped dinner rolls are dangerously easy to whip up, and they bring pure, nostalgic comfort to any table. They’re just right for brightening up your Pinterest board, a sweet treat for your kids, or a showstopper for your next family gathering. I’ve tested this recipe more times than I can count (in the name of research, of course), and it’s become a staple for gifting, brunches, and cozy dinners. If you’re after a bread recipe that feels like a warm hug and puts a smile on everyone’s face, you’re going to want to bookmark this one.
Why You’ll Love These Fluffy Bunny Shaped Dinner Rolls
I’ve baked a lot of bread in my day—everything from chewy sourdough to sweet cinnamon rolls. But these bunny shaped dinner rolls? They’re in a class of their own. Here’s why you’ll find yourself coming back to this recipe again and again:
- Quick & Easy: These rolls come together in just over an hour (with most of that being hands-off rising time), so you can whip them up for a last-minute family dinner or a spontaneous brunch.
- Simple Ingredients: No fancy bread flours or hard-to-find additions here—just milk, yeast, flour, butter, and a pinch of sweetness. You probably have everything in your pantry right now.
- Perfect for Easter (or Any Time!): Honestly, they’re a hit at any spring gathering, but I also bake them for birthday parties, baby showers, or “just because.” They’re always welcome on any table.
- Crowd-Pleaser: Kids light up when they see these on the plate, but the grown-ups are just as excited. I’ve never had leftovers, and friends always ask for the recipe.
- Unbelievably Delicious: The combination of a soft, fluffy interior and a golden, barely-sweet crust is the definition of comfort food. Pulling apart a bunny ear is just the cherry on top.
What really sets this recipe apart is how approachable it is. No intimidating steps, no dough acrobatics—just gentle kneading and a bit of shaping fun. I like to brush the finished rolls with a little melted butter for extra shine and softness. Shaping the bunnies is easier than you’d think, and even if they come out a bit wonky, they’re still adorable (and, let’s be honest, the “imperfect” ones always taste best because you get to eat them first!).
This isn’t just another bread recipe. It’s a way to bring a little magic to your meal, to make ordinary moments feel special, and to share a bit of happiness with the people you love. Whether you’re a bread-making pro or a total beginner, these fluffy bunny shaped dinner rolls will have you grinning from ear to ear (pun totally intended). They’re the kind of food you close your eyes for that first bite—and maybe the second and third, too. Comfort food, but with a playful twist.
What Ingredients You Will Need
This recipe uses simple, wholesome ingredients to deliver a soft, pillowy crumb, a subtle buttery flavor, and that perfect golden crust. Most of these are pantry staples, and you can easily swap in alternatives if needed. Here’s what you’ll need for your fluffy bunny shaped dinner rolls:
- For the Dough:
- Whole milk, warm (1 cup / 240 ml) – Use 2% or whole for a richer dough. Dairy-free milk works in a pinch, but the rolls will be slightly less tender.
- Active dry yeast (2 1/4 teaspoons / 7 g or 1 packet) – Make sure it’s fresh for the best rise.
- Granulated sugar (2 tablespoons / 25 g) – Adds a subtle sweetness and helps the yeast do its thing.
- Unsalted butter, softened (4 tablespoons / 55 g) – Room temperature is best for easy mixing. Salted butter works, just reduce added salt slightly.
- Large egg, room temperature (1) – Binds the dough and adds softness.
- All-purpose flour (3 cups / 375 g) – I recommend King Arthur for a soft crumb. You can use bread flour for chewier rolls.
- Kosher salt (1 teaspoon / 6 g) – Balances the sweetness and brings out the flavors.
- For Shaping & Glaze:
- Additional flour (as needed, for dusting and shaping)
- Raisins, mini chocolate chips, or currants – For the bunny eyes (totally optional, but cute)
- Melted butter (1 tablespoon / 14 g) – For brushing on after baking for extra softness and shine
Ingredient Tips:
- If you want to make these dairy-free, use oat or almond milk and a vegan butter substitute. The texture stays fluffy but with a slightly different flavor.
- For a whole wheat version, swap in up to 1 cup (120 g) whole wheat flour and reduce the all-purpose flour slightly. Rolls will be a little denser, but still soft and tasty.
- No eggs on hand? Try 1/4 cup (60 ml) plain Greek yogurt as a substitute for binding and moisture.
- For spring flair, toss in a teaspoon of orange or lemon zest to the dough—it brightens the flavor beautifully.
I find that the best bunny rolls come from using ingredients at room temperature, especially the egg and butter. It makes the dough smoother and easier to shape, and helps everything rise more evenly. You don’t need anything fancy for this recipe—just a little patience, a warm kitchen, and a sense of fun!
Equipment Needed
You don’t need a commercial kitchen to make these fluffy bunny shaped dinner rolls. Here’s what you’ll want to have ready:
- Large mixing bowl: I use a glass bowl because it’s easy to see the dough rise, but any big bowl works.
- Measuring cups and spoons: Standard sets are perfect. A kitchen scale is handy for precise flour measurements, but not required.
- Wooden spoon or dough whisk: For mixing the dough. A stand mixer with a dough hook makes things easier, but isn’t essential.
- Baking sheet / Cookie tray: Lined with parchment paper for easy cleanup.
- Plastic wrap or clean kitchen towel: To cover the dough as it rises.
- Bench scraper or sharp knife: For dividing the dough. A butter knife works in a pinch (just dust with flour).
- Pastry brush: For brushing on melted butter. You can use a clean paper towel if you don’t have one.
If you don’t have a stand mixer, kneading by hand works just fine—think of it as a little upper body workout. For shaping, I sometimes use a small kitchen scale to keep my bunny bodies even, but it’s not required. Clean hands and a playful attitude are the most important tools here! If you’re missing parchment paper, just grease your baking sheet well and keep an eye on the rolls as they bake.
Pro tip: If you bake a lot, invest in a sturdy metal bench scraper. It makes dividing dough and cleaning up floury countertops so much simpler. Mine has lasted for years with just a quick wash and dry after each use.
How to Make Fluffy Bunny Shaped Dinner Rolls
-
Warm the Milk & Proof the Yeast (5 minutes):
Gently warm 1 cup (240 ml) of milk until just lukewarm (about 100°F/38°C—test with your finger, it should feel like warm bathwater). Pour it into your mixing bowl, sprinkle over 2 1/4 teaspoons (7 g) active dry yeast and 2 tablespoons (25 g) sugar. Stir and let sit for 5-10 minutes, until foamy and bubbly. If it doesn’t foam, your yeast might be old—start over with a fresh packet.
-
Mix the Dough (10 minutes):
Add 4 tablespoons (55 g) softened butter, 1 large egg, and 1 teaspoon (6 g) kosher salt to the yeast mixture. Stir to combine. Add 3 cups (375 g) of all-purpose flour, one cup at a time, mixing well after each addition. The dough will be sticky but should pull away from the sides of the bowl.
If using a stand mixer, use the dough hook on low speed for 2-3 minutes. If mixing by hand, use a wooden spoon and some elbow grease.
-
Knead the Dough (8-10 minutes):
Turn the dough onto a lightly floured surface. Knead by hand for 8-10 minutes, adding a little flour as needed, until the dough is smooth, elastic, and just slightly tacky. If it sticks like crazy, sprinkle on a tablespoon more flour at a time. Too dry? Wet your hands and keep going. The dough is ready when it springs back if you poke it.
-
First Rise (45 minutes):
Place the dough in a greased bowl, cover with plastic wrap or a clean towel, and let it rise in a warm, draft-free spot for about 45 minutes, until doubled in size. (On chilly days, I set mine in the oven with the light on.)
-
Shape the Bunnies (15-20 minutes):
Punch down the risen dough. Divide into 12 equal pieces (about 60 g each). For each bunny, pinch off a walnut-sized ball for the “tail” and a smaller piece for the “ears.” Roll the main piece into a smooth ball for the body. Roll the smaller piece into a short rope, then shape into a “U” for the ears. Attach to the body, pressing gently. Add a tiny ball for the tail and press in raisins or chocolate chips for eyes if you like. (Don’t worry if they look a little wonky—they’ll bake up adorable!)
-
Second Rise (20-30 minutes):
Place shaped bunnies on a parchment-lined baking sheet, leaving space between each. Cover and let rise for 20-30 minutes, until puffy.
-
Bake (13-15 minutes):
Preheat your oven to 350°F (175°C). Bake the bunnies for 13-15 minutes, until golden brown and hollow-sounding when tapped on the bottom. Rotate the tray halfway through for even color.
-
Finish & Cool:
As soon as they’re out of the oven, brush with melted butter for shine and extra softness. Let cool for 10 minutes before serving (if you can wait that long!).
Troubleshooting: If your dough isn’t rising, check that your yeast is active and your kitchen isn’t too cold. If the bunnies spread too much while baking, you may have over-proofed—next time, shape just before they’re doubled in size. And if you end up with “mutant” bunnies, just call it rustic charm (they taste just as good)!
Pro Tips & Techniques for the Fluffiest Bunny Rolls
Over the years, I’ve picked up a few tricks to guarantee soft, fluffy bunny shaped dinner rolls every time:
- Temperature Matters: Always use warm (not hot) liquid for blooming yeast. Too hot and you’ll kill the yeast; too cold and nothing happens. I once scalded my milk out of impatience and ended up with sad, dense rolls. Lesson learned—patience is key!
- Watch the Dough, Not the Clock: Rising times vary depending on your kitchen’s temperature. If in doubt, gently poke the dough—if it springs back slowly, you’re good to go.
- Don’t Over-Flour: It’s tempting to keep adding flour if things get sticky, but resist! A slightly tacky dough means soft rolls. Dust your hands and counter instead of the dough itself.
- Shaping Tips: For smooth bunny bodies, roll dough balls under your palm in a circular motion. Use just enough pressure to smooth out seams, but not so much you tear the dough.
- Creative Ears & Tails: If your ears flop over in the oven, you can twist them into knots or make “bow” bunnies for a different look. Kids love getting involved in this part—it’s not about perfection, it’s about fun.
- Brushing Butter: Don’t skip the butter brush at the end. It keeps the crust soft and adds a lovely shine.
- Multitasking: While your dough rises, prep your toppings, set the table, or whip up a quick salad. I always use this time to tidy up the kitchen (or just relax with a cup of tea).
If you’re new to bread making, don’t stress about getting every bunny identical. The magic is in their uniqueness! And if you find yourself with leftover dough scraps, roll them into mini rolls or bake as “bunny bites” for taste-testing. Practice makes perfect—and honestly, the “test” rolls always disappear first around here.
Variations & Adaptations
One of my favorite things about these fluffy bunny shaped dinner rolls is how easy they are to customize for different diets, flavors, and seasons. Here are a few ideas to get you started:
- Whole Wheat or Multigrain: Substitute up to 1 cup (120 g) of the all-purpose flour with whole wheat flour. For a hearty, nutty twist, toss in 2 tablespoons (20 g) of ground flaxseed or wheat germ.
- Dairy-Free: Use your favorite plant-based milk (almond, oat, or soy) and vegan butter. The rolls turn out just as fluffy, with a slightly nuttier taste.
- Gluten-Free: Swap in a measure-for-measure gluten-free flour blend. Add 1/2 teaspoon xanthan gum if not already included. Your rolls will be a bit denser, but still delicious and bunny-shaped!
- Sweet Bunnies: Add 1/4 cup (50 g) mini chocolate chips or dried cranberries to the dough for a sweet treat. Sprinkle with coarse sugar before baking for sparkle.
- Savory Herbed Bunnies: Mix in 1 tablespoon (3 g) chopped fresh rosemary, thyme, or chives for a savory twist. Serve with herbed butter or a sprinkle of flaky sea salt on top.
- Allergen-Friendly: For egg-free rolls, substitute with 1/4 cup (60 ml) unsweetened applesauce or plain vegan yogurt. For nut allergies, double-check your milk and butter substitutes.
Personally, I love adding lemon zest and a little honey to the dough for spring brunches. The citrus makes the rolls feel extra sunny. For Christmas, I’ve shaped these into reindeer (just add pretzel “antlers”)—the possibilities are endless. Feel free to get creative with toppings, too: poppy seeds, sesame, or even a dusting of cinnamon sugar for dessert bunnies!
Serving & Storage Suggestions
These fluffy bunny shaped dinner rolls are best served warm, straight from the oven, with a little extra butter melting into every bite. Arrange them on a pretty platter, ears pointing out, for a show-stopping centerpiece at your Easter brunch or spring feast. They pair beautifully with honey butter, fruit preserves, or a simple herbed cream cheese.
For a savory meal, serve alongside roasted chicken, ham, or a fresh green salad. Kids love them with a cup of hot cocoa or a scoop of vanilla ice cream for a sweet twist (not going to lie, so do the grown-ups). And if you’re feeling fancy, tuck a roll into each place setting for a personal touch—your guests will be delighted!
To store, cool completely, then place in an airtight container or zip-top bag. They’ll stay fresh at room temperature for up to 2 days. For longer storage, freeze in a single layer until solid, then transfer to a freezer-safe bag. Thaw at room temperature or reheat in a 300°F (150°C) oven for 5-7 minutes to restore softness. I find the flavor develops even more after a day, making leftovers (if you have any) perfect for snacking or breakfast sandwiches.
Nutritional Information & Benefits
Each fluffy bunny shaped dinner roll (without add-ins) contains approximately:
- Calories: 150
- Fat: 4 g (mostly from butter)
- Carbohydrates: 24 g
- Protein: 4 g
- Sugar: 3 g
- Sodium: 120 mg
Thanks to the milk and egg, these rolls offer a little extra protein and calcium compared to basic bread. You can make them lower in sugar by omitting the glaze or using unsweetened dairy alternatives. They’re naturally nut-free, and can be made dairy- or egg-free with the swaps above. Always double-check ingredient labels if allergies are a concern.
From a wellness perspective, there’s something joyful about baking bread—kneading dough is a kind of kitchen therapy, and sharing warm rolls with your family is good for the soul. Enjoy these as part of a balanced meal, and don’t forget to savor every bunny bite!
Conclusion
If you’re looking for a bread recipe that brings smiles, laughter, and a touch of whimsy to your table, these fluffy bunny shaped dinner rolls are the answer. They’re soft, pillowy, and just sweet enough to make everyone reach for seconds (or thirds). Whether you keep things classic or try a fun variation, you’ll find yourself making these not just for Easter, but anytime you want to add a little magic to your meal.
I love how these rolls turn a simple gathering into a special occasion. The shaping is playful, the taste is pure comfort, and the memories you’ll make are truly priceless. Don’t be afraid to put your own spin on them—add herbs, swap flours, or let your kids create a whole bunny family. If you try this recipe, I’d love to hear how it turned out! Leave a comment, share your photos, or tag me on social media. Happy baking, and may your kitchen always smell like fresh bread and happy memories!
FAQs – Fluffy Bunny Shaped Dinner Rolls
How do I keep the bunny ears from flopping over while baking?
Make sure the “ear” dough pieces are well attached to the body and not too thin. If they still flop, try twisting the ears or tucking them closer to the body before baking. Even floppy-eared bunnies are adorable!
Can I make the dough ahead of time?
Yes! You can mix and shape the dough up to the second rise, then cover and refrigerate overnight. Let them come to room temperature for 45 minutes before baking the next day.
What’s the best way to reheat leftover rolls?
Wrap rolls in foil and warm in a 300°F (150°C) oven for 5-7 minutes. You can also microwave them for 10-15 seconds, but the crust stays softer with the oven method.
Can I freeze baked bunny rolls?
Absolutely. Cool completely, then freeze in a single layer. Store in a freezer bag for up to 2 months. Reheat straight from frozen in a low oven until soft and warm.
What if I don’t have raisins or chocolate chips for the eyes?
No worries! You can use a tiny dot of black sesame seed, a sliver of dried fruit, or just leave them plain. The bunnies are cute either way, and nobody minds a “blinking” bunny at the table.
Pin This Recipe!
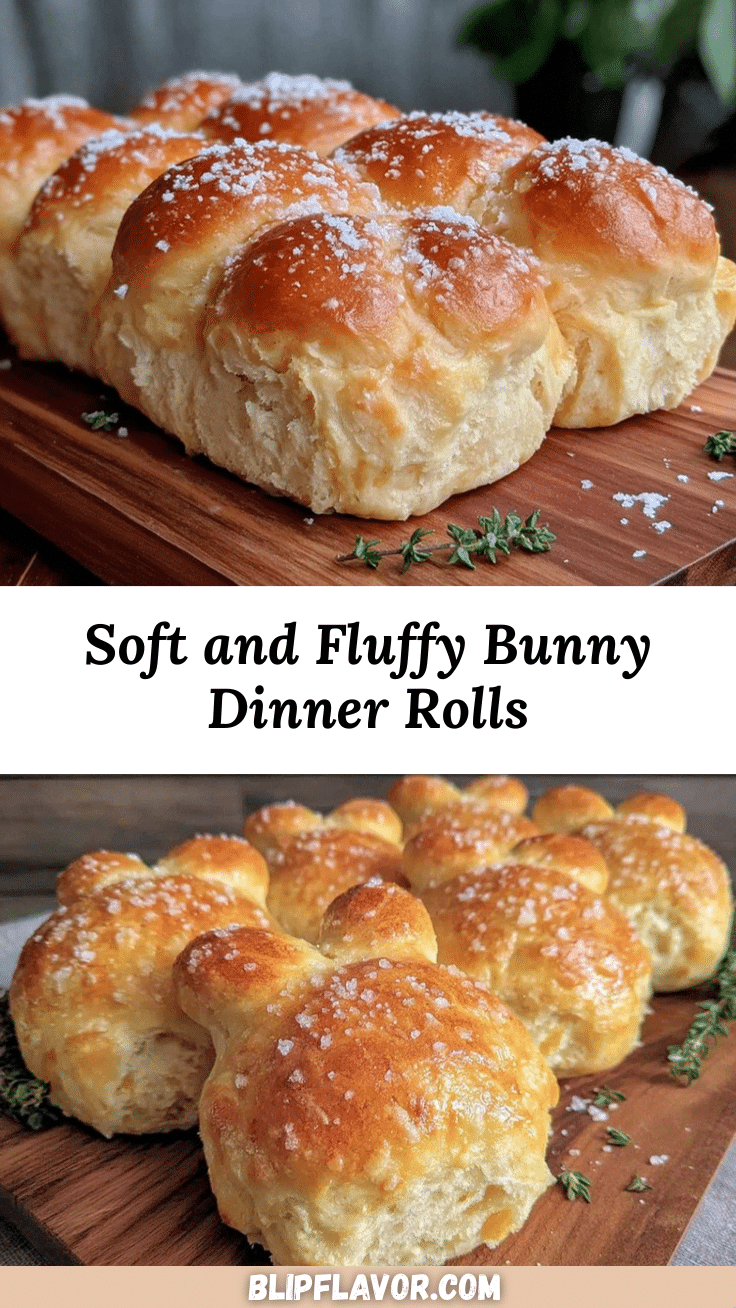
Fluffy Bunny Shaped Dinner Rolls – Easy Homemade Easter Bread Recipe
These adorable, fluffy bunny shaped dinner rolls are soft, pillowy, and just sweet enough to brighten any springtime celebration. Perfect for Easter brunch or family gatherings, they’re easy to make and guaranteed to bring smiles to your table.
- Prep Time: 30 minutes
- Cook Time: 15 minutes
- Total Time: 1 hour 30 minutes
- Yield: 12 rolls 1x
- Category: Bread
- Cuisine: American
Ingredients
- 1 cup whole milk, warm (2% or whole recommended; dairy-free milk works as a substitute)
- 2 1/4 teaspoons active dry yeast (1 packet)
- 2 tablespoons granulated sugar
- 4 tablespoons unsalted butter, softened
- 1 large egg, room temperature
- 3 cups all-purpose flour
- 1 teaspoon kosher salt
- Additional flour, as needed for dusting and shaping
- Raisins, mini chocolate chips, or currants (for bunny eyes, optional)
- 1 tablespoon melted butter (for brushing after baking)
Instructions
- Gently warm the milk until just lukewarm (about 100°F). Pour into a mixing bowl, sprinkle yeast and sugar over, stir, and let sit for 5-10 minutes until foamy.
- Add softened butter, egg, and salt to the yeast mixture. Stir to combine.
- Add flour one cup at a time, mixing well after each addition. The dough will be sticky but should pull away from the sides of the bowl.
- Knead the dough on a lightly floured surface for 8-10 minutes until smooth, elastic, and slightly tacky.
- Place dough in a greased bowl, cover, and let rise in a warm spot for about 45 minutes, until doubled in size.
- Punch down the risen dough. Divide into 12 equal pieces. For each bunny, pinch off a walnut-sized ball for the tail and a smaller piece for the ears. Roll the main piece into a ball for the body, shape the ears, and attach to the body. Add a tiny ball for the tail and press in raisins or chocolate chips for eyes if desired.
- Place shaped bunnies on a parchment-lined baking sheet, cover, and let rise for 20-30 minutes until puffy.
- Preheat oven to 350°F. Bake for 13-15 minutes until golden brown and hollow-sounding when tapped.
- Brush with melted butter immediately after baking for shine and softness. Let cool for 10 minutes before serving.
Notes
Use room temperature ingredients for best results. For dairy-free or egg-free adaptations, substitute plant-based milk and butter, and use yogurt or applesauce instead of egg. Don’t over-flour the dough; a slightly tacky texture yields the fluffiest rolls. Get creative with bunny shapes and toppings—kids love helping with the shaping!
Nutrition
- Serving Size: 1 roll
- Calories: 150
- Sugar: 3
- Sodium: 120
- Fat: 4
- Saturated Fat: 2
- Carbohydrates: 24
- Fiber: 1
- Protein: 4
Keywords: Easter bread, bunny rolls, dinner rolls, homemade bread, spring recipes, kid-friendly, holiday baking, fluffy rolls, yeast bread, party food


