Let me tell you, the aroma of peppermint and vanilla swirling through my kitchen as I whip up a batch of Creamy Christmas Peppermint Creams is downright magical. There’s something about that cool, minty fragrance mixed with a gentle sweetness that just screams holiday cheer. One bite into these melt-in-your-mouth candies, and you’re hit with a wave of creamy, peppermint bliss—like the first snowflake landing on your tongue, or that cozy feeling when you pull on your favorite Christmas sweater.
The first time I made these peppermint creams, I was trying to recreate a treat my grandma would stash in her cookie tin every December. She’d let us sneak a few before dinner if we promised not to tell (which, of course, we always did). The moment those candies came out looking picture-perfect, I paused, took a deep breath, and grinned—because I knew I’d stumbled onto something special. There’s just something about holiday recipes that connect you to happy memories and traditions. When I was knee-high to a grasshopper, I’d watch those peppermint creams disappear from the tray faster than the blinking lights on our tree.
Honestly, these treats are dangerously easy. My family can’t help but sneak them off the cooling rack, and I can’t blame them. They’re perfect for gifting, for brightening up your holiday cookie board on Pinterest, or just for a little sweet treat after a snowy walk. I wish I’d discovered how simple homemade peppermint creams could be years ago. Now, they’re a staple at every December gathering—tested and retested (for research purposes, obviously)—and every batch feels like wrapping the holidays in a creamy, minty hug. If you love easy homemade holiday treats, you’re going to want to bookmark this one!
Why You’ll Love These Creamy Christmas Peppermint Creams
When it comes to festive homemade treats, Creamy Christmas Peppermint Creams stand out for so many reasons. After years of tinkering and taste-testing, I can honestly say this recipe is a game-changer for holiday candy making. Here’s why you’ll love whipping up a batch:
- Quick & Easy: Ready in under 30 minutes, even with kids “helping” in the kitchen. Perfect for busy holiday schedules or last-minute party prep.
- Simple Ingredients: No running around town for specialty items—just pantry basics like powdered sugar, butter, peppermint extract, and a splash of cream.
- Perfect for Gifting: These peppermint creams look adorable boxed up with a festive ribbon. They stay fresh for days, making them ideal for homemade gifts or cookie exchanges.
- Crowd-Pleaser: I’ve never met a person who didn’t go back for seconds. Kids love the creamy texture and minty flavor, and adults appreciate the nostalgia.
- Unbelievably Delicious: The creamy filling is silky, not gritty, with just enough peppermint to refresh your taste buds. Plus, a touch of vanilla rounds out the flavor for pure comfort food joy.
This isn’t just another peppermint candy recipe. What makes mine different? First, I blend the butter and cream to ultra-smooth perfection before adding the sugar—no crumbly mess, just silky-smooth centers every time. Second, I use a dash of vanilla for warmth and depth (thanks to my grandma’s secret trick). And, unlike store-bought versions, you can control the peppermint punch—mild or bold, it’s up to you.
I’ve tried endless variations: vegan swaps, colored stripes, even chocolate-dipped versions. Still, this classic creamy peppermint cream recipe is my go-to for holiday celebrations. It’s comfort food, but with a festive twist that makes every bite feel like the holidays. Whether you’re impressing guests or making memories with your family, these homemade treats always deliver that soul-soothing satisfaction. Trust me—your holiday dessert table needs these!
What Ingredients You Will Need
This recipe uses simple, wholesome ingredients to deliver bold flavor and satisfying texture without the fuss. Most of them are probably in your pantry right now, which is always a win (especially when you’ve got holiday chaos happening all around).
- For the Creamy Center:
- Powdered sugar (also called icing sugar, 400g / 3 1/4 cups) – provides sweetness and a smooth texture
- Unsalted butter (softened, 60g / 1/4 cup) – adds richness and helps the filling set up
- Heavy cream (30ml / 2 tbsp) – makes the filling extra creamy (substitute coconut cream for dairy-free)
- Peppermint extract (1 to 1 1/2 tsp, to taste) – gives that classic minty zing (I love Nielsen-Massey for the best flavor)
- Vanilla extract (1/2 tsp) – rounds out the flavor (my grandma swore by adding a splash)
- Salt (a pinch) – balances the sweetness
- Optional: red or green gel food coloring (just a drop for festive flair)
- For Finishing:
- Extra powdered sugar (for dusting and rolling)
- Crushed peppermint candies or candy canes (for topping, 2 tbsp / 20g)
- Optional: melted dark or white chocolate (for drizzling or dipping, 100g / 3.5 oz)
Ingredient tips from my kitchen:
- Use unsalted butter for a softer, creamier texture. Salted works in a pinch—just omit extra salt.
- If you’re out of heavy cream, half-and-half will do (I’ve tried it, and it’s perfectly fine!).
- For dairy-free, swap butter and cream for vegan alternatives—Earth Balance and coconut cream are my favorites.
- Want a gluten-free treat? All ingredients here are naturally gluten-free, so you’re safe!
- If you can’t find peppermint extract, crushed candies will add flavor (just a little crunch, too).
- To make them extra festive, divide the mixture and tint half with red or green gel coloring. Swirl together for a marbled look.
Honestly, you can tweak these ingredients to suit your needs and preferences. If you’re feeling adventurous, try dipping them in chocolate or dusting with cocoa powder. The best part? No baking required!
Equipment Needed
I love recipes that don’t require fancy gadgets, and these creamy Christmas peppermint creams fit the bill perfectly. Here’s what you need:
- Mixing bowl – large enough to hold all your ingredients without a powdered sugar explosion
- Hand mixer or stand mixer – for blending the butter and sugar smoothly (though a sturdy wooden spoon also works if you’re old-school)
- Rubber spatula – helps scrape down the sides and fold everything together
- Measuring cups and spoons – accuracy is key for the perfect creamy texture
- Parchment paper or a silicone baking mat – keeps candies from sticking as they set
- Rolling pin (optional) – if you want to flatten the mixture before cutting shapes
- Small cookie cutters or round cutter (about 1 inch / 2.5cm diameter) – makes uniform, adorable peppermint creams
- Wire rack or tray – for drying and setting the candies
If you don’t have a mixer, you can absolutely make this recipe by hand with a sturdy spoon and a little elbow grease. I’ve done it in a pinch during power outages, and it works! For cookie cutters, the rim of a shot glass or a small biscuit cutter does the job. For cleanup, silicone mats are a breeze—just rinse and reuse. Budget tip: Dollar-store mixing bowls and spatulas work just fine (I’ve used them for years, and they’re still going strong!).
Preparation Method

-
Cream the Butter and Sugar:
In a large mixing bowl, combine 60g (1/4 cup) unsalted butter and 400g (3 1/4 cups) powdered sugar. Using a hand mixer or stand mixer, beat on low until the mixture is crumbly but starting to come together. This takes about 2 minutes. (Tip: If your butter isn’t soft, microwave it for 10 seconds—don’t melt it!). -
Add Cream and Flavors:
Pour in 30ml (2 tbsp) heavy cream, 1 to 1 1/2 tsp peppermint extract (start with less if you want milder flavor), 1/2 tsp vanilla extract, and a pinch of salt. Beat the mixture for another 2-3 minutes, until it’s smooth, pale, and creamy. (If mixture feels too stiff, add a splash more cream; too soft, add extra powdered sugar by the tablespoon). -
Color the Mixture (Optional):
If you want festive red or green peppermint creams, divide the mixture into bowls and add a tiny drop of gel food coloring to each. Mix until the color is even. (Warning: Too much coloring can make the mixture sticky, so use sparingly). -
Shape the Creams:
Dust your work surface and hands with powdered sugar. Scoop out small balls (about 2 teaspoons or 12g each) and roll into smooth rounds. You can flatten them with your palm or use a rolling pin to about 1/4 inch (6mm) thick, then cut shapes with cookie cutters. -
Set the Creams:
Place shaped creams onto parchment paper or a silicone mat. Let them sit at room temperature for 1-2 hours to firm up. (If your kitchen is humid, refrigerate for 30 minutes instead). -
Add Toppings:
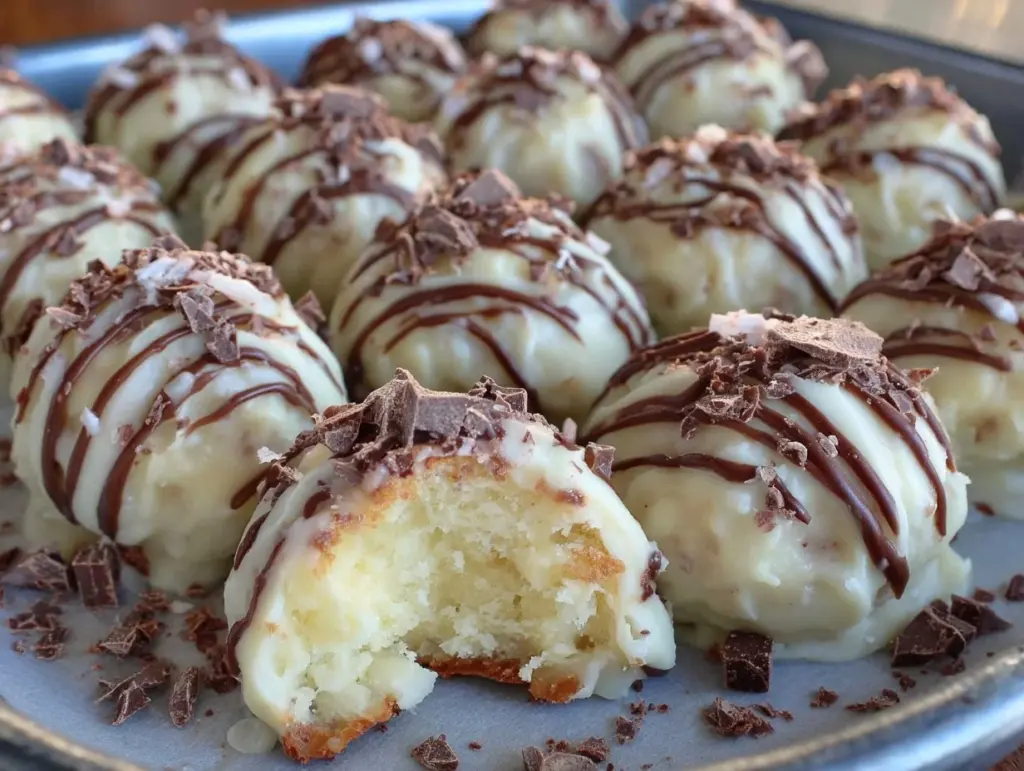
Sprinkle with crushed peppermint candies or candy canes (about 2 tbsp). If you like, drizzle or dip each cream in melted chocolate (100g / 3.5 oz), then return to the tray to set. (Chocolate sets faster in the fridge, about 10 minutes). -
Serve or Store:
Once set, arrange on a festive platter for serving or layer in gift boxes between sheets of parchment paper. Makes about 36 creams.
Personal tip: If the mixture gets sticky, pop it in the fridge for 10 minutes—makes rolling a breeze. If candies stick to your hands, dust them with a bit more powdered sugar. Don’t worry if they aren’t perfect; homemade charm is part of the fun!
Cooking Tips & Techniques
After making peppermint creams for over a decade (holiday after holiday), I’ve picked up a few tricks that’ll guarantee perfect results every time. Here’s what I’ve learned:
- Don’t Overmix: Beat the mixture just until smooth. Overmixing can make it sticky and hard to shape.
- Temperature Matters: If your kitchen is warm, chill the mixture before shaping—it’s much easier to handle!
- Consistent Size: Use a small cookie scoop for even candies. This helps everything set uniformly and look great on a platter.
- Powdered Sugar Dusting: Always dust your hands and surface to prevent sticking. I’ve learned this the hard way—sticky hands equal lumpy creams!
- Chocolate Dipping: If dipping in chocolate, let the creams chill first. Warm creams melt when dipped, and you’ll end up with a gooey mess.
- Flavor Control: Peppermint extract is strong—add a little at a time and taste. Too much can overpower, too little can be bland.
- Storage: Store in an airtight container with parchment between layers, especially if gifting.
- Troubleshooting: If the mixture is too dry, add cream; too wet, add more sugar. It’s forgiving, so adjust as needed.
Once, I forgot to add vanilla and wondered why the batch tasted a bit flat. Lesson learned: even tiny ingredients make a big difference. Multitasking tip—prepare toppings while the creams set, so everything comes together smoothly. Consistency is key: weigh ingredients for best results, especially powdered sugar. Trust me, these small details make your peppermint creams look and taste bakery-worthy!
Variations & Adaptations
One of my favorite things about Creamy Christmas Peppermint Creams is how easily you can switch them up for different tastes, dietary needs, or festive flair. Here are some tried-and-true variations:
- Vegan Version: Swap out butter and cream for plant-based alternatives (like vegan butter and coconut cream). The flavor is just as rich, and it’s perfect for dairy-free guests.
- Chocolate Peppermint Creams: Dip or drizzle the set creams in melted dark, milk, or white chocolate. You can even add a sprinkle of sea salt for a grown-up twist (I do this for my chocolate-loving friends).
- Festive Colors: Divide the mixture and tint half with red or green gel food coloring. Swirl together for peppermint “marble” creams that really pop on a holiday tray.
- Nut-Free Option: All ingredients are nut-free, but be sure to check labels on extracts and toppings if you have allergies in the family.
- Low-Sugar Alternative: Use a powdered sugar substitute like Swerve for a lower-carb, diabetic-friendly treat. I’ve made these for my aunt, and she was thrilled!
Personally, I love making a “hot cocoa” version—adding a dash of cocoa powder to the mix and topping with mini marshmallows. For a summer twist, swap peppermint for lemon or orange extract. And if you want bite-sized treats, roll the mixture into tiny balls and coat in cocoa powder or crushed candy. There’s no wrong way to enjoy peppermint creams, so let your creativity shine!
Serving & Storage Suggestions
Creamy Christmas Peppermint Creams are best served at room temperature, where their texture is perfectly soft and creamy. Arrange them on a festive platter or tiered tray—add a sprinkle of crushed candy canes for sparkle, or tuck a few sprigs of fresh mint alongside for a Pinterest-worthy presentation.
Pair these treats with a mug of hot chocolate, a scoop of vanilla ice cream, or alongside other holiday cookies for a complete dessert spread. They’re delightful with coffee after dinner, too (my dad swears by this combo!).
For storage, layer peppermint creams between sheets of parchment paper in an airtight container. They keep beautifully for up to 1 week in the fridge—just let them warm up for 10 minutes before serving for the best texture. You can freeze them up to 2 months (though I rarely have leftovers that long). To reheat, simply let them come to room temp; microwaving will melt the creamy centers, so skip that step.
Fun fact: the mint flavor actually deepens after a day or two, making leftovers taste even more festive. Perfect for prepping ahead of holiday parties or gifting to friends!
Nutritional Information & Benefits
Each peppermint cream (about 12g) contains approximately:
- Calories: 60
- Fat: 2.5g
- Saturated fat: 1.5g
- Carbohydrates: 10g
- Sugar: 9g
- Protein: 0.2g
These treats are naturally gluten-free and nut-free, making them safe for most holiday guests. Heavy cream and butter provide a touch of calcium and vitamin A, while peppermint extract may aid digestion (a little holiday bonus!). If you go the vegan or sugar-free route, they’re even lighter—just check ingredient labels for allergens.
Personally, I love knowing exactly what’s in my holiday sweets. Making peppermint creams at home means fewer additives and preservatives. They’re a sweet indulgence, but with wholesome ingredients and portion control, you can enjoy a little festive cheer without the guilt!
Conclusion
If you’re searching for a festive homemade treat that’s as easy as it is irresistible, these Creamy Christmas Peppermint Creams are worth every minute. They’re quick to make, endlessly customizable, and guaranteed to light up your holiday table. I love this recipe because it brings together family tradition, pure comfort food, and a little bit of holiday magic—plus, you can tweak it to suit any taste or dietary need.
Give these peppermint creams a whirl, and don’t be afraid to try new flavors or shapes. I promise, they’ll become a staple in your holiday kitchen. If you make them, I’d love to hear how yours turn out—drop a comment below, tag your creations on Pinterest, or share your favorite twists. Happy holidays, and may your kitchen be filled with laughter, love, and creamy peppermint goodness!
FAQs
How do I keep the peppermint creams from sticking to my hands?
Dust your hands and work surface with powdered sugar before rolling or shaping. If the mixture gets too sticky, chill it for 10 minutes—it makes everything easier!
Can I make these peppermint creams ahead of time?
Absolutely! Store them in an airtight container in the fridge for up to a week. The flavor even gets better after a day or two.
Can I freeze peppermint creams?
Yes, layer them with parchment paper in a freezer-safe container. They’ll keep for up to 2 months. Thaw at room temperature before serving.
What’s the best way to package these for gifts?
Layer peppermint creams in decorative boxes or tins with parchment paper. Add a festive ribbon and a sprinkle of crushed candy for a holiday touch!
Can I use other flavors besides peppermint?
Definitely! Try lemon, orange, or almond extract for a different twist. Just adjust the amount to taste—these creams are super versatile!
Pin This Recipe!
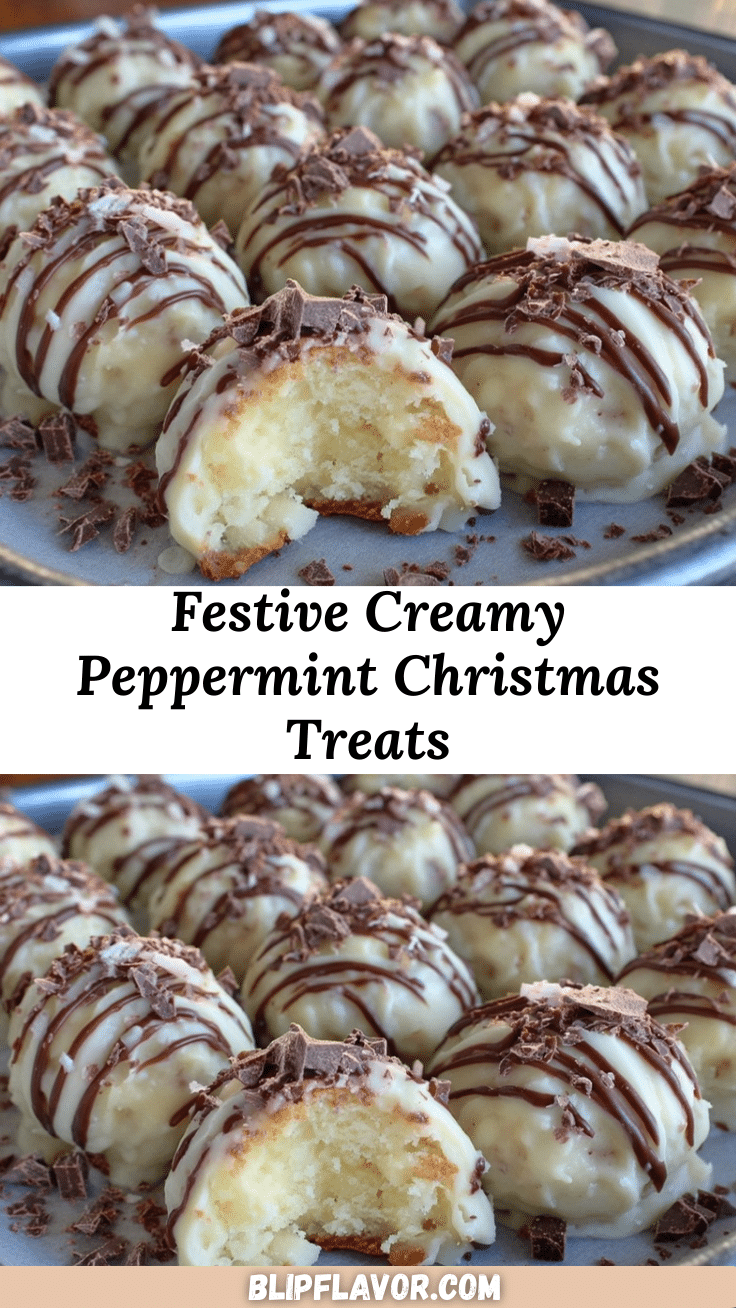
Creamy Christmas Peppermint Creams

These easy homemade peppermint creams are a festive, melt-in-your-mouth holiday treat with a creamy, minty filling and customizable toppings. Perfect for gifting, cookie trays, or a sweet bite after a snowy walk.
- Prep Time: 15 minutes
- Cook Time: 0 minutes
- Total Time: 30 minutes
- Yield: 36 creams 1x
- Category: Dessert
- Cuisine: American
Ingredients
- 3 1/4 cups powdered sugar (icing sugar)
- 1/4 cup unsalted butter, softened
- 2 tablespoons heavy cream (or coconut cream for dairy-free)
- 1 to 1 1/2 teaspoons peppermint extract, to taste
- 1/2 teaspoon vanilla extract
- Pinch of salt
- Optional: red or green gel food coloring
- Extra powdered sugar (for dusting and rolling)
- 2 tablespoons crushed peppermint candies or candy canes (for topping)
- Optional: 3.5 ounces melted dark or white chocolate (for drizzling or dipping)
Instructions
- In a large mixing bowl, combine softened butter and powdered sugar. Beat on low with a hand mixer or stand mixer until crumbly but starting to come together, about 2 minutes.
- Add heavy cream, peppermint extract, vanilla extract, and a pinch of salt. Beat for another 2-3 minutes until smooth, pale, and creamy. Adjust consistency by adding more cream (if too stiff) or powdered sugar (if too soft) as needed.
- If desired, divide the mixture and add a tiny drop of red or green gel food coloring to each portion. Mix until color is even.
- Dust your work surface and hands with powdered sugar. Scoop out small balls (about 2 teaspoons each) and roll into smooth rounds. Flatten with your palm or use a rolling pin to 1/4 inch thick, then cut shapes with cookie cutters.
- Place shaped creams onto parchment paper or a silicone mat. Let sit at room temperature for 1-2 hours to firm up, or refrigerate for 30 minutes if humid.
- Sprinkle with crushed peppermint candies or candy canes. If desired, drizzle or dip each cream in melted chocolate, then return to tray to set (chill in fridge for 10 minutes to set chocolate).
- Once set, arrange on a festive platter for serving or layer in gift boxes between sheets of parchment paper. Makes about 36 creams.
Notes
For best results, use unsalted butter and high-quality peppermint extract. If mixture gets sticky, chill for 10 minutes before shaping. Store in airtight container with parchment between layers for up to 1 week in the fridge or 2 months in the freezer. Easily adapt for vegan or low-sugar diets. Flavor deepens after a day or two.
Nutrition
- Serving Size: 1 cream (about 12g)
- Calories: 60
- Sugar: 9
- Sodium: 10
- Fat: 2.5
- Saturated Fat: 1.5
- Carbohydrates: 10
- Protein: 0.2
Keywords: peppermint creams, holiday candy, Christmas treats, homemade candy, gluten-free dessert, easy holiday recipe, peppermint, no bake, gifting, festive sweets


