
Let me tell you, the scent of warm honey and freshly baked wheat rolls wafting through the kitchen is enough to make anyone’s mouth water. The first time I baked these cozy honey wheat rolls, I was instantly hooked—the kind of moment where you pause, take a deep breath, and just smile because you know you’re onto something truly special. Years ago, when I was knee-high to a grasshopper, my grandma used to pull soft, sweet rolls like these from her oven, and honestly, they felt like a warm hug on a chilly day. I stumbled upon this particular recipe on a rainy weekend, trying to recreate that nostalgic comfort, and I wish I’d discovered it years ago.
My family couldn’t stop sneaking them off the cooling rack (and I can’t really blame them). Let’s face it, these honey wheat rolls are dangerously easy to make and provide pure, nostalgic comfort in every bite. You know what? They’re perfect for potlucks, a sweet treat for your kids, or to brighten up your Pinterest cookie board with something a little different. After testing this recipe multiple times—in the name of research, of course—it’s become a staple for family gatherings and gifting. Trust me, you’re going to want to bookmark this one.
Why You’ll Love This Recipe
Honestly, this cozy honey wheat rolls recipe has everything going for it, and I’m happy to share why it stands out from the crowd. From my kitchen to yours, this recipe has been chef-tested and family-approved, making it a reliable go-to for soft, sweet rolls that just hit the spot.
- Quick & Easy: Comes together in under 2 hours, perfect for busy weeknights or last-minute brunch ideas.
- Simple Ingredients: No fancy grocery trips needed; you likely already have everything in your pantry and fridge.
- Perfect for Any Occasion: Great for cozy dinners, holiday mornings, or casual weekend baking sessions.
- Crowd-Pleaser: Always gets rave reviews from kids and adults alike—soft, fluffy, and sweet without being overpowering.
- Unbelievably Delicious: The honey adds a subtle sweetness, while the wheat flour gives a hearty, wholesome texture you’ll crave again and again.
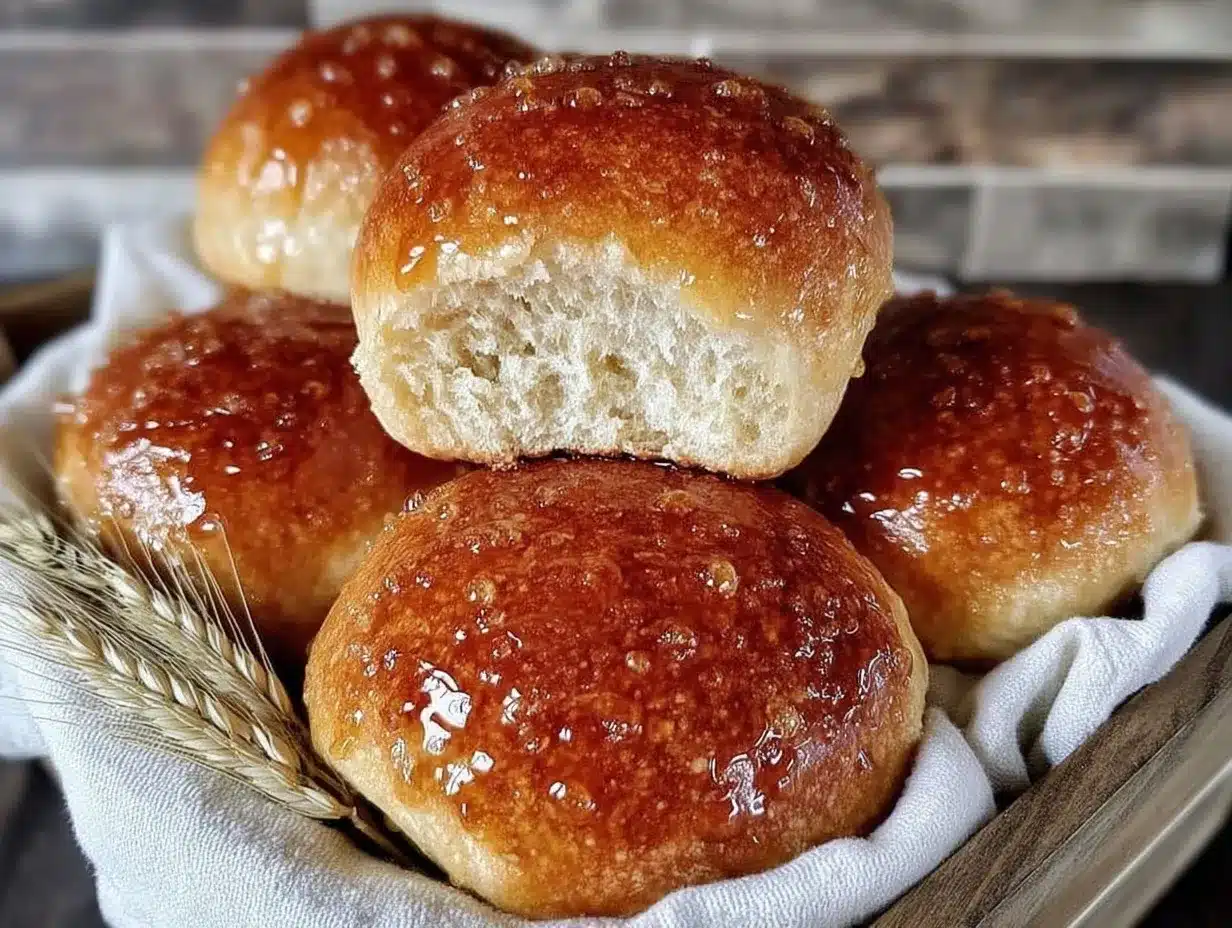
What really makes this recipe different? It’s the soft, sweet glaze that locks in moisture, giving each roll a shiny, irresistible finish. Plus, I use a little extra honey in the dough for that perfect balance of sweetness and warmth. This recipe isn’t just good—it’s the kind that makes you close your eyes after the first bite. It’s comfort food reimagined in a way that’s healthier and faster but still soul-soothing. Whether you’re impressing guests without stress or turning a simple meal into a memory, these honey wheat rolls deliver every time.
What Ingredients You Will Need
This recipe uses simple, wholesome ingredients to deliver bold flavor and satisfying texture without the fuss. Most are pantry staples, and the honey gives a natural sweetness that pairs beautifully with the wheat flour’s nutty note.
- Whole Wheat Flour – 3 cups (360g), provides that hearty, wholesome base (I recommend King Arthur for consistent results).
- All-Purpose Flour – 1 cup (120g), to lighten up the texture and keep rolls soft.
- Active Dry Yeast – 2 ¼ teaspoons (one packet), for that perfect rise.
- Warm Water – 1 cup (240ml), about 110°F (43°C) to activate the yeast.
- Honey – ¼ cup (85g) plus 2 tablespoons for glaze, adds natural sweetness and moisture (local or raw honey works wonders).
- Unsalted Butter – 4 tablespoons (56g), melted, adds richness and softness.
- Milk – ½ cup (120ml), whole or 2%, warmed, for tenderness.
- Egg – 1 large, room temperature, helps with structure and richness.
- Salt – 1 ½ teaspoons, balances the sweetness and enhances flavor.
- Optional: A pinch of cinnamon or nutmeg for a cozy spice twist.
For substitutions, almond milk can replace dairy milk for a dairy-free option, and agave syrup works if you want a vegan-friendly sweetener. If you prefer gluten-free, swapping the whole wheat for a gluten-free blend will change the texture, but it’s doable (just expect a bit less chew). The glaze is simple: honey mixed with a touch of warm water to brush on, giving that shiny, soft finish that keeps the rolls irresistible.
Equipment Needed
- Large mixing bowl – for combining and proofing the dough.
- Measuring cups and spoons – for precise ingredient amounts.
- Kitchen scale (optional, but recommended) – ensures accuracy, especially with flours.
- Stand mixer with dough hook attachment (optional) – makes kneading a breeze, but hand-kneading works just fine.
- Rolling pin – to roll out dough evenly (a wine bottle can be a budget-friendly substitute).
- Baking sheet or round cake pan – lined with parchment paper or lightly greased.
- Pastry brush – for applying that soft, sweet glaze.
- Clean kitchen towel or plastic wrap – to cover dough while it rises.
If you don’t have a stand mixer, don’t worry—I’ve kneaded this dough by hand more times than I can count. It’s a great way to connect with the dough and feel when it’s ready (it should be smooth and slightly tacky, not sticky). For those on a budget, a basic hand whisk and a sturdy bowl will do; just plan on spending a little extra time kneading.
Preparation Method
- Activate the yeast: In a small bowl, combine 1 cup (240ml) of warm water (110°F/43°C) with 2 ¼ teaspoons active dry yeast and 1 tablespoon honey. Stir gently and let sit for 5-10 minutes until foamy. If it doesn’t foam, your yeast might be old—start again with fresh yeast.
- Mix dry ingredients: In a large mixing bowl, whisk together 3 cups (360g) whole wheat flour, 1 cup (120g) all-purpose flour, and 1 ½ teaspoons salt. If you’re adding spices like cinnamon, mix them in now.
- Combine wet ingredients: In a separate bowl, whisk 1 large room-temperature egg, 4 tablespoons melted unsalted butter, ½ cup (120ml) warmed milk, and ¼ cup (85g) honey until smooth.
- Make the dough: Pour the yeast mixture and wet ingredients into the dry ingredients. Stir with a wooden spoon or dough hook until a shaggy dough forms.
- Knead the dough: Turn the dough onto a lightly floured surface and knead for about 8-10 minutes until smooth, elastic, and slightly tacky. If using a stand mixer, knead on medium speed for 6-7 minutes. Add flour sparingly if dough is too sticky—too much flour will make rolls dense.
- First rise: Lightly grease a large bowl with butter or oil. Place the dough inside, cover with a clean towel or plastic wrap, and let rise in a warm spot for 1 to 1 ½ hours until doubled in size. You’ll know it’s ready when the dough gently springs back when poked.
- Shape the rolls: Punch down the dough to release air, then divide into 12 equal pieces (about 2 ounces or 60g each). Roll each piece into a smooth ball and place on a parchment-lined baking sheet or into a greased round cake pan, spacing slightly apart.
- Second rise: Cover the rolls loosely and let rise again for 30-40 minutes until puffy and nearly doubled.
- Preheat and bake: Preheat your oven to 375°F (190°C). Brush the tops of the rolls with a little melted butter, then bake for 18-22 minutes until golden brown and cooked through. The rolls should sound hollow when tapped on the bottom.
- Glaze the rolls: While still warm, brush the rolls generously with a glaze made from 2 tablespoons honey mixed with 1 tablespoon warm water. Let them cool slightly before serving.
Pro tip: Don’t skip the glaze—it locks in moisture and adds that perfect sweet shine. If your dough feels sticky during shaping, dust your hands lightly with flour but don’t overdo it. Also, baking times can vary by oven, so start checking at 18 minutes to avoid overbaking.
Cooking Tips & Techniques
Making soft, sweet rolls can feel tricky, but a few tips from my kitchen will help you nail it every time. Start with the yeast: too hot water kills the yeast, too cold, and it won’t activate. Aim for about 110°F (43°C)—warm to the touch but not scalding. I’ve learned the hard way that rushing the rise leads to dense rolls, so patience is key.
Kneading is where the magic happens. You want the dough to feel elastic and slightly tacky but not sticky. If your dough sticks to your fingers, sprinkle a tiny bit of flour—less is more here. Also, cover your dough well during rising to avoid a crust forming on top, which can mess with the texture.
When shaping, rolling the dough into smooth balls helps the rolls puff up nicely and look uniform. If you’re short on time, you can do a single longer rise, but the two-step rising process really gives the best texture. And don’t forget the glaze—brushing it on while warm keeps rolls soft and adds a subtle sweet finish.
One of my favorite hacks: if you want extra softness, try brushing the rolls with melted butter right after baking and then cover them with a kitchen towel for 10 minutes. It traps steam and keeps them tender.
Variations & Adaptations
These cozy honey wheat rolls are flexible, so you can tweak them to suit your taste or dietary needs without losing their charm. Here are a few ways I’ve played around with the base recipe:
- Gluten-Free Version: Swap whole wheat and all-purpose flour for a high-quality gluten-free blend like Bob’s Red Mill 1-to-1. Expect a slightly different texture but still soft and delicious.
- Spiced Honey Rolls: Add ½ teaspoon cinnamon and a pinch of nutmeg to the dough for a warm, cozy flavor perfect for fall mornings.
- Vegan Adaptation: Use plant-based milk such as almond or oat, replace butter with coconut oil, and swap the egg for a flax egg (1 tablespoon ground flaxseed + 3 tablespoons water). Use agave syrup or maple syrup instead of honey for the glaze.
- Whole Grain Boost: Add ¼ cup (30g) rolled oats or wheat germ into the dough for extra texture and nutrients.
- Stuffed Rolls: For a fun twist, fill each roll with a little cream cheese and honey before shaping for a sweet surprise inside.
Once, I tried adding chopped nuts and dried cranberries for a festive holiday version—total crowd-pleaser! Just remember that adding extra mix-ins might require a slightly longer baking time.
Serving & Storage Suggestions
These honey wheat rolls shine right out of the oven, best served warm and fresh. I love them with a pat of butter or a drizzle of extra honey. They pair beautifully with savory dishes like roasted chicken or soups, but honestly, they’re just as good on their own for breakfast or tea time.
For storing, place cooled rolls in an airtight container at room temperature for up to 2 days. To keep them soft longer, wrap them tightly in plastic wrap and freeze for up to 3 months. When ready to enjoy, thaw at room temperature and warm in the oven at 300°F (150°C) for 10 minutes or microwave for 20 seconds—just enough to bring back that fresh-baked softness.
Flavors actually mellow and deepen after a day, so if you can wait, they taste even better the next day. If you want to refresh the glaze, just brush on a little warmed honey before serving.
Nutritional Information & Benefits
Each cozy honey wheat roll contains approximately 150-180 calories, with about 4 grams of protein and 3 grams of fiber, depending on size and flour brands. The whole wheat flour adds more fiber and nutrients than regular white rolls, making these a more wholesome choice.
Honey provides natural antioxidants and a touch of sweetness without refined sugars. Using real butter and milk adds richness and calcium, contributing to a balanced treat. These rolls are vegetarian-friendly, and with simple substitutions, can be vegan or gluten-free too.
From a wellness standpoint, they offer a satisfying comfort food option that’s not overly processed or heavy—perfect for those who want a bit of indulgence without compromising on quality ingredients.
Conclusion
In short, this cozy honey wheat rolls recipe is worth every minute you spend baking. They’re soft, sweet, and just the right kind of comforting, making them a versatile addition to your baking repertoire. You can customize them to your liking, whether that’s spicing them up, going gluten-free, or turning them vegan.
I personally love how they bring my family around the table with smiles and full bellies. Give this recipe a try—you might just find your new favorite roll. And hey, if you do, let me know how you make them your own! Drop a comment, share your tweaks, or send this along to a friend who needs some cozy baking magic.
Happy baking, and remember: sometimes, the simplest recipes bring the greatest joy!
FAQs
How do I know if the yeast is still good?
If your yeast mixture doesn’t foam within 10 minutes of adding warm water and honey, the yeast is likely dead. Always check the expiration date and store yeast in a cool, dry place.
Can I make these honey wheat rolls ahead of time?
Absolutely! You can prepare the dough and let it rise in the fridge overnight, then shape and bake the next day. Just bring the dough to room temperature before shaping.
What’s the best way to store leftover rolls?
Store cooled rolls in an airtight container at room temperature for up to 2 days or freeze them wrapped tightly for up to 3 months. Reheat gently before serving.
Can I use all whole wheat flour instead of mixing with all-purpose?
You can, but the rolls may be denser and less soft. The mix of all-purpose flour lightens the texture while still keeping that wholesome wheat flavor.
Is there a way to make these rolls less sweet?
Yes! Simply reduce the honey in the dough and glaze by half. They’ll still be delicious but less sweet—perfect if you prefer a more subtle honey flavor.
Pin This Recipe!
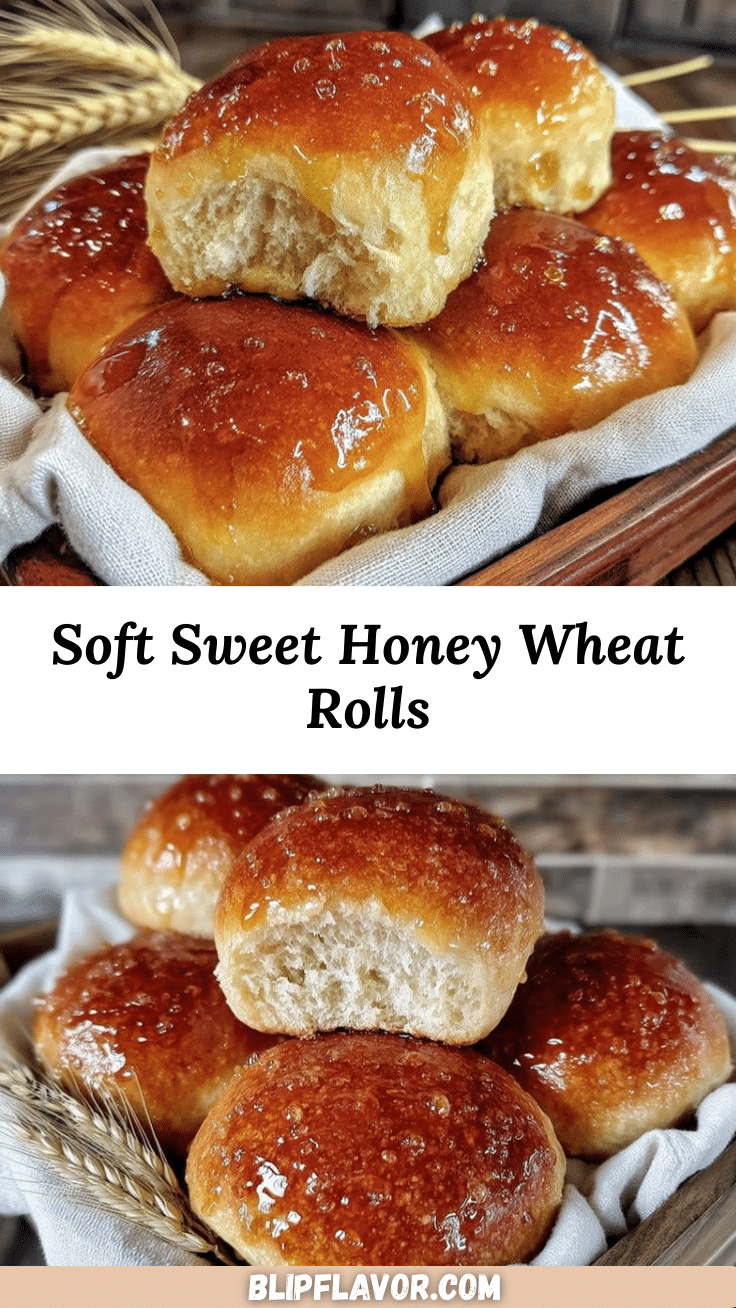
Cozy Honey Wheat Rolls

Soft, sweet, and wholesome honey wheat rolls with a shiny honey glaze, perfect for cozy dinners, brunch, or family gatherings.
- Prep Time: 20 minutes
- Cook Time: 20 minutes
- Total Time: 1 hour 50 minutes
- Yield: 12 rolls 1x
- Category: Bread
- Cuisine: American
Ingredients
- 3 cups whole wheat flour (360g)
- 1 cup all-purpose flour (120g)
- 2 ¼ teaspoons active dry yeast (one packet)
- 1 cup warm water (110°F/43°C)
- ¼ cup honey (85g) plus 2 tablespoons for glaze
- 4 tablespoons unsalted butter (56g), melted
- ½ cup milk (120ml), whole or 2%, warmed
- 1 large egg, room temperature
- 1 ½ teaspoons salt
- Optional: pinch of cinnamon or nutmeg
Instructions
- Activate the yeast: In a small bowl, combine 1 cup warm water (110°F/43°C) with 2 ¼ teaspoons active dry yeast and 1 tablespoon honey. Stir gently and let sit for 5-10 minutes until foamy.
- Mix dry ingredients: In a large mixing bowl, whisk together 3 cups whole wheat flour, 1 cup all-purpose flour, and 1 ½ teaspoons salt. Add spices if using.
- Combine wet ingredients: In a separate bowl, whisk 1 large egg, 4 tablespoons melted unsalted butter, ½ cup warmed milk, and ¼ cup honey until smooth.
- Make the dough: Pour the yeast mixture and wet ingredients into the dry ingredients. Stir until a shaggy dough forms.
- Knead the dough: Turn dough onto a lightly floured surface and knead for 8-10 minutes until smooth, elastic, and slightly tacky. Alternatively, knead with a stand mixer on medium speed for 6-7 minutes.
- First rise: Lightly grease a large bowl, place dough inside, cover, and let rise in a warm spot for 1 to 1 ½ hours until doubled in size.
- Shape the rolls: Punch down dough, divide into 12 equal pieces (~2 ounces or 60g each), roll into smooth balls, and place on parchment-lined baking sheet or greased round cake pan.
- Second rise: Cover rolls loosely and let rise for 30-40 minutes until puffy and nearly doubled.
- Preheat oven to 375°F (190°C). Brush rolls with melted butter and bake for 18-22 minutes until golden brown and hollow sounding when tapped.
- Glaze the rolls: While warm, brush rolls with glaze made from 2 tablespoons honey mixed with 1 tablespoon warm water. Let cool slightly before serving.
Notes
Do not skip the honey glaze as it locks in moisture and adds a shiny finish. Use warm water at about 110°F to activate yeast properly. Knead until dough is elastic and slightly tacky but not sticky. Baking times may vary; start checking at 18 minutes. For extra softness, brush rolls with melted butter after baking and cover with a towel for 10 minutes.
Nutrition
- Serving Size: 1 roll
- Calories: 165
- Sugar: 5
- Sodium: 230
- Fat: 5
- Saturated Fat: 3
- Carbohydrates: 27
- Fiber: 3
- Protein: 4
Keywords: honey wheat rolls, soft rolls, homemade bread, sweet rolls, easy bread recipe, cozy rolls, family recipe


