Can you imagine the smell of cinnamon, toasted nuts, and gooey chocolate drifting through your kitchen around the holidays? The first time I baked a batch of Christmas squares and bars, my home was instantly filled with that unmistakable festive aroma—it’s the sort of scent that pulls everyone in from the cold and makes them linger just a little longer. You know, the kind of moment where you pause, take a deep breath, and just smile because you know you’re onto something truly special.
Years ago, when I was knee-high to a grasshopper, my grandma would lay out trays of her famous festive bars at family gatherings. We’d sneak bites before dinner (even though we were supposed to wait), and honestly, that’s when I realized how these Christmas squares and bars aren’t just desserts—they’re memories in the making. The first time I tried to recreate her recipe, it was on a snowy weekend when everyone seemed to need a little cheer. I wish I’d discovered how dangerously easy these treats are to make much sooner!
My family can’t help themselves—these bars disappear from the cooling rack faster than you can say “Merry Christmas.” Every time I bring them to a holiday potluck or send a batch to friends, I get texts asking for the recipe (and, let’s face it, requests for seconds). There’s pure, nostalgic comfort packed into each bite, and they’re perfect for brightening up your Pinterest cookie board, wrapping up for homemade gifts, or just keeping on hand for those sweet cravings after dinner.
Honestly, I’ve tested this recipe more times than I care to admit—in the name of research, of course. Now, it’s a staple for family gatherings, classroom parties, and those cozy evenings when you want something that feels like a warm hug. Trust me, you’re going to want to bookmark this one and make it a holiday tradition.
Why You’ll Love This Recipe
I’ve baked my way through dozens of festive desserts over the years, and I can say with confidence these Christmas squares and bars are a cut above the rest. Whether I’m wearing my chef’s apron or just doing some late-night taste tests with the kids, these bars always come out perfectly balanced—never too sweet, always just right.
- Quick & Easy: Comes together in under an hour—ideal for rushed holiday schedules or spontaneous baking sessions.
- Simple Ingredients: No need for specialty stores; you probably have everything tucked away in your pantry right now.
- Perfect for Festive Celebrations: Whether it’s a Christmas brunch, potluck, or family movie night, these bars fit right in.
- Crowd-Pleaser: Kids beg for seconds, adults sneak extras—these bars never last long.
- Unbelievably Delicious: Think chewy, crunchy, chocolatey goodness with hints of spice and toasted nuts. It’s next-level comfort food.
What sets this Christmas squares and bars recipe apart? I blend my dry ingredients for an ultra-light base, use a hint of orange zest for brightness, and layer on a mix of textures (from gooey caramel to crisp pecans). It’s not just another holiday dessert—it’s the one you’ll want to make every year. There’s something about how the flavors meld together after a day in the fridge, too; honestly, it gets better as it sits.
These bars aren’t just delicious—they’re the kind of treat that makes you close your eyes after the first bite and savor every crumb. If you’re aiming to impress guests without stress or want to turn a simple weeknight into something memorable, this is your ticket. Comfort food reimagined: easier, faster, and just as soul-soothing as the classics.
What Ingredients You Will Need
This recipe uses simple, wholesome ingredients to deliver bold flavor and that classic festive texture—without any fuss. Most are pantry staples, and you can swap in seasonal favorites if you’re feeling creative. Here’s what you’ll need to whip up the perfect batch of Christmas squares and bars:
- For the base:
- 2 cups (250g) all-purpose flour (swap with gluten-free blend if needed)
- 1 cup (225g) unsalted butter, softened (adds richness)
- 1/2 cup (100g) brown sugar, packed (for that melt-in-your-mouth chew)
- 1/2 teaspoon salt
- 1 teaspoon ground cinnamon (optional, but highly recommended)
- For the filling:
- 3/4 cup (180ml) sweetened condensed milk (helps bind and sweeten)
- 1 cup (180g) chocolate chips (I like semi-sweet, but dark works too)
- 1/2 cup (60g) chopped pecans or walnuts (for crunch—use seeds for nut-free)
- 1/2 cup (80g) dried cranberries or cherries (adds festive color and tang)
- 1/4 cup (30g) shredded coconut (unsweetened or sweetened, your call)
- 1 tablespoon orange zest (optional, but it brightens everything up!)
- For the topping:
- 1/2 cup (90g) white chocolate chips or chunks (for drizzle)
- 1/4 cup (40g) crushed peppermint candies (totally optional, but so festive)
- Sprinkles, extra nuts, or more dried fruit (decorate to your heart’s content)
If you want to make these bars dairy-free, swap the butter for vegan margarine and use coconut condensed milk. For a lower-sugar option, try monk fruit sweetener in place of brown sugar and use sugar-free chocolate chips. In summer, fresh berries are a delicious substitute for dried fruit. I always recommend King Arthur flour for the best texture, and Ghirardelli chocolate chips for that dreamy melt.
Don’t worry if you’re missing one or two items—these bars are forgiving and easy to customize. Just remember, the base sets the stage, and the filling brings the festive cheer!
Equipment Needed
You don’t need fancy gadgets to make Christmas squares and bars—just a few trusty tools and maybe a little elbow grease. Here’s what’s in my kitchen when I bake these treats:
- 9×13-inch (23x33cm) baking pan (lined with parchment for easy removal—trust me, you’ll thank yourself later)
- Mixing bowls (medium and large)
- Hand mixer or sturdy whisk (I’ve used both, but a mixer saves time)
- Rubber spatula (for scraping every last bit of batter)
- Measuring cups and spoons (accuracy matters for bars)
- Cooling rack (optional, but helpful for neat squares)
- Sharp knife (for clean cuts—serrated works best for chunky toppings)
If you don’t have a baking pan that size, you can use two smaller pans or even a rimmed cookie sheet in a pinch. For mixing, a wooden spoon works just fine if you’re feeling old-school. I always keep parchment paper on hand for easy clean-up, and my trusty Pyrex bowls have survived years of holiday baking. If you’re on a budget, most dollar stores or thrift shops have affordable baking pans and utensils—no need to splurge.
Preparation Method
- Preheat and prep: Preheat your oven to 350°F (175°C). Line your baking pan with parchment paper, leaving a little overhang for easy lifting later. A light spritz of nonstick spray on the parchment helps everything release smoothly.
- Make the base: In a large mixing bowl, cream together 1 cup (225g) unsalted butter and 1/2 cup (100g) brown sugar until light and fluffy—about 2 minutes with a hand mixer, or a bit longer by hand. Add 2 cups (250g) all-purpose flour, 1/2 teaspoon salt, and 1 teaspoon cinnamon. Mix until just combined; don’t overwork, or the bars can get tough.
- Press and par-bake: Spread the base mixture evenly into your prepared pan. Press down firmly with a spatula or your hands to create a compact layer. Bake for 12-15 minutes, until edges look just golden. The base should smell buttery and fragrant—like shortbread.
- Prepare the filling: While the base bakes, combine 3/4 cup (180ml) sweetened condensed milk, 1 cup (180g) chocolate chips, 1/2 cup (60g) chopped nuts, 1/2 cup (80g) dried cranberries, 1/4 cup (30g) shredded coconut, and 1 tablespoon orange zest in a bowl. Stir well to coat everything evenly. If the mixture seems too thick, add a splash of milk.
- Layer the filling: Once the base is out of the oven, spoon the filling mixture over the top and spread gently to cover. Try not to press too hard, or you’ll squish the base. The filling should look chunky and colorful.
- Bake again: Return the pan to the oven and bake for another 20-22 minutes, until the edges bubble and the top looks set. You’ll know it’s done when a toothpick inserted near the center comes out mostly clean—gooey bits are fine, but it shouldn’t be wet.
- Add the topping: While bars are still warm, sprinkle over 1/2 cup (90g) white chocolate chips and 1/4 cup (40g) crushed peppermint candies. Let the heat melt the chocolate a bit, then use a spatula to swirl it around. Decorate with extra nuts, sprinkles, or dried fruit if you like.
- Cool completely: Let the pan sit at room temperature for at least 1 hour, then transfer to the fridge for another hour—this helps everything set for neat slices. (Impatient? You can speed this up in the freezer for 20 minutes, but watch for condensation.)
- Slice and serve: Use your parchment overhang to lift the bars out of the pan. Cut into squares or rectangles with a sharp, slightly damp knife for clean edges. Wipe the knife between cuts to keep things tidy.
- Troubleshooting: If your bars seem crumbly, chances are the base was overmixed or underbaked. Too gooey? Chill a bit longer. If the topping’s too hard, warm for a few seconds in the microwave before slicing. I’ve learned the hard way—patience pays off!
For efficiency, prep your toppings while the bars bake. If you want smaller bites for a cookie tray, cut into bite-sized pieces after chilling. The sensory cues are key—look for golden edges, smell the toasted nuts, and feel the slight firmness when pressing down.
Cooking Tips & Techniques
Baking Christmas squares and bars isn’t rocket science, but a few pro tricks make all the difference. Over the years, I’ve had my share of messy pans and crumbly bars—let’s save you some trouble:
- Don’t overmix the base: Once you add the flour, mix just until combined. Overmixing leads to tough, dry bars (ask me how I know).
- Use room temperature butter: Soft butter creams better and helps the base stay tender. Cold butter can leave clumps and uneven texture.
- Layer evenly: Spread the filling gently so you don’t crack the base. If the filling is thick, use wet fingers or a spatula lightly oiled to gently press it down.
- Watch the bake time: Ovens vary—start checking a few minutes early. Bars should be golden around the edges and set in the center. If they overbake, they lose that chewy magic.
- Cool completely before slicing: Warm bars are soft and messy. Chilling helps them firm up and makes for perfect, Pinterest-worthy squares.
- Multitasking tip: Prep your toppings and decorations while the bars bake—that way, everything’s ready to go when they come out of the oven.
One of my early fails was rushing the cooling process—ended up with a gooey mess instead of neat bars. Now, I always build in extra chilling time. Consistency comes from measuring carefully and not skipping the chilling step. If you want bars that look bakery-quality, use a ruler for straight lines when slicing (seriously, it’s worth it for holiday trays!).
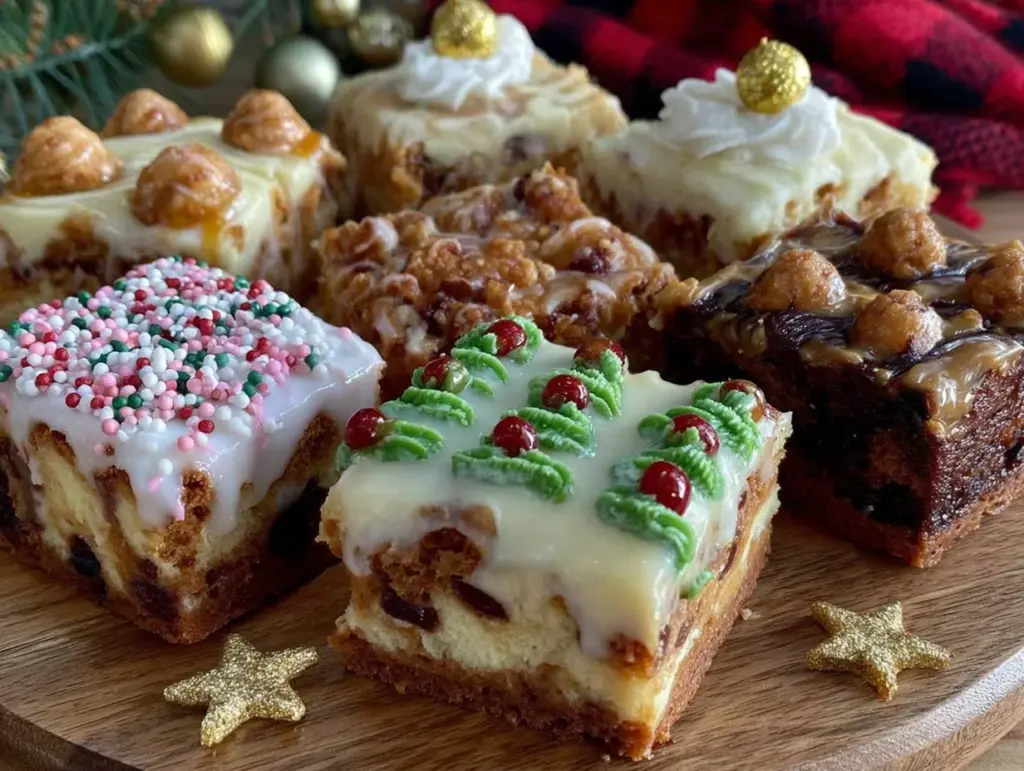
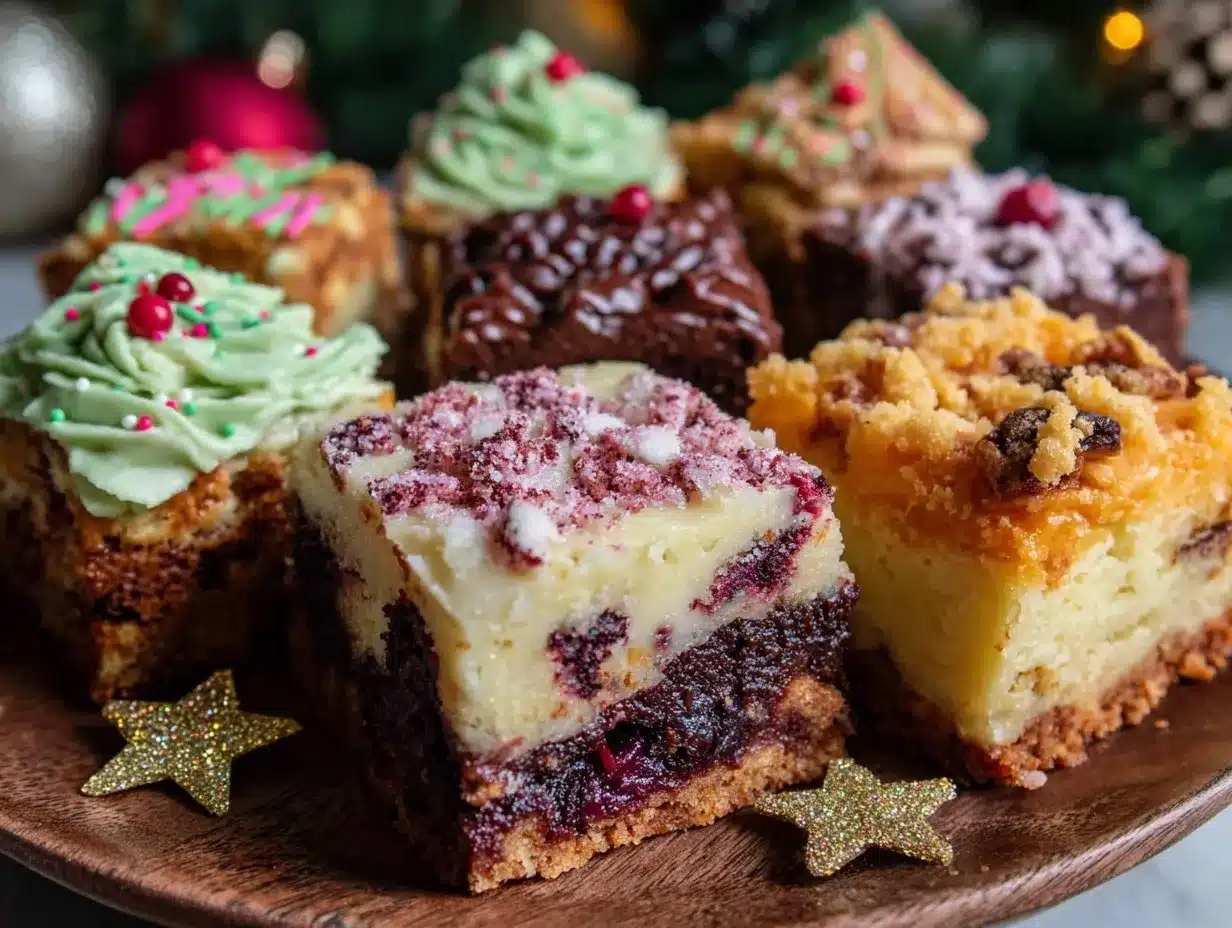
Variations & Adaptations
There’s no one-size-fits-all when it comes to Christmas squares and bars. Here are a few ways to switch things up for different tastes, seasons, and dietary needs:
- Gluten-free: Substitute the all-purpose flour with your favorite gluten-free blend. I’ve used King Arthur’s and Bob’s Red Mill—both work well.
- Dairy-free: Swap butter for vegan margarine, and use coconut condensed milk. Dairy-free chocolate chips and coconut shreds complete the transformation!
- Nut-free: Use sunflower seeds or pumpkin seeds in place of nuts, and skip the nut toppings. This version still packs plenty of crunch.
- Seasonal twist: In spring or summer, trade dried cranberries for fresh raspberries or blueberries. Add a squeeze of lemon instead of orange zest for a brighter flavor profile.
- Flavor customization: Add a teaspoon of espresso powder to the filling for mocha bars, or stir in mini marshmallows for a s’mores-inspired twist.
Personally, my favorite adaptation is swapping out cranberries for dried apricots and using almond extract instead of orange zest—gives a subtle, almost floral note that’s perfect for tea parties or afternoon snacking. Don’t be afraid to experiment with your favorite candies, jams, or spices. The bars are sturdy enough to handle mix-ins, so get creative!
Serving & Storage Suggestions
Christmas squares and bars are best served slightly chilled or at room temperature. Arrange them on a festive platter, dust with powdered sugar, and add a few sprigs of rosemary for a Pinterest-worthy holiday spread. They pair beautifully with hot cocoa, spiced tea, or even a glass of mulled wine if you’re feeling extra fancy.
For gifting, stack squares in cellophane bags tied with ribbon—trust me, they’ll be the first treat your friends reach for. If you’re making ahead, these bars keep well in the refrigerator for up to 5 days (just seal tightly in an airtight container). They freeze like a dream, too—wrap individual squares in wax paper and pop them in a freezer-safe bag for up to 3 months.
To reheat, zap a square in the microwave for 10-15 seconds for a warm, gooey bite. Honestly, I think the flavors deepen and meld together after a day or two, so they’re even better as leftovers. Just don’t leave them out uncovered—air makes them dry out faster.
Nutritional Information & Benefits
Each Christmas square or bar (based on a 9×13-inch pan sliced into 24 pieces) is roughly:
- Calories: 180
- Fat: 9g
- Carbohydrates: 22g
- Protein: 2g
- Sugar: 12g
Key ingredients like nuts and dried fruit offer a little fiber and healthy fats, while the coconut adds texture and a touch of iron. If you go for gluten-free flours or lower-sugar chocolate chips, these bars can fit more dietary needs. Major allergens include wheat, dairy, nuts, and eggs (if using certain variations)—so check your swaps if you’re baking for a crowd.
I love these bars because, while they’re a treat, they’re not overly heavy or cloying. A couple bites satisfy that holiday sweet tooth, and you can feel good about sharing them with family. Moderation is key, but a little indulgence feels just right at Christmas!
Conclusion
Honestly, if you’re searching for the ultimate Christmas squares and bars recipe, this is the one to try. It’s easy, adaptable, and sure to win hearts at any festive gathering. Whether you follow the classic version or mix in your own favorite flavors, you’ll end up with a dessert that feels like a warm hug—nostalgic, comforting, and totally irresistible.
Make it your own! Swap ingredients, add a sprinkle of magic, and don’t be afraid to get creative. I love this recipe because it brings my family together and makes every holiday brighter. If you bake these bars, I’d love to hear how you put your personal spin on them—leave a comment below, share your photos, or let me know your favorite variation.
Most of all, happy baking! May your kitchen be filled with laughter, good smells, and plenty of sweet treats this season.
FAQs
Can I prepare Christmas squares and bars ahead of time?
Yes! These bars taste even better after a day or two. Refrigerate in an airtight container and slice just before serving for freshest results.
Can I freeze these bars for later?
Absolutely. Wrap individual squares in wax paper and freeze for up to 3 months. Thaw in the fridge overnight and enjoy!
What can I use if I’m allergic to nuts?
Swap nuts for seeds like pumpkin or sunflower, or simply leave them out. The bars will still be delicious and crunchy.
Can I use different types of chocolate?
Of course! Milk, dark, or white chocolate all work. You can even use a mix for extra flavor and color.
How do I get clean, even slices?
Chill the bars completely before cutting, use a sharp knife, and wipe the blade between slices. For extra neatness, use a ruler to measure out even squares.
Pin This Recipe!
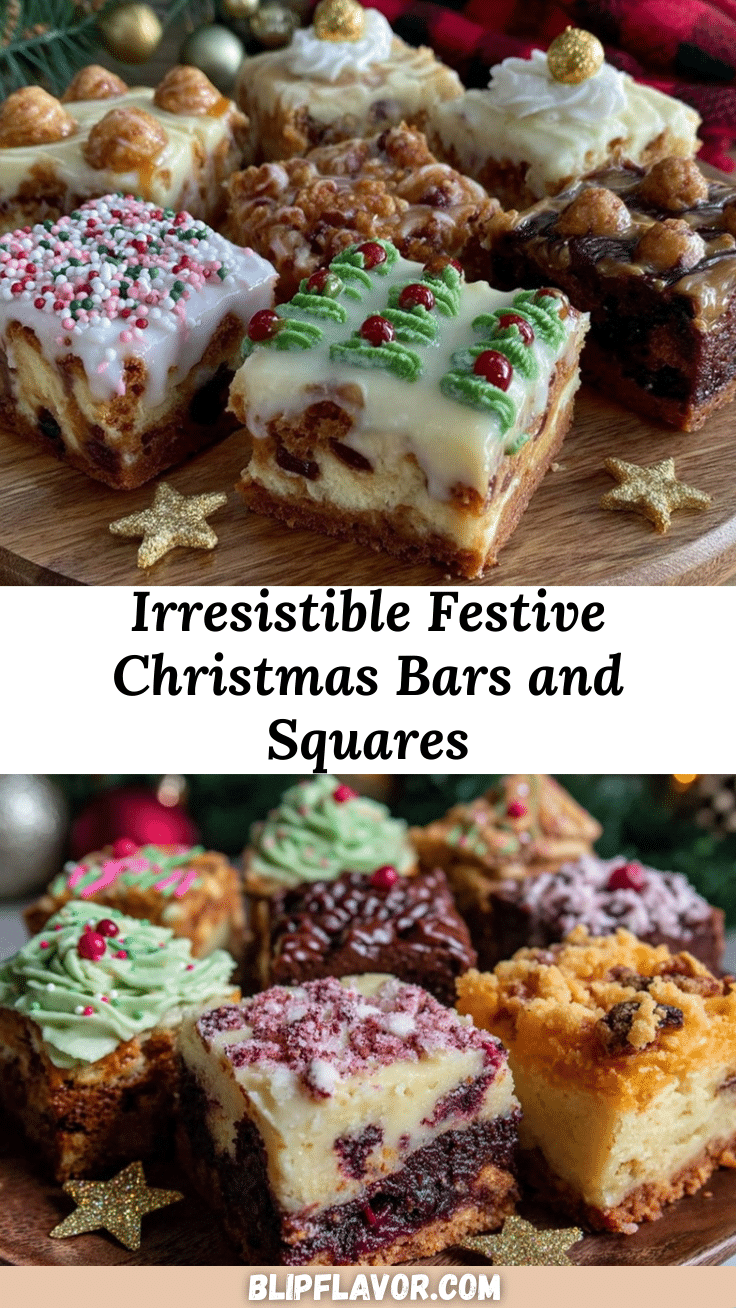
Christmas Squares and Bars: 15 Easy Festive Desserts to Bake

These Christmas squares and bars are a nostalgic, crowd-pleasing holiday treat packed with chewy, crunchy, chocolatey goodness and hints of spice and toasted nuts. Quick to make and endlessly adaptable, they’re perfect for festive gatherings, gifting, or cozy nights in.
- Prep Time: 20 minutes
- Cook Time: 35 minutes
- Total Time: 1 hour 15 minutes
- Yield: 24 squares 1x
- Category: Dessert
- Cuisine: American
Ingredients
- 2 cups all-purpose flour
- 1 cup unsalted butter, softened
- 1/2 cup brown sugar, packed
- 1/2 teaspoon salt
- 1 teaspoon ground cinnamon (optional)
- 3/4 cup sweetened condensed milk
- 1 cup chocolate chips (semi-sweet or dark)
- 1/2 cup chopped pecans or walnuts (or seeds for nut-free)
- 1/2 cup dried cranberries or cherries
- 1/4 cup shredded coconut (unsweetened or sweetened)
- 1 tablespoon orange zest (optional)
- 1/2 cup white chocolate chips or chunks
- 1/4 cup crushed peppermint candies (optional)
- Sprinkles, extra nuts, or more dried fruit for decoration
Instructions
- Preheat oven to 350°F (175°C). Line a 9×13-inch baking pan with parchment paper, leaving an overhang for easy lifting. Lightly spray parchment with nonstick spray.
- In a large mixing bowl, cream together butter and brown sugar until light and fluffy (about 2 minutes with a hand mixer).
- Add flour, salt, and cinnamon. Mix until just combined; do not overmix.
- Spread base mixture evenly into prepared pan. Press down firmly to create a compact layer.
- Bake base for 12-15 minutes, until edges are just golden.
- While base bakes, combine sweetened condensed milk, chocolate chips, nuts, dried cranberries, coconut, and orange zest in a bowl. Stir well.
- Once base is baked, spoon filling mixture over the top and spread gently to cover.
- Return pan to oven and bake for another 20-22 minutes, until edges bubble and top looks set. Toothpick inserted near center should come out mostly clean.
- While bars are still warm, sprinkle white chocolate chips and crushed peppermint candies over the top. Let chocolate melt slightly, then swirl with a spatula. Decorate with extra nuts, sprinkles, or dried fruit as desired.
- Cool pan at room temperature for at least 1 hour, then refrigerate for another hour to set. (Or freeze for 20 minutes if needed.)
- Lift bars out of pan using parchment overhang. Cut into squares or rectangles with a sharp, damp knife, wiping between cuts for clean edges.
- Store in airtight container in refrigerator for up to 5 days, or freeze wrapped squares for up to 3 months.
Notes
For gluten-free, use a GF flour blend. For dairy-free, swap butter for vegan margarine and use coconut condensed milk. Nut-free option: use seeds instead of nuts. Chill bars fully before slicing for neat squares. Decorate with festive toppings for extra holiday flair. Bars taste even better after a day in the fridge.
Nutrition
- Serving Size: 1 square (1/24th of
- Calories: 180
- Sugar: 12
- Sodium: 70
- Fat: 9
- Saturated Fat: 5
- Carbohydrates: 22
- Fiber: 2
- Protein: 2
Keywords: Christmas bars, holiday dessert, festive squares, easy baking, chocolate, nuts, coconut, cranberry, potluck, giftable treats


