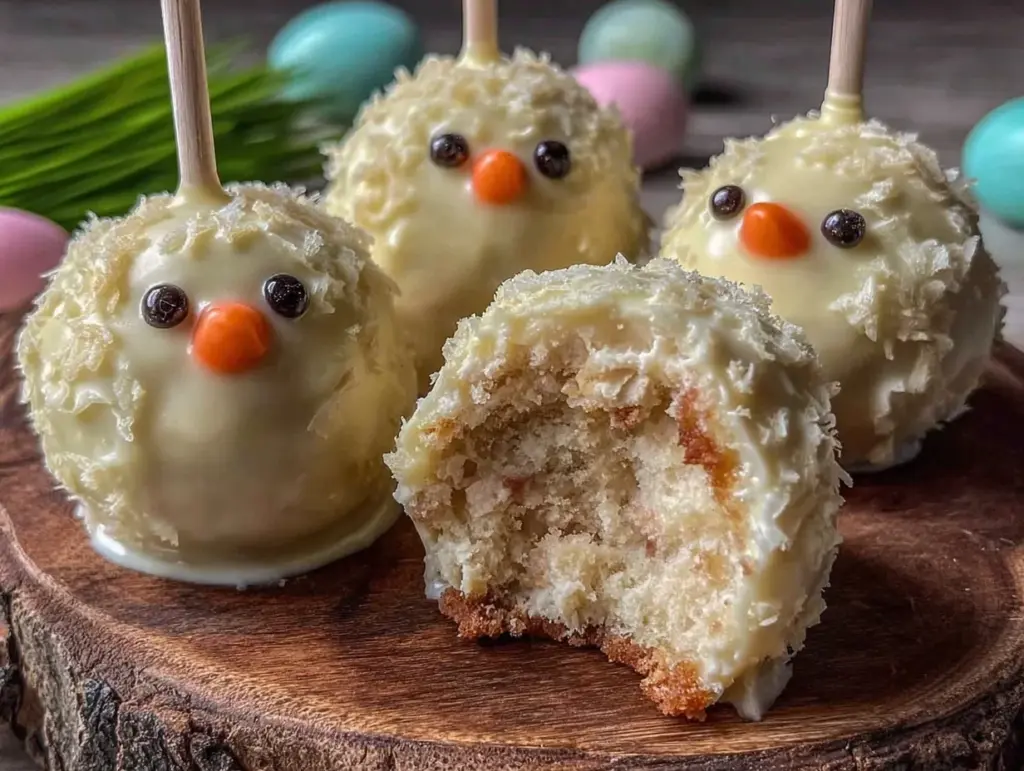
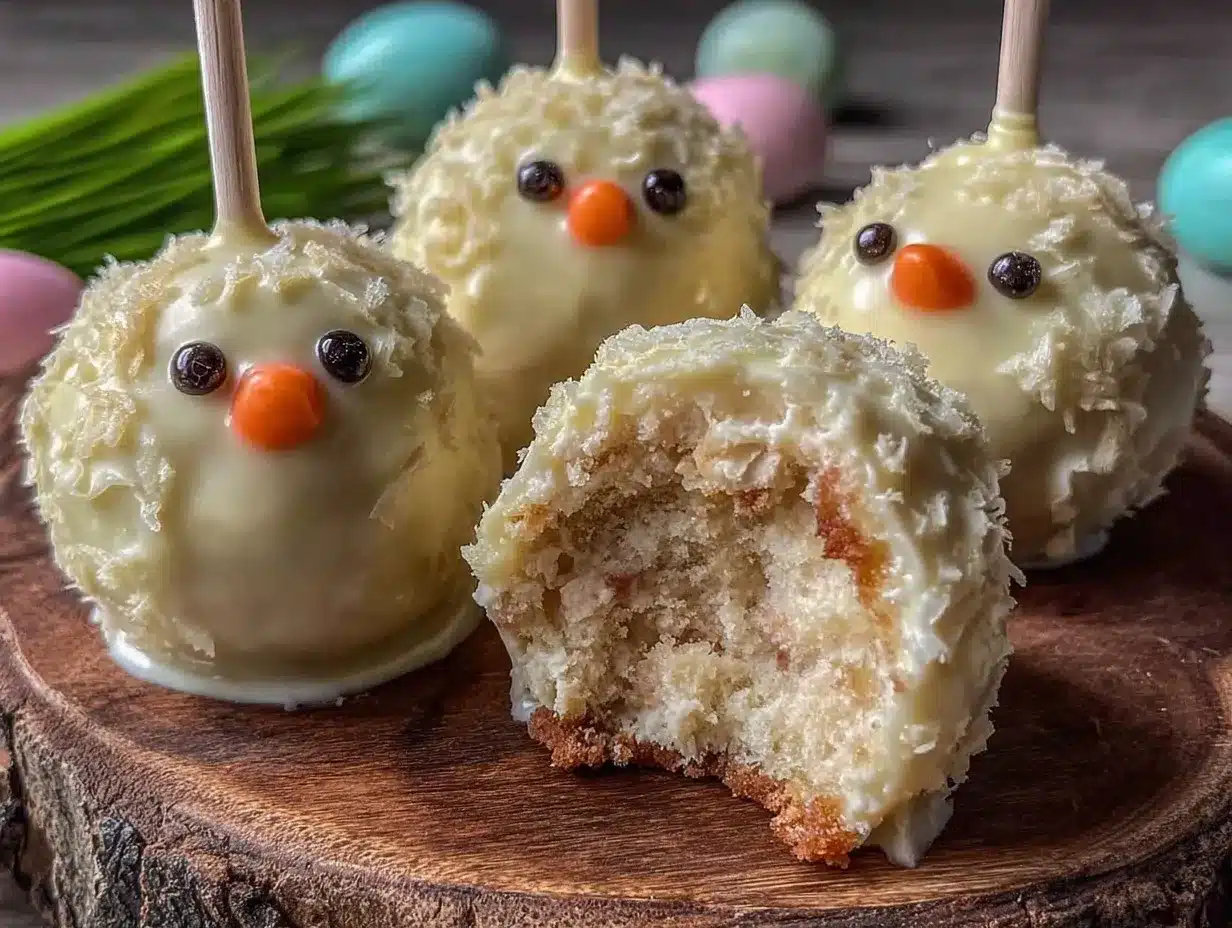
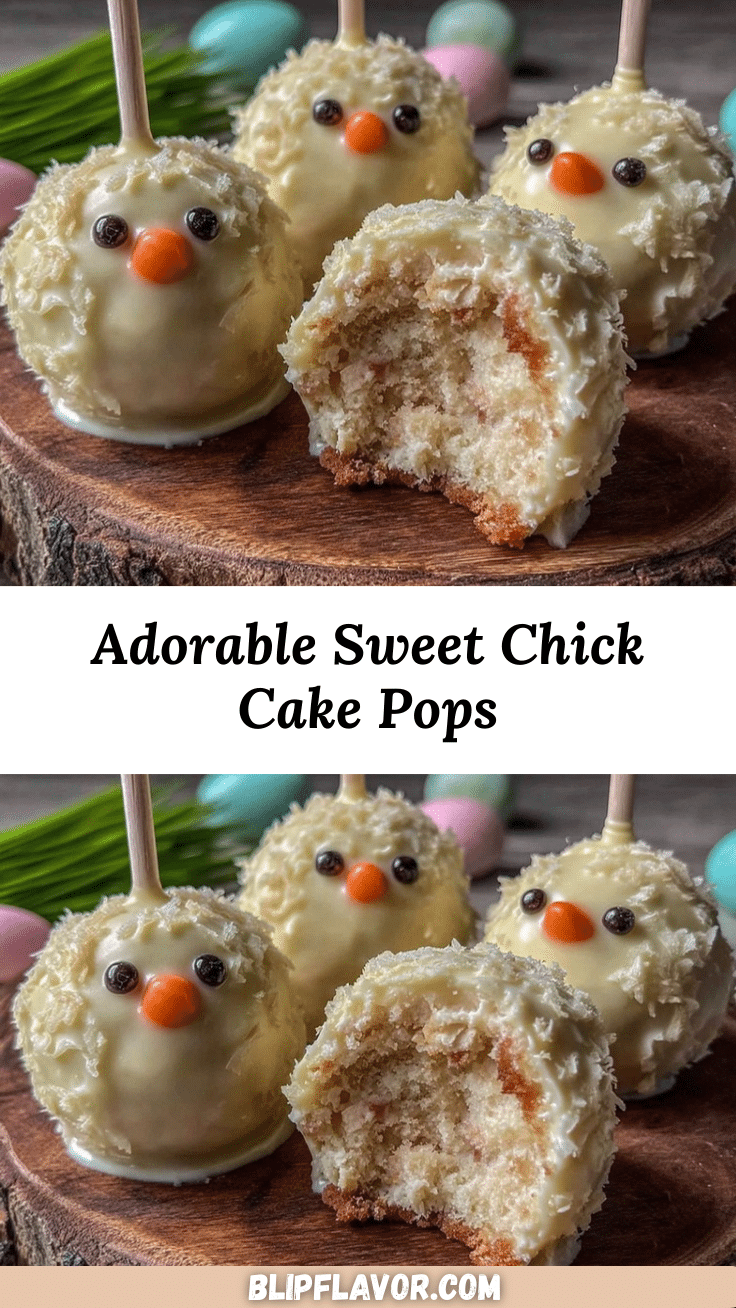
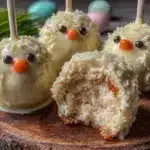
Let me tell you, the sight of these little chick cake pops, all bright yellow and peeping with their candy eyes, brings an instant smile—like a springtime party on a stick! The first time I made these, I was honestly just trying to whip up something cute for a rainy weekend craft with my niece. But as soon as I dipped that first pop into the yellow coating and added the tiny beak, I was instantly hooked. It was one of those moments where you pause, take a deep breath, and just smile because you know you’re onto something truly special.
Years ago, when I was knee-high to a grasshopper, my grandma used to make the most delightful Easter treats, but none quite like these cake pops. I stumbled upon the idea while flipping through an old recipe book, but it wasn’t until I tweaked the recipe myself that the magic really happened. Honestly, I wish I’d discovered this recipe years ago—it’s dangerously easy and delivers pure, nostalgic comfort with every bite.
My family couldn’t stop sneaking them off the cooling rack (and I can’t really blame them). The kids especially loved the little chick faces; it’s like they got a tiny burst of springtime fun in each pop. Let’s face it, these adorable chick cake pops are perfect for potlucks, a sweet treat for your kids, or just to brighten up your Pinterest cookie board with something playful and delicious.
After testing this recipe multiple times (in the name of research, of course), these chick cake pops have become a staple for family gatherings and gifting. They feel like a warm hug on a stick, and I promise you’re going to want to bookmark this one for every spring celebration ahead!
Why You’ll Love This Recipe
Honestly, making these adorable chick cake pops is as fun as eating them. From my many attempts in the kitchen, I can say this recipe hits the sweet spot between creativity and simplicity.
- Quick & Easy: Comes together in about 45 minutes, perfect for busy weeknights or last-minute party plans.
- Simple Ingredients: You likely have everything in your pantry or fridge—no need for fancy trips to specialty stores.
- Perfect for Spring Occasions: Great for Easter brunches, school parties, or just bringing a little sunshine to your day.
- Crowd-Pleaser: Kids and adults alike can’t resist these cute, bite-sized treats.
- Unbelievably Delicious: The moist cake inside paired with the creamy candy coating is pure joy.
What makes this recipe stand out? It’s the little details, like blending the cake crumbs to just the right texture so they bind perfectly without being too dense. The bright yellow candy coating isn’t just for looks—it adds a subtle sweetness that complements the cake inside. Plus, the chick faces are made with simple candy bits and edible markers, so you get that homemade charm without a fuss.
This isn’t just another cake pop recipe; it’s the one that makes you close your eyes after the first bite and smile. It’s comfort food reimagined—fun, festive, and delicious without the stress. Perfect for impressing your guests or turning a simple snack into a memorable moment.
What Ingredients You Will Need
This recipe uses simple, wholesome ingredients to deliver bold flavor and satisfying texture without the fuss. Most are pantry staples, and substitutions are easy if you need them.
- Cake Base:
- 1 box yellow cake mix (or homemade equivalent)
- 3 large eggs, room temperature (helps bind the cake crumbs)
- 1/3 cup vegetable oil (adds moisture and tenderness)
- 1 cup water or milk (milk makes it richer)
- Frosting Binder:
- 1/2 cup cream cheese, softened (for that tangy richness)
- 1/4 cup unsalted butter, softened
- 1 cup powdered sugar
- Coating & Decoration:
- Yellow candy melts or white chocolate with yellow food coloring (for the chick’s body)
- Mini candy eyes or edible markers (for the eyes)
- Orange candy pieces or orange icing (for the beak)
- Optional: pink candy dust or edible blush (for rosy cheeks)
- Tools:
- White lollipop sticks or wooden skewers
I personally recommend using Wilton candy melts for the coating—they melt smoothly and have great coverage. If you can’t find yellow, white chocolate with a bit of gel food coloring works just fine. For the cake mix, any trusted brand you prefer is good; I often go with Pillsbury for consistent texture.
If you want to keep it gluten-free, swap the cake mix for your favorite gluten-free brand, and use dairy-free cream cheese to make it suitable for dairy-sensitive friends.
Equipment Needed
- Mixing bowls – a couple of medium-sized ones for the cake batter and frosting.
- Electric mixer or hand whisk – to cream the frosting smoothly.
- Baking pan (9×13 inch / 23×33 cm) – for baking the cake evenly.
- Cooling rack – to cool the cake completely before crumbling.
- Large spoon or spatula – for mixing cake crumbs with frosting.
- Baking sheet lined with parchment paper – to place cake pops while they set.
- Microwave-safe bowls – for melting candy melts.
- Lollipop sticks or wooden skewers – essential for holding the pops.
If you don’t have a mixer, no worries—just whisk the frosting by hand, but it might take a bit longer. For melting candy melts, a double boiler works great if you prefer not to use a microwave. I usually prefer microwave for speed and ease, but be careful to stir frequently to avoid burning.
Budget-friendly tip: Use wooden skewers if lollipop sticks aren’t handy—they do the trick just fine!
Preparation Method
- Preheat your oven to 350°F (175°C). Grease your baking pan lightly or line it with parchment paper for easy cake removal.
- Prepare the cake batter. In a large bowl, combine the yellow cake mix, eggs, vegetable oil, and water or milk. Use an electric mixer or whisk until the mixture is smooth and lump-free—about 2-3 minutes. The batter should be slightly thick but pourable.
- Bake the cake. Pour batter evenly into your prepared pan. Bake for 30-35 minutes, or until a toothpick inserted in the center comes out clean. Baking times can vary, so keep an eye on it after 30 minutes.
- Cool completely. Once baked, place the cake pan on a cooling rack and let it cool fully—this usually takes about 1 hour. Cake pops need crumbly but not warm cake, or the frosting will melt.
- Make the frosting. While the cake cools, beat the softened cream cheese and butter together until smooth and creamy. Gradually add powdered sugar and mix until fully combined and fluffy. Taste it—you’ll want it sweet but balanced.
- Crumble the cooled cake. Break the cake into small crumbs using your hands or a fork in a large bowl. It should look like coarse sand.
- Mix cake crumbs and frosting. Add frosting to the cake crumbs a little at a time. Mix with a spoon or your hands until the mixture is moist enough to hold its shape when rolled but not too sticky. You might need about 1 cup of frosting, but adjust as needed.
- Shape the chick cake pops. Scoop out small amounts of the mixture and roll into 1.5-inch (4 cm) balls. Then shape each ball slightly oval to mimic a chick’s body.
- Insert sticks. Dip the tip of each lollipop stick in melted candy coating, then gently push it halfway into the cake pop. This helps stick stay in place. Place pops on a baking sheet lined with parchment paper.
- Chill the pops. Refrigerate for about 30 minutes to firm up before dipping.
- Melt the candy coating. In a microwave-safe bowl, melt the yellow candy melts in 30-second intervals, stirring in between, until smooth and creamy.
- Dip the cake pops. Holding the stick, dip each chilled cake pop into the melted candy coating, covering completely. Gently tap off excess coating.
- Decorate the chicks. Before the coating sets, attach mini candy eyes and a small orange candy piece or piped icing for the beak. If you want cheeks, lightly brush pink edible dust or color onto the sides.
- Let the pops set. Place the decorated pops upright in a styrofoam block or stand them in a glass to dry completely—about 20 minutes.
- Serve and enjoy! These little chicks are ready to brighten your table and your day.
Cooking Tips & Techniques
One key to success with these adorable chick cake pops is getting the cake and frosting balance just right—too dry, and the pops crumble; too wet, and they won’t hold their shape. I learned the hard way that adding frosting gradually is the way to go.
When melting candy melts, patience is vital. Stir often and avoid overheating, which can cause the coating to seize or become grainy. If you accidentally get lumps, a quick stir and gentle warming fix most issues.
Another tip: chill your pops thoroughly before dipping. I’ve found that if they’re too soft, the candy coating can slide right off, making a mess. Plus, chilled pops give a cleaner finish and crisp snap when you bite into them.
Don’t rush the decorating! Adding the eyes and beak while the candy coating is still wet ensures they stick well. If you’re using edible markers, wait until the coating is fully dry to avoid smudging.
Finally, multitasking helps: bake the cake while prepping the frosting, then crumble and mix while the cake cools. It makes the process feel quick and smooth rather than a big production.
Variations & Adaptations
Want to mix things up? Here are some fun ways to customize these chick cake pops:
- Dietary swaps: Use a gluten-free cake mix and dairy-free frosting options to make them allergy-friendly.
- Flavor twists: Add a teaspoon of lemon zest to the cake batter for a fresh spring zing, or swap yellow cake mix for carrot cake to add a subtle spice.
- Seasonal spins: For a summer picnic, swap yellow candy melts for pastel pink or green for a different festive look.
- Alternative coatings: Try white chocolate with colored sprinkles instead of candy melts for texture and extra sweetness.
- Personal favorite: I once added a tiny bit of coconut extract to the frosting and it gave the chick pops an unexpected tropical twist that was a hit at a family brunch.
Serving & Storage Suggestions
Serve these adorable chick cake pops at room temperature for the best flavor and texture. They look fantastic presented upright in a decorated styrofoam block or nestled in a basket lined with pastel tissue paper—perfect for springtime celebrations.
Pair them with fresh fruit or a light punch for an easy dessert table spread. They’re also great alongside a cup of tea or coffee for a cozy afternoon treat.
To store, keep the cake pops in an airtight container in the refrigerator for up to 5 days. If you want to keep them longer, you can freeze them for up to a month. Just thaw in the fridge before serving to keep the candy coating intact.
Reheating isn’t necessary, but if you prefer a softer center, let them sit at room temperature for about 30 minutes before enjoying. Over time, the flavors meld beautifully—the tang of the cream cheese frosting and the sweetness of the candy coating deepen, making each bite even more satisfying.
Nutritional Information & Benefits
Each adorable chick cake pop contains approximately 150-180 calories, with a balance of carbs, fats, and a touch of protein from the cream cheese frosting. While it’s definitely a treat, the use of cream cheese adds some calcium and protein compared to pure buttercream.
The yellow cake base provides energy from carbohydrates, and using real eggs adds some essential nutrients like vitamin D and B vitamins. For those watching sugar intake, you can reduce the powdered sugar slightly in the frosting or swap candy melts for a less sugary coating.
This recipe can be easily adapted for gluten-free or dairy-free diets, making it a versatile option for many. Just remember to check labels for allergens like nuts or soy, depending on your ingredient choices.
From a wellness perspective, making treats like this at home means you control the ingredients, avoiding preservatives and artificial additives often found in store-bought cake pops. Plus, the joy and creativity of making these with family boosts the soul more than any vitamin!
Conclusion
These adorable chick cake pops are a wonderful way to bring a little cheer and fun to any spring celebration. The combination of simple ingredients, easy steps, and playful presentation makes this recipe a keeper in my kitchen and hopefully yours, too.
Feel free to customize them based on your tastes or dietary needs—the possibilities are endless, and that’s part of the joy. Honestly, I love how these cake pops bring out the kid in me and the joy in sharing something so sweet and cute with friends and family.
If you try this recipe, I’d love to hear how your chick cake pops turned out! Drop a comment, share your photos, or tell me about your own twist on this festive treat. Here’s to making springtime just a little sweeter and a lot more adorable!
FAQs About Adorable Chick Cake Pops
How long do chick cake pops last?
Stored in an airtight container in the fridge, they last about 5 days. For longer storage, freeze them up to a month and thaw before serving.
Can I use homemade cake instead of box mix?
Absolutely! Just make sure your homemade cake is moist but firm enough to crumble and bind with frosting.
What if I don’t have candy melts?
You can melt white chocolate and tint it with gel food coloring. Just be careful not to overheat the chocolate.
How do I keep the cake pops from falling off the sticks?
Dip the stick tip in melted coating before inserting into the cake ball, and chill the pops well before dipping to help them set firmly.
Can I make these without cream cheese frosting?
You can swap the cream cheese frosting for buttercream or marshmallow fluff, but cream cheese adds a nice tang and moisture that works best.
Pin This Recipe!
Adorable Chick Cake Pops
These adorable chick cake pops are a fun and festive spring treat featuring moist yellow cake balls coated in bright yellow candy melts and decorated with cute chick faces. Perfect for Easter, school parties, or any spring celebration.
- Prep Time: 15 minutes
- Cook Time: 35 minutes
- Total Time: 1 hour 50 minutes
- Yield: 24 cake pops 1x
- Category: Dessert
- Cuisine: American
Ingredients
- 1 box yellow cake mix (or homemade equivalent)
- 3 large eggs, room temperature
- 1/3 cup vegetable oil
- 1 cup water or milk
- 1/2 cup cream cheese, softened
- 1/4 cup unsalted butter, softened
- 1 cup powdered sugar
- Yellow candy melts or white chocolate with yellow food coloring
- Mini candy eyes or edible markers
- Orange candy pieces or orange icing
- Optional: pink candy dust or edible blush
- White lollipop sticks or wooden skewers
Instructions
- Preheat your oven to 350°F (175°C). Grease your baking pan lightly or line it with parchment paper.
- In a large bowl, combine the yellow cake mix, eggs, vegetable oil, and water or milk. Mix until smooth and lump-free, about 2-3 minutes.
- Pour batter evenly into the prepared pan and bake for 30-35 minutes or until a toothpick inserted in the center comes out clean.
- Cool the cake completely on a cooling rack, about 1 hour.
- Beat the softened cream cheese and butter together until smooth and creamy. Gradually add powdered sugar and mix until fluffy.
- Crumble the cooled cake into small crumbs in a large bowl.
- Add frosting to the cake crumbs gradually, mixing until the mixture holds its shape but is not too sticky.
- Shape the mixture into 1.5-inch balls and slightly oval them to mimic a chick’s body.
- Dip the tip of each lollipop stick in melted candy coating and insert halfway into each cake pop. Place on a parchment-lined baking sheet.
- Refrigerate the cake pops for about 30 minutes to firm up.
- Melt the yellow candy melts in a microwave-safe bowl in 30-second intervals, stirring until smooth.
- Dip each chilled cake pop into the melted candy coating, covering completely. Tap off excess coating.
- Decorate the chicks by attaching mini candy eyes and an orange candy piece or piped icing for the beak. Optionally, brush pink edible dust for cheeks.
- Let the pops set upright in a styrofoam block or glass for about 20 minutes until fully dry.
- Serve and enjoy.
Notes
Add frosting gradually to avoid overly wet mixture. Chill cake pops thoroughly before dipping to prevent coating from sliding off. Stir candy melts frequently while melting to avoid burning. Decorate while coating is wet for best adhesion. Use wooden skewers if lollipop sticks are unavailable.
Nutrition
- Serving Size: 1 cake pop
- Calories: 165
- Sugar: 18
- Sodium: 110
- Fat: 8
- Saturated Fat: 4
- Carbohydrates: 22
- Fiber: 0.5
- Protein: 2
Keywords: cake pops, chick cake pops, spring treats, Easter desserts, kid-friendly desserts, candy coated cake pops, festive treats


