“Wait, are you seriously making a cake in school colors?” my neighbor asked with a raised eyebrow as I shuffled around my kitchen, bags of colored candy and frosting tubes spread out like a tiny candy factory. Honestly, I wasn’t sure if it would turn out or if it would look like a messy blob of color, but there was something oddly comforting about it. I was prepping for my niece’s big game day, and she’s the kind of kid who counts on every scrap of school spirit to fuel her cheerleading squad. So, making a perfect school colors drip cake with custom candy toppers wasn’t just about dessert—it was about capturing that buzz of excitement, the pride, the energy.
Funny enough, the first attempt was a bit of a disaster. The ganache ran too fast, the colors bled a little, and some of those candy toppers didn’t quite stick like I’d hoped. But after a few evenings of tweaking, testing, and (okay, I admit) sneaking bites when no one was looking, this recipe emerged. It’s got just the right balance of smooth drip, vibrant colors, and those personalized candy toppers that make a cake feel truly one-of-a-kind. And if you’re anything like me, juggling last-minute party prep with a million other things, this recipe will become your go-to. Not fancy or intimidating, just reliable and festive.
Looking back, it’s kind of funny how a simple cake turned into a little ritual of pride and celebration for my niece’s team—and a sweet reminder that even the simplest ingredients can bring a big smile. That’s why I’m sharing this recipe, hoping it’ll bring that same spark to your celebrations, whether it’s for a school event, a birthday, or just because you want to wow a crowd with some custom candy magic.
Why You’ll Love This Recipe
Honestly, this perfect school colors drip cake with custom candy toppers has been through the ringer in my kitchen, and I can confidently say it’s a winner for anyone looking to impress without stress. Here’s why it stands out:
- Quick & Easy: The whole cake comes together in under 2 hours, including decorating, making it perfect for crunch time when you’ve got a party to prep.
- Simple Ingredients: No exotic stuff here—just pantry staples and a handful of candy basics for the toppers. You probably already have most of what you need.
- Perfect for Game Days & Celebrations: Whether it’s a pep rally, birthday, or team party, this cake screams school spirit and festive fun.
- Crowd-Pleaser: Kids and adults alike love the sweet, creamy layers paired with the playful drip and candy details. It’s a cake that gets people talking—and snapping photos.
- Unbelievably Delicious: The moist layers paired with smooth buttercream and a glossy ganache drip hit just the right note of celebration comfort food.
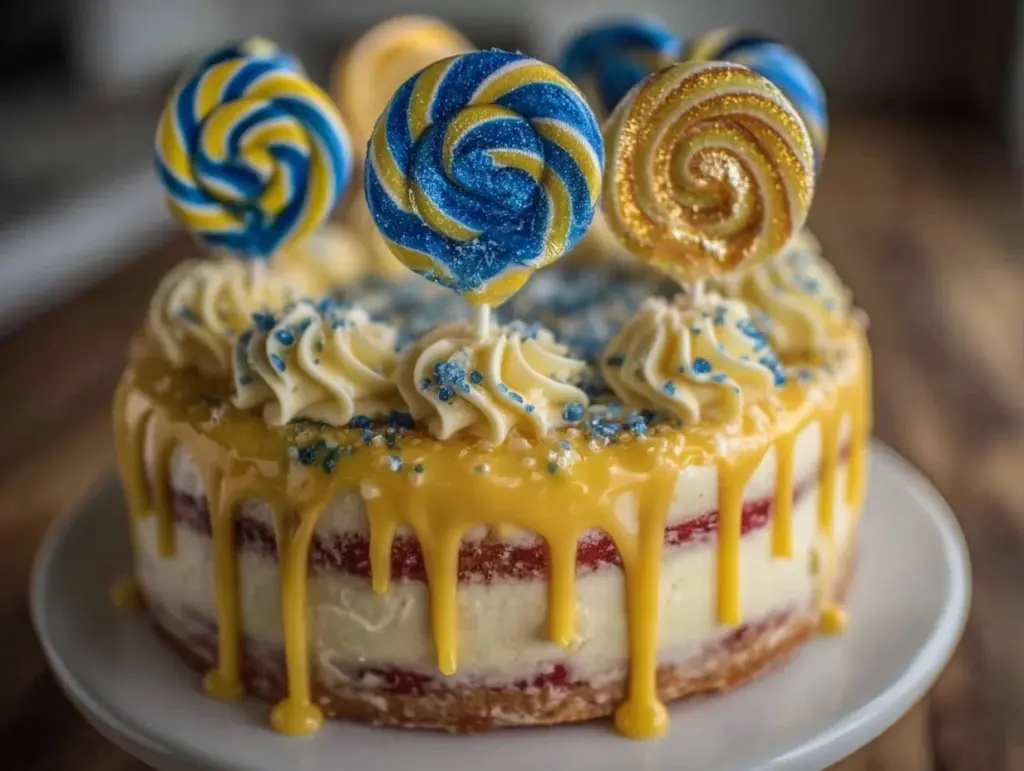
What makes this recipe different? The custom candy toppers. I’ve spent hours experimenting with candy melts and molds to create toppers that actually stay put and add a personal touch. Plus, the drip isn’t just any drip—it’s a carefully timed pour that creates those perfect, slow drips down the sides, not a messy waterfall.
It’s a cake that feels personal and festive without being fussy. You get the joy of making something that looks like a pro’s work but without the stress. When you bite into it, you’ll know it’s more than just a cake—it’s a celebration wrapped in frosting and color.
What Ingredients You Will Need
This recipe uses simple, wholesome ingredients to deliver bold flavor and satisfying texture without the fuss. Most are pantry staples, and the candy toppers use easy-to-find candy melts and sprinkles. Here’s the rundown:
- For the Cake Layers:
- All-purpose flour – 2 ½ cups (300g), sifted
- Baking powder – 2 ½ teaspoons
- Baking soda – 1 teaspoon
- Salt – ½ teaspoon
- Unsalted butter – 1 cup (227g), softened (I like using Land O’Lakes for creaminess)
- Granulated sugar – 1 ¾ cups (350g)
- Large eggs – 4, room temperature
- Vanilla extract – 2 teaspoons (pure vanilla makes a difference)
- Buttermilk – 1 cup (240ml), room temperature (or milk + 1 tbsp lemon juice if needed)
- Food coloring gels – in your school colors (AmeriColor gels work well)
- For the Buttercream Frosting:
- Unsalted butter – 1 cup (227g), softened
- Powdered sugar – 4 cups (480g), sifted
- Vanilla extract – 1 ½ teaspoons
- Heavy cream – 2-3 tablespoons (adjust for consistency)
- Food coloring gels – matching the cake’s colors
- For the Ganache Drip:
- White chocolate chips or candy melts – 8 oz (225g)
- Heavy cream – ½ cup (120ml)
- Food coloring gels – matching your school colors
- For Custom Candy Toppers:
- Candy melts – matching colors (I use Wilton brand for reliable melting)
- Sprinkles and edible glitter – complementary colors
- Silicone candy molds or piping bags for shapes
- Edible markers (optional) for details
Pro tip: When selecting butter, avoid salted varieties unless you want to tweak the sugar balance. Also, using gel-based food coloring prevents the frosting from thinning out like liquid dyes might.
Equipment Needed
- Two 8-inch (20 cm) round cake pans – nonstick or well-greased
- Mixing bowls – medium and large
- Electric mixer (stand or hand) – for smooth batter and frosting
- Offset spatula – essential for even frosting
- Bench scraper or cake scraper – for smooth sides
- Small saucepan – to melt ganache
- Silicone candy molds or piping bags – for custom candy toppers
- Cooling racks – to cool cake layers completely
- Measuring cups and spoons – precise measurements are key
If you don’t have a cake scraper, a straight-edged ruler or even a large butter knife can work in a pinch for frosting smoothness. For candy melts, a microwave-safe bowl is your best friend—easy melting without scorching.
I once tried making candy toppers without molds and ended up with a sticky mess, so investing in silicone molds (they’re affordable!) saved me from frustration later on.
Preparation Method
- Preheat and prep pans: Set your oven to 350°F (175°C). Grease two 8-inch round pans and line the bottoms with parchment paper. This prevents sticking and helps with clean removal. (10 minutes prep)
- Mix dry ingredients: In a medium bowl, sift together 2 ½ cups (300g) flour, 2 ½ teaspoons baking powder, 1 teaspoon baking soda, and ½ teaspoon salt. Set aside. This ensures a light, airy crumb. (5 minutes)
- Cream butter and sugar: In a large bowl, beat 1 cup softened butter and 1 ¾ cups sugar until light and fluffy—about 3-4 minutes using a mixer on medium speed. This step traps air, giving the cake lift. (5 minutes)
- Add eggs and vanilla: Beat in eggs one at a time, mixing well after each addition, then stir in 2 teaspoons vanilla extract. The batter may look a bit curdled here, but that’s okay. (3 minutes)
- Combine wet and dry: Alternate adding dry ingredients and 1 cup buttermilk to the butter mixture, starting and ending with dry ingredients. Mix gently—don’t overdo it or the cake will be dense. (4 minutes)
- Divide and color batter: Split the batter evenly into separate bowls depending on how many colors you want. Add gel food coloring to each and stir until evenly tinted. (5 minutes)
- Layer batter: Pour each color in sections into the prepared pans, swirling slightly with a knife if desired for a marbled effect, or keep colors separate for bold stripes. (10 minutes)
- Bake: Place pans in the oven and bake for 30-35 minutes or until a toothpick inserted in the center comes out clean. Let cool in pans for 10 minutes, then transfer to wire racks to cool completely. (40 minutes)
- Prepare buttercream: Beat 1 cup softened butter until smooth, then gradually add 4 cups powdered sugar alternated with 2-3 tablespoons heavy cream. Beat in 1 ½ teaspoons vanilla. Divide and tint with food coloring. (10 minutes)
- Assemble and crumb coat: Level cooled cakes if needed. Spread a thin layer of buttercream between layers and apply a thin crumb coat to the outside. Chill 20 minutes to set. (25 minutes)
- Final frosting: Apply the remaining buttercream smoothly with an offset spatula and bench scraper. Chill again for 15 minutes. (15 minutes)
- Make ganache drip: Heat ½ cup heavy cream until just simmering, pour over 8 oz white chocolate, let sit 2 minutes, then stir until smooth. Tint with food coloring. Let cool slightly to thicken. (10 minutes)
- Drip ganache: Pour ganache slowly around the edges to create drips, then fill the center and smooth with a spatula. (10 minutes)
- Create candy toppers: Melt candy melts in microwave-safe bowls. Pour into silicone molds or pipe shapes onto parchment. Add sprinkles or edible glitter quickly before setting. Let harden fully. (30 minutes)
- Decorate cake: Arrange candy toppers on the cake gently. Store cake in a cool spot until serving. (10 minutes)
Note: If your ganache is too runny, let it cool longer or add a little more chocolate. Too thick? Warm gently. Watch the drip carefully—it’s all about patience here.
Cooking Tips & Techniques
One lesson I learned the hard way? Temperature control is everything when working with ganache and candy melts. Too hot, and the drip runs like a waterfall; too cool, and it won’t drip at all. I usually let the ganache rest at room temp for about 10 minutes, then test a small drip on the side of the cake before going all in.
For buttercream, don’t skip sifting your powdered sugar. It makes the frosting smooth instead of grainy, which is key for that polished look. I once tried skipping this step—never again!
Another trick: chilling your cake between frosting layers makes crumb coating easier and stops crumbs from mixing into that final frosting layer. Trust me, it saves you from frustration.
When making candy toppers, melting candy melts in short bursts (15-20 seconds) and stirring in between prevents burning. Also, silicone molds release candy like a dream, but if you don’t have molds, piping shapes on parchment works too—just let them set fully.
Multitasking tip: While the cake cools, start prepping your candy toppers. It’s a great way to keep the momentum going without wasting time.
Variations & Adaptations
You can easily adapt this cake to suit different preferences or occasions:
- Dietary: For gluten-free, swap all-purpose flour with a gluten-free baking blend. Use dairy-free butter and milk substitutes to make it vegan-friendly.
- Seasonal: Swap candy toppers for themed shapes—pumpkins for fall, snowflakes for winter, or fresh berries in summer.
- Flavor Twists: Add citrus zest to the buttercream or a splash of espresso to the ganache for a sophisticated note. You could also layer in a fruit jam for surprise bursts of flavor.
- Color Ideas: Instead of school colors, try metallic shades like gold and silver for a glam birthday or pastel tones for baby showers.
- Cooking Method: This cake layers well with a chiffon base or even a box mix for a quicker version—you’ll still get the same drip and topper magic.
I once made a version with rose-shaped apple tart toppers for a spring party, and those delicate fruit shapes gave a fresh twist this recipe didn’t expect!
Serving & Storage Suggestions
This cake is best served at room temperature so the buttercream and ganache soften just right. I like to slice it with a sharp serrated knife, wiping it clean between cuts to keep the layers neat.
Pair it with a simple sparkling beverage or a rich hot chocolate for a cozy celebration. For a brunch event, it’s a fun, colorful highlight alongside classics like those Quiche Lorraine.
Store leftovers tightly wrapped in the fridge for up to 3 days. Bring it back to room temperature before serving to let flavors bloom. You can freeze cake layers (unfrosted) for up to 2 months—just thaw overnight in the fridge, then frost and decorate.
Over time, the ganache firms up and the candy toppers hold their shape beautifully, making this cake look just as impressive the next day.
Nutritional Information & Benefits
Per serving (based on 12 slices): approximately 350 calories, 18g fat, 45g carbs, and 3g protein.
This cake offers a fun treat with some calcium from butter and cream, though it’s definitely an indulgence. Using real butter and high-quality chocolate brings richer flavor without artificial additives.
For those watching gluten or dairy, substitutions can make this cake friendly for many diets. The candy toppers are small, so allergen concerns mostly revolve around typical cake ingredients.
Personally, I see this cake as a joyful way to celebrate moments that matter—sometimes, that’s just as important as the nutrition.
Conclusion
This perfect school colors drip cake with custom candy toppers is more than just a dessert—it’s a canvas for celebration and a slice of pride. Whether you’re cheering on your team, celebrating a birthday, or just craving a fun, colorful treat, this recipe delivers on flavor and festivity without the fuss.
I love how customizable it is, letting you tweak colors, flavors, and toppers to fit your vibe. It’s become a staple in my kitchen for marking special moments, and I’m confident it’ll find a place in yours too.
Give it a try, play with your favorite colors and candies, and don’t hesitate to share your own creative twists. I’d love to hear how your cake turns out!
Happy baking and celebrating!
FAQs
- Can I use store-bought frosting instead of making buttercream?
Yes, you can, but homemade buttercream offers better texture and color control for this drip cake. - How do I prevent the ganache from melting the buttercream?
Let the ganache cool slightly before dripping, and chill the cake beforehand to firm the buttercream. - What if I don’t have silicone molds for the candy toppers?
You can pipe shapes onto parchment paper and let them harden, though molds make it easier to get consistent shapes. - Can I make this cake ahead of time?
Absolutely! Bake and frost the cake a day ahead, add the drip and toppers the day of serving for best freshness. - How do I get sharp color contrasts for the drip?
Use gel food coloring and be precise with your mixing. Let each color drip separately if you want distinct lines.
Pin This Recipe!
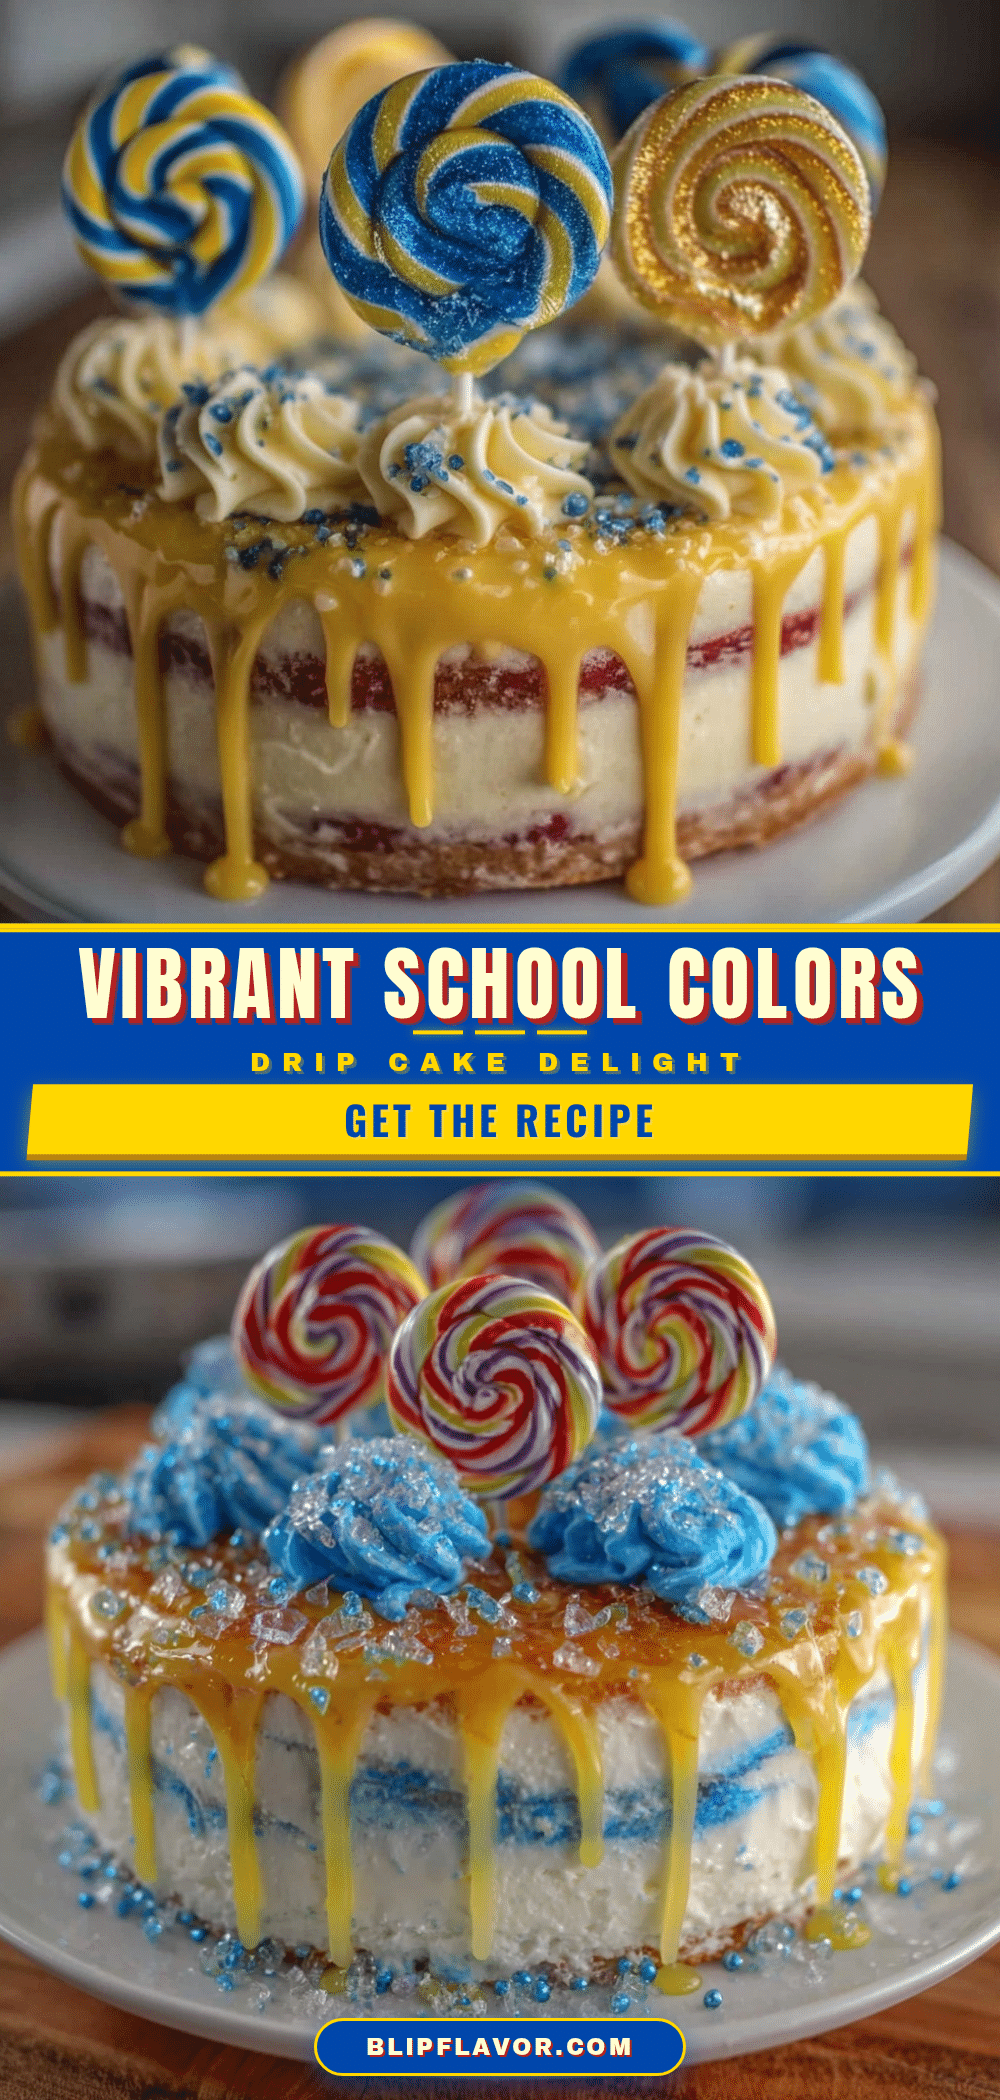
Perfect School Colors Drip Cake Recipe with Custom Candy Toppers
A festive and customizable drip cake featuring vibrant school colors and personalized candy toppers, perfect for game days and celebrations.
- Prep Time: 45 minutes
- Cook Time: 40 minutes
- Total Time: 1 hour 25 minutes
- Yield: 12 servings 1x
- Category: Dessert
- Cuisine: American
Ingredients
- 2 ½ cups (300g) all-purpose flour, sifted
- 2 ½ teaspoons baking powder
- 1 teaspoon baking soda
- ½ teaspoon salt
- 1 cup (227g) unsalted butter, softened
- 1 ¾ cups (350g) granulated sugar
- 4 large eggs, room temperature
- 2 teaspoons vanilla extract
- 1 cup (240ml) buttermilk, room temperature (or milk + 1 tbsp lemon juice)
- Food coloring gels in school colors
- 1 cup (227g) unsalted butter, softened (for buttercream)
- 4 cups (480g) powdered sugar, sifted
- 1 ½ teaspoons vanilla extract (for buttercream)
- 2–3 tablespoons heavy cream (for buttercream)
- White chocolate chips or candy melts – 8 oz (225g)
- ½ cup (120ml) heavy cream (for ganache)
- Candy melts in matching colors (for toppers)
- Sprinkles and edible glitter
- Silicone candy molds or piping bags
- Edible markers (optional)
Instructions
- Preheat oven to 350°F (175°C). Grease two 8-inch round pans and line bottoms with parchment paper. (10 minutes)
- Sift together flour, baking powder, baking soda, and salt in a medium bowl. Set aside. (5 minutes)
- Beat softened butter and granulated sugar in a large bowl until light and fluffy, about 3-4 minutes. (5 minutes)
- Add eggs one at a time, mixing well after each addition, then stir in vanilla extract. (3 minutes)
- Alternate adding dry ingredients and buttermilk to the butter mixture, starting and ending with dry ingredients. Mix gently. (4 minutes)
- Divide batter into separate bowls for each color. Add gel food coloring and stir until evenly tinted. (5 minutes)
- Pour each colored batter into pans in sections, swirling slightly for marbled effect or keeping colors separate. (10 minutes)
- Bake for 30-35 minutes or until toothpick comes out clean. Cool in pans 10 minutes, then transfer to wire racks to cool completely. (40 minutes)
- Beat softened butter for buttercream until smooth. Gradually add powdered sugar alternated with heavy cream. Beat in vanilla extract. Divide and tint with food coloring. (10 minutes)
- Level cooled cakes if needed. Spread thin layer of buttercream between layers and crumb coat outside. Chill 20 minutes. (25 minutes)
- Apply remaining buttercream smoothly with offset spatula and bench scraper. Chill 15 minutes. (15 minutes)
- Heat heavy cream until simmering, pour over white chocolate, let sit 2 minutes, then stir until smooth. Tint with food coloring. Let cool slightly to thicken. (10 minutes)
- Pour ganache slowly around edges to create drips, fill center and smooth with spatula. (10 minutes)
- Melt candy melts in microwave-safe bowls. Pour into silicone molds or pipe shapes on parchment. Add sprinkles or edible glitter before setting. Let harden fully. (30 minutes)
- Arrange candy toppers on cake gently. Store cake in cool spot until serving. (10 minutes)
Notes
Use gel-based food coloring to prevent thinning frosting. Chill cake between frosting layers for easier crumb coating. Let ganache cool to proper consistency before dripping. Melt candy melts in short bursts to avoid burning. Silicone molds recommended for candy toppers but piping on parchment is an alternative.
Nutrition
- Serving Size: 1 slice (1/12th of c
- Calories: 350
- Fat: 18
- Carbohydrates: 45
- Protein: 3
Keywords: drip cake, school colors cake, custom candy toppers, celebration cake, buttercream, ganache drip, colorful cake, party cake


