
“Could you just grab an Oreo cheesecake for dessert?” texted my friend last minute, and honestly, I was already eyeing the clock, thinking, “There’s no way I can bake anything now.” So, I decided to whip up my creamy no-bake cheesecake with Oreo crust—a recipe I stumbled upon during one of those chaotic evenings when dinner felt like a marathon but dessert had to be quick and fuss-free.
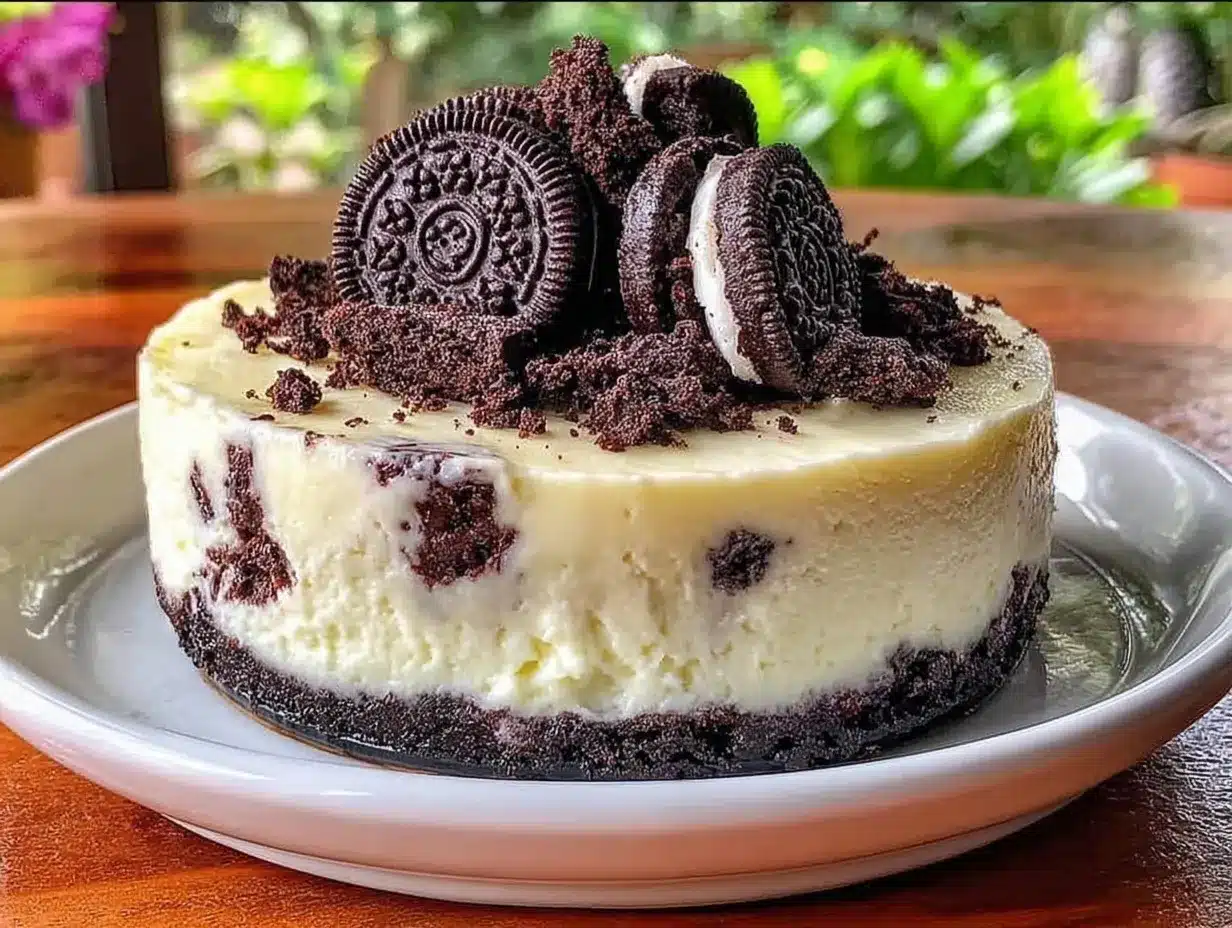
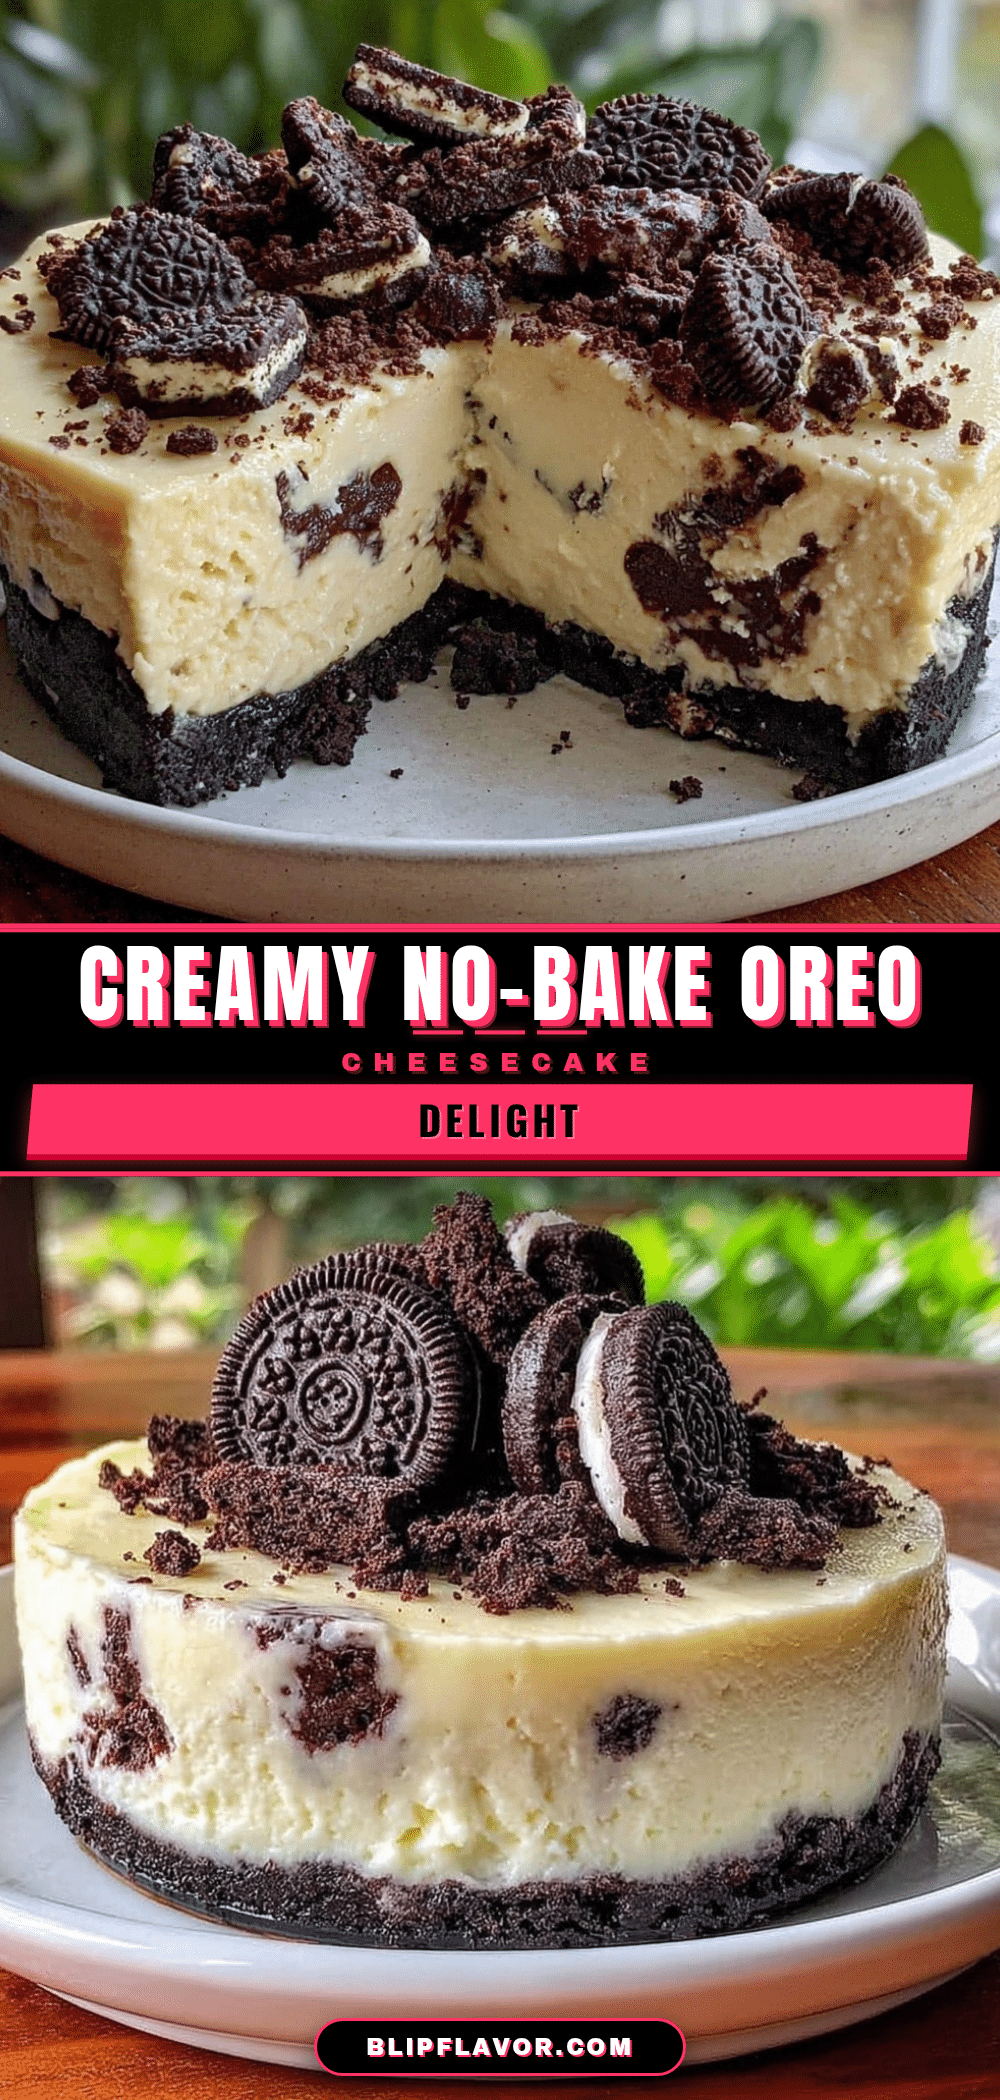
The smell of crushed Oreos mixing with cream cheese and a hint of vanilla filled the kitchen while I was juggling pots and pans. I remember thinking, “This can’t turn out great without an oven,” but, well, it did. The cheesecake set beautifully in the fridge, the crust held together just right, and that first spoonful? Silky smooth, with the perfect balance of sweetness and that nostalgic Oreo crunch.
What surprised me most was how this no-bake dessert felt indulgent but without the stress of baking or the heat of the oven on a warm day. It’s the kind of recipe that sneaks its way into your favorite go-tos—whether you’re craving something quick after work or need a last-minute treat for guests. I’ve since made it multiple times; honestly, it’s even become my “go-to” when I want something impressive but effortless.
That night, as the creamy cheesecake disappeared faster than anticipated, I realized this recipe wasn’t just a shortcut—it’s a keeper. It’s the kind of dessert that comforts like an old friend yet surprises with how easy it is to pull off. If you’ve ever thought no-bake meant compromising flavor, this one quietly proves otherwise.
Why You’ll Love This Creamy No-Bake Cheesecake with Oreo Crust
Having tested and tweaked this recipe more times than I can count, I can confidently say it hits the sweet spot between simplicity and indulgence. Here’s why this no-bake cheesecake deserves a spot in your dessert rotation:
- Quick & Easy: Ready in under 30 minutes—no oven, no fuss—perfect for busy weeknights or unexpected guests.
- Simple Ingredients: Uses pantry staples like cream cheese and Oreos, so no emergency grocery runs necessary.
- Perfect for Any Occasion: Whether it’s a casual family dinner or a celebration, this cheesecake fits right in.
- Crowd-Pleaser: Kids love it, adults keep asking for seconds, and it’s always a hit at potlucks.
- Unbelievably Delicious: The Oreo crust adds a delightful crunch that contrasts perfectly with the velvety filling.
This recipe isn’t just another no-bake cheesecake. What sets it apart is the Oreo crust that’s finely crushed with melted butter for that impeccable texture, and the filling’s creaminess, thanks to whipping the cream cheese with a touch of sour cream and vanilla extract. The sweetness is just right—never overpowering, just like comfort food should be.
Honestly, the first time I made this, I closed my eyes after the first bite and realized I’d nailed that perfect creamy texture that so many no-bake cheesecakes miss. It’s like a slice of classic dessert magic—without the oven drama.
What Ingredients You Will Need
This creamy no-bake cheesecake with Oreo crust relies on straightforward, accessible ingredients that come together beautifully to create a rich, satisfying dessert. Most of these are pantry staples, but a few tips on selection make all the difference.
- For the Oreo Crust:
- 24 Oreo cookies (regular or double-stuffed; I prefer regular for balance)
- 6 tablespoons unsalted butter, melted (adds richness and helps crust bind)
- For the Cheesecake Filling:
- 16 ounces (450g) cream cheese, softened (full-fat works best for creaminess)
- 1/2 cup (120ml) sour cream (adds tang and smooth texture)
- 1 cup (120g) powdered sugar (adjust to taste)
- 2 teaspoons vanilla extract (use pure vanilla for best flavor)
- 1 cup (240ml) heavy whipping cream, cold (whipped to soft peaks)
For best results, I recommend using Philadelphia cream cheese if you can find it—it blends smoothly and has a clean flavor. If you’re looking to make this gluten-free, many brands now offer gluten-free Oreos, so feel free to swap those in without worry. Also, if dairy is a concern, try substituting the sour cream with a dairy-free coconut yogurt and use coconut cream instead of heavy cream for whipping.
On warmer days, I sometimes swap out the powdered sugar for honey or maple syrup for a more natural sweetness that pairs lovely with the Oreo flavor. A little tweak like that can make this recipe feel fresh and new.
Equipment Needed
- 9-inch (23cm) springform pan or pie dish (springform is ideal for easy removal)
- Food processor or strong blender (to crush Oreos finely)
- Mixing bowls (one large for filling, one for whipping cream)
- Electric mixer or hand whisk (to beat the cream cheese and whip the cream)
- Rubber spatula (for folding whipped cream gently)
- Measuring cups and spoons
If you don’t have a food processor, placing Oreos in a sealed plastic bag and crushing them with a rolling pin works just fine—takes a bit longer, but the texture is just as good. For beating, I usually use a hand mixer because it’s quick and less noisy than my stand mixer, but either will get the job done.
Pro tip: Make sure your cream cheese is at room temperature before mixing—that makes it easier to get a smooth filling without lumps.
Preparation Method
- Prepare the Oreo Crust:
Place the Oreo cookies (with filling) in your food processor and pulse until they become fine crumbs, about 20-30 seconds. If using a bag and rolling pin, crush until you get a sandy texture with a few small chunks for crunch.
Pour the melted butter over the crumbs and stir to combine thoroughly. The mixture should feel like wet sand and hold together when pressed.
- Form the Crust:
Press the Oreo mixture firmly into the bottom and about 1 inch (2.5cm) up the sides of your springform pan. Use the bottom of a glass or measuring cup to compact evenly. Place the crust in the fridge to chill while you prepare the filling (about 15 minutes).
- Make the Cheesecake Filling:
In a large bowl, beat the softened cream cheese and sour cream with an electric mixer on medium speed until smooth and creamy, about 2-3 minutes.
Add the powdered sugar and vanilla extract, then continue beating until fully incorporated and silky, scraping down the sides as needed.
- Whip the Cream:
In a separate cold bowl, whip the heavy cream to soft peaks—when you lift the whisk, the cream should hold a gentle peak but bend slightly at the tip.
- Combine Filling:
Gently fold the whipped cream into the cream cheese mixture using a rubber spatula. Fold carefully to keep the mixture light and airy without deflating the cream.
- Assemble and Chill:
Pour the creamy filling over the chilled Oreo crust and smooth the top with a spatula. Cover the pan with plastic wrap and refrigerate for at least 4 hours, preferably overnight, to let it set properly.
- Serve:
Before serving, run a knife around the pan edges to loosen the cheesecake. Release the springform and slice with a sharp knife dipped in hot water for clean cuts.
Common hiccup? If your cream cheese isn’t soft enough, lumps will sneak in. Just be patient and beat a bit longer, or microwave in 5-second bursts if needed. Also, don’t rush chilling—the cheesecake sets best with that slow fridge time for that perfect creamy texture.
Cooking Tips & Techniques
One thing I’ve learned through many attempts is that temperature control is key. The cream cheese absolutely needs to be at room temp to blend smoothly with the other ingredients. Cold cream cheese will make the filling lumpy and harder to work with.
When whipping the cream, watch it closely. Over-whipping can turn it grainy or into butter, and under-whipping will make the filling runny. Aim for soft peaks—just enough to hold shape but still soft and foldable.
The folding technique is worth mentioning too. Instead of stirring vigorously, use gentle folding motions to keep the air in the whipped cream, which makes the cheesecake light instead of dense.
Also, pressing the crust firmly is important. I learned the hard way that if the crust is too crumbly, slices fall apart when serving. Using the bottom of a glass to compact the crust really helps it hold together.
Time management tip: Crush the Oreos and prepare the crust first, then while it chills, whip the cream and mix the filling. This way, you’re multitasking efficiently without feeling overwhelmed.
Variations & Adaptations
- Chocolate Lovers’ Twist: Add 1/4 cup (25g) cocoa powder to the filling for a chocolate-flavored cheesecake that pairs amazingly with the Oreo crust.
- Berry Swirl: Fold in 1/2 cup (120ml) of raspberry or strawberry puree before folding in the whipped cream for a fresh, fruity contrast.
- Vegan Option: Use vegan cream cheese, coconut cream whipped to soft peaks, and vegan Oreos (check labels) to keep this dessert plant-based without losing that creamy texture.
- Mini Cheesecakes: Divide the crust and filling into muffin tins lined with cupcake papers for individual servings—perfect for parties or kids.
- Personal Favorite: I sometimes sprinkle a handful of mini chocolate chips on top just before chilling for a little surprise crunch.
For a warmer climate, you can speed up setting time by popping the cheesecake in the freezer for 1-2 hours, but remember to thaw it 15 minutes before serving for the best texture.
Serving & Storage Suggestions
This cheesecake tastes best chilled straight from the fridge. I like to serve slices with a dollop of whipped cream or a few fresh berries on top to brighten the richness. For a fun brunch spread, it pairs beautifully with light, fruity drinks—like something from a perfect mimosa bar setup.
If you want to get fancy, serving alongside a cup of coffee or a light dessert wine makes for a cozy night in. It also complements the flavors of tangy lemon or berry desserts, such as the fresh strawberry pie I made last summer.
Store leftovers in an airtight container or cover the springform pan tightly with plastic wrap. It keeps well in the fridge for up to 4 days. For longer storage, you can freeze it for up to 1 month—just thaw overnight in the fridge before serving.
Reheating is not recommended; the cheesecake is best enjoyed cold. Over time, the flavors meld and deepen, making slices even more enjoyable on day two or three.
Nutritional Information & Benefits
One slice (based on 12 servings) of this creamy no-bake cheesecake contains approximately 320 calories, 24g fat, 20g carbohydrates, and 5g protein. While it’s a treat, the recipe balances indulgence with relatively simple ingredients.
Key benefits include the protein and calcium from cream cheese and the antioxidants from cocoa in Oreos (yes, Oreos do contain some!). Using sour cream adds a slight tang and creaminess without extra heaviness.
This recipe is naturally gluten-free if you use gluten-free Oreos, and can be adapted for dairy-free diets as mentioned. While it’s rich, it’s a great option for those who want a luscious dessert without baking or artificial additives.
Conclusion
If you’re after a dessert that’s creamy, rich, and surprisingly easy, this creamy no-bake cheesecake with Oreo crust is the answer. It’s one of those recipes that feels like a treat but comes together fast—perfect when you want to impress without the stress.
Feel free to play around with the variations or pair it with your favorite summer fruit pie or even a light brunch like quiche Lorraine for a complete meal. I love this cheesecake because it’s reliably delicious every time and brings that comforting “wow” factor to the table.
Give it a try, tweak it your way, and I’d love to hear how your version turns out!
FAQs About Creamy No-Bake Cheesecake with Oreo Crust
Can I use a different cookie for the crust?
Absolutely! While Oreos are classic, graham crackers, chocolate wafers, or even gingersnaps can work well depending on your flavor preference.
How long does the cheesecake need to chill?
At least 4 hours in the fridge, but overnight chilling is best for firm, creamy texture.
Can I make this cheesecake ahead of time?
Yes! It actually tastes better the next day as flavors meld. Just cover and refrigerate until ready to serve.
Is it possible to freeze this cheesecake?
You can freeze it for up to a month. Thaw in the fridge overnight before serving to maintain texture.
What can I substitute for sour cream?
You can use Greek yogurt for a similar tang and texture, or dairy-free coconut yogurt if you prefer a vegan version.
Pin This Recipe!
Creamy No-Bake Cheesecake with Oreo Crust
A quick and easy no-bake cheesecake featuring a crunchy Oreo crust and a silky smooth cream cheese filling, perfect for any occasion without the need for an oven.
- Prep Time: 15 minutes
- Cook Time: 0 minutes
- Total Time: 4 hours 15 minutes
- Yield: 12 servings 1x
- Category: Dessert
- Cuisine: American
Ingredients
- 24 Oreo cookies (regular or double-stuffed)
- 6 tablespoons unsalted butter, melted
- 16 ounces (450g) cream cheese, softened
- 1/2 cup (120ml) sour cream
- 1 cup (120g) powdered sugar
- 2 teaspoons vanilla extract
- 1 cup (240ml) heavy whipping cream, cold
Instructions
- Place the Oreo cookies (with filling) in your food processor and pulse until they become fine crumbs, about 20-30 seconds. Alternatively, crush Oreos in a sealed plastic bag with a rolling pin until sandy with some small chunks.
- Pour the melted butter over the crumbs and stir to combine thoroughly until the mixture feels like wet sand and holds together when pressed.
- Press the Oreo mixture firmly into the bottom and about 1 inch up the sides of a 9-inch springform pan. Compact evenly using the bottom of a glass or measuring cup. Chill in the fridge for about 15 minutes.
- In a large bowl, beat the softened cream cheese and sour cream with an electric mixer on medium speed until smooth and creamy, about 2-3 minutes.
- Add the powdered sugar and vanilla extract, then continue beating until fully incorporated and silky, scraping down the sides as needed.
- In a separate cold bowl, whip the heavy cream to soft peaks—when lifted, the cream should hold a gentle peak but bend slightly at the tip.
- Gently fold the whipped cream into the cream cheese mixture using a rubber spatula, folding carefully to keep the mixture light and airy.
- Pour the creamy filling over the chilled Oreo crust and smooth the top with a spatula. Cover with plastic wrap and refrigerate for at least 4 hours, preferably overnight, to set.
- Before serving, run a knife around the pan edges to loosen the cheesecake. Release the springform and slice with a sharp knife dipped in hot water for clean cuts.
Notes
Ensure cream cheese is at room temperature for smooth mixing. Whip cream to soft peaks to avoid grainy texture. Press crust firmly to prevent crumbling. Chill at least 4 hours or overnight for best texture. Variations include adding cocoa powder for chocolate flavor or berry puree for a fruity twist. Vegan and dairy-free substitutions are possible.
Nutrition
- Serving Size: 1 slice (1/12th of c
- Calories: 320
- Fat: 24
- Carbohydrates: 20
- Protein: 5
Keywords: no-bake cheesecake, Oreo crust, easy dessert, quick cheesecake, creamy cheesecake, no oven dessert, Oreo dessert


