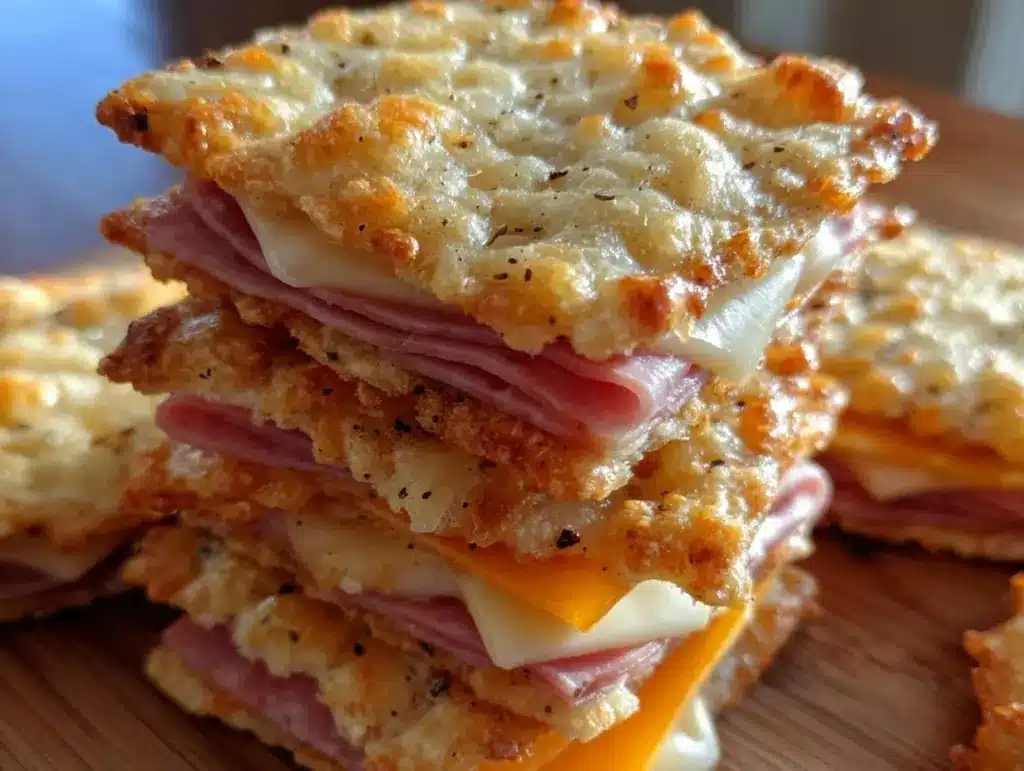
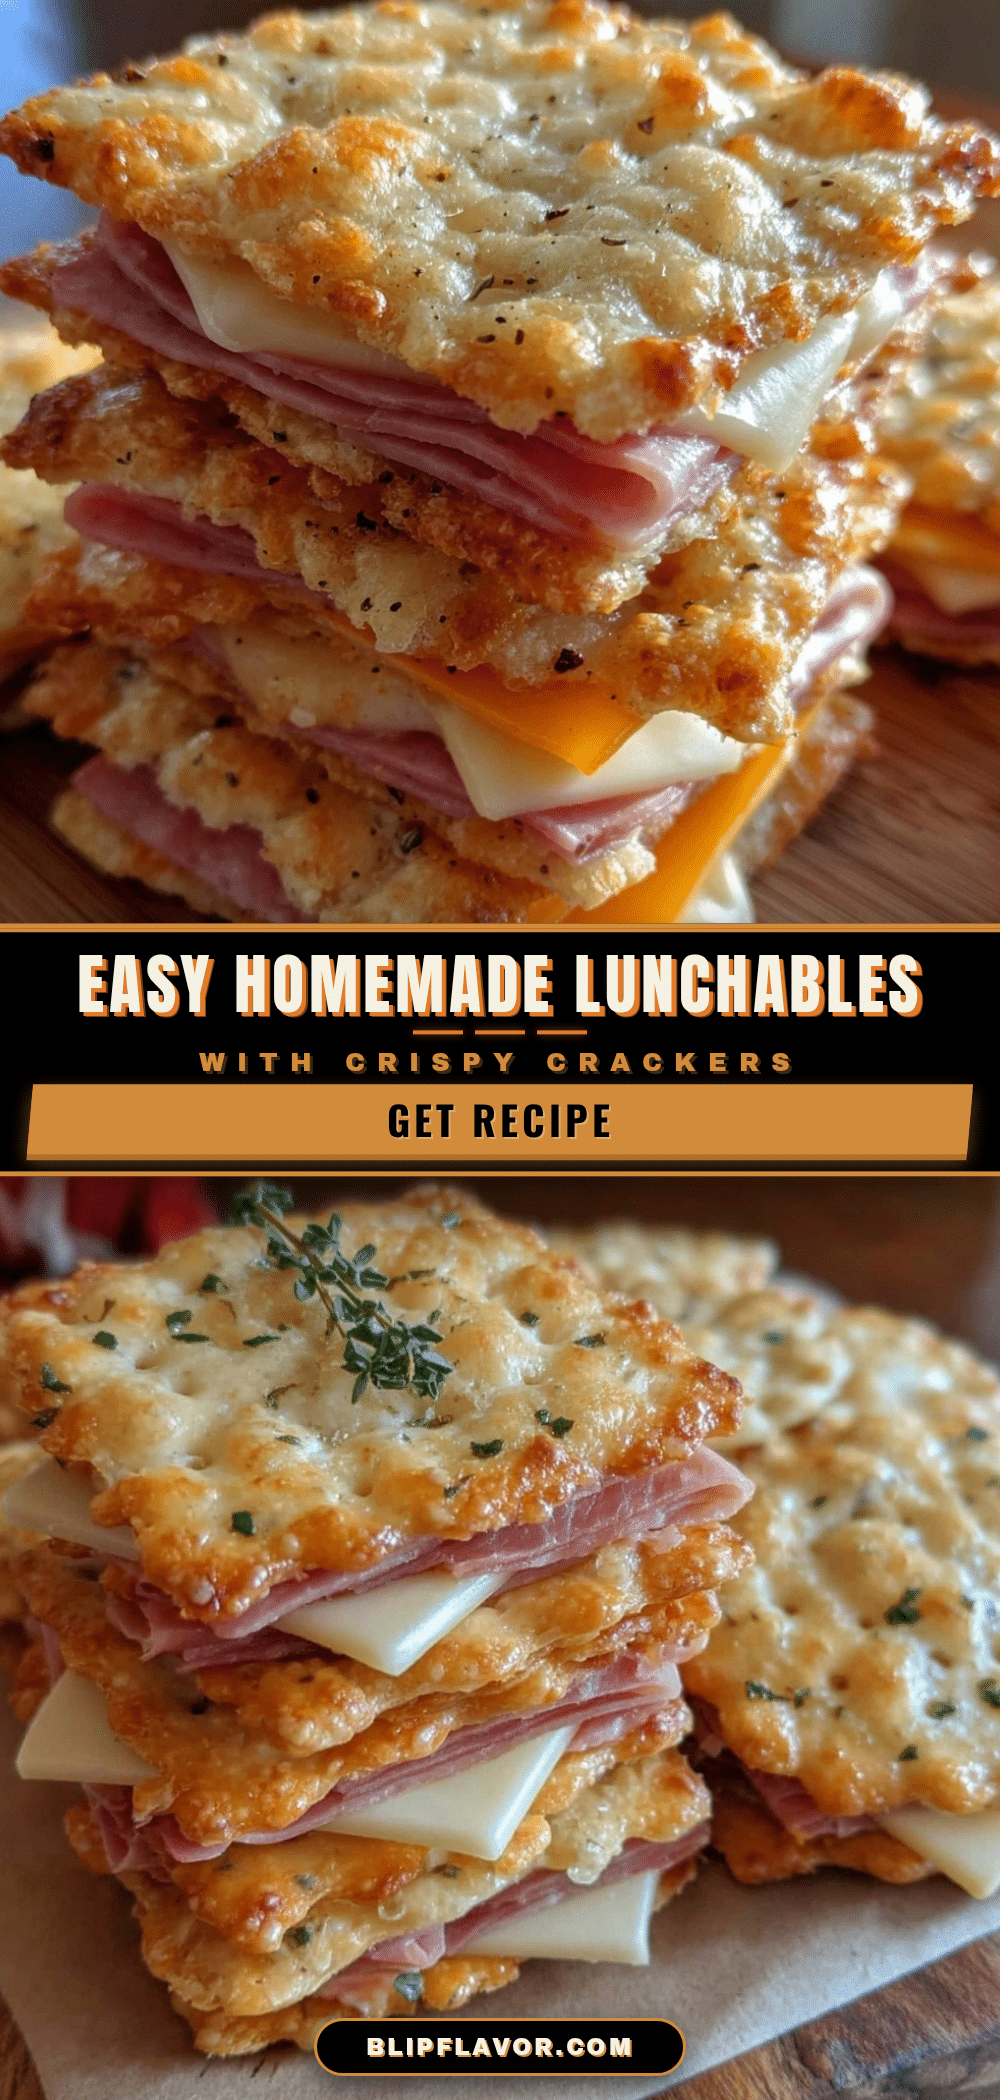
“You want Lunchables for lunch?” my kid asked with a hopeful grin as I rummaged through the pantry. Honestly, I usually shy away from the prepackaged stuff—too much mystery in those plastic trays. So one afternoon, tired of last-minute snack panic, I decided to craft my own version: easy DIY Lunchables with homemade crispy crackers, ham & cheese. The crackers were an experiment born from a lazy Sunday when I wanted something crunchy but wholesome, something that didn’t come from a box. The first batch was a little uneven—some burnt edges, some doughy centers—but the salty, buttery crispiness won us over instantly.
What really sold me was watching my kid carefully assemble their own little lunchbox masterpiece, choosing just the right cheese slice and folding ham like a tiny sandwich artist. The kitchen smelled warm, inviting, and honest—not like processed snacks but like real food made with a pinch of love and a dash of patience. Since then, these DIY Lunchables have popped up on our weekly menu more times than I can count.
There’s something quietly satisfying about knowing exactly what’s inside each cracker and slice, plus the joy of a simple lunch that feels special without fuss. This recipe stuck with me because it’s practical, delicious, and, honestly, it makes lunchtime a little less chaotic. It’s the kind of recipe that’s perfect when you want a break from the usual, but don’t want to complicate your day. Plus, it pairs beautifully with easy brunch dishes like a flaky Quiche Lorraine or a stack of fluffy ricotta pancakes.
So here’s my take on making your own easy DIY Lunchables with homemade crispy crackers, ham & cheese—a little bit of crunch, a little bit of savory, and a lot of homemade comfort.
Why You’ll Love This Recipe
This DIY Lunchables recipe is one of those kitchen wins that feels both smart and satisfying. I’ve tested it over several weeks, tweaking the cracker texture and the ham-to-cheese ratio until it hit just right. Here’s why it’s become a staple in my house:
- Quick & Easy: The whole setup, including baking the crackers, takes about 45 minutes. Perfect for those days when you want something homemade without the hassle.
- Simple Ingredients: No fancy trips to specialty stores—just pantry staples like flour, butter, and good-quality deli ham and cheese.
- Perfect for Lunchboxes and Snacks: Great for school lunches, office snacks, or casual picnics where you want convenience and taste.
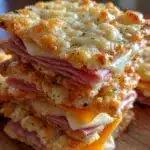
- Crowd-Pleaser: Kids and adults alike love the crispy, buttery crackers paired with savory ham and melty cheese. It’s hard to resist!
- Unbelievably Delicious: The crackers have a satisfying snap and buttery flavor that beats store-bought by miles. Plus, the ham and cheese combo is classic, comforting, and familiar.
What sets this recipe apart is the homemade crackers. Instead of the usual processed crackers, these are baked fresh with a hint of sea salt and a golden crunch. You’ll notice the difference immediately—no artificial preservatives or weird aftertaste. This recipe isn’t just a quick fix; it’s a little celebration of simple food done right. Honestly, it’s the kind of lunch that makes you pause and savor every bite, whether you’re packing for yourself or making it for someone you care about.
What Ingredients You Will Need
This recipe uses straightforward, wholesome ingredients to achieve a bold, satisfying flavor and a crispy texture without the fuss. Most of these are pantry staples you likely already have, and the few fresh additions make all the difference.
- For the Crispy Crackers:
- All-purpose flour (1 ½ cups / 190 g) — I prefer King Arthur for consistent texture
- Cold unsalted butter (6 tbsp / 85 g), cubed — adds that flaky, buttery crunch
- Sea salt (½ tsp) — enhances flavor and crunch
- Cold water (about 4-6 tbsp / 60-90 ml) — helps bind the dough
- Optional: A pinch of garlic powder or dried herbs for a flavor twist
- For the Ham & Cheese:
- Thinly sliced deli ham (6-8 oz / 170-225 g) — I like a honey-glazed ham for a subtle sweetness
- Cheddar cheese slices (6-8 slices, about 4 oz / 115 g) — sharp or mild, your choice
- Optional: Swiss or provolone for variety
- Extras for Assembly (Optional):
- Pickles or sliced cucumbers — adds crunch and freshness
- Mustard or mayo packets — for dipping or spreading
- Fresh fruit like grapes or apple slices — a nice sweet balance
If you want a gluten-free option, swapping regular flour for almond or oat flour works well, though the texture will be slightly different. For dairy-free needs, use vegan butter and a plant-based cheese alternative. I’ve tested this with coconut oil too, but the crackers aren’t as flaky.
Equipment Needed
- Baking sheet — a standard half-sheet pan works great for spreading out the crackers evenly.
- Parchment paper — essential to prevent sticking and make cleanup easier.
- Rolling pin — to roll the cracker dough thin and uniform. A wine bottle can be a fine substitute if you’re low on tools.
- Sharp knife or pizza cutter — for slicing crackers into neat squares before baking.
- Mixing bowl — preferably medium-sized, non-reactive like glass or stainless steel.
- Measuring cups and spoons — accuracy really helps with the cracker dough consistency.
Pro tip: I keep my rolling pin lightly floured to avoid sticking, and sometimes chill the dough in the fridge for 15 minutes to make it easier to handle. Don’t have parchment paper? A silicone baking mat is a fantastic alternative and reusable.
Preparation Method

- Make the Cracker Dough: In a mixing bowl, combine 1 ½ cups (190 g) of all-purpose flour with ½ teaspoon of sea salt and any optional seasonings like garlic powder. Add 6 tablespoons (85 g) of cold, cubed unsalted butter. Using your fingers or a pastry cutter, work the butter into the flour until the mixture looks like coarse crumbs (pea-sized bits are good). This step is key for that flaky texture. (About 5 minutes)
- Add Cold Water: Slowly drizzle in 4 tablespoons (60 ml) of cold water, mixing lightly with a fork. Add more water, a tablespoon at a time, until the dough just comes together when pressed. It should be firm but not sticky. Overmixing can make the crackers tough, so stop once it holds.
- Chill the Dough: Shape the dough into a flat disc, wrap it in plastic wrap, and refrigerate for at least 30 minutes. This resting period helps the gluten relax and firms up the butter for crispier crackers.
- Preheat Oven & Prepare Pan: Preheat your oven to 375°F (190°C). Line a baking sheet with parchment paper.
- Roll Out the Dough: On a lightly floured surface, roll the dough out as thin as you can—about 1/8 inch (3 mm) thick. The thinner, the crispier. Use a sharp knife or pizza cutter to slice the dough into bite-sized squares or rectangles. Transfer them carefully to the baking sheet, spacing them evenly.
- Bake the Crackers: Bake for 12-15 minutes, rotating the pan halfway. Watch closely toward the end—edges should turn a lovely golden brown. Remove from oven and cool completely on a wire rack to crisp up further.
- Assemble the Lunchables: Arrange the homemade crackers alongside thin slices of ham and cheese in your preferred lunchbox or container. Add any optional extras like pickles or fresh fruit. Pack small mustard or mayo packets for dipping if you like.
If your crackers feel soft after baking, give them a few extra minutes in the oven—every oven varies! And if your dough cracks while rolling, just press it back gently; it won’t affect the outcome.
Cooking Tips & Techniques
Making homemade crackers isn’t rocket science, but a few tricks can really make a difference. First, keep your butter cold. I’ve learned the hard way that warm butter turns the dough greasy and chewy, not flaky and crisp. The coarse crumbs stage is your best friend—don’t overwork the dough.
When rolling, I try to keep the dough moving. If it sticks, a quick dusting of flour or chilling the dough a bit longer helps. Cutting the crackers before baking is crucial. Trust me, trying to cut them after baking just leads to crumbs everywhere.
Timing is everything. Ovens vary, so start checking around 12 minutes. The crackers should be golden but not burnt. I usually bake two trays at once, swapping their positions halfway to ensure even cooking. It’s a good multitasking move if you’re prepping other dishes like a creamy asparagus risotto for dinner.
Lastly, let the crackers cool fully before storing or serving. This final crisp-up step is often overlooked but makes all the difference between soggy and perfectly crunchy.
Variations & Adaptations
One of the best things about this recipe is how easy it is to adapt. Here are a few ways I’ve switched things up over time:
- Dietary Adjustments: For gluten-free crackers, I swap all-purpose flour for a blend of almond flour and tapioca starch. The texture is a bit different—more delicate—but still tasty. For dairy-free, vegan butter and plant-based cheese do the trick nicely.
- Flavor Twists: Sometimes I add dried rosemary or thyme to the cracker dough for a herby note. A little grated Parmesan in the dough also adds a savory depth that’s irresistible.
- Cooking Method: I’ve tried air frying the crackers instead of baking, which cuts cooking time and gives an extra crispy edge. Just keep an eye on them as they can brown quickly.
- Protein Swaps: Instead of ham, turkey or smoked chicken slices work wonderfully. For a vegetarian option, pair the crackers with thick slices of aged cheddar and apple slices.
My personal favorite variation is adding a smear of honey mustard on the crackers before stacking ham and cheese. It adds a little zing that keeps the lunchbox from ever feeling boring.
Serving & Storage Suggestions
These DIY Lunchables are best served chilled or at room temperature. The crackers hold their crunch beautifully, making them perfect for lunchboxes or picnics. I like to pack the ham and cheese separately to avoid sogginess, letting the eater build their own bites.
Pair this lunchbox with fresh fruit or a crisp green salad for a balanced meal. A small container of mustard or a dab of mayo makes a nice dip or spread if you want a little extra flavor. For a cozy brunch day, consider serving alongside buttery lemon ricotta pancakes or a classic egg bake with ham and cheddar.
Store leftover crackers in an airtight container at room temperature for up to 5 days. If you want to keep them longer, freezing works well—just thaw them in a sealed bag and re-crisp briefly in the oven. Ham and cheese should always be refrigerated and consumed within 3-4 days for freshness.
Reheating isn’t necessary since these are meant to be a grab-and-go snack, but if you want a warm bite, a few seconds in the microwave with the cheese on top can be delightful.
Nutritional Information & Benefits
Each serving of these DIY Lunchables offers a balanced mix of carbs, protein, and fat. The homemade crackers provide complex carbs and fewer additives compared to store-bought options. Butter adds richness and fat essential for satiety, while ham and cheese deliver quality protein and calcium.
This recipe is naturally gluten-containing unless you substitute flours, and contains dairy and pork, so be mindful of allergies and dietary preferences. It’s a wholesome lunch that feels indulgent without being over the top. From a wellness perspective, making your own crackers means you can skip preservatives and excess sodium common in pre-packaged snacks.
Conclusion
Making your own easy DIY Lunchables with homemade crispy crackers, ham & cheese turns an ordinary lunch into something a bit more thoughtful and tasty. It’s a simple recipe with familiar flavors but the kind of satisfaction you get only from homemade food. You can tweak it easily to match your pantry, dietary needs, or cravings.
For me, it’s the little moments—watching my kid carefully stack their own bites, the smell of baking crackers wafting through the kitchen—that make this recipe a keeper. If you try this out, I’d love to hear how you make it your own. Feel free to share your twists or questions below—I’m always here for a good food chat!
FAQs About Easy DIY Lunchables with Homemade Crispy Crackers, Ham & Cheese
How long do the homemade crackers stay fresh?
Stored in an airtight container at room temperature, they stay crisp for about 5 days. For longer storage, freeze them in a sealed bag.
Can I make the crackers ahead of time?
Absolutely! You can bake the crackers a few days in advance and store them airtight. They’re great for meal prepping lunches.
What’s the best cheese for these DIY Lunchables?
Cheddar is classic and melts nicely, but Swiss, provolone, or even a sharp gouda work well depending on your taste.
Can I use other meats besides ham?
Yes, thinly sliced turkey, smoked chicken, or even salami make excellent substitutes.
Are these crackers gluten-free?
The original recipe uses all-purpose flour, which has gluten. You can substitute almond or oat flour for a gluten-free version, though the texture will vary slightly.
Pin This Recipe!
Easy DIY Lunchables Recipe with Homemade Crispy Crackers Ham Cheese
A simple and satisfying homemade version of Lunchables featuring crispy homemade crackers paired with deli ham and cheese, perfect for lunchboxes and snacks.
- Prep Time: 10 minutes
- Cook Time: 15 minutes
- Total Time: 45 minutes
- Yield: 4 servings 1x
- Category: Lunch, Snack
- Cuisine: American
Ingredients
- 1 ½ cups (190 g) all-purpose flour
- 6 tbsp (85 g) cold unsalted butter, cubed
- ½ tsp sea salt
- 4–6 tbsp (60–90 ml) cold water
- Optional: pinch of garlic powder or dried herbs
- 6–8 oz (170–225 g) thinly sliced deli ham (honey-glazed preferred)
- 6–8 slices (about 4 oz / 115 g) cheddar cheese slices
- Optional: Swiss or provolone cheese slices
- Optional extras for assembly: pickles or sliced cucumbers, mustard or mayo packets, fresh fruit like grapes or apple slices
Instructions
- In a mixing bowl, combine 1 ½ cups (190 g) all-purpose flour with ½ teaspoon sea salt and any optional seasonings like garlic powder.
- Add 6 tablespoons (85 g) cold, cubed unsalted butter. Work the butter into the flour using fingers or a pastry cutter until the mixture resembles coarse crumbs.
- Slowly drizzle in 4 tablespoons (60 ml) cold water, mixing lightly with a fork. Add more water, a tablespoon at a time, until the dough just comes together when pressed. It should be firm but not sticky.
- Shape the dough into a flat disc, wrap in plastic wrap, and refrigerate for at least 30 minutes.
- Preheat oven to 375°F (190°C). Line a baking sheet with parchment paper.
- On a lightly floured surface, roll the dough out as thin as possible (about 1/8 inch or 3 mm thick). Use a sharp knife or pizza cutter to slice the dough into bite-sized squares or rectangles.
- Transfer the crackers to the baking sheet, spacing evenly.
- Bake for 12-15 minutes, rotating the pan halfway through. Remove when edges are golden brown and cool completely on a wire rack to crisp further.
- Arrange homemade crackers alongside thin slices of ham and cheese in a lunchbox or container. Add optional extras like pickles or fresh fruit and pack mustard or mayo packets if desired.
Notes
Keep butter cold to ensure flaky, crispy crackers. Chill dough before rolling. Cut crackers before baking to avoid crumbs. Bake two trays at once, swapping positions halfway for even cooking. Let crackers cool fully before storing or serving. For gluten-free, substitute flour with almond or oat flour. For dairy-free, use vegan butter and plant-based cheese.
Nutrition
- Serving Size: 1 serving (includes
- Calories: 320
- Sugar: 1
- Sodium: 580
- Fat: 18
- Saturated Fat: 9
- Carbohydrates: 25
- Fiber: 1
- Protein: 14
Keywords: DIY Lunchables, homemade crackers, ham and cheese, lunchbox recipe, easy snack, crispy crackers


