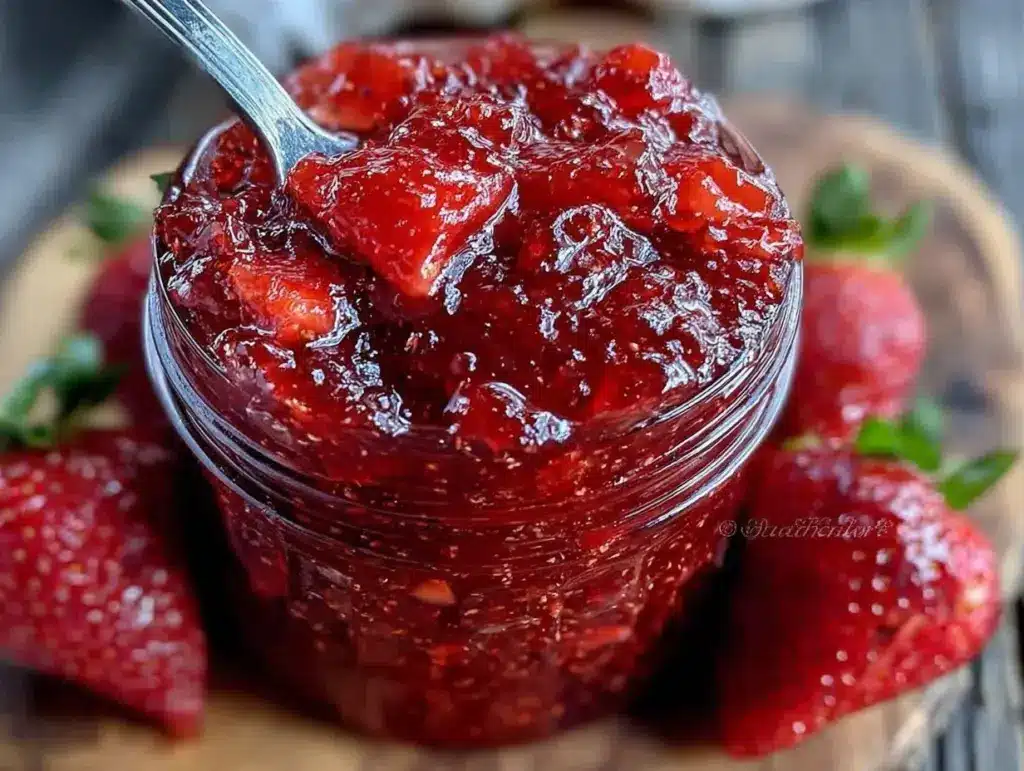
Let me tell you, the scent of fresh strawberries simmering on the stove, mingled with a hint of lemon zest and sugar, is enough to make anyone’s mouth water. The first time I made this easy homemade strawberry jam recipe, I was instantly hooked—the kind of moment where you pause, take a deep breath, and just smile because you know you’re onto something truly special. I remember when I was knee-high to a grasshopper, sneaking into my grandma’s kitchen, watching her stir her jam pot with that knowing grin. Years ago, I stumbled upon this recipe during a rainy weekend, desperate for a sweet project that didn’t require fancy ingredients or a lot of fuss. Honestly, I wish I’d discovered it way sooner.
My family couldn’t stop sneaking spoonfuls off the cooling jars (and I can’t really blame them). It’s dangerously easy but delivers pure, nostalgic comfort with every bite. You know what? This easy homemade strawberry jam recipe is perfect for potlucks, a sweet treat for your kids’ breakfast toast, or to brighten up your Pinterest cookie board with something homemade and heartfelt. After testing this jam multiple times (in the name of research, of course), it’s become a staple for family gatherings and gift baskets alike. This jam feels like a warm hug on a spoon, and you’re going to want to bookmark this one.
Why You’ll Love This Easy Homemade Strawberry Jam Recipe
Having played around with strawberry jam recipes for years, I can say this version hits the sweet spot between simplicity and flavor without any complicated steps or weird ingredients. It’s not just your average jam—here’s why this recipe stands out:
- Quick & Easy: Comes together in under an hour, perfect for a spontaneous kitchen project or last-minute gift idea.
- Simple Ingredients: No fancy grocery trips needed; just strawberries, sugar, lemon, and a pinch of patience.
- Perfect for: Breakfast spreads, afternoon tea, or homemade gifts that scream love and care.
- Crowd-Pleaser: Kids adore it on pancakes, and adults love it stirred into yogurt or drizzled on ice cream.
- Unbelievably Delicious: The jam balances natural strawberry sweetness with a zesty lemon kick and just the right texture—thick but spreadable.
This isn’t just jam; it’s the kind that makes you close your eyes after the first bite. It’s comfort food reimagined—simple, fresh, and with a soul-soothing satisfaction that’s hard to beat. Whether you want to impress guests without stress or turn a simple meal into something memorable, this recipe’s got your back.
What Ingredients You Will Need for Easy Homemade Strawberry Jam
This recipe uses simple, wholesome ingredients to deliver bold flavor and satisfying texture without the fuss. Most are pantry staples or easy to find at your local market during strawberry season. Here’s what you’ll need:
- Fresh Strawberries – about 4 cups (roughly 500g), hulled and quartered (choose ripe, fragrant berries for best flavor)
- Granulated Sugar – 2 cups (400g) (you can adjust slightly depending on your sweetness preference)
- Fresh Lemon Juice – 2 tablespoons (about 30ml), freshly squeezed (adds brightness and helps set the jam)
- Lemon Zest – 1 teaspoon (optional, for a subtle citrus aroma)
- Water – 1/4 cup (60ml), to help the fruit soften initially
Substitution tips: If you want a natural sweetener alternative, try raw honey or maple syrup (though the texture may vary). For a lower sugar version, reduce sugar to 1 1/2 cups and add a pectin substitute if needed. Organic strawberries work beautifully here, but conventional berries are fine as long as they’re fresh and firm.
I recommend using a trusted brand of sugar like Domino or C&H for consistent results. When selecting lemons, choose firm, unwaxed ones for that perfect tart kick.
Equipment Needed
- Large heavy-bottomed saucepan or jam pot – helps prevent scorching and allows even cooking
- Wooden spoon or heatproof spatula – for stirring the jam gently but thoroughly
- Measuring cups and spoons – for accurate ingredient amounts
- Glass jars with lids – sterilized, for storing your jam (mason jars work great)
- Potato masher or fork – optional, to gently crush strawberries if you prefer a chunkier jam
If you don’t have a heavy-bottomed pot, a thick stainless steel pan will do. I learned the hard way that flimsy pans burn the jam quickly, so investing in a sturdy pot is worth it. For sterilizing jars, boiling water bath or dishwasher heat works just fine. Don’t stress over fancy tools—simplicity is key here!
Preparation Method: 5 Simple Steps for Perfect Strawberry Jam

- Prepare your strawberries: Rinse the strawberries under cold water, hull them by removing the green tops, and cut into quarters. You should have about 4 cups (500g) ready. This step takes about 10 minutes.
- Combine fruit and sugar: In your large saucepan, mix the strawberries, sugar, lemon juice, lemon zest (if using), and water. Stir gently to combine. Let this mixture sit for 15-20 minutes until the sugar dissolves and the fruit releases some juice.
- Cook the jam: Place the saucepan over medium heat and bring the mixture to a gentle boil, stirring frequently to prevent sticking. Once boiling, reduce heat slightly and let it simmer for about 20-25 minutes. During this time, the jam will thicken and the strawberries will break down. Use a potato masher or fork to crush the fruit if you want a chunkier texture.
- Test for doneness: To check if your jam is ready, place a small spoonful on a chilled plate and tilt it. If it wrinkles and holds its shape after a minute, it’s done. If not, cook for a few more minutes and test again. This step is crucial to get that perfect spreadable consistency.
- Jar and cool: Carefully ladle the hot jam into sterilized glass jars, leaving about 1/4 inch (0.5 cm) headspace. Wipe rims clean, seal with lids, and let jars cool to room temperature. Refrigerate after opening. This final step takes about 15 minutes.
Pro tip: Stir gently but constantly when boiling the jam to avoid burning. If foam forms on top, skim it off with a spoon for a clearer jam. Letting the mixture sit before cooking helps the sugar dissolve fully, which improves texture.
Cooking Tips & Techniques for Jam-Making Success
Jam-making might seem intimidating, but with a few tricks, it’s honestly pretty straightforward. Here’s what I’ve learned after many batches:
- Don’t rush the simmer: Low and slow is your friend. Hurrying the process can cause burning or separation.
- Keep stirring: Strawberries and sugar love to stick and scorch, so keep that wooden spoon moving.
- Use fresh, ripe berries: Flavor depends on fruit quality—too underripe and your jam won’t be as sweet or flavorful.
- Test your jam properly: The cold plate test is your go-to. Skip it and you risk runny jam or overcooking.
- Beware of foam: It’s normal but removing it makes your jam prettier and less bitter.
- Cool jars before filling: Hot jars can crack when filled with hot jam; warm or room temp works best.
One time, I accidentally left the jam unattended for too long, and it turned into more of a strawberry candy. Lesson learned: stay close and enjoy the delicious smells while you stir!
Variations & Adaptations for Your Strawberry Jam
If you want to mix things up or accommodate dietary needs, here are some fun ways to customize this easy homemade strawberry jam recipe:
- Low sugar version: Reduce sugar to 1 1/2 cups and add a natural pectin powder to help set.
- Mixed berry jam: Swap half the strawberries with raspberries or blueberries for a vibrant twist.
- Spiced jam: Add a cinnamon stick or a few cloves during simmering for a cozy fall flavor.
- Vegan & Paleo friendly: Use coconut sugar or maple syrup instead of granulated sugar.
- Chunky or smooth: Adjust texture by mashing more or less, or even blend part of the jam for a smooth spread.
Personally, I love adding a splash of balsamic vinegar for a subtle tang that deepens the strawberry flavor. Try it once—you might get hooked like I did!
Serving & Storage Suggestions
This strawberry jam shines best served at room temperature on warm toast, fresh scones, or dolloped over vanilla yogurt. It pairs beautifully with a cup of hot tea or your morning coffee. For a lovely brunch, try it alongside cream cheese or melted butter on a bagel.
Store unopened jars in a cool, dark place for up to a year. Once opened, refrigerate and use within 3 weeks for best flavor. You can freeze jam in airtight containers for up to 6 months, but the texture may soften slightly upon thawing.
Reheat gently in a saucepan or microwave if you want a spread that melts into warm bread. Over time, the flavors deepen and meld—an unexpected bonus that makes your jam taste even better after a week or two.
Nutritional Information & Benefits
Per 2-tablespoon (30g) serving, this jam roughly contains:
| Calories | 50 |
|---|---|
| Carbohydrates | 13g |
| Sugar | 12g |
| Fiber | 0.5g |
| Fat | 0g |
| Protein | 0g |
Strawberries are packed with vitamin C and antioxidants, making this jam a little boost of wholesome goodness despite the sweetness. Using fresh lemon juice adds a dose of vitamin C and helps preserve the jam naturally. For those watching sugar intake, reducing sugar or using natural substitutes can make this a friendlier option. Keep in mind, this recipe contains no gluten or nuts, making it suitable for many dietary preferences.
Conclusion
So, why should you try this easy homemade strawberry jam recipe? Because it’s fuss-free, delicious, and brings a little sunshine to your kitchen regardless of the season. You can tweak it to your taste, whether you want it sweeter, tangier, or with a seasonal twist. I love this jam because it connects me to those simple, joyful moments in the kitchen with family, and it tastes like summer in a jar.
Give it a go—you might find yourself making it again and again. And hey, if you do try it, drop a comment below, share your variations, or tell me your favorite way to enjoy it. I’m all ears! Remember, homemade jam isn’t just food; it’s a little bit of love you can spread.
FAQs About Easy Homemade Strawberry Jam
How long does homemade strawberry jam last?
Unopened and stored in a cool, dark place, it can last up to a year. Once opened, keep it refrigerated and use within 3 weeks for the best taste and safety.
Can I use frozen strawberries for this jam?
Yes! Just thaw and drain excess liquid before cooking. Frozen berries work well but may produce a slightly softer texture.
Do I need to add pectin to this recipe?
No, the natural pectin in strawberries combined with lemon juice is usually enough to help the jam set, especially with the sugar amount used.
How do I prevent my jam from being too runny?
Cook it a bit longer to reduce liquid and test on a cold plate until it wrinkles. Avoid adding too much water initially.
Can I make this jam without sugar?
You can reduce sugar or use natural sweeteners like honey or maple syrup, but the texture and preservation qualities will change, so consume it sooner.
Pin This Recipe!
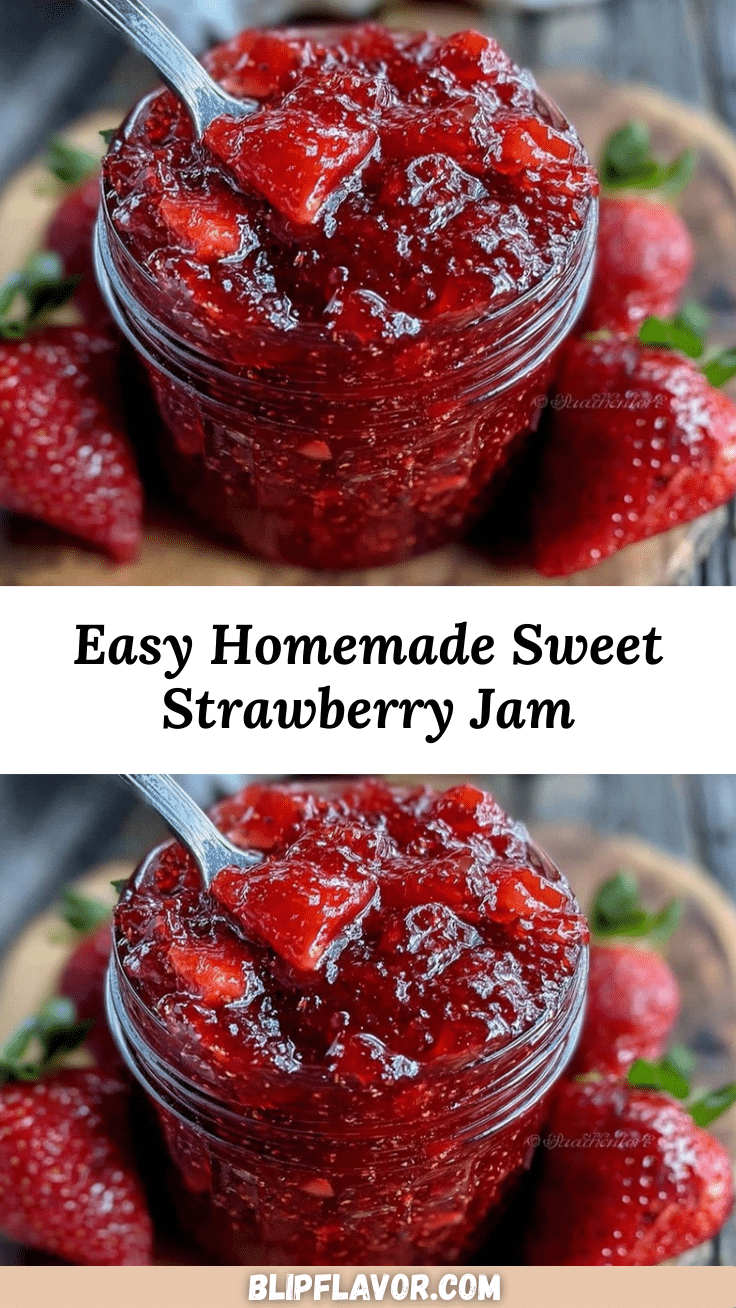
Easy Homemade Strawberry Jam Recipe
A simple and quick homemade strawberry jam recipe using fresh strawberries, sugar, and lemon juice that yields a thick, spreadable jam perfect for breakfast or gifts.
- Prep Time: 10 minutes
- Cook Time: 25 minutes
- Total Time: 50 minutes
- Yield: About 4 cups (approximately 8 servings) 1x
- Category: Preserves
- Cuisine: American
Ingredients
- 4 cups fresh strawberries (about 500g), hulled and quartered
- 2 cups granulated sugar (400g)
- 2 tablespoons fresh lemon juice (about 30ml)
- 1 teaspoon lemon zest (optional)
- 1/4 cup water (60ml)
Instructions
- Rinse the strawberries under cold water, hull them by removing the green tops, and cut into quarters. This step takes about 10 minutes.
- In a large heavy-bottomed saucepan, mix the strawberries, sugar, lemon juice, lemon zest (if using), and water. Stir gently to combine. Let this mixture sit for 15-20 minutes until the sugar dissolves and the fruit releases some juice.
- Place the saucepan over medium heat and bring the mixture to a gentle boil, stirring frequently to prevent sticking. Once boiling, reduce heat slightly and let it simmer for about 20-25 minutes. Use a potato masher or fork to crush the fruit if you want a chunkier texture.
- Test if the jam is ready by placing a small spoonful on a chilled plate and tilting it. If it wrinkles and holds its shape after a minute, it’s done. If not, cook for a few more minutes and test again.
- Carefully ladle the hot jam into sterilized glass jars, leaving about 1/4 inch (0.5 cm) headspace. Wipe rims clean, seal with lids, and let jars cool to room temperature. Refrigerate after opening. This final step takes about 15 minutes.
Notes
Stir gently but constantly when boiling to avoid burning. Skim off foam for clearer jam. Let mixture sit before cooking to dissolve sugar fully. Test jam doneness with cold plate test. Use fresh, ripe strawberries for best flavor. Cool jars before filling to prevent cracking.
Nutrition
- Serving Size: 2 tablespoons (30g)
- Calories: 50
- Sugar: 12
- Carbohydrates: 13
- Fiber: 0.5
Keywords: strawberry jam, homemade jam, easy jam recipe, breakfast spread, fruit preserves, simple jam, homemade strawberry jam


