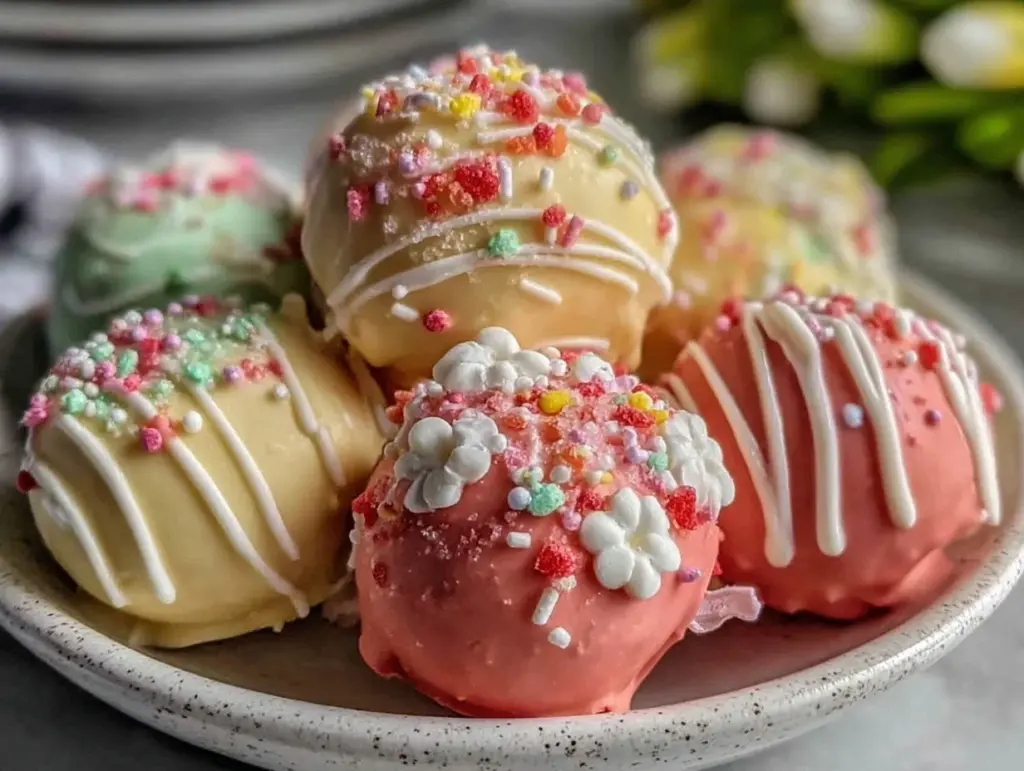
Let me tell you, the sight of these easy colorful Easter cake pops brightening up my kitchen counter is the kind of thing that makes your heart do a little happy dance. The first time I whipped up these playful treats, I was instantly hooked—the kind of moment where you pause, take a deep breath, and just smile because you know you’re onto something truly special. Years ago, when I was knee-high to a grasshopper, my grandma used to make the most delightful little sweets for spring, but I never quite nailed the art of the perfect bite-sized cake pop until recently.
Honestly, my family couldn’t stop sneaking them off the cooling rack (and I can’t really blame them). These cake pops are dangerously easy to make, bursting with pastel colors and sweet flavors that scream spring celebration. Whether you’re planning a potluck, looking for a sweet treat for your kids, or want to brighten up your Pinterest cookie board, these colorful Easter cake pops hit the spot every single time. I’ve tested this recipe more times than I care to admit—in the name of research, of course—and it’s now a staple for our family gatherings and gifting. If you’re looking for a fun, festive dessert that feels like a warm hug, you’re going to want to bookmark this one.
Why You’ll Love This Recipe
After many tries and tweaks, this easy colorful Easter cake pops recipe has proven itself time and again. Here’s why it deserves a spot in your spring celebration lineup:
- Quick & Easy: Comes together in under an hour, perfect for busy weeknights or last-minute party prep.
- Simple Ingredients: No fancy grocery trips needed; you likely already have everything in your kitchen pantry.
- Perfect for Spring Celebrations: Great for Easter brunches, school parties, or just a cheerful weekend treat.
- Crowd-Pleaser: Always gets rave reviews from kids and adults alike—because who can resist a colorful bite?
- Unbelievably Delicious: The texture is moist and tender, balanced with just the right amount of sweetness.
What makes this recipe stand out? It’s the little creative twists—I like to blend the cake crumbs with a smooth cream cheese frosting to get that perfect consistency for rolling. Plus, the vibrant candy melts and sprinkles bring a joyful pop of color that’s just so spring-time appropriate. It’s not just a cake pop—it’s a mood booster on a stick. This recipe isn’t just good, it’s the kind that makes you close your eyes after the first bite and smile. It’s comfort food reimagined for a festive season—fun, fast, and fabulously flavorful.
What Ingredients You Will Need
This recipe uses simple, wholesome ingredients to deliver bold flavor and satisfying texture without the fuss. Most of these are pantry staples, with some spring-inspired extras to add color and charm.
- For the Cake:
- 1 box of yellow cake mix (or your favorite flavor), about 15.25 oz (432g)
- 3 large eggs, room temperature
- 1/2 cup vegetable oil (120ml)
- 1 cup water (240ml)
- For the Frosting Binder:
- 8 oz (225g) cream cheese, softened (I recommend Philadelphia for smoothness)
- 1/2 cup (60g) powdered sugar, sifted
- 1 tsp vanilla extract
- For Decoration:
- 12 oz (340g) pastel-colored candy melts (pink, yellow, green, blue)
- Assorted sprinkles and edible glitter (choose spring-themed shapes like flowers and eggs)
- 1 package of cake pop sticks (about 50 sticks)
Ingredient tips: If you want a gluten-free option, you can swap the cake mix for a gluten-free variety. For dairy-free, use coconut cream cheese and dairy-free candy melts. In summer, fresh edible flowers on top add a lovely touch instead of sprinkles. I find smaller cake pops are easier to handle and perfect for little hands, so I use mini cake pop sticks when baking for kids.
Equipment Needed
- Mixing bowls (one large for batter, one medium for frosting binder)
- Electric mixer or stand mixer (hand mixing is possible, but takes more elbow grease)
- Baking pan (9×13 inches / 23×33 cm)
- Cooling rack to cool cake
- Large mixing spoon or spatula for combining ingredients
- Measuring cups and spoons for precision
- Microwave-safe bowls for melting candy melts
- Styrofoam block or cake pop stand (optional, but great for drying pops upright)
- Wax paper or parchment paper for workspace
If you don’t have a cake pop stand, an empty flower pot filled with rice or beans works wonders to hold your pops upright while the candy coating sets. For melting candy melts, a double boiler is nice but the microwave method is quick and efficient (just heat in short bursts!). I’ve found a silicone spatula is best for scraping bowls clean. Budget-wise, you can get away with basic tools—no fancy gadgets necessary.
Preparation Method

- Bake the Cake: Preheat your oven to 350°F (175°C). Grease and flour your 9×13 inch (23×33 cm) baking pan. In a large bowl, combine the cake mix, eggs, vegetable oil, and water. Mix with an electric mixer on medium speed for about 2 minutes until smooth and well blended.
- Pour and Bake: Pour the batter evenly into the prepared pan. Bake for 30-35 minutes or until a toothpick inserted in the center comes out clean. Remove from oven and let cool completely on a cooling rack—this is important, or your frosting won’t blend well.
- Make the Frosting Binder: In a medium bowl, beat the softened cream cheese, powdered sugar, and vanilla extract together until smooth and creamy. This will act as the glue for your cake crumbs.
- Crumble the Cake: Once the cake is completely cool, crumble it into fine crumbs using your hands or a food processor. You want it as fine as possible to get smooth, uniform cake pops.
- Combine Cake and Frosting: Add the cream cheese frosting in small batches (start with half) to the cake crumbs. Mix gently with a spatula until the mixture sticks together when pressed. Add more frosting as needed, but don’t overdo it—too wet and the cake pops won’t hold their shape.
- Shape the Cake Pops: Scoop out about 1.5 tablespoons (about 20g) of the mixture and roll it into a smooth ball. Place on a baking sheet lined with parchment paper. Repeat for all the mixture. Chill the balls in the fridge for at least 1 hour to firm up.
- Melt Candy Coating: Melt your candy melts in microwave-safe bowls, heating in 30-second intervals and stirring in between until smooth. Avoid overheating to prevent clumps.
- Insert Sticks: Dip the tip of each cake pop stick into the melted candy, then insert it halfway into a cake ball. This helps the stick stay in place.
- Dip and Decorate: Holding the stick, dip the cake pop into the melted candy coating until fully covered. Gently tap off excess coating and immediately decorate with sprinkles or edible glitter. Place the pop upright in a styrofoam block or on wax paper to set.
- Chill and Serve: Refrigerate the cake pops for about 30 minutes to let the coating harden. Serve at room temperature for the best flavor and texture.
Pro tip: If the candy coating thickens as you dip, warm it briefly in the microwave to keep it smooth. Also, chilling the cake balls before dipping is key to preventing them from falling apart—the cold helps them hold firm.
Cooking Tips & Techniques
Making cake pops might seem tricky, but with a few tricks up your sleeve, it’s actually quite straightforward. One thing I learned the hard way is not to skip chilling the cake balls—warm cake pops tend to crumble or drop off the stick when dipped. So definitely let them rest in the fridge or even pop them in the freezer for 15 minutes if you’re in a hurry.
When melting candy melts, patience is your best friend. Microwave them in short bursts and stir well—overheating leads to clumpy, grainy chocolate, which is hard to work with. If you don’t have candy melts, white chocolate chips can work, but tempering is a bit more finicky.
Another tip is to tap the excess coating off gently instead of shaking vigorously. This keeps the candy coating smooth and prevents cracking. If you want a really shiny finish, add a tiny bit of vegetable oil to the melted candy melts to thin them out slightly.
Multitasking helps—while cake balls chill, prep your decorations and melt the coatings. This way, when the cake balls are ready, you can dip them quickly to avoid melting or softening. Lastly, don’t stress perfect shapes—slightly imperfect cake pops give them a homemade charm that everyone loves!
Variations & Adaptations
There’s plenty of room to play around with this easy colorful Easter cake pops recipe. Here are some fun ideas:
- Dietary Twist: Use almond flour cake mix and dairy-free cream cheese for gluten- and dairy-free pops. Coconut yogurt also works nicely as a binder if you prefer not to use cream cheese.
- Flavor Swap: Try mixing in lemon zest and a touch of poppy seeds for a springy citrus kick. Or fold in mini chocolate chips for extra indulgence.
- Seasonal Colors: Swap pastel candy melts for bright, bold colors for summer parties or autumn tones (orange, brown, yellow) for fall gatherings.
- Cooking Method Variation: Instead of baking a whole cake, use leftover cake or boxed cake mix prepared as cupcakes—crumbled cupcakes make perfect cake balls.
- Personal Favorite: I once dipped these pops in dark chocolate, then sprinkled toasted coconut and chopped pistachios on top—a delightful twist that was a hit at a spring brunch.
Serving & Storage Suggestions
Serve these cake pops at room temperature to enjoy that perfect balance of moist cake and crisp candy coating. They look fabulous arranged upright in a decorative container or laid out on a festive platter sprinkled with edible flowers or confetti sprinkles.
Pair them with fresh fruit, a light lemonade, or even a chilled glass of sparkling wine for the adults. They make a playful dessert centerpiece for Easter baskets or springtime celebrations.
To store, keep cake pops in an airtight container in the refrigerator for up to 5 days. For longer storage, freeze them in a single layer on a baking sheet, then transfer to a freezer-safe container for up to 3 months. When ready to eat, thaw in the fridge overnight—don’t leave them out at room temperature too long or the coating might sweat.
Flavors actually deepen a bit after a day in the fridge, so if you’re prepping ahead, they’ll taste even better the next day.
Nutritional Information & Benefits
Each cake pop (approximately 50g) contains roughly 180-220 calories, depending on size and decoration. The cream cheese binder adds a touch of protein and fat, balancing the sweetness of the cake and candy coating.
Key ingredients like eggs and cream cheese provide essential nutrients such as vitamin A, calcium, and protein. Using real cream cheese instead of buttercream frosting cuts down on sugar and adds a tangy depth.
This recipe can be adapted to be gluten-free or dairy-free, making it accessible for many dietary needs. Just watch for allergens like eggs and dairy if serving to sensitive guests.
From a wellness perspective, these cake pops are an occasional treat that brings joy and connection—sometimes that’s just as important as nutrition!
Conclusion
Easy colorful Easter cake pops are a fun, festive way to add a splash of spring to your celebrations. They’re simple enough for bakers of all levels, yet impressive enough to wow guests and family alike. I love how customizable they are—whether you stick to the classic pastel palette or mix in your own flavors and decorations, these pops always bring smiles.
Give this recipe a whirl, and don’t be shy about making it your own. I’d love to hear how you customize your cake pops or what flavors you try next! Drop a comment, share your pictures, or tell me your favorite ways to celebrate spring with sweet treats.
Here’s to colorful bites and joyful moments—happy baking!
FAQs About Easy Colorful Easter Cake Pops
How long do cake pops stay fresh?
Stored in an airtight container in the fridge, cake pops stay fresh for up to 5 days. For longer storage, freeze them for up to 3 months.
Can I make cake pops without cream cheese?
Yes! You can use buttercream frosting or even peanut butter as a binder, but cream cheese gives a nice tangy flavor and smooth texture.
What if my cake pops fall off the sticks?
Make sure the cake balls are well chilled before dipping, and dip the stick tip in melted candy before inserting to help it stick. Also, avoid overloading with frosting binder.
Can I use homemade cake instead of boxed mix?
Absolutely! Homemade cake works just as well. Just crumble it finely and mix with your binder to form cake balls.
How do I store cake pops if I’m transporting them?
Place them upright in a sturdy container with tissue or bubble wrap to prevent movement. Keep them cool, but avoid refrigeration right before serving to prevent condensation.
Pin This Recipe!
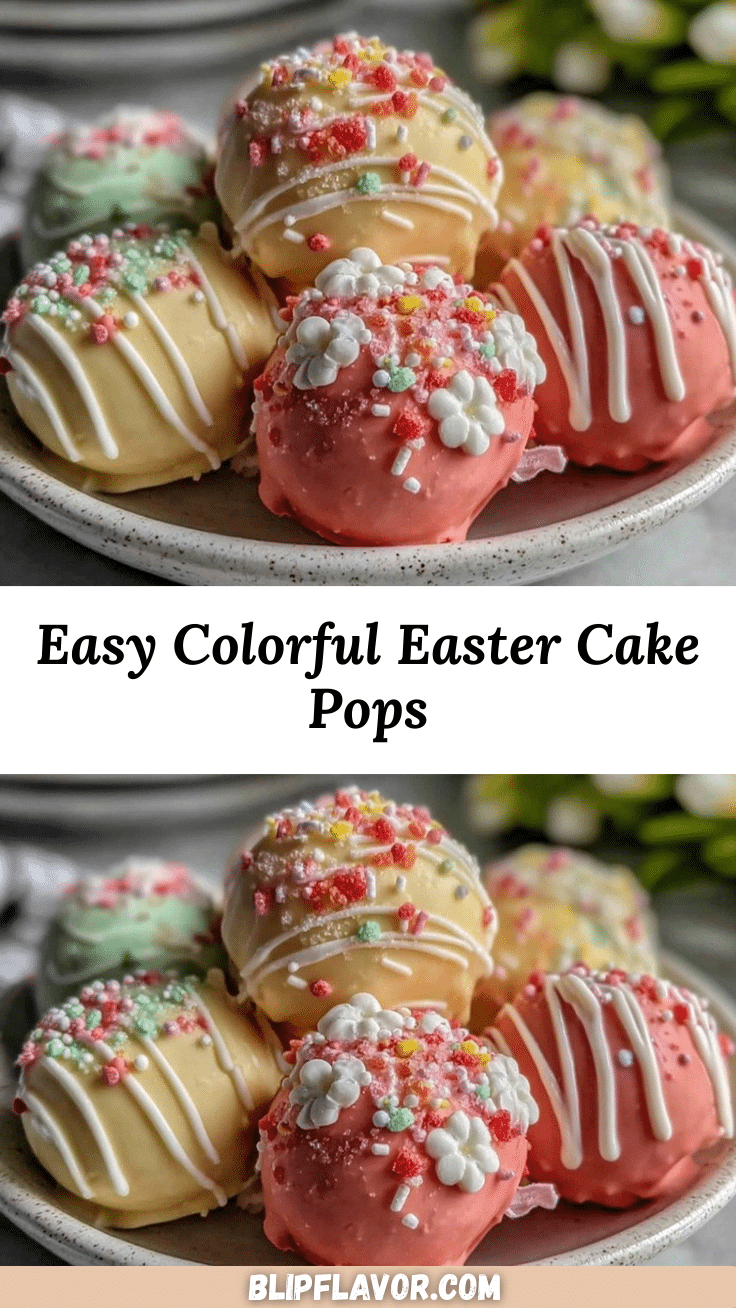
Easy Colorful Easter Cake Pops Recipe Perfect for Spring Celebrations

These easy colorful Easter cake pops are a fun, festive treat perfect for spring celebrations, combining moist cake with a smooth cream cheese binder and vibrant candy coating.
- Prep Time: 20 minutes
- Cook Time: 35 minutes
- Total Time: 1 hour 30 minutes
- Yield: About 50 cake pops 1x
- Category: Dessert
- Cuisine: American
Ingredients
- 1 box yellow cake mix (about 15.25 oz / 432g)
- 3 large eggs, room temperature
- 1/2 cup vegetable oil (120ml)
- 1 cup water (240ml)
- 8 oz (225g) cream cheese, softened
- 1/2 cup (60g) powdered sugar, sifted
- 1 tsp vanilla extract
- 12 oz (340g) pastel-colored candy melts (pink, yellow, green, blue)
- Assorted sprinkles and edible glitter (spring-themed shapes like flowers and eggs)
- 1 package cake pop sticks (about 50 sticks)
Instructions
- Preheat oven to 350°F (175°C). Grease and flour a 9×13 inch (23×33 cm) baking pan.
- In a large bowl, combine cake mix, eggs, vegetable oil, and water. Mix with an electric mixer on medium speed for about 2 minutes until smooth.
- Pour batter evenly into prepared pan. Bake for 30-35 minutes or until a toothpick inserted in the center comes out clean.
- Remove from oven and cool completely on a cooling rack.
- In a medium bowl, beat softened cream cheese, powdered sugar, and vanilla extract until smooth and creamy.
- Crumble cooled cake into fine crumbs using hands or food processor.
- Add cream cheese frosting in small batches to cake crumbs, mixing gently until mixture sticks together when pressed. Add more frosting if needed but do not overdo.
- Scoop about 1.5 tablespoons (20g) of mixture and roll into smooth balls. Place on parchment-lined baking sheet.
- Chill cake balls in fridge for at least 1 hour to firm up.
- Melt candy melts in microwave-safe bowls in 30-second intervals, stirring until smooth.
- Dip tip of each cake pop stick into melted candy, then insert halfway into cake ball.
- Dip cake pop into melted candy coating until fully covered. Tap off excess coating gently.
- Decorate immediately with sprinkles or edible glitter.
- Place cake pops upright in styrofoam block or on wax paper to set.
- Refrigerate cake pops for about 30 minutes to harden coating.
- Serve at room temperature.
Notes
Chill cake balls before dipping to prevent them from falling apart. Warm candy melts briefly if they thicken during dipping. Tap excess coating gently instead of shaking to keep coating smooth. Use mini sticks for smaller cake pops for kids. For gluten-free or dairy-free options, swap cake mix and cream cheese accordingly.
Nutrition
- Serving Size: 1 cake pop (approxim
- Calories: 180220
- Sugar: 20
- Sodium: 150
- Fat: 9
- Saturated Fat: 4
- Carbohydrates: 28
- Fiber: 0.5
- Protein: 3
Keywords: Easter cake pops, colorful cake pops, spring dessert, cake pops recipe, easy cake pops, festive treats


