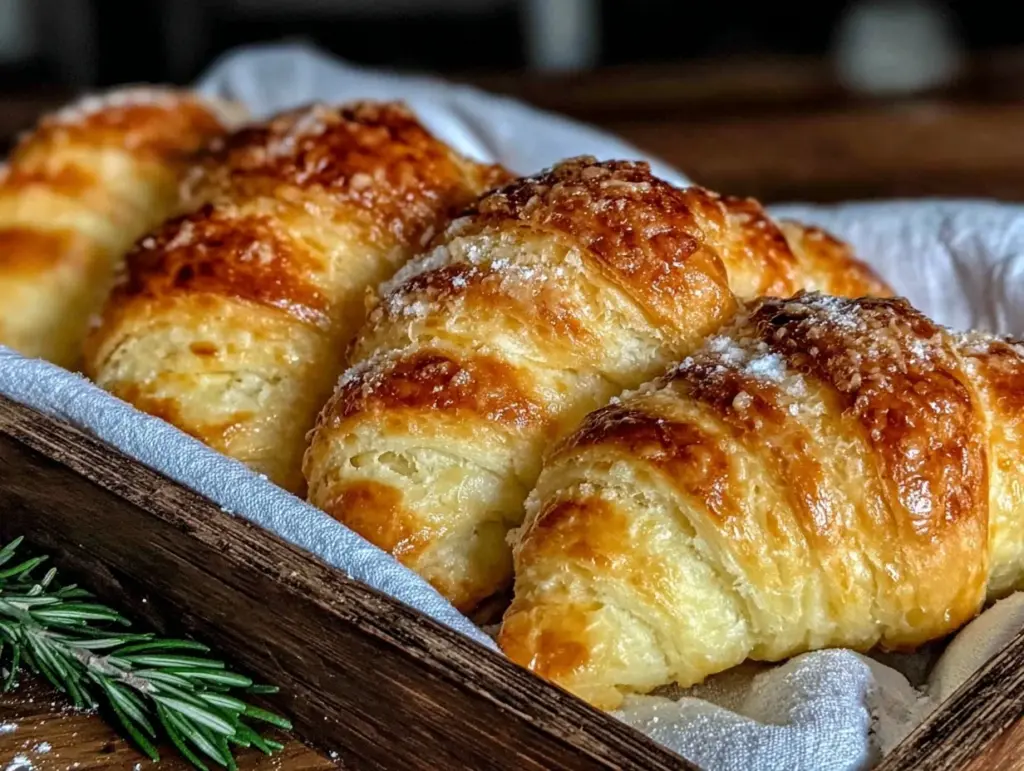
Let me tell you, the scent of freshly baked crescent rolls wafting through the kitchen is enough to make anyone’s mouth water instantly. The very first time I baked these flaky crescent rolls with buttery, melt-in-your-mouth layers, I was instantly hooked. There’s this kind of moment when you pull them from the oven — golden, puffed up, and smelling like pure comfort — and you pause, take a deep breath, and just smile because you know you’re onto something truly special.
Years ago, when I was knee-high to a grasshopper, my grandma used to make something similar for weekend breakfasts, but her recipe was a bit fussy and time-consuming. I stumbled upon this easy homemade version on a rainy afternoon, trying to recreate that nostalgic feeling without all the fuss. Honestly, I wish I’d found this flaky crescent rolls recipe years ago — it’s dangerously easy and delivers that same nostalgic comfort, only better.
My family couldn’t stop sneaking these rolls off the cooling rack (and I can’t really blame them). They’re perfect for cozy mornings, potlucks, or even a sweet treat for the kids after school. You know what? These flaky crescent rolls have become a staple for family gatherings, gifting, and those times when you just want a warm hug in bread form. If you’re looking to brighten up your Pinterest cookie board with something a little different, buttery, and downright irresistible, you’re going to want to bookmark this one.
Why You’ll Love This Flaky Crescent Rolls Recipe
After testing this recipe multiple times (in the name of research, of course), I can say with confidence it’s a winner for so many reasons. Here’s why you’ll fall head over heels for these crescent rolls:
- Quick & Easy: Comes together in under 2 hours, which is a breeze for homemade bread.
- Simple Ingredients: No fancy grocery trips needed; you likely already have everything in your kitchen pantry.
- Perfect for Breakfast & Brunch: Ideal for lazy weekend mornings or holiday spreads where you want to impress without stress.
- Crowd-Pleaser: Always gets rave reviews from kids, picky eaters, and bread lovers alike.
- Unbelievably Delicious: The flaky texture combined with those buttery layers is next-level comfort food — honestly, it’s hard to stop at just one.
What makes this recipe stand out? It’s the layering technique that creates those delicate, melt-in-your-mouth sheets. Plus, the perfect balance of butter and dough means you get that rich flavor without it feeling heavy. This isn’t just another roll recipe — it’s the best version I’ve tried, and I’m thrilled to share it with you.
Whether you want to impress guests or simply treat yourself to some soul-soothing carbs, these flaky crescent rolls hit the spot every time. They’re the kind of recipe that makes you close your eyes after the first bite and smile — pure, buttery bliss!
What Ingredients You Will Need
This recipe uses simple, wholesome ingredients to deliver bold flavor and a satisfyingly flaky texture without the fuss. Most are pantry staples, which makes it perfect for last-minute baking sessions. Here’s what you’ll want to gather:
- All-purpose flour: 3 ½ cups (440g) – I recommend King Arthur brand for consistent results.
- Granulated sugar: 2 tablespoons – adds a hint of sweetness to balance the buttery layers.
- Instant yeast: 2 ¼ teaspoons (one packet) – for that perfect rise.
- Salt: 1 teaspoon – enhances flavor, don’t skip it!
- Whole milk: 1 cup (240ml), warmed to about 110°F (43°C) – gives the dough richness and tenderness.
- Unsalted butter: ¾ cup (170g), softened + extra for layering – key to creating those flaky, buttery layers.
- Large egg: 1, room temperature – adds structure and color.
- Water: 2 tablespoons, warm – helps activate the yeast.
- Optional: honey: 1 tablespoon – swap with sugar for a subtle floral note if desired.
If you want to make these rolls dairy-free, swap the butter and milk with dairy-free alternatives like coconut oil and almond milk. For a gluten-free tweak, almond flour won’t quite work here, but a 1:1 gluten-free flour blend can be tried with some patience. For best flakiness, make sure the butter you use for layering is chilled but still pliable.
Equipment Needed
- Mixing bowl: Medium to large size for combining dough ingredients.
- Stand mixer with dough hook (optional): Makes kneading easier but you can knead by hand.
- Rolling pin: Essential for rolling out the dough and layering butter evenly.
- Baking sheet: Rimmed, lined with parchment paper for easy cleanup.
- Pastry brush: For brushing melted butter on layers and tops.
- Sharp knife or pizza cutter: To cut dough into triangles for shaping.
- Kitchen towel or plastic wrap: To cover dough while it rises.
If you don’t have a stand mixer, no worries — kneading by hand is just as satisfying (and therapeutic!). For budget-friendly options, a simple rolling pin from any kitchenware store will do the trick, and parchment paper is your best friend to prevent sticking and mess.
Preparation Method
- Activate the yeast: In a small bowl, combine warm milk (110°F/43°C), warm water, sugar, and yeast. Stir gently and let it sit for 5-10 minutes until foamy. If it doesn’t foam, your yeast might be expired or water too hot/cold.
- Mix the dough: In a large bowl (or stand mixer bowl), whisk together flour and salt. Add the softened butter (¾ cup) cut into small pieces, and rub it into the flour with your fingertips until the mixture resembles coarse crumbs. Add the yeast mixture and egg, stirring to combine. The dough will be shaggy and sticky.
- Knead: Knead the dough on a lightly floured surface for about 8-10 minutes until smooth and elastic — or use a stand mixer with dough hook for 5-6 minutes. If dough feels too sticky, sprinkle with a touch more flour but be careful not to overdo it.
- First rise: Form dough into a ball, place it in a lightly greased bowl, cover with a kitchen towel or plastic wrap, and let it rise in a warm spot for 1 to 1 ½ hours until doubled in size.
- Prepare butter for layering: While dough rises, place remaining butter (about 4 tablespoons) between two sheets of parchment and pound with rolling pin into a thin square (about 7×7 inches / 18×18 cm). Chill until dough is ready.
- Roll and layer: Punch down risen dough, turn onto a floured surface, and roll into a 12×12 inch (30×30 cm) square. Place chilled butter square diagonally in the center. Fold dough edges over butter like an envelope, sealing edges to encase butter completely.
- Laminate the dough: Roll the dough gently into a 12×8 inch (30×20 cm) rectangle. Fold the dough into thirds like a letter (this is called a “turn”). Chill for 20-30 minutes. Repeat rolling and folding two more times, chilling between each turn. This layering creates the flaky texture.
- Shape the rolls: After last turn, roll dough into a 12-inch (30 cm) circle. Cut into 8-12 triangles. Starting from wide end, roll each triangle tightly toward the point, forming crescent shapes. Place on parchment-lined baking sheet, point side down, curving ends slightly.
- Second rise: Cover rolls loosely and let rise for 45-60 minutes until puffy but not doubled.
- Bake: Preheat oven to 375°F (190°C). Brush rolls with melted butter. Bake 15-18 minutes or until golden brown and flaky. Let cool slightly before serving.
Pro tip: If you notice butter leaking during rolling, your butter might be too soft or dough too warm. Chill both longer next time. Also, don’t rush the rising times — they really make a difference in texture.
Cooking Tips & Techniques
Flaky crescent rolls require patience but aren’t as tricky as they look. Here’s what I’ve learned from experience:
- Temperature matters: Keep your butter cold but pliable. Too soft and it’ll soak into the dough, ruining those layers. Too hard and it’ll break through the dough.
- Don’t over-flour: Dust your surface lightly to avoid tough rolls. Excess flour dries out dough.
- Handle dough gently: Overworking after layering can knock out air and flatten your layers. Be delicate when rolling out and folding.
- Timing is key: Rise times vary with room temp. If your kitchen is cold, give dough extra time to double.
- Use quality yeast: Fresh yeast makes a big difference. Expired yeast often results in dense rolls.
- Brush with butter: Brushing tops with melted butter pre- and post-bake adds flavor and helps get that gorgeous golden crust.
When I first tried this, I rushed the folding process and ended up with dense rolls — lesson learned the hard way! Now, I stick to the chill times and see those perfect flaky layers every time.
Variations & Adaptations
These flaky crescent rolls are versatile and easy to customize:
- Herbed butter: Mix softened butter with garlic, rosemary, or thyme before layering for savory rolls.
- Sweet twist: Add cinnamon and sugar to the butter layers or sprinkle sugar before baking for a breakfast treat.
- Vegan option: Use plant-based butter and milk substitutes. The technique remains the same, just expect slightly different flavor nuances.
- Cheese-filled: Add a small slice of cheese or cream cheese at the wide end of each triangle before rolling.
- Gluten-free adaptation: Use a gluten-free flour blend designed for yeast breads and watch hydration closely—you might need a bit more liquid.
Personally, I once tried almond and herb-flavored crescent rolls for a brunch party, and they were a hit — guests loved the subtle nutty aroma paired with flaky layers. Feel free to experiment with your favorite flavors!
Serving & Storage Suggestions
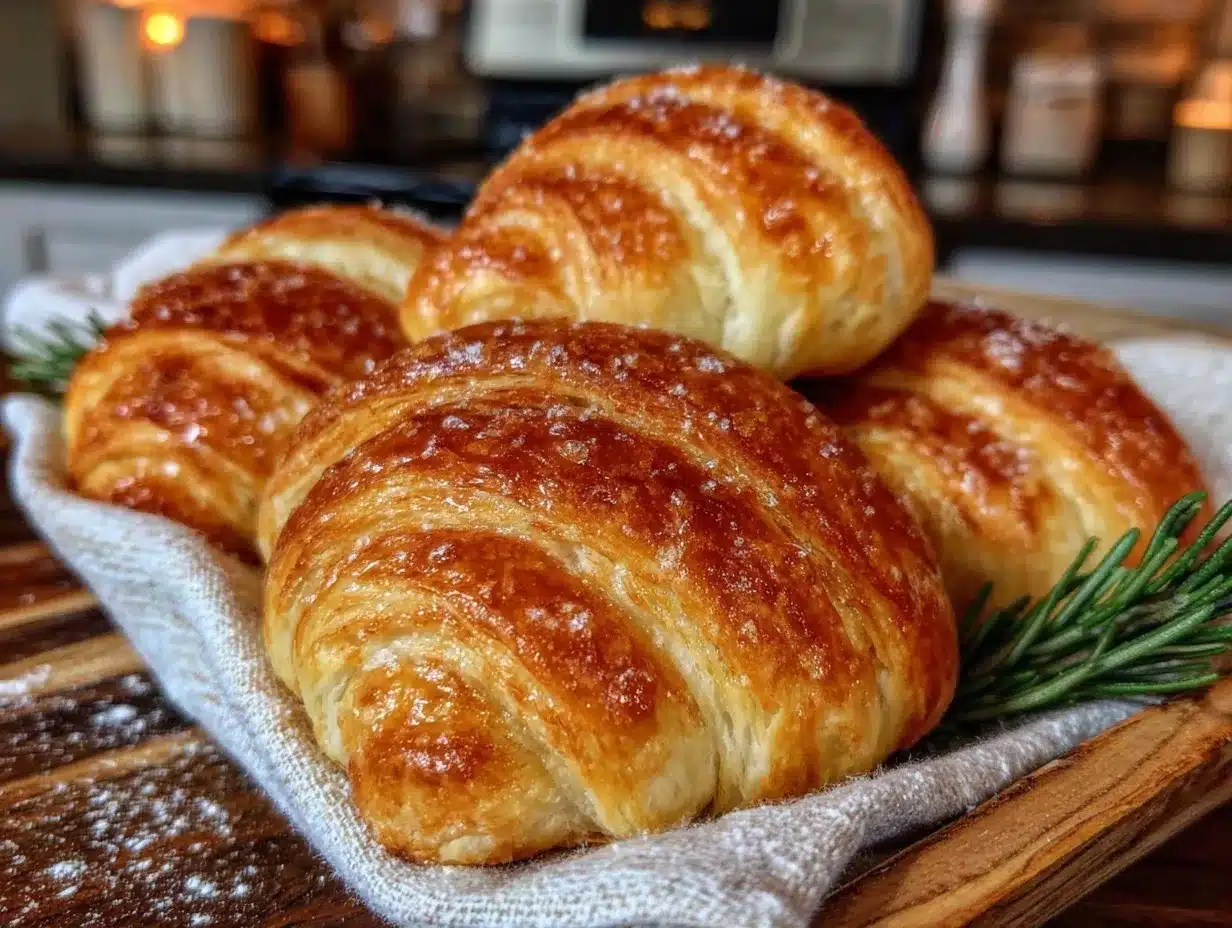
Serve these flaky crescent rolls warm, fresh out of the oven, brushed with an extra layer of melted butter for that irresistible shine. They go beautifully alongside scrambled eggs, fresh fruit, or a hot cup of coffee.
If you have leftovers (which might be tough), store them in an airtight container at room temperature for up to 2 days or freeze for up to 1 month. To reheat, wrap in foil and warm in a 350°F (175°C) oven for 10-12 minutes until soft and flaky again.
Flavors actually deepen and layers become even more tender the next day when reheated properly — so don’t worry if you can’t finish them all at once!
Nutritional Information & Benefits
Each buttery crescent roll (approximate) contains about 180 calories, 9 grams of fat, 22 grams of carbohydrates, and 4 grams of protein. While these rolls are indulgent, using quality ingredients means you’re enjoying real butter and wholesome flour instead of processed shortcuts.
Butter provides fat-soluble vitamins like A and E, and milk adds a bit of calcium and protein to the mix. If you opt for whole milk, you get a richer flavor and creamier texture. For those watching carbs, you can reduce sugar or try alternative flours, but honestly, these rolls are meant to be savored in moderation.
From a wellness perspective, freshly baked homemade breads like these bring joy and comfort, which counts for something, right?
Conclusion
If you’re after a flaky crescent rolls recipe that’s easy to whip up and bursting with buttery, melt-in-your-mouth layers, this one’s a keeper. It’s a wonderful balance of simple ingredients and thoughtful technique that pays off with every golden bite. Customize it, share it, and most importantly, enjoy the process — because these rolls bring a little warmth and happiness to any table.
Honestly, I love how this recipe feels like a warm hug and makes me feel connected to those cozy mornings of my childhood. Now it’s your turn to give it a try — and I’d love to hear how yours turn out! Drop a comment, share your twists, or just tell me if you’re as hooked as I am.
Happy baking!
FAQs
Can I make these crescent rolls ahead of time?
Yes! Prepare and shape the rolls, then refrigerate overnight before baking. Just bring them to room temperature and let them rise a bit before baking.
Why didn’t my rolls turn out flaky?
Flakiness depends on proper butter layering and chilling. If butter melts into the dough or dough gets overworked, the layers won’t form. Keep butter cold and handle dough gently.
Can I freeze the dough before baking?
Absolutely! After shaping, freeze the rolls on a tray, then transfer to a bag. Bake from frozen, adding a few extra minutes to the baking time.
What’s the best way to reheat leftover crescent rolls?
Wrap in foil and warm in a 350°F (175°C) oven for 10-12 minutes. Avoid microwaving to keep the flaky texture.
Can I use salted butter instead of unsalted?
Yes, but reduce or omit added salt in the dough to keep the flavor balanced.
Pin This Recipe!

Flaky Crescent Rolls

An easy homemade recipe for flaky crescent rolls with buttery, melt-in-your-mouth layers perfect for breakfast, brunch, or any cozy occasion.
- Prep Time: 30 minutes
- Cook Time: 15-18 minutes
- Total Time: 1 hour 45 minutes to 2 hours 15 minutes
- Yield: 8-12 rolls 1x
- Category: Breakfast, Brunch
- Cuisine: American
Ingredients
- 3 ½ cups (440g) all-purpose flour
- 2 tablespoons granulated sugar
- 2 ¼ teaspoons (one packet) instant yeast
- 1 teaspoon salt
- 1 cup (240ml) whole milk, warmed to about 110°F (43°C)
- ¾ cup (170g) unsalted butter, softened + extra for layering
- 1 large egg, room temperature
- 2 tablespoons warm water
- Optional: 1 tablespoon honey (can substitute sugar)
Instructions
- Activate the yeast: In a small bowl, combine warm milk (110°F/43°C), warm water, sugar, and yeast. Stir gently and let it sit for 5-10 minutes until foamy.
- Mix the dough: In a large bowl or stand mixer bowl, whisk together flour and salt. Add softened butter cut into small pieces and rub into flour until mixture resembles coarse crumbs. Add yeast mixture and egg, stirring to combine. Dough will be shaggy and sticky.
- Knead: Knead dough on a lightly floured surface for 8-10 minutes until smooth and elastic, or use stand mixer with dough hook for 5-6 minutes. Add flour sparingly if too sticky.
- First rise: Form dough into a ball, place in lightly greased bowl, cover with towel or plastic wrap, and let rise in warm spot for 1 to 1 ½ hours until doubled in size.
- Prepare butter for layering: Place remaining butter (about 4 tablespoons) between parchment sheets and pound with rolling pin into a thin 7×7 inch square. Chill until dough is ready.
- Roll and layer: Punch down dough, roll into 12×12 inch square. Place chilled butter square diagonally in center. Fold dough edges over butter like envelope, sealing completely.
- Laminate dough: Roll dough into 12×8 inch rectangle. Fold into thirds (a ‘turn’). Chill 20-30 minutes. Repeat rolling, folding, and chilling two more times.
- Shape rolls: Roll dough into 12-inch circle. Cut into 8-12 triangles. Roll each triangle from wide end to point to form crescents. Place on parchment-lined baking sheet, point side down, curving ends slightly.
- Second rise: Cover rolls loosely and let rise 45-60 minutes until puffy but not doubled.
- Bake: Preheat oven to 375°F (190°C). Brush rolls with melted butter. Bake 15-18 minutes until golden brown and flaky. Let cool slightly before serving.
Notes
Keep butter cold but pliable for proper layering. Avoid over-flouring dough to prevent tough rolls. Handle dough gently after layering to preserve flaky layers. Chill dough between folds to maintain structure. Use fresh yeast for best rise. Brush rolls with melted butter before and after baking for golden crust. Rolls can be made ahead and refrigerated overnight before baking. Freeze shaped rolls for longer storage and bake from frozen with extra time.
Nutrition
- Serving Size: 1 crescent roll
- Calories: 180
- Fat: 9
- Carbohydrates: 22
- Protein: 4
Keywords: crescent rolls, flaky rolls, homemade bread, buttery rolls, breakfast rolls, easy crescent rolls, layered dough


