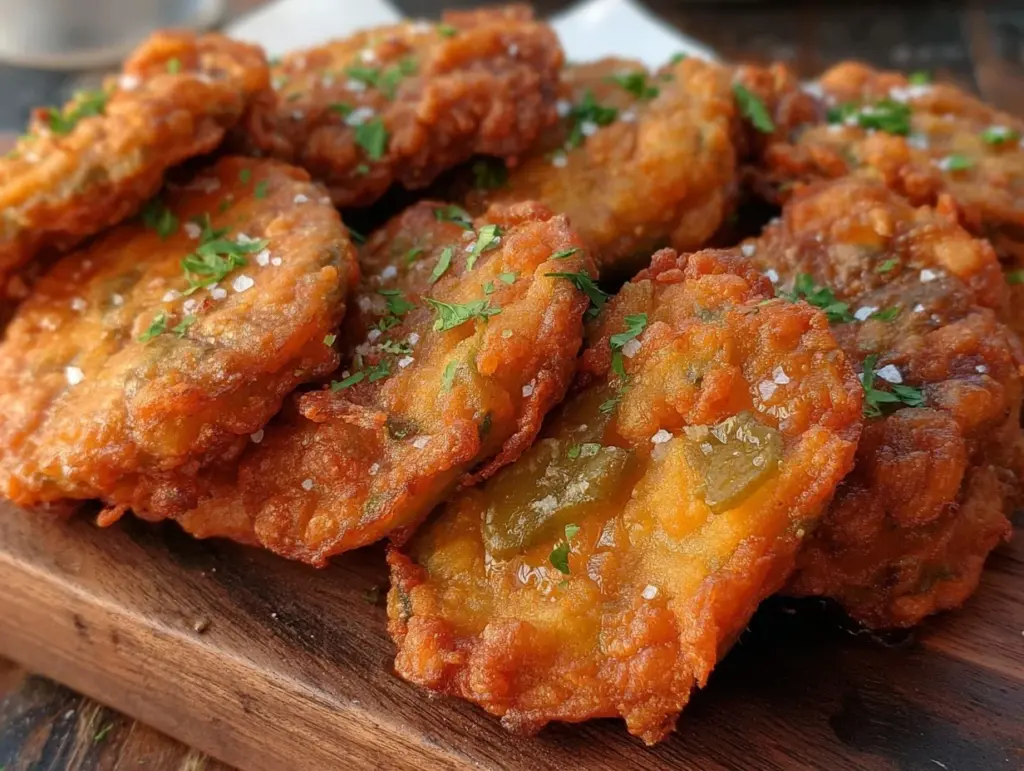
Let me tell you, the scent of tangy dill pickles sizzling in hot oil, cloaked in a golden, crunchy batter, is enough to make anyone’s mouth water instantly. The first time I made crispy fried pickles with perfectly golden batter, I was honestly hooked from the very first bite. It’s the kind of snack that makes you pause, take a deep breath, and just smile because you know you’re onto something truly special.
Years ago, when I was knee-high to a grasshopper, my grandma used to bring home fried pickles from the local diner. That slightly sour, salty crunch dipped in creamy ranch dressing was pure, nostalgic comfort. I never thought I could recreate that magic in my own kitchen—until one rainy weekend I decided to experiment. The result? Dangerously easy crispy fried pickles with perfectly golden batter that had my family sneaking them off the cooling rack (and I can’t really blame them!).
You know what? This recipe quickly became a staple for family gatherings and casual get-togethers. Whether you’re looking for a sweet treat for your kids, a fun appetizer to brighten up your Pinterest cookie board, or a crowd-pleaser for potlucks, these crispy fried pickles deliver. I’ve tested this recipe more times than I care to admit—in the name of research, of course—and it never disappoints. Trust me, you’re going to want to bookmark this one.
Why You’ll Love This Recipe
This crispy fried pickles recipe isn’t just good—it brings that perfect balance of tang, crunch, and savory goodness that makes your taste buds do a happy dance. Here’s why it’s worth every minute in the kitchen:
- Quick & Easy: Comes together in under 30 minutes, perfect for busy weeknights or last-minute cravings.
- Simple Ingredients: No fancy grocery trips needed; you probably already have most of these in your pantry.
- Perfect for Entertaining: Great for game days, casual parties, or a fun appetizer to impress guests without stress.
- Crowd-Pleaser: Kids and adults alike can’t get enough of that crispy, golden batter with pickle tang.
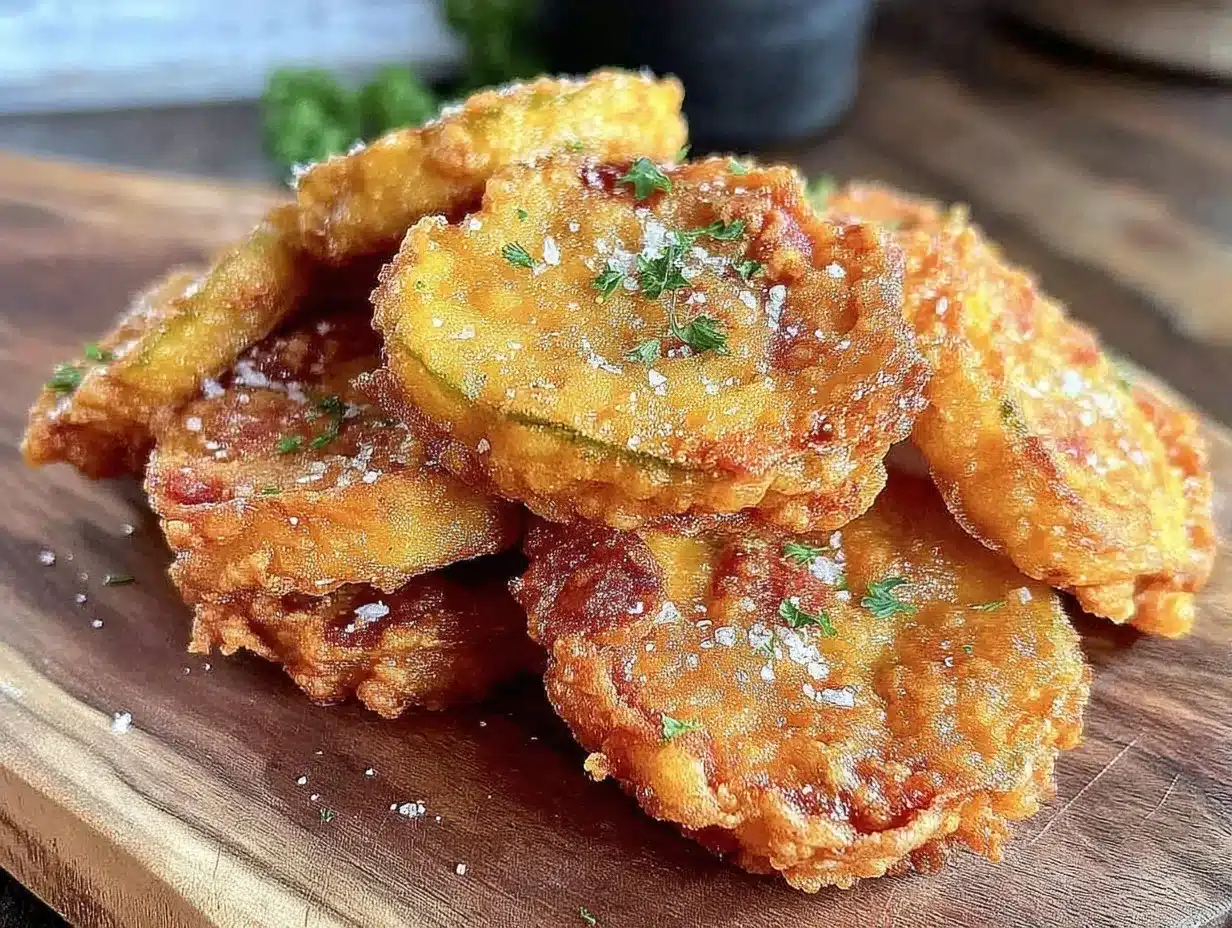
- Unbelievably Delicious: The batter crisps up just right—light, flaky, and golden, locking in the juicy pickle flavor.
What sets this recipe apart? It’s all about the batter. I blend a little cornstarch with flour for that extra crunch and add just the right seasoning to keep flavors popping without overpowering the pickles. Plus, the step of soaking the pickle slices in buttermilk before battering ensures the coating sticks like a charm. Honestly, this isn’t just any fried pickle recipe—it’s your best version, the one that’ll have you closing your eyes after the first bite and thinking, “Yep, this is comfort food done right.”
What Ingredients You Will Need
This recipe uses simple, wholesome ingredients to deliver bold flavor and a satisfying crunch without the fuss. Most are pantry staples, and the fresh pickles are the star here.
- Dill pickle slices: About 16-20 slices, drained well (I prefer thick-cut for the best bite)
- Buttermilk: 1 cup (soaks the pickles for a tender bite and helps the batter adhere)
- All-purpose flour: 1 cup (provides the base for the crispy batter)
- Cornstarch: ¼ cup (adds extra crunch to the batter)
- Garlic powder: 1 teaspoon (for savory depth)
- Onion powder: 1 teaspoon (complements the garlic)
- Paprika: ½ teaspoon (adds mild smokiness and color)
- Cayenne pepper: ⅛ teaspoon, optional (for a gentle kick)
- Salt: ½ teaspoon (balances flavors)
- Black pepper: ¼ teaspoon, freshly ground (adds a subtle spice)
- Egg: 1 large, beaten (helps bind the batter together)
- Vegetable oil or peanut oil: For frying (choose a high smoke point oil for best results)
Tip: If you’re feeling adventurous, swap out dill pickles for spicy pickles or bread-and-butter pickles for a sweeter touch. For a gluten-free option, try almond flour or a gluten-free all-purpose blend instead of regular flour.
Equipment Needed
- Deep frying pan or Dutch oven: For frying the pickles evenly without crowding.
- Thermometer: A candy or deep-fry thermometer to monitor oil temperature (keeps the batter perfectly golden).
- Mixing bowls: One for the wet ingredients and one for the dry batter mix.
- Tongs or slotted spoon: To safely lower and retrieve pickles from the hot oil.
- Cooling rack or paper towels: For draining excess oil and keeping pickles crispy.
If you don’t have a thermometer, a small cube of bread dropped in the oil should brown in about 60 seconds when the temperature is right (around 350°F / 175°C). For budget-friendly tools, a heavy-bottomed pan works just fine, but keep the heat steady and don’t overcrowd the pan to avoid soggy batter.
Preparation Method
- Drain and prep pickles: Start by draining your dill pickle slices well. Pat them dry with paper towels to remove excess moisture. This step is key so the batter sticks nicely and doesn’t get soggy.
- Soak in buttermilk: Place the dried pickle slices in a bowl and pour over the buttermilk. Let them soak for at least 10 minutes — this tenderizes the pickles and helps the batter cling better.
- Mix dry ingredients: In a separate bowl, whisk together the flour, cornstarch, garlic powder, onion powder, paprika, cayenne pepper (if using), salt, and black pepper until well combined.
- Prepare the wet batter: Beat the egg in another bowl and stir in the buttermilk left from soaking the pickles (about ¾ cup). This mix will be your wet batter base.
- Heat the oil: Pour about 2 inches of vegetable or peanut oil into your deep frying pan or Dutch oven. Heat it to 350°F (175°C). Use a thermometer for accuracy—too cool and the batter gets greasy, too hot and it burns fast.
- Batter the pickles: Remove pickles from the buttermilk (reserve some for the wet batter). Dip each pickle slice first into the wet batter, then dredge in the dry flour mixture. For an extra thick coating, repeat the wet and dry dip.
- Fry in batches: Carefully place battered pickles into the hot oil without overcrowding. Fry for 2-3 minutes per side or until they are golden brown and crispy. You’ll know they’re ready when they float to the surface and look beautifully golden.
- Drain and rest: Use tongs or a slotted spoon to remove fried pickles, and place them on a cooling rack or paper towels to drain excess oil. Let them rest a minute or two to firm up that crunch before serving.
Pro tip: Keep the oil temperature steady; a quick drop can cause greasy batter. Also, frying in small batches helps maintain oil heat and crispiness. If you notice the batter isn’t sticking well, a quick extra dip in wet batter before the dry coating usually does the trick.
Cooking Tips & Techniques
One of the trickiest parts of making crispy fried pickles is getting that perfectly golden batter that stays crunchy without being greasy. Here’s what I learned from trial and error:
- Oil temperature is king: Always heat your oil to 350°F (175°C). Too low, and the batter soaks up oil; too high, and it burns before the pickle is heated through.
- Don’t skip the buttermilk soak: It tenderizes the pickles and acts like glue for the batter.
- Double-dip for thickness: For extra crunchy coating, dip the pickles twice—wet, dry, then wet, and dry again.
- Drain well: Let fried pickles rest on a wire rack instead of paper towels when possible. Paper towels can trap steam and make the coating soggy.
- Use cornstarch: Mixing cornstarch with flour gives the batter a light, crispy texture that regular flour alone can’t achieve.
Honestly, I’ve burned more batches than I care to admit, but learning to watch the oil and not crowd the pan made a huge difference. Also, multitasking by prepping your dipping sauce while frying keeps things moving smoothly!
Variations & Adaptations
If you want to mix things up, here are some tasty twists and alternatives you can try:
- Spicy kick: Add cayenne pepper or chili powder to the dry mix or swap regular pickles for spicy jalapeño slices.
- Gluten-free option: Use almond flour or a gluten-free all-purpose blend in place of wheat flour and cornstarch.
- Baking method: For a lighter version, coat the pickles the same way and bake on a greased rack at 425°F (220°C) for 15-20 minutes, flipping halfway through.
- Herb-infused batter: Toss in dried dill or parsley to the batter for an herbaceous note.
- Personal favorite: I once mixed Parmesan cheese into the dry batter for a savory, cheesy crunch that had everyone asking for more.
Serving & Storage Suggestions
Serve these crispy fried pickles hot and fresh for the best crunch. They’re fantastic with a side of ranch, spicy aioli, or even a tangy mustard dip. For presentation, scatter some fresh chopped parsley or a sprinkle of sea salt over the top.
If you have leftovers (which is rare!), store them in an airtight container in the refrigerator for up to 2 days. To reheat, pop them in a 375°F (190°C) oven for 5-7 minutes to bring back that crispiness—microwaving will make them soggy, so avoid that.
These fried pickles also make a great party snack to prepare ahead and reheat just before serving. Over time, the flavors of the batter meld beautifully with the pickles, making every bite a little more flavorful.
Nutritional Information & Benefits
This crispy fried pickles recipe offers a tasty snack option with moderate calories, especially if fried in healthy oils like peanut or vegetable oil. Pickles themselves are low in calories and provide a good source of probiotics and antioxidants from the fermentation process.
The batter adds carbs and fat, so enjoy these in moderation, especially if you’re watching your intake. For a lighter version, baking the pickles cuts down on oil absorption and calories.
Also, this recipe is naturally gluten-free if you use the right flour alternatives. Just watch out for allergens like eggs if you have sensitivities—substituting an egg replacer can work in a pinch.
Conclusion
To wrap it up, these crispy fried pickles with perfectly golden batter are one of those snacks that feel like a warm hug from the inside out. They’re quick, simple, and so satisfying that you’ll find yourself craving them again and again.
Feel free to customize the seasoning or try different dipping sauces to make this recipe your own. Honestly, I love how versatile and forgiving it is—perfect whether you’re a seasoned cook or just starting out.
Give it a try, share your tweaks, and don’t be shy about dropping a comment below to tell me how yours turned out. You’re going to want to keep this recipe handy for whenever the craving strikes!
FAQs About Crispy Fried Pickles
What pickles work best for frying?
Thick-cut dill pickle slices are ideal because they hold up well during frying and deliver that classic tangy flavor. Avoid very thin or soft pickles as they can get mushy.
Can I make these ahead of time?
Fried pickles are best enjoyed fresh for maximum crunch. You can prep the batter and pickles ahead, but fry them right before serving. Leftovers can be reheated in the oven to regain crispness.
How do I know when the oil is the right temperature?
Use a deep-fry thermometer to maintain 350°F (175°C). If you don’t have one, drop a small piece of bread in the oil; if it browns in about 60 seconds, the temperature is good.
What can I serve with crispy fried pickles?
They’re delicious with ranch dressing, spicy mayo, honey mustard, or even a cool blue cheese dip. They also pair well with burgers, sandwiches, or as a fun side to your favorite BBQ.
Is there a healthier way to make fried pickles?
Yes! Baking them instead of frying reduces oil and calories. Coat the pickles the same way and bake at 425°F (220°C) for 15-20 minutes, turning halfway through for even crispiness.
Pin This Recipe!
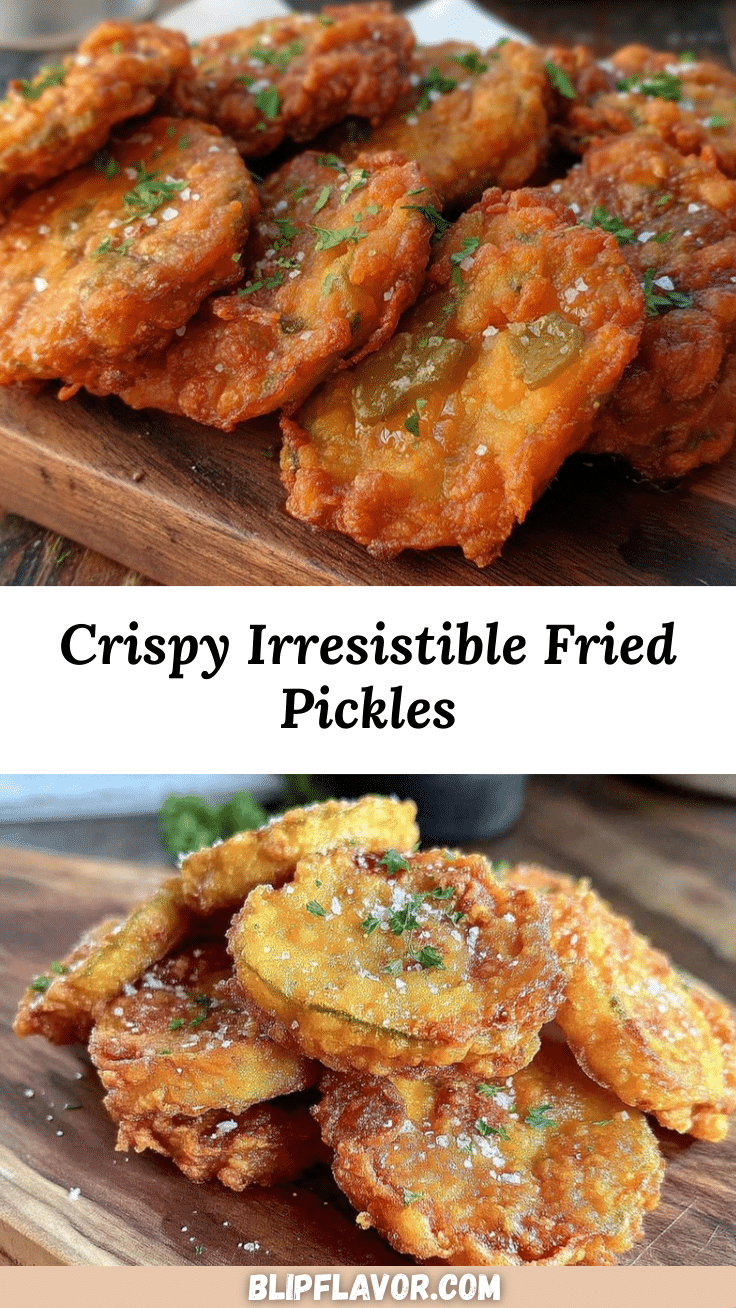
Crispy Fried Pickles Recipe Easy Perfectly Golden Batter Guide

Crispy fried pickles with a perfectly golden, crunchy batter that delivers a tangy, savory snack perfect for gatherings and quick cravings.
- Prep Time: 15 minutes
- Cook Time: 15 minutes
- Total Time: 30 minutes
- Yield: 4 servings 1x
- Category: Appetizer
- Cuisine: American
Ingredients
- 16–20 dill pickle slices, drained well (prefer thick-cut)
- 1 cup buttermilk
- 1 cup all-purpose flour
- 1/4 cup cornstarch
- 1 teaspoon garlic powder
- 1 teaspoon onion powder
- 1/2 teaspoon paprika
- 1/8 teaspoon cayenne pepper (optional)
- 1/2 teaspoon salt
- 1/4 teaspoon freshly ground black pepper
- 1 large egg, beaten
- Vegetable oil or peanut oil for frying
Instructions
- Drain and pat dry dill pickle slices to remove excess moisture.
- Soak pickle slices in buttermilk for at least 10 minutes.
- In a bowl, whisk together flour, cornstarch, garlic powder, onion powder, paprika, cayenne pepper (if using), salt, and black pepper.
- Beat the egg in another bowl and stir in about 3/4 cup of the buttermilk from soaking the pickles to create the wet batter.
- Heat 2 inches of vegetable or peanut oil in a deep frying pan or Dutch oven to 350°F (175°C).
- Dip each pickle slice first into the wet batter, then dredge in the dry flour mixture. For extra thick coating, repeat the wet and dry dip.
- Fry pickles in batches without overcrowding for 2-3 minutes per side until golden brown and crispy.
- Remove fried pickles with tongs or slotted spoon and drain on a cooling rack or paper towels. Let rest for a minute or two before serving.
Notes
Maintain oil temperature at 350°F (175°C) to avoid greasy or burnt batter. Double dip pickles for extra crunch. Drain on a wire rack instead of paper towels to keep coating crispy. For gluten-free, substitute flour and cornstarch with almond flour or gluten-free blend. Baking option: bake at 425°F (220°C) for 15-20 minutes, flipping halfway.
Nutrition
- Serving Size: About 4-5 pickle sli
- Calories: 180
- Sugar: 2
- Sodium: 600
- Fat: 10
- Saturated Fat: 1.5
- Carbohydrates: 20
- Fiber: 1
- Protein: 3
Keywords: fried pickles, crispy fried pickles, appetizer, snack, golden batter, easy recipe, party food


