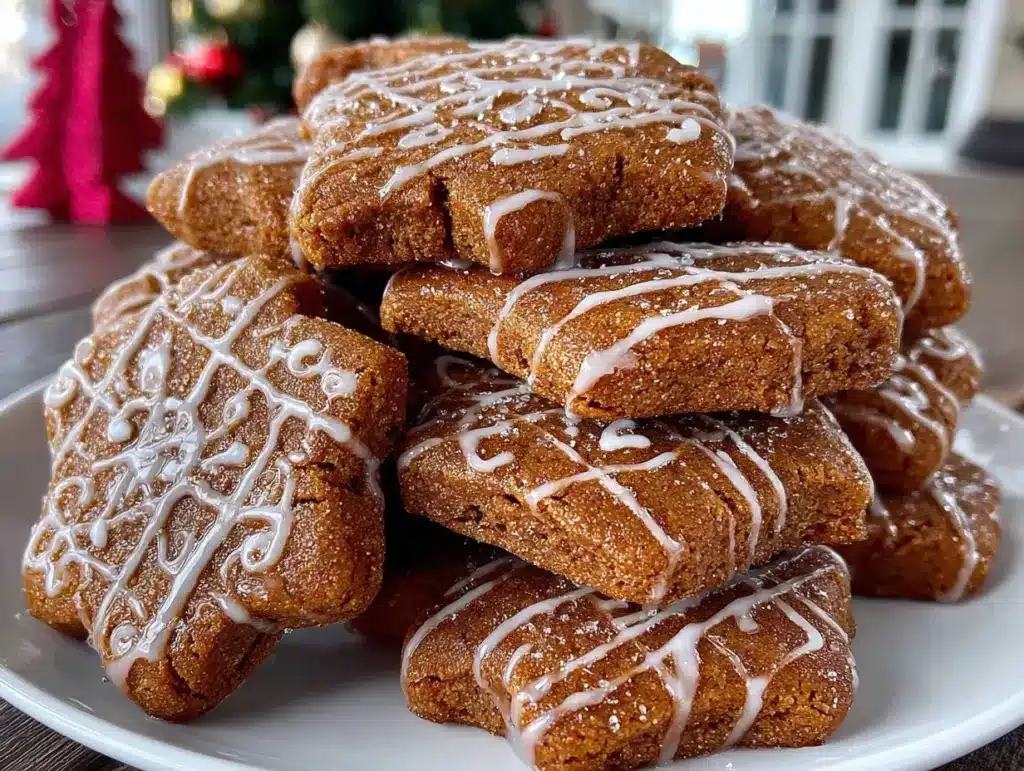
Wafting through my kitchen on a snowy December afternoon, the intoxicating aroma of molasses, ginger, and cinnamon from these gingerbread tiles with rum butter glaze is honestly the kind of thing that makes you stop in your tracks. The scent alone is pure holiday magic—warm, spicy, and a little bit mischievous thanks to the buttery glaze. The first time I made these, I was knee-high to a grasshopper, helping my grandma roll out dough on her old oak table. She’d wink as she pressed intricate tile patterns into each cookie, promising that the spicy snap and sweet glaze would be worth every flour-dusted finger.
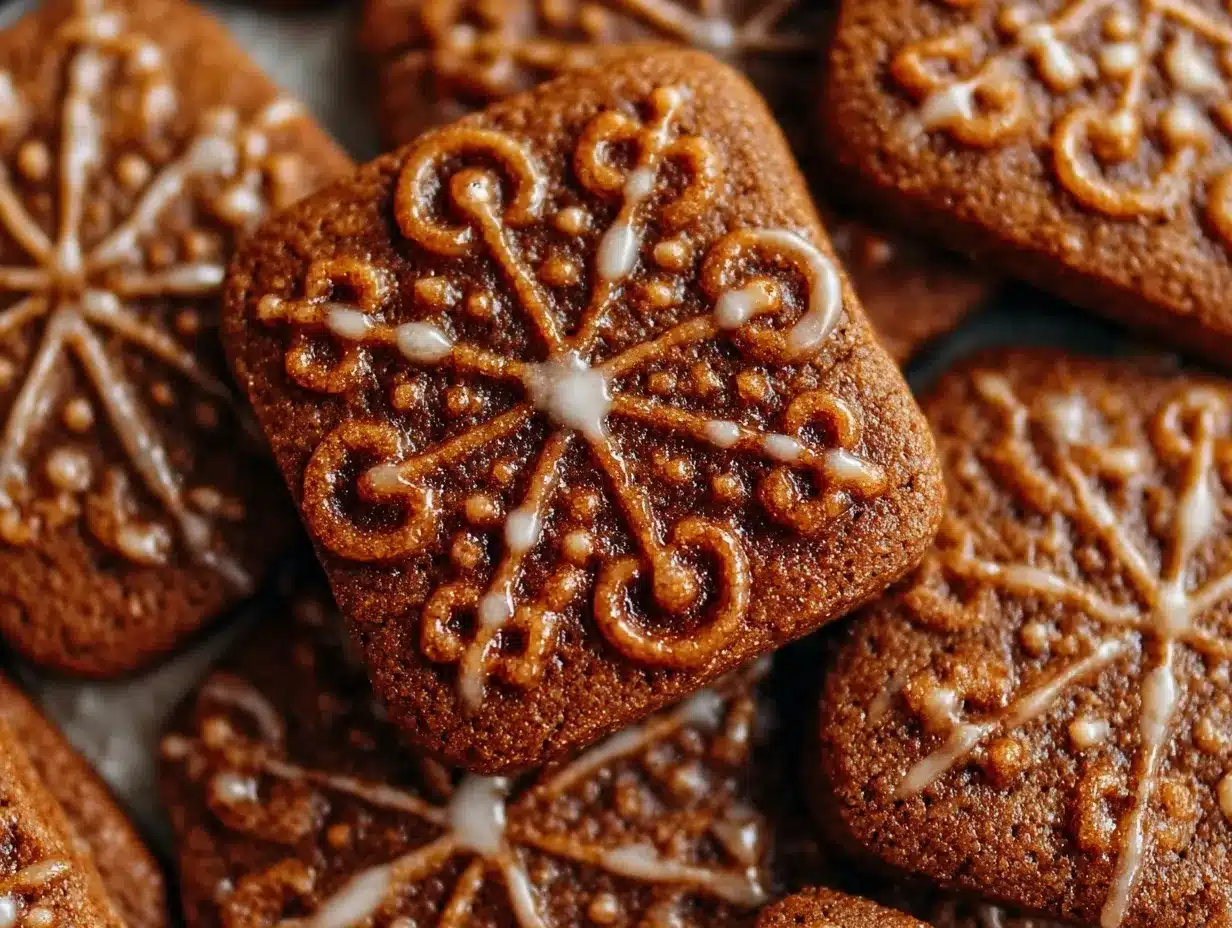
Let’s face it, gingerbread is the backbone of holiday baking traditions. But these gingerbread tiles? They take it to another level. Each tile is pressed with a pattern—sometimes geometric, sometimes floral (sometimes, let’s be real, a little lopsided if the kids help)—and when the glaze soaks in, you get a treat that’s as beautiful as it is delicious. I stumbled on the rum butter glaze by accident, searching for something to jazz up my usual batch after a rainy weekend spent baking for a neighborhood swap. I wish I’d known about it years ago because now everyone asks for these!
My family can’t resist sneaking gingerbread tiles off the cooling rack, and I catch myself doing the same (strictly in the name of research, of course). These cookies have become a staple for gifting, cookie exchanges, and those “just because” moments with a cup of tea. They’re dangerously easy, perfect for holiday potlucks, and bright enough to make any Pinterest board pop. If you love bold spice, buttery glaze, and pure, nostalgic comfort, you’re going to want to bookmark this gingerbread tiles recipe—believe me, it feels like a warm hug every time.
Why You’ll Love This Recipe
After years of rolling, stamping, and glazing, I can say with confidence that these gingerbread tiles are my go-to holiday cookie. I’ve tested dozens of gingerbread recipes, but the combination of crisp edges, tender crumb, and that decadent rum butter glaze puts this one at the top. Here’s why you’ll fall in love (and keep coming back for more):
- Quick & Easy: Ready in under an hour (yes, even with kids helping and a little dough chilling thrown in). Perfect for last-minute holiday baking or when you need a sweet treat pronto.
- Simple Ingredients: No need for a fancy grocery list. Most of what you need is already in the pantry—molasses, spices, butter, flour—plus a splash of rum if you’re feeling festive.
- Perfect for Holiday Gatherings: These tiles are ideal for cookie swaps, school bake sales, or cozy evenings by the fire. They look gorgeous stacked on a platter or boxed up as edible gifts.
- Crowd-Pleaser: Kids love the fun patterns, adults swoon over the rich glaze. I’ve never seen a batch last more than a day—everyone sneaks seconds.
- Unbelievably Delicious: The texture is spot-on: crisp around the edges, soft in the center, and the rum butter glaze soaks into every nook for an unforgettable bite.
What sets this gingerbread tiles recipe apart? The dough is perfectly balanced—not too sweet, with just the right amount of spice and a hint of orange zest for brightness. The rum butter glaze is a playful twist that adds depth and a little grown-up flair. You can stamp intricate patterns or keep it rustic, and the glaze always finds its way into the grooves, making each tile look and taste incredible.
Honestly, these cookies are more than just good—they’re the kind that make you close your eyes and savor. They’re comfort food for the holidays, but lighter, quicker, and with all the soul-soothing satisfaction. Whether you’re impressing guests or sneaking a midnight snack, this recipe delivers big flavor with zero stress. It’s the best gingerbread I’ve ever baked, and I think you’ll agree after the first bite.
What Ingredients You Will Need
This gingerbread tiles recipe leans on classic, wholesome ingredients to deliver bold flavor and a satisfying texture—no complicated shopping trips needed. Most items are pantry staples, and there’s plenty of room for swaps if you’re short on something (or baking for special diets).
- For the Gingerbread Tiles:
- All-purpose flour – 3 cups (375g), sifted (for structure)
- Baking soda – 1 teaspoon (5g)
- Salt – ½ teaspoon (3g)
- Ground ginger – 2 teaspoons (4g) (the star spice!)
- Ground cinnamon – 2 teaspoons (5g)
- Ground cloves – ½ teaspoon (1g)
- Ground nutmeg – ¼ teaspoon (0.5g)
- Unsalted butter – ¾ cup (170g), softened (adds richness)
- Light brown sugar – ⅔ cup (130g), packed
- Molasses – ¾ cup (180ml) (for that classic tangy depth)
- Large egg – 1, room temperature
- Vanilla extract – 1 teaspoon (5ml)
- Orange zest – 1 teaspoon (optional, but highly recommended for brightness)
- For the Rum Butter Glaze:
- Unsalted butter – ¼ cup (60g), melted
- Powdered sugar – 1 cup (120g), sifted
- Dark rum – 2 tablespoons (30ml) (or sub with milk for a kid-friendly version)
- Vanilla extract – ½ teaspoon (2.5ml)
- Pinch of salt
If you need a gluten-free version, swap the all-purpose flour for a trusted 1:1 gluten-free blend—I’ve had great results with Bob’s Red Mill. Dairy-free? Use vegan butter and plant-based milk in the glaze. Don’t have molasses? You can use dark corn syrup or honey, but the flavor will be a bit different (more mellow, less spicy). For extra spice, add a dash of black pepper—my grandma swore by it. In summer, swap orange zest for lemon zest, or toss in a pinch of cardamom for something new.
For best results, I recommend using King Arthur Flour and Grandma’s Molasses (they’re my pantry go-tos for gingerbread). Fresh spices make a big difference—if yours have been sitting for years, consider replacing them for deeper flavor. The rum butter glaze is forgiving—use any rum you like, or skip it entirely and stick with vanilla for a classic finish. These simple ingredients come together to make a cookie that’s anything but ordinary.
Equipment Needed
To make these gingerbread tiles with rum butter glaze, you don’t need a fancy kitchen—just a few trusty tools:
- Mixing bowls – At least two: one for dry and one for wet ingredients. Stainless steel is easiest to clean.
- Electric mixer – Stand or hand mixer works (I’ve used both, and the hand mixer is fine for small batches).
- Rolling pin – Wooden is classic, but silicone rolls dough more evenly if you struggle with sticking.
- Tile-pattern cookie stamps or cutters – Any patterned stamp works. If you don’t have one, use a regular cookie cutter or improvise with a fork for texture.
- Baking sheets – Heavy-duty sheets keep cookies from burning. Lined with parchment paper for easy cleanup.
- Wire cooling rack – Helps glaze set and keeps cookies crisp.
- Small saucepan – For melting butter for the glaze.
- Pastry brush – For glazing. A silicone brush is easiest to clean, but even the back of a spoon works.
If you don’t have cookie stamps, you can use a drinking glass with a textured bottom, or just cut the dough into squares and press with a fork for a rustic look. My old wooden rolling pin has survived years of dough—just rub in a little flour to keep it from sticking. For budget-friendly options, check thrift stores; I found my favorite stamp there! Clean patterned stamps gently with a toothbrush and warm water to keep the details sharp for years.
Preparation Method
Ready to bake? Here’s how to make these gingerbread tiles with rum butter glaze, step by step. I’ve included exact measurements, timing, and handy tips from years of trial and error.
- Prep your workspace: Set out all ingredients (let butter and egg come to room temperature). Line baking sheets with parchment paper. Preheat your oven to 350°F (175°C).
- Mix dry ingredients: In a large bowl, sift together 3 cups (375g) flour, 1 tsp (5g) baking soda, ½ tsp (3g) salt, 2 tsp (4g) ginger, 2 tsp (5g) cinnamon, ½ tsp (1g) cloves, and ¼ tsp (0.5g) nutmeg. Stir to combine. (If your spices are clumpy, sift them twice.)
- Cream butter and sugar: In a separate bowl, beat ¾ cup (170g) softened butter and ⅔ cup (130g) brown sugar until light and fluffy (about 3 minutes). Scrape down sides as needed.
- Add wet ingredients: Beat in 1 large egg, ¾ cup (180ml) molasses, 1 tsp (5ml) vanilla extract, and 1 tsp orange zest until fully incorporated. It’ll look glossy and smell amazing.
- Combine and form dough: Gradually add dry ingredients to wet, mixing on low speed. Dough will be thick and sticky. If it feels too wet, add 2-3 tablespoons extra flour. (It should pull away from the bowl.)
- Chill dough: Wrap dough in plastic wrap and refrigerate for at least 30 minutes (up to 2 hours). Chilling makes it easier to stamp and cut. If you skip this, dough will be sticky and lose its shape.
- Roll and stamp: On a lightly floured surface, roll dough to ¼ inch (6mm) thickness. Dust your cookie stamps/cutters with flour to prevent sticking. Press patterns into dough, then cut into 2×2 inch (5x5cm) tiles. If dough sticks, chill for 10 more minutes.
- Bake: Place tiles on prepared baking sheets, spacing 1 inch (2.5cm) apart. Bake for 10-12 minutes, until edges are firm and centers are just set. Watch closely—overbaking leads to dry cookies.
- Cool: Transfer cookies to wire rack. Let cool completely before glazing. Warm cookies will melt the glaze and lose definition.
- Make rum butter glaze: Melt ¼ cup (60g) butter in a small saucepan over low heat. Stir in 1 cup (120g) powdered sugar, 2 tbsp (30ml) rum, ½ tsp vanilla, and pinch of salt. Whisk until smooth and slightly thickened.
- Glaze tiles: Brush glaze over cooled cookies, letting it pool into the stamped grooves. Allow glaze to set for 10-15 minutes (it’ll harden slightly and get glossy).
- Serve or store: Once glaze is set, stack tiles on a platter or pack in a tin for gifting. The flavor deepens overnight!
Notes: If your dough cracks, knead gently and re-roll. If glaze is too runny, add extra powdered sugar. For crisp tiles, bake 1-2 minutes longer, but don’t wander off—burned edges sneak up fast. For soft centers, underbake by a minute and cool on the sheet. These tiles freeze beautifully before glazing—just thaw and finish when you’re ready.
Cooking Tips & Techniques
Years of holiday baking have taught me a few tricks to make these gingerbread tiles come out perfect every time. Here’s what I’ve learned (sometimes the hard way):
- Don’t skip chilling: Chilled dough holds patterns better and is easier to stamp. I once baked a batch without chilling and ended up with sad, blob-shaped cookies—lesson learned!
- Flour your stamps: Dusting your cookie stamps with flour keeps dough from sticking and preserves crisp details. If dough sticks, dip the stamp in flour between presses.
- Watch oven time: Every oven is quirky. Bake one test tile to check timing—edges should be firm, not browned, and centers just set. Overbaking dries out the tiles, especially if you like a softer bite.
- Cool before glazing: Glazing warm cookies makes the glaze run off and the pattern disappear. Let tiles cool completely for neat, shiny results.
- Troubleshooting dough: If dough is sticky, add flour a tablespoon at a time. If it cracks, knead gently until smooth. If tiles warp during baking, chill cut shapes for 10 minutes before baking.
- Glaze consistency: For thicker glaze lines, let glaze cool slightly before brushing on. If you want a thinner coat, brush while warm.
Multitasking tip: While dough chills, prep your glaze and set up your stamping station. I like to stamp and cut all tiles before baking—makes things smoother and keeps hands (mostly) clean. For consistent size, use a ruler or cut a cardboard template. And if you ever find cookies sticking to the parchment, let them cool a little longer—they’ll release easily once set.
Honestly, the biggest trick is enjoying the process! Don’t stress about perfect patterns—homemade always wins. If you make mistakes, just call them “rustic” and pour another cup of tea (or rum, depending on your mood).
Variations & Adaptations
One of the best things about gingerbread tiles is how adaptable they are. Over the years, I’ve played with lots of variations—here are my favorites and some useful swaps for dietary needs and different tastes:
- Gluten-Free: Use a 1:1 gluten-free flour blend (like King Arthur or Bob’s Red Mill). Add ½ teaspoon xanthan gum if your blend doesn’t include it for better texture.
- Dairy-Free: Swap unsalted butter for vegan butter in both dough and glaze. Use plant-based milk in place of rum for a kid-friendly, non-alcoholic glaze.
- Spice Swap: For a different flavor profile, add ground cardamom or black pepper. Lemon zest instead of orange adds bright, citrusy notes—especially good for spring.
- Honey Tiles: Substitute molasses with honey for milder, golden cookies. The tiles will be sweeter and less tangy.
- Chocolate Gingerbread: Add 2 tablespoons unsweetened cocoa powder to the flour mix for a chocolatey twist (my kids love these!).
For different cooking methods, you can bake tiles in a silicone mold for even shapes—just reduce baking time by a minute. If you’re not into cookie stamps, roll dough and cut into rectangles, then score patterns with a fork or toothpick. For nut allergies, skip the glaze and dust with powdered sugar instead.
Personally, I love adding chopped crystallized ginger to the dough for extra zing—it’s a family favorite! These tiles are endlessly customizable and perfect for experimenting to suit your crowd.
Serving & Storage Suggestions
These gingerbread tiles are best served at room temperature, where their flavor and texture shine. Stack them on a festive platter, arrange in neat rows for a pretty presentation, or let the kids pile them high (messy is charming during the holidays!). For a wow factor, sprinkle a little extra orange zest or edible glitter over the glaze.
Pair with hot tea, mulled cider, or even a splash of eggnog for a true seasonal treat. They’re also great with fresh fruit or a scoop of vanilla ice cream for dessert. For holiday brunch, serve alongside spiced nuts and dried fruit.
To store, keep tiles in an airtight container at room temperature for up to 1 week. If you need to keep them longer, freeze undecorated cookies for up to 2 months—thaw and glaze before serving. Glazed tiles can be frozen for up to 1 month, though the glaze might lose its shine (still delicious!). Reheat gently in a low oven for 2-3 minutes if you want warm cookies. I find the flavors deepen overnight, so they’re even better the next day.
For gifting, stack tiles in parchment-lined tins or cellophane bags tied with ribbon. They hold up well and travel beautifully—perfect for holiday mail-outs or teacher gifts.
Nutritional Information & Benefits
Each gingerbread tile (with glaze) is about 120 calories, 4g fat, 20g carbs, and 1g protein (based on a 2×2 inch square). They’re not low-calorie, but they do offer some wholesome benefits—molasses is rich in iron and calcium, and the spices (ginger, cinnamon, cloves) bring anti-inflammatory and digestive perks.
This recipe can be adapted for gluten-free or dairy-free diets, and you can omit the rum for an alcohol-free version. Allergens include wheat, eggs, and dairy (unless substitutions are used). If you’re watching sugar, swap in coconut sugar or reduce the glaze.
Personally, I love these cookies in moderation—they’re a treat but with wholesome ingredients and a cozy, comforting vibe. They’re perfect for sharing, and honestly, a little spice is good for the soul!
Conclusion
If you’re looking for a holiday treat that’s as beautiful as it is delicious, these gingerbread tiles with rum butter glaze are a must-try. They bring together classic flavors, festive patterns, and a glaze that’s just a little bit daring. Whether you’re baking for your family, gifting friends, or just craving some spicy comfort, this recipe delivers every time.
Don’t be afraid to customize—change the glaze, try new patterns, or adjust the spices to fit your taste. That’s the beauty of homemade cookies! I love this recipe because it’s tied to so many happy memories, and it’s always the first to disappear from the cookie tray.
Give this gingerbread tiles recipe a go, and let me know how yours turn out! Drop a comment below, share your creative variations, or tag your cookies on social media. Here’s to sweet holiday baking and lots of flour-dusted smiles!
Frequently Asked Questions
Can I make gingerbread tiles ahead of time?
Yes! You can bake the tiles up to 2 days ahead and glaze them the day you serve. Unglazed tiles freeze well for up to 2 months.
Is there a substitute for rum in the glaze?
Absolutely—just use milk, orange juice, or water for a family-friendly version. The flavor will be milder but still delicious.
How do I keep gingerbread tiles from spreading?
Chill the dough before rolling and chill stamped tiles for 10 minutes before baking. This helps cookies hold their shape.
Can I use whole wheat flour for these tiles?
You can use half whole wheat and half all-purpose for a nuttier flavor, but full whole wheat will make the tiles denser.
Do I need special stamps for this recipe?
Nope! You can use any patterned stamp, a regular cutter, or get creative with a fork or textured glass. The glaze highlights any pattern.
Pin This Recipe!
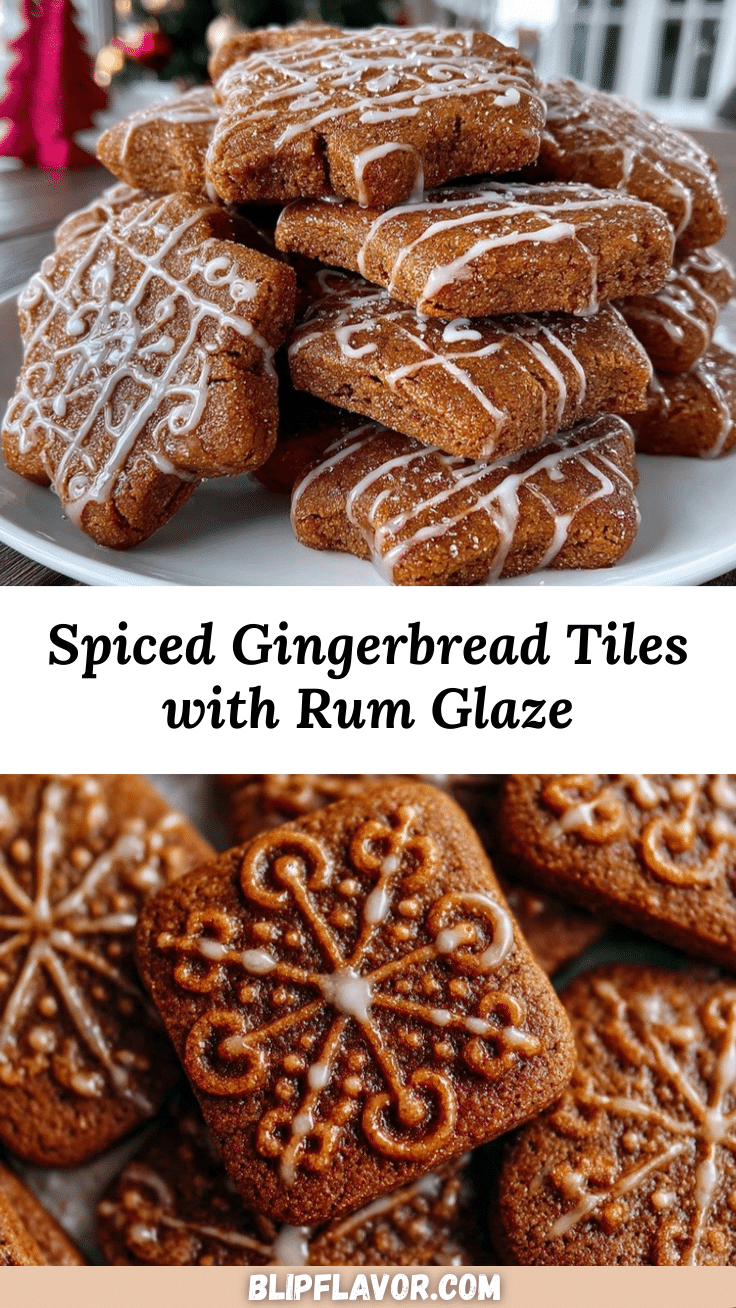
Gingerbread Tiles with Rum Butter Glaze
These gingerbread tiles are a festive holiday treat featuring bold spices, a hint of orange zest, and a decadent rum butter glaze. Perfect for gifting, cookie swaps, or cozy evenings, they combine crisp edges, tender crumb, and beautiful stamped patterns for a show-stopping cookie.
- Prep Time: 20 minutes
- Cook Time: 12 minutes
- Total Time: 1 hour
- Yield: 36 tiles 1x
- Category: Dessert
- Cuisine: American
Ingredients
- 3 cups all-purpose flour, sifted
- 1 teaspoon baking soda
- 1/2 teaspoon salt
- 2 teaspoons ground ginger
- 2 teaspoons ground cinnamon
- 1/2 teaspoon ground cloves
- 1/4 teaspoon ground nutmeg
- 3/4 cup unsalted butter, softened
- 2/3 cup light brown sugar, packed
- 3/4 cup molasses
- 1 large egg, room temperature
- 1 teaspoon vanilla extract
- 1 teaspoon orange zest (optional)
- For the Rum Butter Glaze:
- 1/4 cup unsalted butter, melted
- 1 cup powdered sugar, sifted
- 2 tablespoons dark rum (or milk for non-alcoholic)
- 1/2 teaspoon vanilla extract
- Pinch of salt
Instructions
- Set out all ingredients and let butter and egg come to room temperature. Line baking sheets with parchment paper. Preheat oven to 350°F (175°C).
- In a large bowl, sift together flour, baking soda, salt, ginger, cinnamon, cloves, and nutmeg. Stir to combine.
- In a separate bowl, beat softened butter and brown sugar until light and fluffy (about 3 minutes).
- Beat in egg, molasses, vanilla extract, and orange zest until fully incorporated.
- Gradually add dry ingredients to wet, mixing on low speed. Dough will be thick and sticky. If too wet, add 2-3 tablespoons extra flour.
- Wrap dough in plastic wrap and refrigerate for at least 30 minutes (up to 2 hours).
- On a lightly floured surface, roll dough to 1/4 inch thickness. Dust cookie stamps/cutters with flour. Press patterns into dough, then cut into 2×2 inch tiles.
- Place tiles on prepared baking sheets, spacing 1 inch apart. Bake for 10-12 minutes, until edges are firm and centers are just set.
- Transfer cookies to wire rack and let cool completely before glazing.
- For the glaze: Melt butter in a small saucepan over low heat. Stir in powdered sugar, rum, vanilla, and salt. Whisk until smooth and slightly thickened.
- Brush glaze over cooled cookies, letting it pool into the stamped grooves. Allow glaze to set for 10-15 minutes.
- Serve or store: Once glaze is set, stack tiles on a platter or pack in a tin for gifting. Flavor deepens overnight.
Notes
Chill dough for best pattern definition. Flour your stamps to prevent sticking. For gluten-free, use a 1:1 blend. For dairy-free, use vegan butter and plant-based milk. Glaze can be made alcohol-free by substituting rum with milk or juice. Tiles freeze well before glazing. For crisp tiles, bake slightly longer; for softer centers, underbake by a minute.
Nutrition
- Serving Size: 1 tile (2x2 inch squ
- Calories: 120
- Sugar: 11
- Sodium: 65
- Fat: 4
- Saturated Fat: 2.5
- Carbohydrates: 20
- Fiber: 0.5
- Protein: 1
Keywords: gingerbread, holiday cookies, rum glaze, Christmas, spiced cookies, edible gifts, gingerbread tiles, festive baking


