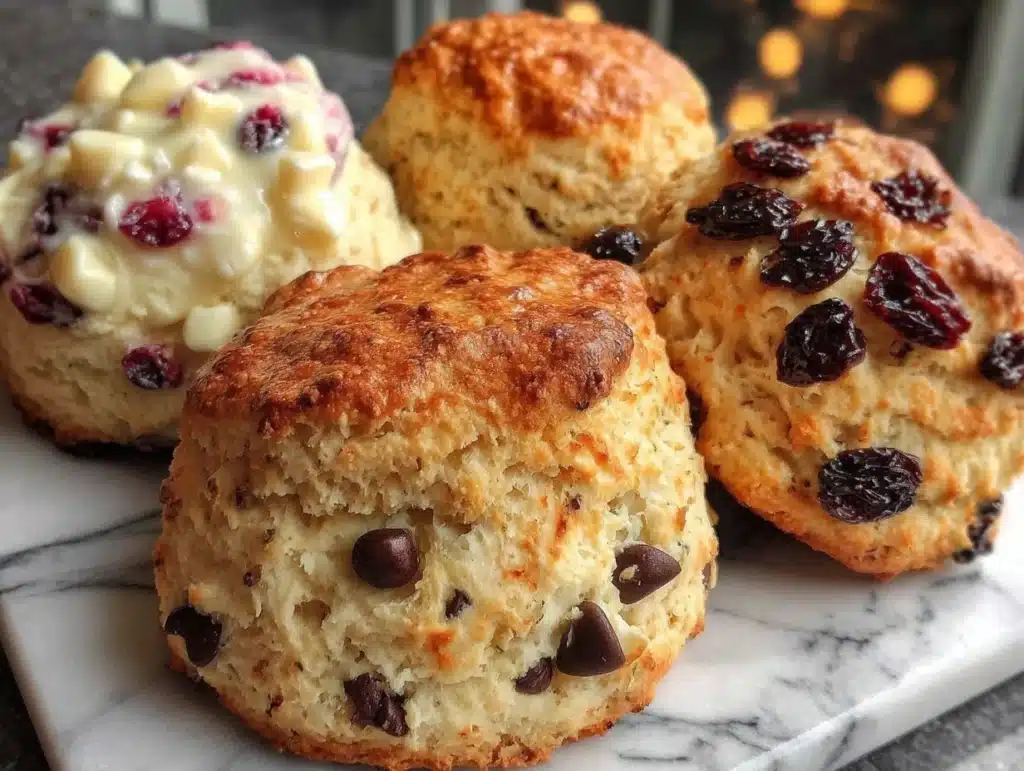
Let me tell you, there’s nothing quite like the aroma of freshly baked scones wafting through your kitchen on a lazy weekend morning. The buttery, flaky texture combined with a gentle sweetness is the kind of thing that makes you pause, pour yourself a cup of tea, and savor the moment. The first time I made these scones, I was skeptical—could I really recreate the magic of the bakery at home? But the second I cracked open one of these golden beauties and watched the steam rise, I knew I had something special. My family couldn’t wait to slather theirs with jam and cream, sneaking bites before I could even snap a picture!
Honestly, these scones have become a tradition in our household. Whether it’s a chilly Sunday morning or a last-minute brunch with friends, they always hit the spot. And the best part? They’re ridiculously easy to make. No fancy equipment, no exotic ingredients—just simple pantry staples that you likely already have. Once you try them, I guarantee they’ll become a staple for your gatherings, too. So grab your apron, preheat your oven, and let’s bake the best homemade scones together. Trust me, you’re going to want to bookmark this one!
Why You’ll Love This Recipe
- Beginner-Friendly: If you’ve never made scones before, this is the perfect recipe to start with. It’s straightforward and forgiving, even if you’re not a seasoned baker.
- Quick and Easy: Ready in just about 30 minutes, these scones are ideal for busy mornings or a last-minute treat.
- Simple Ingredients: No need to hunt down obscure items; everything you need might already be in your pantry or fridge.
- Customizable: You can make them sweet, savory, or both! Add berries, chocolate chips, or cheese—whatever suits your taste.
- Perfect Texture: These scones strike the perfect balance between tender and flaky, almost melting in your mouth.
- Crowd-Pleaser: These scones are always a hit, whether you’re serving them at brunch or as an afternoon snack.
This isn’t just any scone recipe. I’ve made sure to include little tips and tricks learned from years of trial and error—like how to handle the dough gently to achieve that perfect texture. These scones aren’t just good; they’re the kind that make you close your eyes in delight and instantly reach for another. Whether you’re a beginner in the kitchen or a pro looking for a foolproof recipe, these scones will make you feel like a baking champion!
What Ingredients You Will Need
This recipe uses simple, wholesome ingredients to create perfectly tender and buttery scones. No fancy grocery trips required—just grab what you’ve got and let’s get baking!
- All-Purpose Flour: 2 cups (250 g) – The base of our scones, creating the perfect texture.
- Granulated Sugar: 1/4 cup (50 g) – Adds just the right amount of sweetness.
- Baking Powder: 1 tablespoon – Gives your scones a beautiful rise and light texture.
- Salt: 1/2 teaspoon – Balances the sweetness and enhances flavor.
- Unsalted Butter: 1/2 cup (115 g), cold and cubed – The key to flaky layers in your scones.
- Heavy Cream: 2/3 cup (160 ml), cold – Provides richness and moisture.
- Large Egg: 1, beaten – Helps bind the dough together and adds structure.
- Vanilla Extract: 1 teaspoon – Brings a lovely aroma and flavor to the scones.
- Optional Add-Ins: Fresh or dried fruit, chocolate chips, or shredded cheese for a savory twist.
Feel free to swap ingredients based on your dietary preferences. Use gluten-free flour or dairy-free alternatives like almond milk and vegan butter if needed!
Equipment Needed
You don’t need anything fancy to make these scones. Here’s what you’ll need:
- Mixing Bowls: One large and one medium for dry and wet ingredients.
- Pastry Cutter: For cutting the butter into the flour (or use two forks as a substitute).
- Rolling Pin: To gently flatten the dough.
- Baking Sheet: A sturdy sheet for even baking.
- Parchment Paper: Keeps the scones from sticking and makes cleanup a breeze.
- Cooling Rack: Essential for cooling scones evenly once they’re baked.
If you don’t have a pastry cutter, don’t worry! You can use your fingers to rub the butter into the flour—it may take a little longer, but it works just as well.
Preparation Method
- Preheat your oven to 400°F (200°C). Line a baking sheet with parchment paper and set aside.
- In a large mixing bowl, whisk together the flour, sugar, baking powder, and salt.
- Add the cold, cubed butter to the dry ingredients. Use a pastry cutter or your fingertips to cut the butter into the flour until the mixture resembles coarse crumbs. (Tip: If you’re using your hands, work quickly to prevent the butter from melting.)
- In a separate bowl, whisk together the heavy cream, beaten egg, and vanilla extract.
- Pour the wet ingredients into the dry ingredients. Stir gently until the dough begins to come together. Be careful not to overmix—it’s okay if the dough looks a little shaggy at this point.
- Lightly flour your work surface and transfer the dough onto it. Use your hands to gently bring it together into a ball. (If the dough is too sticky, add a sprinkle of flour.)
- Pat the dough into a circle about 1 inch (2.5 cm) thick. Use a sharp knife to cut the circle into 8 wedges, like a pizza.
- Transfer the wedges to the prepared baking sheet, spacing them out slightly.
- Brush the tops of the scones with a little extra heavy cream for a golden finish.
- Bake for 15-20 minutes, or until the tops are golden brown and the scones feel firm to the touch.
- Allow the scones to cool on a wire rack for about 5 minutes before serving.
Serve your scones warm, slathered with butter, jam, or clotted cream. Trust me, the first bite will feel like a cozy hug!
Cooking Tips & Techniques
Making the perfect scones isn’t hard, but here are some tips to guarantee success:
- Keep Your Ingredients Cold: Cold butter is the secret to flaky scones. Pop it in the freezer for a few minutes before using.
- Avoid Overmixing: Once you combine the wet and dry ingredients, mix just until the dough comes together. Overmixing can lead to tough, dense scones.
- Don’t Overwork the Dough: Be gentle when handling the dough. You want to keep those butter chunks intact for flaky layers.
- Use a Sharp Knife: A clean cut helps the scones rise evenly in the oven.
- Preheat Your Oven: Make sure your oven is fully preheated before baking. A hot oven helps the scones puff up beautifully.
Whenever I didn’t keep my butter cold, the scones turned out flat instead of fluffy. Trust me—cold is key! And don’t skip the parchment paper—it prevents sticking and makes cleanup a breeze.
Variations & Adaptations
One of the best things about this homemade scones recipe is how adaptable it is. Here are a few ideas:
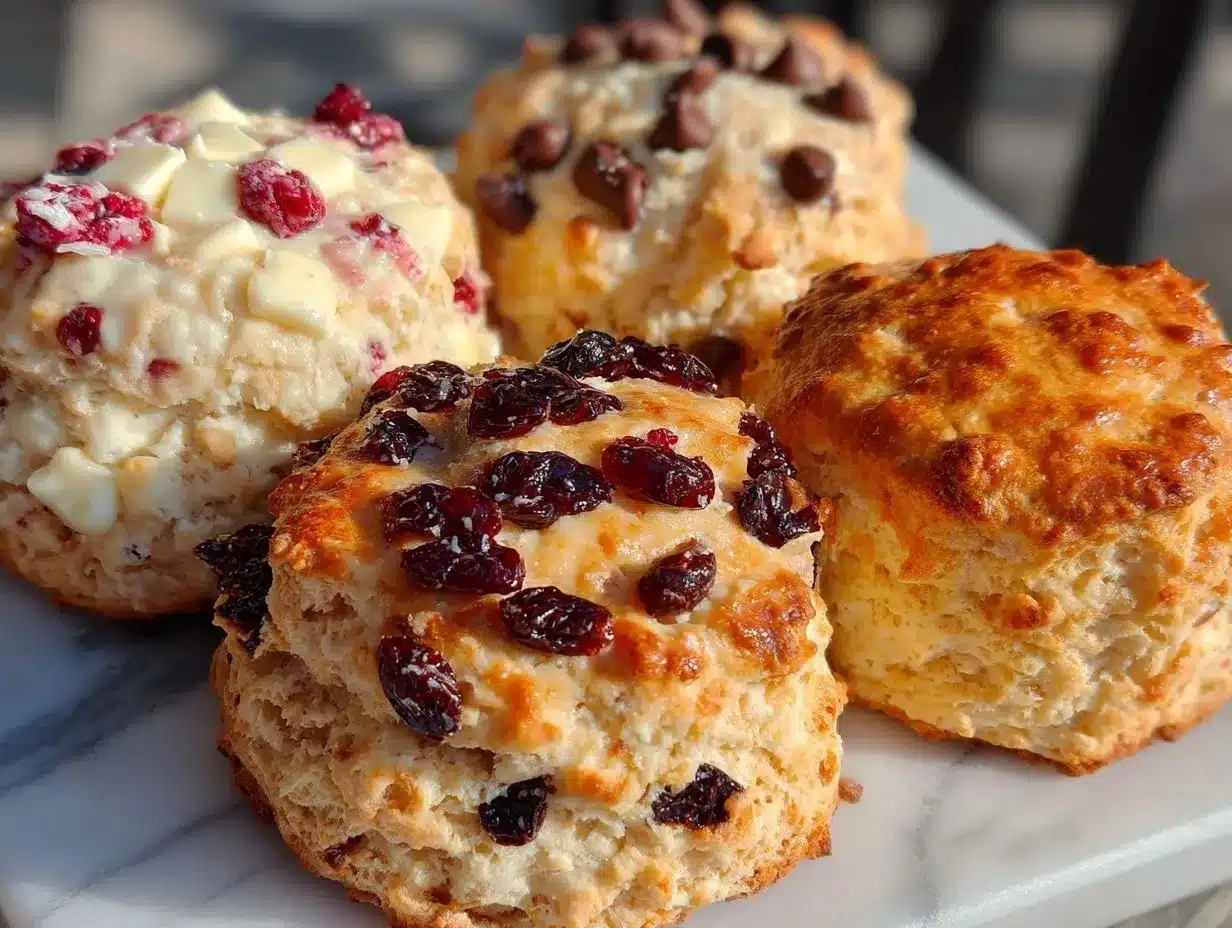
- Sweet Add-Ins: Mix in 1/2 cup of chocolate chips, dried cranberries, or chopped nuts for extra flavor.
- Savory Twist: Skip the sugar and add shredded cheddar cheese, diced ham, or chopped chives for a savory scone.
- Seasonal Touch: Use fresh fruits like blueberries in summer or diced apples and cinnamon in fall.
- Gluten-Free Option: Substitute all-purpose flour with a gluten-free flour blend for a celiac-friendly treat.
- Dairy-Free Adaptation: Swap heavy cream for almond milk and use vegan butter to make these scones vegan-friendly.
Personally, I love adding lemon zest and poppy seeds for a bright, zippy flavor that pairs perfectly with a dollop of honey. Whatever you choose, make it your own!
Serving & Storage Suggestions
Scones are best enjoyed fresh and warm, straight from the oven. Here’s how to serve and store them:
- Serving: Serve warm with butter, jam, clotted cream, or even a drizzle of honey. Pair with a hot cup of tea or coffee for the ultimate cozy experience.
- Presentation: Arrange the scones on a pretty plate with a small bowl of jam and cream for a picture-perfect setup—great for gatherings or brunch.
- Storage: Store leftover scones in an airtight container at room temperature for up to 2 days. For longer storage, freeze them in a zip-top bag for up to 3 months.
- Reheating: To enjoy again, warm scones in the oven at 350°F (175°C) for 5-7 minutes or microwave for 10-15 seconds.
- Flavor Over Time: Scones are best fresh, but if you store them properly, they’ll still be delicious the next day!
Nutritional Information & Benefits
Here’s a quick look at the nutritional profile for these homemade scones (per serving):
- Calories: Approximately 200-250
- Protein: 4-6g
- Fat: 9-12g
- Carbohydrates: 25-30g
- Fiber: 1-2g
These scones are a great source of energy thanks to the combination of carbohydrates and healthy fats. Plus, if you add fruits or nuts, you’ll sneak in some extra nutrients and fiber. Just keep in mind that they’re a treat, so enjoy in moderation!
Conclusion
If you’re looking for a recipe that’s as comforting as it is easy to make, this Best Homemade Scones Recipe is it. Whether you’re serving them at brunch, enjoying them with tea, or treating yourself to something sweet, these scones are guaranteed to impress. And the best part? You can customize them to your heart’s content.
I’ve made this recipe countless times, and it always brings a smile to my face—and to my family’s too. There’s something magical about turning simple ingredients into a warm, delicious treat that’s perfect for any occasion.
So, what are you waiting for? Gather your ingredients, follow the steps, and let me know how your scones turn out in the comments below. And if you come up with your own variation, I’d love to hear about it! Happy baking!
FAQs
Can I make these scones ahead of time?
Yes! You can make the dough ahead, shape the scones, and freeze them. When you’re ready to bake, pop them straight into the oven—no need to thaw.
What’s the best way to store leftover scones?
Store them in an airtight container at room temperature for up to 2 days. For longer storage, freeze them in a zip-top bag for up to 3 months.
Can I make these scones gluten-free?
Absolutely! Just swap the all-purpose flour for a high-quality gluten-free flour blend. They’ll still turn out deliciously tender and flaky.
Why do my scones turn out flat?
This usually happens if your butter isn’t cold enough or if you overwork the dough. Make sure to chill your butter and handle the dough gently.
What toppings pair best with scones?
Classic options include clotted cream and jam, but honey, lemon curd, Nutella, or even a dollop of whipped cream are delicious choices too.
Pin This Recipe!

Best Homemade Scones Recipe Perfect for Beginners

This beginner-friendly scone recipe is quick, easy, and customizable. Perfect for a cozy weekend breakfast or brunch with friends.
- Prep Time: 10 minutes
- Cook Time: 20 minutes
- Total Time: 30 minutes
- Yield: 8 scones 1x
- Category: Breakfast
- Cuisine: British
Ingredients
- 2 cups (250 g) all-purpose flour
- 1/4 cup (50 g) granulated sugar
- 1 tablespoon baking powder
- 1/2 teaspoon salt
- 1/2 cup (115 g) unsalted butter, cold and cubed
- 2/3 cup (160 ml) heavy cream, cold
- 1 large egg, beaten
- 1 teaspoon vanilla extract
- Optional: Fresh or dried fruit, chocolate chips, or shredded cheese
Instructions
- Preheat your oven to 400°F (200°C). Line a baking sheet with parchment paper and set aside.
- In a large mixing bowl, whisk together the flour, sugar, baking powder, and salt.
- Add the cold, cubed butter to the dry ingredients. Use a pastry cutter or your fingertips to cut the butter into the flour until the mixture resembles coarse crumbs.
- In a separate bowl, whisk together the heavy cream, beaten egg, and vanilla extract.
- Pour the wet ingredients into the dry ingredients. Stir gently until the dough begins to come together. Be careful not to overmix.
- Lightly flour your work surface and transfer the dough onto it. Use your hands to gently bring it together into a ball.
- Pat the dough into a circle about 1 inch (2.5 cm) thick. Use a sharp knife to cut the circle into 8 wedges, like a pizza.
- Transfer the wedges to the prepared baking sheet, spacing them out slightly.
- Brush the tops of the scones with a little extra heavy cream for a golden finish.
- Bake for 15-20 minutes, or until the tops are golden brown and the scones feel firm to the touch.
- Allow the scones to cool on a wire rack for about 5 minutes before serving.
Notes
Keep your ingredients cold for flaky scones. Avoid overmixing and overworking the dough to ensure a tender texture. Use parchment paper for easy cleanup.
Nutrition
- Serving Size: 1 scone
- Calories: 200250
- Fat: 912
- Carbohydrates: 2530
- Fiber: 12
- Protein: 46
Keywords: scones, homemade scones, easy scones recipe, beginner scones, flaky scones, buttery scones, brunch recipe


