Picture this: a table filled with colorful, bite-sized mini sandwiches, each one a tiny masterpiece of flavor and texture, enticing your guests to reach for seconds (or thirds). The first time I made these, it was for my niece’s birthday party. I remember watching kids and adults alike gather around the table, smiles on their faces, as they marveled at the adorable presentation and delicious combinations. Honestly, I didn’t expect them to disappear so quickly! These mini sandwiches are the kind of party food that makes everyone happy — easy to grab, fun to eat, and completely customizable. Whether it’s a casual get-together or a festive celebration, these sandwiches are bound to be the star of the show.
What makes this recipe even better is how simple it is to pull off. I’ve tested it several times over the years (in the name of entertaining science, of course), and each time, they’ve been a hit. My family now requests them at every gathering, and I don’t mind obliging since they’re so quick to whip up and easy to adapt for any occasion. Trust me — you’re going to want to add these Perfect Mini Sandwiches for Parties to your recipe rotation. It’s like having a secret weapon for stress-free entertaining!
Why You’ll Love This Recipe
- Quick & Easy: These mini sandwiches come together in just 30 minutes, making them ideal for last-minute party prep.
- Customizable: Whether you prefer classic flavors or adventurous combinations, you can mix and match fillings to suit everyone’s taste.
- Perfect for Parties: Small enough for finger food but big on flavor, these are great for birthdays, holidays, brunches, or picnics.
- Crowd-Pleaser: Kids, adults, and everyone in between love these — no one can resist their charm.
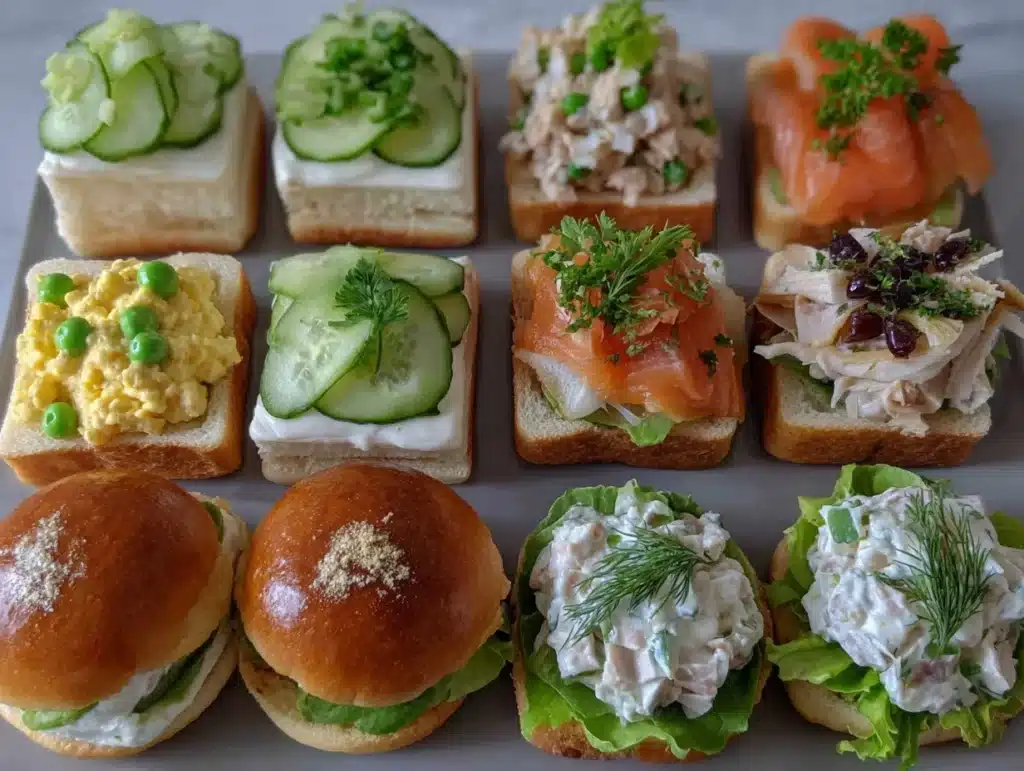
- Adorable Presentation: The colorful layers and bite-sized appeal make them look as good as they taste!
What sets this recipe apart is the emphasis on balancing flavors and textures. Each sandwich offers a harmonious blend of creamy spreads, crunchy veggies, and soft bread. Plus, I’ve included pro tips to ensure your sandwiches look and taste amazing every single time. They’re so good, you’ll want to make these mini sandwiches even when there’s no party in sight — trust me!
What Ingredients You Will Need
This recipe uses simple, fresh ingredients to create a variety of mouthwatering mini sandwiches without any hassle. You probably have most of these in your kitchen already!
For the Bread:
- 1 loaf of white sandwich bread
- 1 loaf of whole wheat bread
- 1 package of mini slider buns (optional)
For the Fillings:

- Thinly sliced turkey or chicken breast
- Honey ham slices
- Cheddar cheese, sliced
- Swiss cheese, sliced
- Romaine lettuce
- Sliced tomatoes
- Dill pickles, thinly sliced
For the Spreads:
- Mayonnaise
- Mustard (yellow or Dijon)
- Cream cheese, softened
- Pesto (optional)
Optional Extras:
- Olives for garnish
- Toothpicks (for holding the sandwiches together)
- Butter (for lightly toasting the bread, if desired)
Feel free to swap regular bread with gluten-free bread or dairy-free cheese as needed. You can also mix up the fillings based on seasonal availability or personal preference. For example, in summer, fresh basil and mozzarella are great additions!
Equipment Needed
- A sharp knife for slicing bread and fillings
- Cutting board
- Spreading knives or butter knives
- Toothpicks (optional, for assembling and presentation)
- Small cookie cutters (optional, for fun shapes)
- Plates or trays for serving
If you don’t have cookie cutters, don’t worry — you can simply cut the sandwiches into quarters for a neat and tidy look. I’ve done both, and while the cookie-cutter shapes add a playful touch, the quartered sandwiches are just as charming (and a bit quicker to make).
Preparation Method
- Prepare the Bread: Slice your bread into squares or use cookie cutters to cut out fun shapes. If you want toasted sandwiches, lightly butter one side of the bread and toast it in a pan until golden.
- Spread the Layers: On each slice of bread, apply a thin layer of your chosen spread — mayonnaise, mustard, cream cheese, or pesto.
- Add Fillings: Layer your fillings starting with protein (turkey, ham), followed by cheese, lettuce, tomato, and pickles. Be mindful of the order to avoid soggy bread.
- Top and Slice: Place the second slice of bread on top, gently pressing down. Use a sharp knife to cut the sandwiches into halves or quarters. If using cookie cutters, press down firmly to create shapes.
- Assemble with Toothpicks: If needed, secure each mini sandwich with a toothpick. Add an olive or pickle slice to the top for extra flair.
- Arrange and Serve: Lay the sandwiches on a serving tray or plate. Arrange them neatly for a stunning presentation.
Pro Tip: Always assemble your sandwiches as close to serving time as possible to keep the bread fresh and the veggies crisp!
Cooking Tips & Techniques
- Keep Your Bread Fresh: If making ahead, store the bread in an airtight container to prevent it from drying out.
- Prevent Soggy Sandwiches: Pat your lettuce and tomatoes dry with a paper towel before adding them to the sandwiches.
- Knife Skills Matter: Use a sharp knife for clean cuts — dull knives can squish the bread and fillings.
- Balance the Flavors: Don’t overload the sandwiches with one type of filling. Aim for a good mix of flavors and textures.
- Customize the Spread: Experiment with flavored cream cheese or spicy mustard to add a unique twist.
Remember, practice makes perfect! The first time I made these sandwiches, I struggled to find the right balance of fillings, but after a few tries, it became second nature.
Variations & Adaptations
- Vegetarian Option: Skip the meat and add grilled veggies like zucchini, eggplant, or roasted peppers. Hummus makes an excellent spread.
- Low-Carb Version: Use lettuce leaves instead of bread to create lettuce wraps filled with your favorite ingredients.
- Seasonal Twist: Swap regular lettuce and tomato for seasonal greens and fruits like arugula and thinly sliced apples in the fall.
- Spicy Kick: Add jalapeños or a spicy chipotle mayo for those who love heat.
- Allergen-Friendly: Use gluten-free bread or dairy-free cheese to accommodate dietary restrictions.
My personal favorite variation? A Caprese-inspired mini sandwich with fresh mozzarella, basil, tomato slices, and balsamic glaze. It’s always a hit!
Serving & Storage Suggestions
Mini sandwiches are best served fresh, but you can prepare them a few hours ahead of time if needed. Here’s how:
- Serving Temperature: Serve at room temperature for the best flavor. Add toothpicks to make them easy to grab.
- Pairing Ideas: Pair your mini sandwiches with a refreshing lemonade, iced tea, or a crisp white wine.
- Storage Tips: Store leftovers in an airtight container in the refrigerator for up to 1 day. Avoid freezing as the bread may become soggy.
- Reheating: If you toasted the bread, reheat briefly in the oven to restore crispness.
Pro Tip: Flavors meld together over time, so if storing, try to keep spreads and veggies separate and assemble right before serving.
Nutritional Information & Benefits
Here’s a general breakdown of what you can expect:
- Calories: Approximately 100-150 calories per mini sandwich (depending on fillings).
- Protein: Lean meats like turkey provide a good source of protein for sustained energy.
- Healthy Fats: Cream cheese or pesto adds a touch of healthy fats while enhancing flavor.
- Fiber: Whole wheat bread and fresh veggies contribute to your daily fiber intake.
- Dietary Considerations: Can be adapted for gluten-free or dairy-free diets.
Always be mindful of allergens like gluten, dairy, or nuts when preparing these sandwiches for crowds.
Conclusion
These Perfect Mini Sandwiches for Parties are more than just a recipe — they’re the key to hosting stress-free, memorable gatherings. With endless customization options, simple ingredients, and crowd-pleasing flavors, they’re bound to become your go-to party dish. I love how they bring people together over good food and great conversation.
Give these mini sandwiches a try at your next event and let your creativity shine. I’d love to hear how you customize them or if you discover new flavor combinations. Leave a comment below or share your photos — it’s always wonderful to see how you make these your own!
So, grab your favorite ingredients and start building these delicious little bites. Trust me, they’ll be gone before you know it!
FAQs
Can I make mini sandwiches ahead of time?
Yes, you can prepare the ingredients in advance and assemble the sandwiches a few hours before serving. Store them covered in the fridge to keep them fresh.
What bread works best for mini sandwiches?
Soft sandwich bread, slider buns, or even mini baguettes work wonderfully. For a gluten-free option, use a gluten-free bread that holds up well to slicing.
Are mini sandwiches suitable for vegetarians?
Absolutely! Skip the meat and fill them with grilled vegetables, hummus, or cheese for a vegetarian-friendly option.
How do I keep mini sandwiches from getting soggy?
Dry your veggies with a paper towel, and avoid overloading spreads. Assemble the sandwiches as close to serving time as possible.
Can I serve these sandwiches warm?
Yes, you can toast the bread lightly or warm the sandwiches in the oven for a few minutes before serving.
Pin This Recipe!

Perfect Mini Sandwiches for Parties Easy Recipe

These bite-sized mini sandwiches are colorful, customizable, and perfect for parties, offering a harmonious blend of flavors and textures.
- Prep Time: 15 minutes
- Cook Time: 15 minutes
- Total Time: 30 minutes
- Yield: 12 mini sandwiches 1x
- Category: Appetizer
- Cuisine: American
Ingredients
- 1 loaf of white sandwich bread
- 1 loaf of whole wheat bread
- 1 package of mini slider buns (optional)
- Thinly sliced turkey or chicken breast
- Honey ham slices
- Cheddar cheese, sliced
- Swiss cheese, sliced
- Romaine lettuce
- Sliced tomatoes
- Dill pickles, thinly sliced
- Mayonnaise
- Mustard (yellow or Dijon)
- Cream cheese, softened
- Pesto (optional)
- Olives for garnish
- Toothpicks (optional, for holding the sandwiches together)
- Butter (for lightly toasting the bread, if desired)
Instructions
- Slice your bread into squares or use cookie cutters to cut out fun shapes. If you want toasted sandwiches, lightly butter one side of the bread and toast it in a pan until golden.
- On each slice of bread, apply a thin layer of your chosen spread — mayonnaise, mustard, cream cheese, or pesto.
- Layer your fillings starting with protein (turkey, ham), followed by cheese, lettuce, tomato, and pickles. Be mindful of the order to avoid soggy bread.
- Place the second slice of bread on top, gently pressing down. Use a sharp knife to cut the sandwiches into halves or quarters. If using cookie cutters, press down firmly to create shapes.
- If needed, secure each mini sandwich with a toothpick. Add an olive or pickle slice to the top for extra flair.
- Lay the sandwiches on a serving tray or plate. Arrange them neatly for a stunning presentation.
Notes
Assemble sandwiches close to serving time to keep bread fresh and veggies crisp. Experiment with spreads and fillings for unique flavor combinations.
Nutrition
- Serving Size: 1 mini sandwich
- Calories: 100150
Keywords: mini sandwiches, party food, finger food, appetizers, easy recipe, customizable sandwiches


