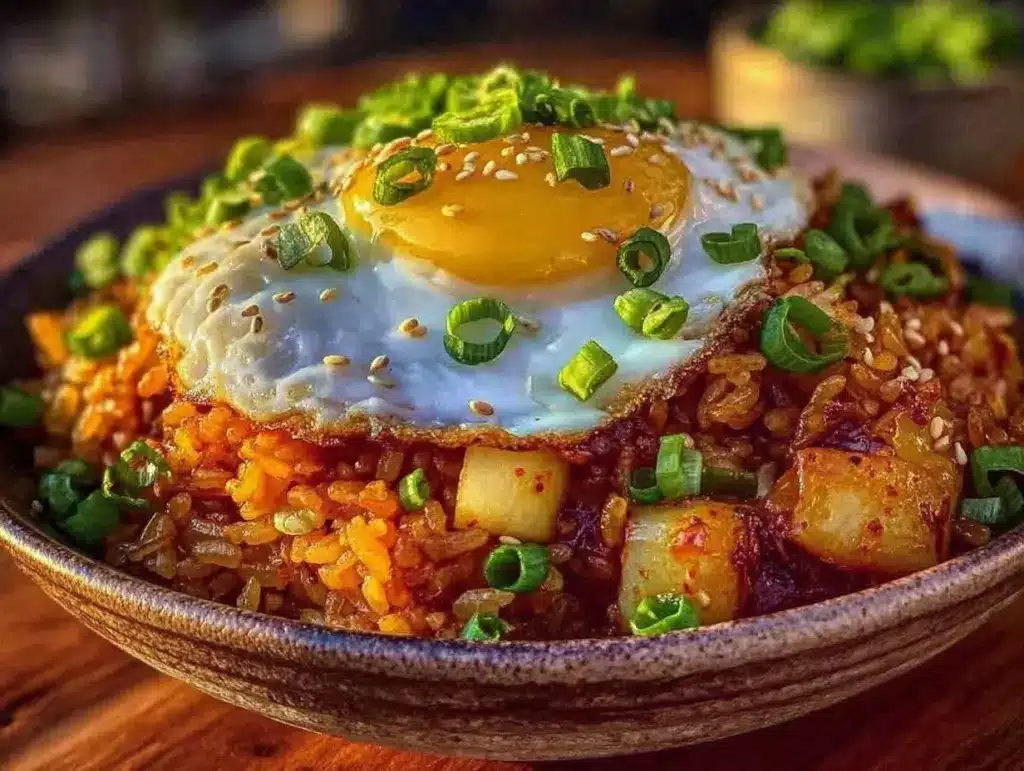
The sizzle of garlic hitting hot oil, the sharp tang of kimchi mixing with steamed rice, and the gentle wobble of a perfectly fried egg with a yolk still runny—this is my late-night kitchen story. One evening, after a long, exhausting day where my brain felt like mush, I found myself rummaging through the fridge with little ambition and even less time. Honestly, I wasn’t expecting much, just something quick to fill the void.
Then, I remembered a jar of kimchi tucked away in the back, slightly forgotten but still vibrant. With just a few staple ingredients and no grand plan, I tossed together a quick fried rice. The first bite surprised me—the spicy-sour kick of kimchi, the savory depth from sesame oil, and that luscious egg yolk melting into every grain created a comforting yet exciting flavor explosion. It wasn’t fancy, but it felt like a quiet reset button after a chaotic day.
Since that night, this kimchi fried rice with a runny egg has become my go-to for both solo dinners and quick meals when friends drop by unannounced. The recipe stuck—not just for the flavors, but for what it represents: simple, satisfying, and a little bit soulful without fuss. And you know, there’s something about how the creamy yolk mingles with the tangy kimchi that just makes the whole dish feel like a warm hug.
That’s why I’m sharing this recipe with you—not as some elaborate culinary masterpiece, but as a no-nonsense, deeply flavorful dish you can whip up any time you crave a meal that feels like home. It’s the kind of recipe that’s easy to trust and hard to forget.
Why You’ll Love This Kimchi Fried Rice Recipe
After making this kimchi fried rice recipe countless times, I can honestly say it’s one of those meals that hits all the right notes every single time. Whether you’re a kimchi aficionado or just kimchi-curious, this dish balances bold flavor with ease and speed.
- Quick & Easy: Ready in about 20 minutes, perfect for busy weeknights or when you want something delicious without the wait.
- Simple Ingredients: Mostly pantry staples plus that jar of kimchi—no need for exotic shopping trips.
- Perfect for Any Occasion: Whether a laid-back dinner or a casual meal with friends, it never disappoints.
- Crowd-Pleaser: The spicy tang and the runny egg yolk combo always gets rave reviews from kids and adults alike.
- Unbelievably Delicious: The marriage of fermented kimchi, savory soy sauce, and toasted sesame oil makes for a flavor-packed comfort dish.
- Unique Twist: Using leftover day-old rice and frying the eggs sunny side up with runny yolks adds texture and richness that sets this apart from other fried rice recipes.
What makes this kimchi fried rice different? It’s that little balance of tangy, spicy kimchi with the richness of the runny egg that melts into the rice, creating a harmony of flavors and textures. It’s comfort food reimagined for quick, satisfying meals without sacrificing taste. Plus, this recipe has been my secret weapon when I wanted something impressive yet effortless, sort of like pulling off a quiche lorraine but with way less fuss.
What Ingredients You Will Need
This recipe uses simple, wholesome ingredients to deliver bold flavor and satisfying texture without the fuss. Most of these are kitchen staples, and substitutions are easy if you’re looking to tweak the recipe.
- Cooked rice (preferably day-old, about 2 cups / 400g) – It’s dryer and fries better without turning mushy.
- Kimchi (about 1 cup / 150g, chopped) – Choose a good quality, fermented kimchi with a nice balance of sour and spicy. I usually grab Mother-in-Law’s brand for its perfect tang.
- Eggs (2 large) – For frying sunny side up with runny yolks.
- Garlic cloves (2, minced) – Adds that essential aromatic punch.
- Green onions (2, sliced thinly) – For freshness and color.
- Soy sauce (1 tablespoon / 15ml) – Use low sodium if preferred.
- Sesame oil (1 teaspoon / 5ml) – Toasted sesame oil is best for that nutty aroma.
- Vegetable oil (1 tablespoon / 15ml) – For frying.
- Optional add-ins:
- Cooked diced pork or bacon (about ½ cup / 75g) for extra savory depth.
- Kimchi juice (a splash) for more tang.
- Gochujang (Korean chili paste, 1 teaspoon) for extra heat.
If you want to keep it vegetarian, swap soy sauce for tamari and skip meat add-ins. You can also use jasmine or brown rice depending on preference. For a gluten-free version, just make sure your soy sauce is gluten-free.
Equipment Needed
To make this flavorful kimchi fried rice with a runny egg, you don’t need fancy gadgets, but a few tools definitely make the process smoother.
- Non-stick skillet or wok: A good non-stick pan is ideal for frying the rice evenly without sticking. A well-seasoned wok works great too.
- Spatula or wooden spoon: For stirring and folding the rice.
- Knife and cutting board: To chop kimchi, garlic, and green onions.
- Small bowl: To beat eggs if you want scrambled or just for prepping.
- Measuring spoons: To keep soy sauce and sesame oil just right.
If you’re watching your budget, a simple cast iron skillet does a fine job and gains character over time. I’ve learned that a silicone spatula is easier on non-stick pans and keeps the rice from getting mushy as you fold it. For the runny egg, a small non-stick pan dedicated for eggs helps maintain that perfect sunny side up without breaking the yolk.
Preparation Method
- Prep the ingredients (5 minutes): Chop about 1 cup (150g) of kimchi into bite-sized pieces. Mince 2 garlic cloves and slice 2 green onions thinly. If using any cooked meat, dice it now.
- Heat the pan: Place 1 tablespoon (15ml) of vegetable oil in your skillet or wok over medium-high heat. Let it get hot but not smoking (about 1-2 minutes).
- Sauté the garlic and kimchi (2-3 minutes): Add the minced garlic, stirring constantly to avoid burning. After 30 seconds, toss in the chopped kimchi. Stir-fry until it’s fragrant and slightly caramelized—this deepens the flavor.
- Add cooked meat (optional): If you’re including pork or bacon, add it now to heat through and mix with the kimchi.
- Stir in the rice (3-4 minutes): Add 2 cups (400g) of day-old cooked rice. Break any clumps gently with your spatula. Stir-fry everything together, letting the rice get slightly toasted but not dry.
- Season the rice: Drizzle 1 tablespoon (15ml) soy sauce and 1 teaspoon (5ml) toasted sesame oil over the rice. Mix well, tasting and adjusting seasoning if necessary. If you like it spicier, add 1 teaspoon gochujang now.
- Finish with green onions: Toss in the sliced green onions and stir for another 30 seconds to freshen up the flavors.
- Fry the eggs (5 minutes): In a separate small non-stick pan, heat a teaspoon of oil over medium heat. Crack 2 eggs gently and cook sunny side up until the whites are set but yolks remain runny (about 2-3 minutes). Season lightly with salt.
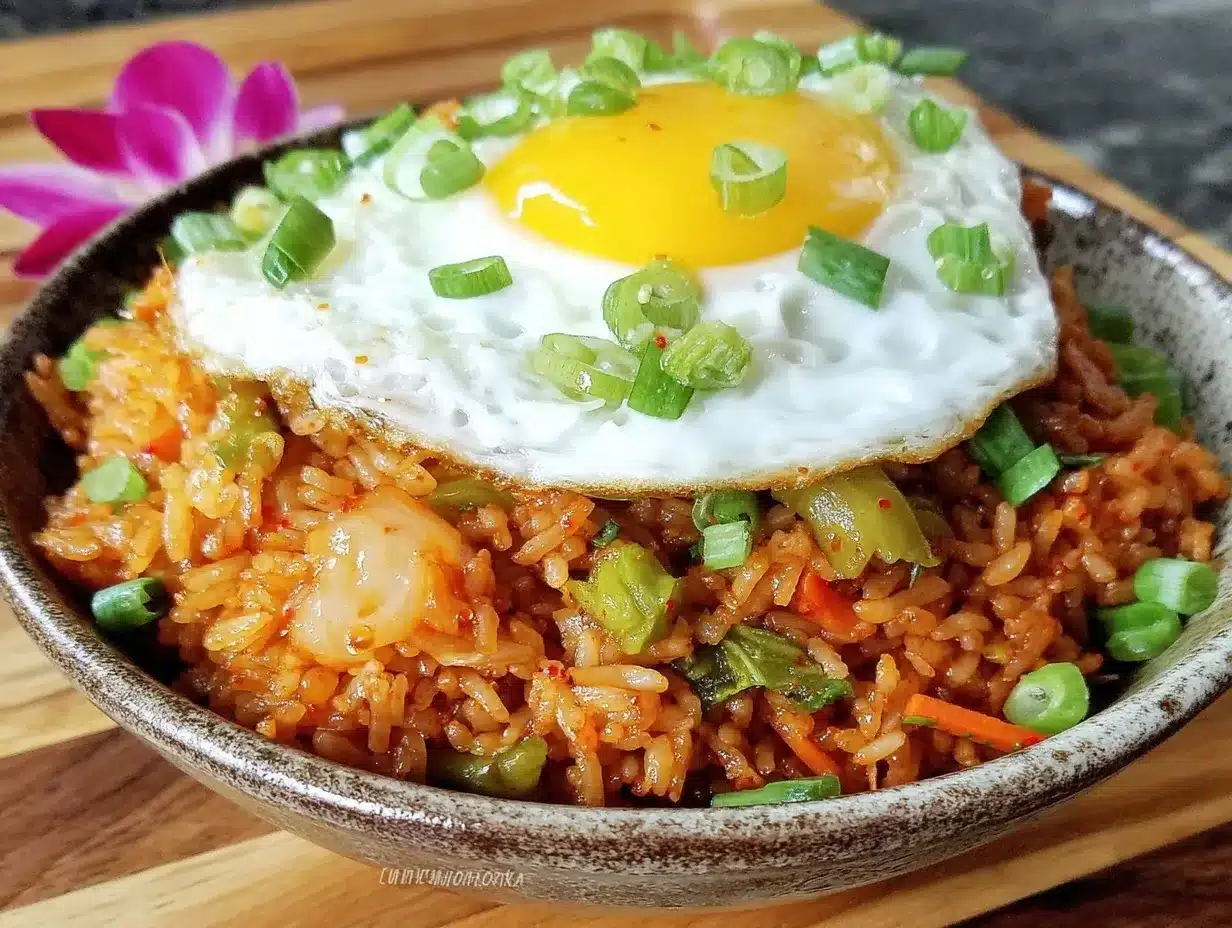
- Plate and serve: Spoon the kimchi fried rice onto plates. Top each serving with a fried egg. The moment the yolk breaks and seeps into the rice is pure magic.
Tips: Use day-old rice because fresh rice is too moist and tends to clump. Keep the heat fairly high to get that slightly crispy texture on the rice. If your kimchi is very sour or spicy, balance it with a pinch of sugar in the rice. When frying eggs, don’t poke the yolk—let it be the crowning glory.
Cooking Tips & Techniques
Cooking kimchi fried rice perfectly requires attention to a few little details that make a big difference.
- Use the right rice: For best texture, use leftover rice that’s been refrigerated overnight. It’s drier and fries up nicely without turning mushy.
- Control the heat: Medium-high heat is key to get some caramelization on the kimchi and rice. Too high, and you risk burning the garlic or rice; too low, and it steams rather than fries.
- Don’t overcrowd: If you make a larger batch, fry in batches to avoid steaming the rice.
- Perfect runny egg: Use a non-stick pan and medium heat. Covering the pan loosely for a minute helps set the whites without overcooking yolks.
- Balance flavors: Kimchi can vary widely in heat and sourness. Taste as you go, adding a pinch of sugar or a splash of kimchi juice to balance acidity.
I once tried making this with fresh-cooked rice and ended up with a mushy mess—lesson learned the hard way! Also, frying the egg in the same pan after the rice can cause the yolk to break because the pan is too hot or greasy. So I keep a separate pan just for eggs now. These little tweaks make a big difference in the final dish.
Variations & Adaptations
This kimchi fried rice recipe is a fantastic base for playing around, making it easy to customize for different tastes and dietary needs.
- Protein swaps: Instead of pork or bacon, try tofu cubes for a vegetarian twist or leftover shredded chicken for a different texture.
- Vegetable additions: Add chopped mushrooms, spinach, or bell peppers for extra nutrients and color. Frozen mixed veggies work well too.
- Spice it up: Increase heat by adding more gochujang or a dash of chili flakes. For a milder version, reduce kimchi amount or rinse it slightly before cooking.
- Low-carb option: Substitute cooked cauliflower rice instead of regular rice. The cooking time will be shorter—just stir-fry until heated through.
Personally, I once made a version with leftover honey lemon glazed salmon chopped into the rice instead of pork. The sweetness paired surprisingly well with the tangy kimchi, adding another layer of flavor I never expected.
Serving & Storage Suggestions
This kimchi fried rice is best served immediately while the egg yolk is still runny and the rice warm and fragrant. Scoop it onto warm plates for the best experience.
Pair it with light sides like a crisp cucumber salad or a simple miso soup to balance the spicy richness. For brunch gatherings, it complements dishes like eggs benedict nicely, offering a bold contrast of flavors.
Leftovers can be stored covered in the refrigerator for up to 3 days. Reheat gently in a skillet over medium heat with a splash of water or oil to prevent drying out. The flavors actually deepen overnight, though the egg is best freshly cooked.
Nutritional Information & Benefits
For one serving of this kimchi fried rice with a runny egg, you can expect roughly:
| Calories | 400-450 kcal |
|---|---|
| Protein | 15-20g |
| Fat | 15-20g |
| Carbohydrates | 45-50g |
Kimchi is rich in probiotics that support gut health, while eggs provide high-quality protein and essential nutrients like choline. Using sesame oil adds heart-healthy fats and antioxidants. This dish is naturally gluten-free if you use tamari and is relatively low in sugar.
From a personal wellness standpoint, this recipe balances indulgence with nutrition, making it a go-to when I want something nourishing but still satisfying my craving for bold, spicy flavors.
Conclusion
This flavorful kimchi fried rice with a runny egg is one of those recipes that’s easy to make, packed with personality, and endlessly comforting. It’s flexible enough to fit your pantry and your taste buds, yet reliable enough to deliver a satisfying meal every time.
I love how it brings a little spark to my routine meals without any fuss, and I’m sure once you try it, you’ll find your own reasons to keep it in your regular rotation. Whether you tweak it with different proteins, add veggies, or keep it classic, it’s a recipe that welcomes creativity.
Give it a try and let me know how you make it your own. Your kitchen might just become your favorite late-night hangout spot, like mine did.
FAQs About Kimchi Fried Rice with a Runny Egg
Can I use fresh rice instead of day-old rice?
Fresh rice tends to be too moist and can make the dish mushy. If you only have fresh rice, spread it out on a tray and let it air dry for a bit before frying, or try refrigerating it for a few hours.
How do I get the perfect runny egg yolk?
Cook eggs sunny side up on medium-low heat, cover loosely with a lid for 1-2 minutes, and watch the whites set without overcooking the yolk.
Is kimchi fried rice spicy?
It depends on your kimchi and how much you use. You can adjust the heat by adding or reducing kimchi or gochujang, or rinsing the kimchi lightly to tone down the spice.
Can I make this recipe vegan?
Yes! Skip the egg or use a tofu scramble. Make sure to use vegan kimchi (some contain fish sauce) and swap soy sauce for tamari if needed.
What should I serve with kimchi fried rice?
Light sides like cucumber salad, steamed greens, or a simple soup complement the bold flavors well. For brunch, it pairs nicely with dishes like fluffy lemon ricotta pancakes.
Pin This Recipe!
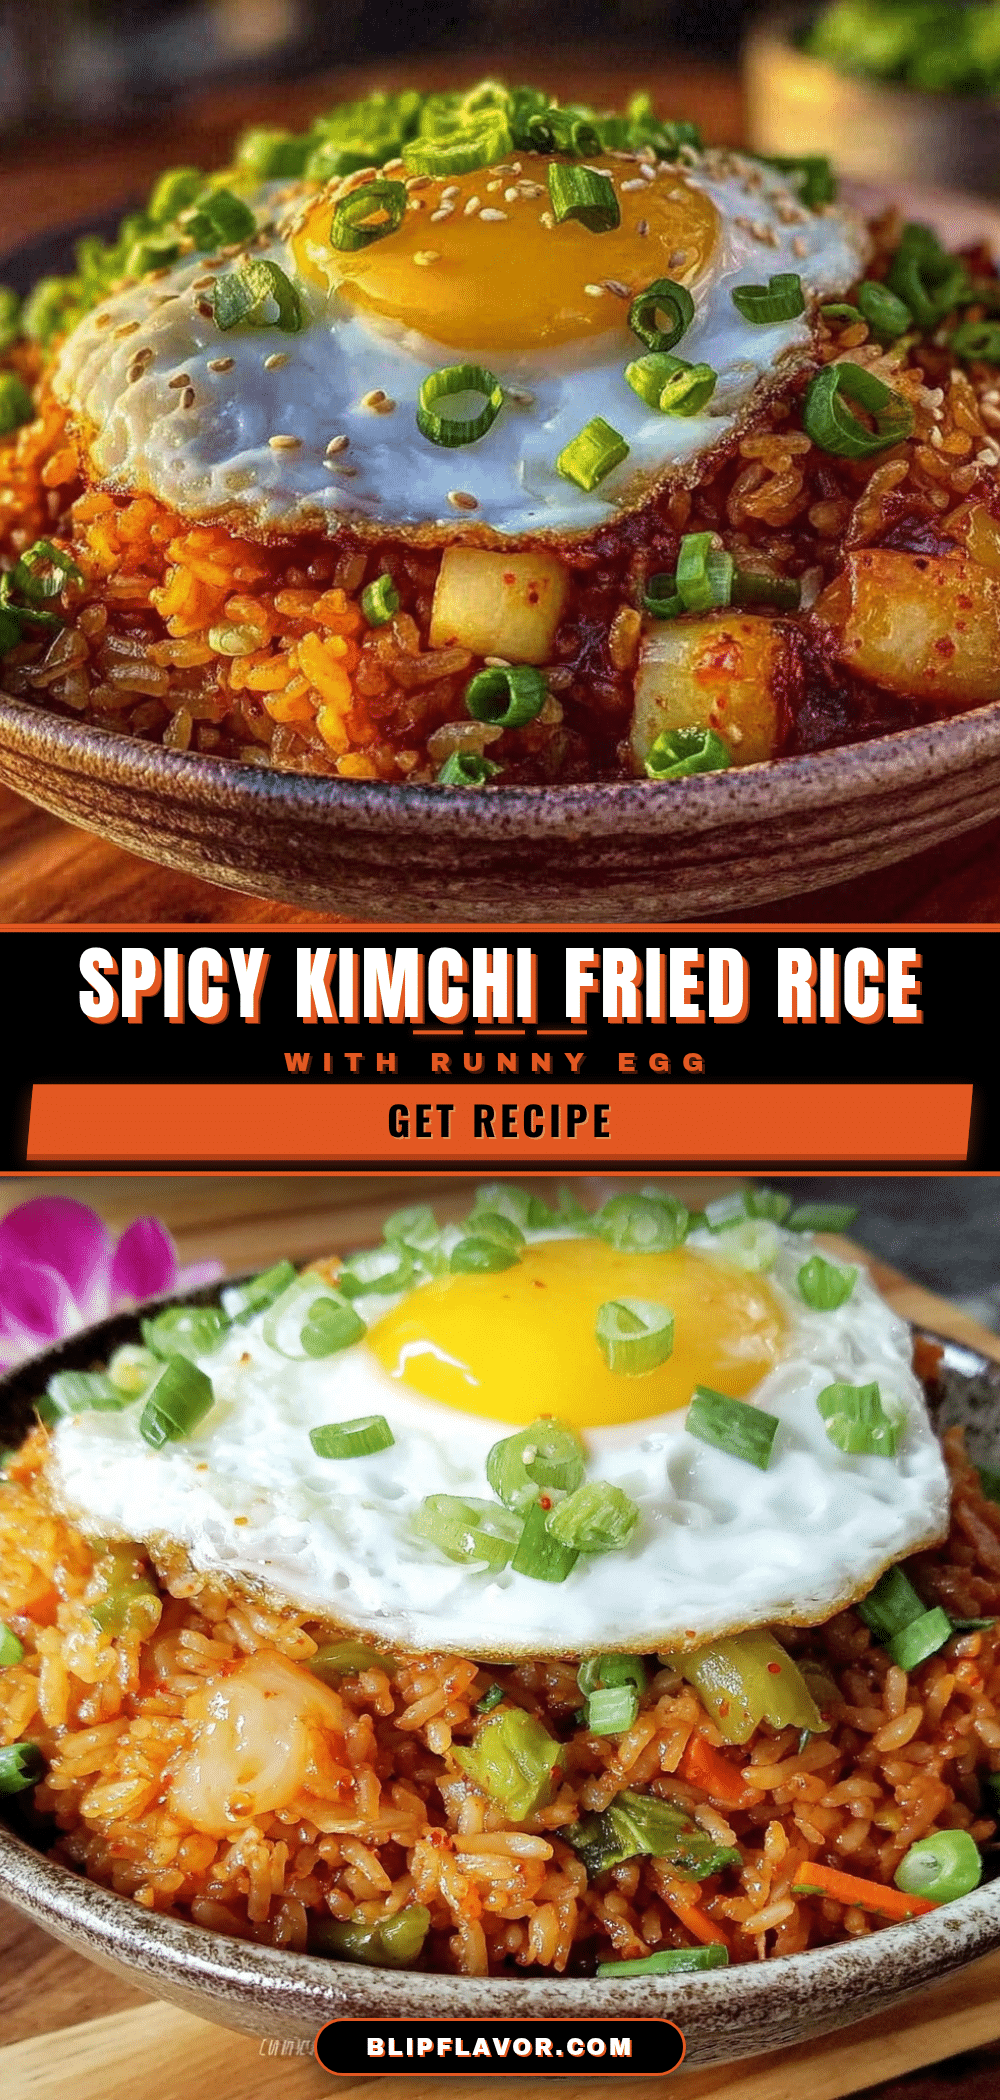
Kimchi Fried Rice Recipe Easy Homemade with Runny Egg Perfect Meal

A quick and easy kimchi fried rice recipe featuring day-old rice, spicy-sour kimchi, and topped with a perfectly fried runny egg yolk for a comforting and flavorful meal.
- Prep Time: 5 minutes
- Cook Time: 15 minutes
- Total Time: 20 minutes
- Yield: 2 servings 1x
- Category: Main Course
- Cuisine: Korean
Ingredients
- 2 cups (400g) cooked day-old rice
- 1 cup (150g) chopped kimchi
- 2 large eggs
- 2 garlic cloves, minced
- 2 green onions, thinly sliced
- 1 tablespoon (15ml) soy sauce (low sodium preferred)
- 1 teaspoon (5ml) toasted sesame oil
- 1 tablespoon (15ml) vegetable oil
- Optional: ½ cup (75g) cooked diced pork or bacon
- Optional: splash of kimchi juice
- Optional: 1 teaspoon gochujang (Korean chili paste)
Instructions
- Chop kimchi into bite-sized pieces. Mince garlic cloves and slice green onions thinly. Dice cooked meat if using.
- Heat vegetable oil in a non-stick skillet or wok over medium-high heat until hot but not smoking (about 1-2 minutes).
- Add minced garlic and stir constantly for 30 seconds to avoid burning.
- Add chopped kimchi and stir-fry until fragrant and slightly caramelized (2-3 minutes).
- Add cooked meat if using and heat through.
- Add day-old cooked rice, breaking up clumps gently with a spatula. Stir-fry for 3-4 minutes until rice is slightly toasted but not dry.
- Drizzle soy sauce and toasted sesame oil over the rice. Mix well and adjust seasoning as needed. Add gochujang for extra heat if desired.
- Toss in sliced green onions and stir for another 30 seconds.
- In a separate small non-stick pan, heat a teaspoon of oil over medium heat. Crack eggs gently and cook sunny side up until whites are set but yolks remain runny (2-3 minutes). Season lightly with salt.
- Plate the kimchi fried rice and top each serving with a fried egg. Serve immediately.
Notes
Use day-old rice for best texture to avoid mushiness. Keep heat medium-high for caramelization but avoid burning. Fry eggs in a separate pan to keep yolks intact. Adjust kimchi spice level by rinsing or adding sugar if too sour or spicy. For vegetarian, omit meat and use tamari instead of soy sauce.
Nutrition
- Serving Size: 1 serving (half of r
- Calories: 425
- Sugar: 4
- Sodium: 700
- Fat: 17
- Saturated Fat: 4
- Carbohydrates: 48
- Fiber: 2
- Protein: 18
Keywords: kimchi fried rice, kimchi recipe, fried rice with egg, quick dinner, Korean food, runny egg, easy recipe, spicy fried rice


