“Wait, are you seriously telling me this cake has no baking?” my friend asked incredulously as I pulled this dessert from the fridge one humid afternoon. Honestly, I was a little skeptical myself the first time I stumbled on this recipe. I’d been hunting for something simple, no-fuss, yet indulgent enough to satisfy a stubborn sweet tooth on a busy weeknight. You know the kind—when the last thing you want is to turn on the oven or babysit a complicated recipe. This creamy no-bake Oreo peanut butter icebox cake arrived almost by accident, during one of those “I just need something sweet now” moments.
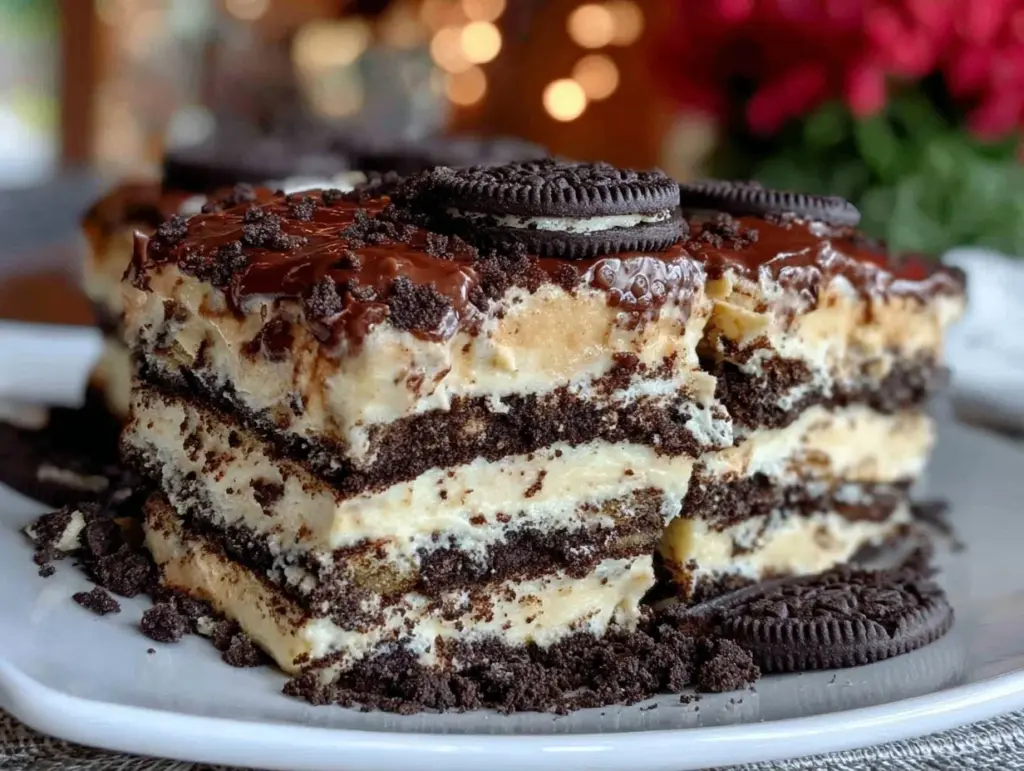
It started with a jar of peanut butter that had been sitting behind the cereal boxes, a pack of Oreos leftover from a movie night, and a hunch that the fridge could do the magic instead of the oven. The layers of crushed Oreos, whipped peanut butter cream, and a chill time in the fridge turned out to be the perfect combo. The texture? Dreamy, velvety, and with just the right amount of crunch from the cookies. I ended up making it three times that week, much to the delight (and slight confusion) of my family. They kept asking for the recipe, which is how I realized this wasn’t just a random snack but a keeper.
What’s really stuck with me is how this cake captures that perfect balance between effortless and impressive. It’s the kind of dessert that feels like a little secret you want to share but also keep for yourself. You can pull it together in under 30 minutes, then let the fridge do the rest while you kick back. No oven heat, no stress, just pure creamy goodness waiting for you when you’re ready. Honestly, it’s become my go-to when I want to impress without all the hassle. And somehow, the peanut butter and Oreo combo feels nostalgic yet fresh—a real crowd-pleaser that never gets old.
So, here’s the story behind my creamy no-bake Oreo peanut butter icebox cake. I hope it finds a cozy spot in your recipe box, just like it did in mine.
Why You’ll Love This Recipe
This creamy no-bake Oreo peanut butter icebox cake isn’t just a dessert; it’s a little slice of happiness that fits right into your busy life. Having tested this recipe countless times, I can say it delivers every single time—whether you’re a kitchen novice or a seasoned home baker. Here’s why this cake earned a permanent spot on my dessert roster:
- Quick & Easy: This dessert comes together in under 30 minutes, making it perfect for last-minute gatherings or those evenings when you just want something sweet without fuss.
- Simple Ingredients: No need for specialty stores—chances are you already have Oreos, peanut butter, and cream in your pantry or fridge.
- Perfect for Any Occasion: Whether it’s a casual brunch with friends, a birthday treat, or a cozy family dessert, this icebox cake fits the bill.
- Crowd-Pleaser: The combination of creamy peanut butter and crunchy Oreos is a winner with kids and adults alike; everyone asks for seconds.
- Unbelievably Delicious: The creamy layers meld with the cookies overnight, creating a texture that’s both smooth and satisfyingly crunchy.
What sets this recipe apart from the countless Oreo cakes out there? Two things: the whipped peanut butter cream that lends a light, airy texture unlike a dense frosting, and the layering method that lets the Oreos soak up just enough moisture—not soggy, just perfectly tender. This cake isn’t just another no-bake dessert; it’s the one I trust to impress without breaking a sweat. After all, I’ve had my fair share of overcomplicated desserts that promise the world but deliver stress. This one delivers pure joy, every time.
What Ingredients You Will Need
This recipe uses simple, wholesome ingredients to deliver bold flavor and satisfying texture without the fuss. Most of these are pantry staples, so no surprise grocery runs needed. Here’s what you’ll gather:
- Oreo cookies (about 36 whole cookies, roughly 3 sleeves) – Use classic Oreos for that iconic flavor. If you want to mix it up, chocolate creme-filled varieties work too.
- Peanut butter (1 cup / 250 grams, creamy) – I prefer natural peanut butter with no added sugar for a more authentic taste, but smooth peanut butter works perfectly.
- Heavy whipping cream (2 cups / 480 ml) – For the best texture, use cold heavy cream. You can swap with coconut cream for a dairy-free option.
- Powdered sugar (3/4 cup / 90 grams) – This sweetens the peanut butter cream without any graininess.
- Vanilla extract (1 teaspoon) – Adds warmth and depth to the cream mixture.
- Salt (a pinch) – Balances the sweetness and enhances the peanut butter flavor.
Optional but recommended for the peanut butter cream’s fluffiness: chill your mixing bowl and beaters ahead of time. I usually use a trusted brand like Skippy for peanut butter and Land O’Lakes for cream—it’s a personal preference based on texture. If you want a seasonal twist, try adding a layer of sliced bananas or fresh strawberries between the cookie layers for a bright contrast.
Equipment Needed
- Mixing bowls: One large for whipping cream, another for combining peanut butter and sugar. Glass or metal bowls work best for chilling.
- Electric mixer or stand mixer: Essential for whipping the cream to soft peaks. A handheld mixer works fine, but a stand mixer makes it easier.
- 9×13 inch (23×33 cm) baking dish or pan: For layering the cake. I’ve also used a deep glass casserole dish, which lets you see those layers beautifully.
- Spatula: For folding the whipped cream gently into the peanut butter mixture and for spreading the layers evenly.
- Plastic wrap or foil: To cover the cake while it chills in the fridge.
If you’re on a budget, no worries—hand mixing with a whisk and a sturdy bowl can do the trick, just expect a little more elbow grease. I learned long ago that having the right tools like a good mixer really makes whipping cream less of a workout and more of a pleasure. Plus, keeping your equipment cold helps the cream whip up faster and hold better, which is a neat trick I picked up from making fluffy lemon ricotta pancakes.
Preparation Method
- Prep your Oreos: Start by roughly crushing about 30 Oreos into chunks. You want a mix of crumbs and larger pieces for that perfect texture. Set aside 6 whole Oreos for garnish if desired.
- Whip the cream: Pour 2 cups (480 ml) of cold heavy whipping cream into a chilled bowl. Beat on medium-high speed until soft peaks form, about 3-4 minutes. Don’t overbeat, or it will turn grainy.
- Make the peanut butter cream: In a separate bowl, combine 1 cup (250 g) creamy peanut butter, 3/4 cup (90 g) powdered sugar, 1 teaspoon vanilla extract, and a pinch of salt. Mix until smooth and well combined.
- Fold whipped cream into peanut butter: Gently fold the whipped cream into the peanut butter mixture using a spatula. Do this carefully in thirds to keep the mixture light and airy. The final texture should be smooth and fluffy.
- Layer the cake: Spread a thin layer of peanut butter cream on the bottom of your 9×13 inch (23×33 cm) dish. Add a single layer of Oreo chunks evenly over the cream. Repeat layering cream and Oreos until you run out, finishing with a thick layer of cream on top.
- Chill to set: Cover the cake tightly with plastic wrap or foil and refrigerate for at least 4 hours, preferably overnight. This lets the Oreos soften and the flavors meld beautifully.
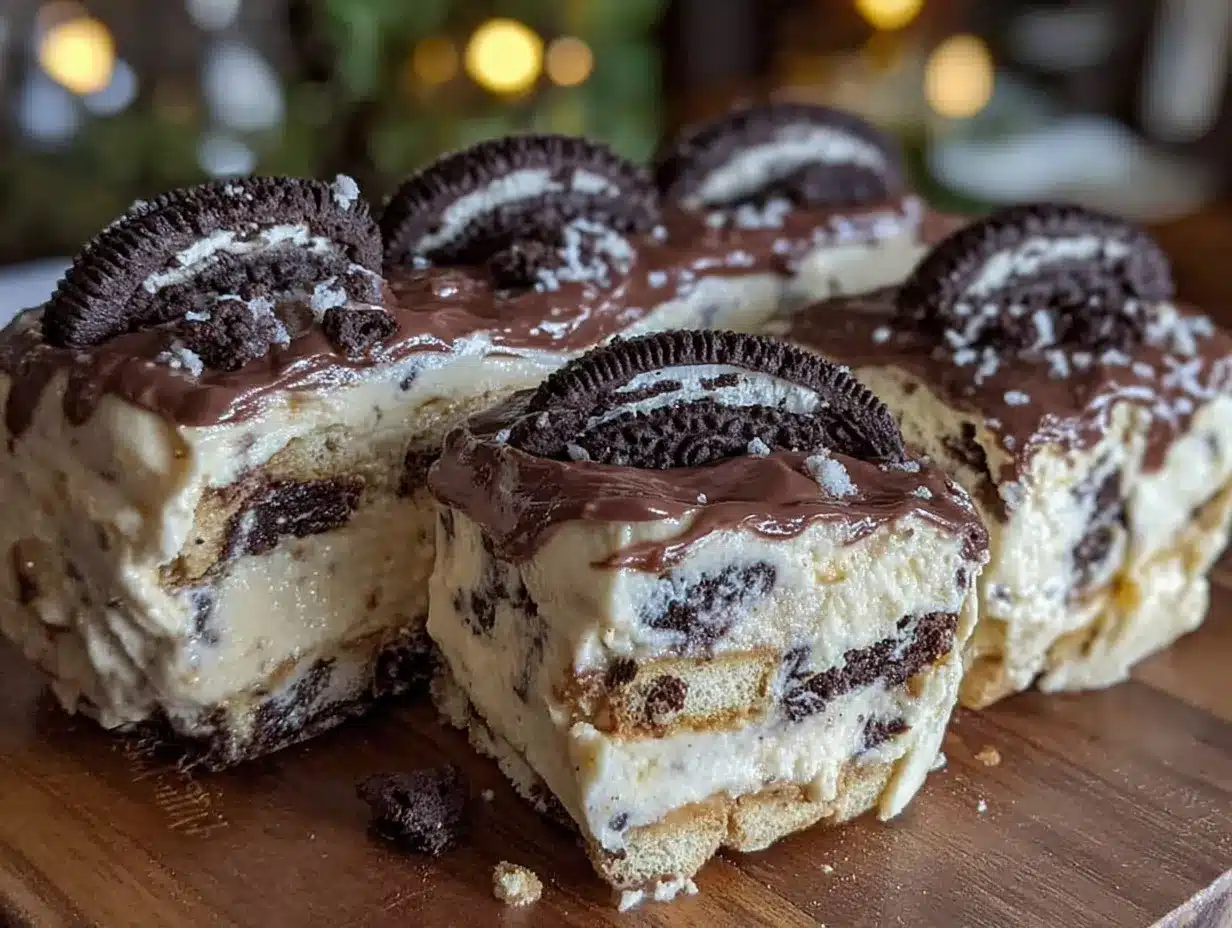
- Garnish and serve: Right before serving, top with the reserved whole Oreos or crushed cookie crumbs for a pretty finish. Slice with a sharp knife, wiping between cuts for clean slices.
A couple of personal tips: Don’t rush the chilling stage; it’s key to getting that creamy, sliceable texture. Also, if your peanut butter mixture feels too thick, add a splash of milk or cream to loosen it up slightly. When layering, keep the spread even to avoid any cookie clumps that can make cutting tricky. This method is a little like the layering you’d do when making a mint Oreo truffles—it’s all about balance and patience.
Cooking Tips & Techniques
Whipping cream might seem straightforward, but it has its quirks. Cold equipment and cream are your best friends here; warm cream just won’t hold the necessary peaks. I’ve learned the hard way that overbeating leads to butter, so stop once you see soft peaks that hold shape but still look smooth.
Folding is another technique that’s easy to mess up. Use a gentle under-and-over motion with a spatula to combine the peanut butter mix and whipped cream. You want to keep as much air in the mixture as possible. Rushing or stirring vigorously will deflate the cream, making the cake dense.
When crushing Oreos, I like to leave some bigger chunks for texture, but if you prefer a more uniform cake, crush them finer. Also, layering evenly is key—don’t pile too thick in any spot to avoid soggy layers or uneven bites.
Multitasking tip: While the cake chills, it’s a great time to prep drinks or a light brunch spread, like pairing this sweet treat with a sparkling mimosa bar setup for a weekend brunch. I’ve found that letting the flavors rest overnight really amps up the richness and melds the peanut butter and Oreo notes perfectly.
Variations & Adaptations
- Chocolate Lover’s Twist: Add a layer of melted chocolate ganache between the peanut butter cream and Oreo layers for extra indulgence.
- Nut-Free Version: Substitute peanut butter with sunflower seed butter or a dairy-free cream cheese frosting to avoid nuts.
- Fruit Layer: Add thin slices of banana or fresh raspberries between the layers for a fresh, tangy contrast that cuts through the richness.
- Vegan Adaptation: Use coconut cream whipped to peaks and dairy-free Oreo-style cookies. Swap powdered sugar for coconut sugar if preferred.
- Crunch Upgrade: Sprinkle chopped roasted peanuts or pretzel bits between layers for an extra salty crunch.
One variation I adore is mixing a bit of espresso powder into the peanut butter cream—gives a subtle mocha note that pairs beautifully with Oreos. It’s a small twist but takes the flavor profile to another level. For a seasonal take, during summer I sometimes swap Oreos for crushed graham crackers and layer with fresh strawberries, creating a peanut butter strawberry icebox cake that’s just as dreamy.
Serving & Storage Suggestions
This icebox cake is best served chilled straight from the fridge. The texture is creamier and more cohesive when cold, offering that luscious melt-in-your-mouth experience. Use a sharp knife to slice, wiping it clean between cuts for neat pieces perfect for presentation.
Pair this dessert with a light coffee or a sparkling fruit punch to balance the richness. It’s especially lovely following a savory brunch spread—try it alongside a classic Quiche Lorraine for a complete meal that impresses without stress.
Store leftovers tightly wrapped in the fridge for up to 3 days. The flavors actually deepen as it sits, so it’s perfectly fine to make in advance. If you want to freeze it, wrap well and thaw overnight in the fridge before serving. Avoid freezing if you’ve added fresh fruit layers, as they can get watery upon thaw.
Nutritional Information & Benefits
Estimated per serving (based on 12 servings): 320 calories, 20g fat, 30g carbohydrates, 5g protein. While this dessert is definitely an indulgence, the peanut butter adds a dose of protein and healthy fats that help balance the sugar from the Oreos and powdered sugar.
Peanut butter provides heart-healthy monounsaturated fats and vitamin E, while the whipped cream contributes calcium. If you swap to coconut cream, it becomes dairy-free but still creamy. Keep in mind this dessert contains gluten and nuts, so it’s not suitable for those with allergies.
From a wellness perspective, I see this cake as a treat that feels indulgent without being overly complicated or heavy. It’s a dessert that fits well into a balanced lifestyle when enjoyed in moderation.
Conclusion
This creamy no-bake Oreo peanut butter icebox cake is a perfect example of how simple ingredients and a little patience can turn into something truly special. It’s a recipe that suits those busy nights when you want indulgence without the mess or stress. Plus, it’s flexible enough to fit your taste and dietary needs with easy swaps and additions.
Personally, I love how this dessert brings family and friends together—often sparking requests for repeats. It’s my little secret weapon for celebrations and casual evenings alike. I hope it gives you the same kind of joy and ease I’ve found making it again and again.
Don’t hesitate to tweak it to your liking and share your favorite twists. After all, the best recipes are the ones that grow with you.
FAQs
Can I use crunchy peanut butter instead of creamy?
Yes, but the texture of the cream will be a bit chunkier. If you prefer smooth frosting, creamy peanut butter is best.
How long should I chill the icebox cake before serving?
At least 4 hours, but overnight chilling yields the best texture and flavor melding.
Can I make this cake gluten-free?
Use gluten-free sandwich cookies instead of Oreos and double-check all other ingredients for gluten content.
Is it possible to prepare this cake ahead of time?
Absolutely! It actually tastes better after resting overnight, making it ideal for advance prep.
What’s the best way to slice this cake neatly?
Use a sharp knife dipped in hot water and wiped dry between slices for clean cuts without crumbling.
Pin This Recipe!
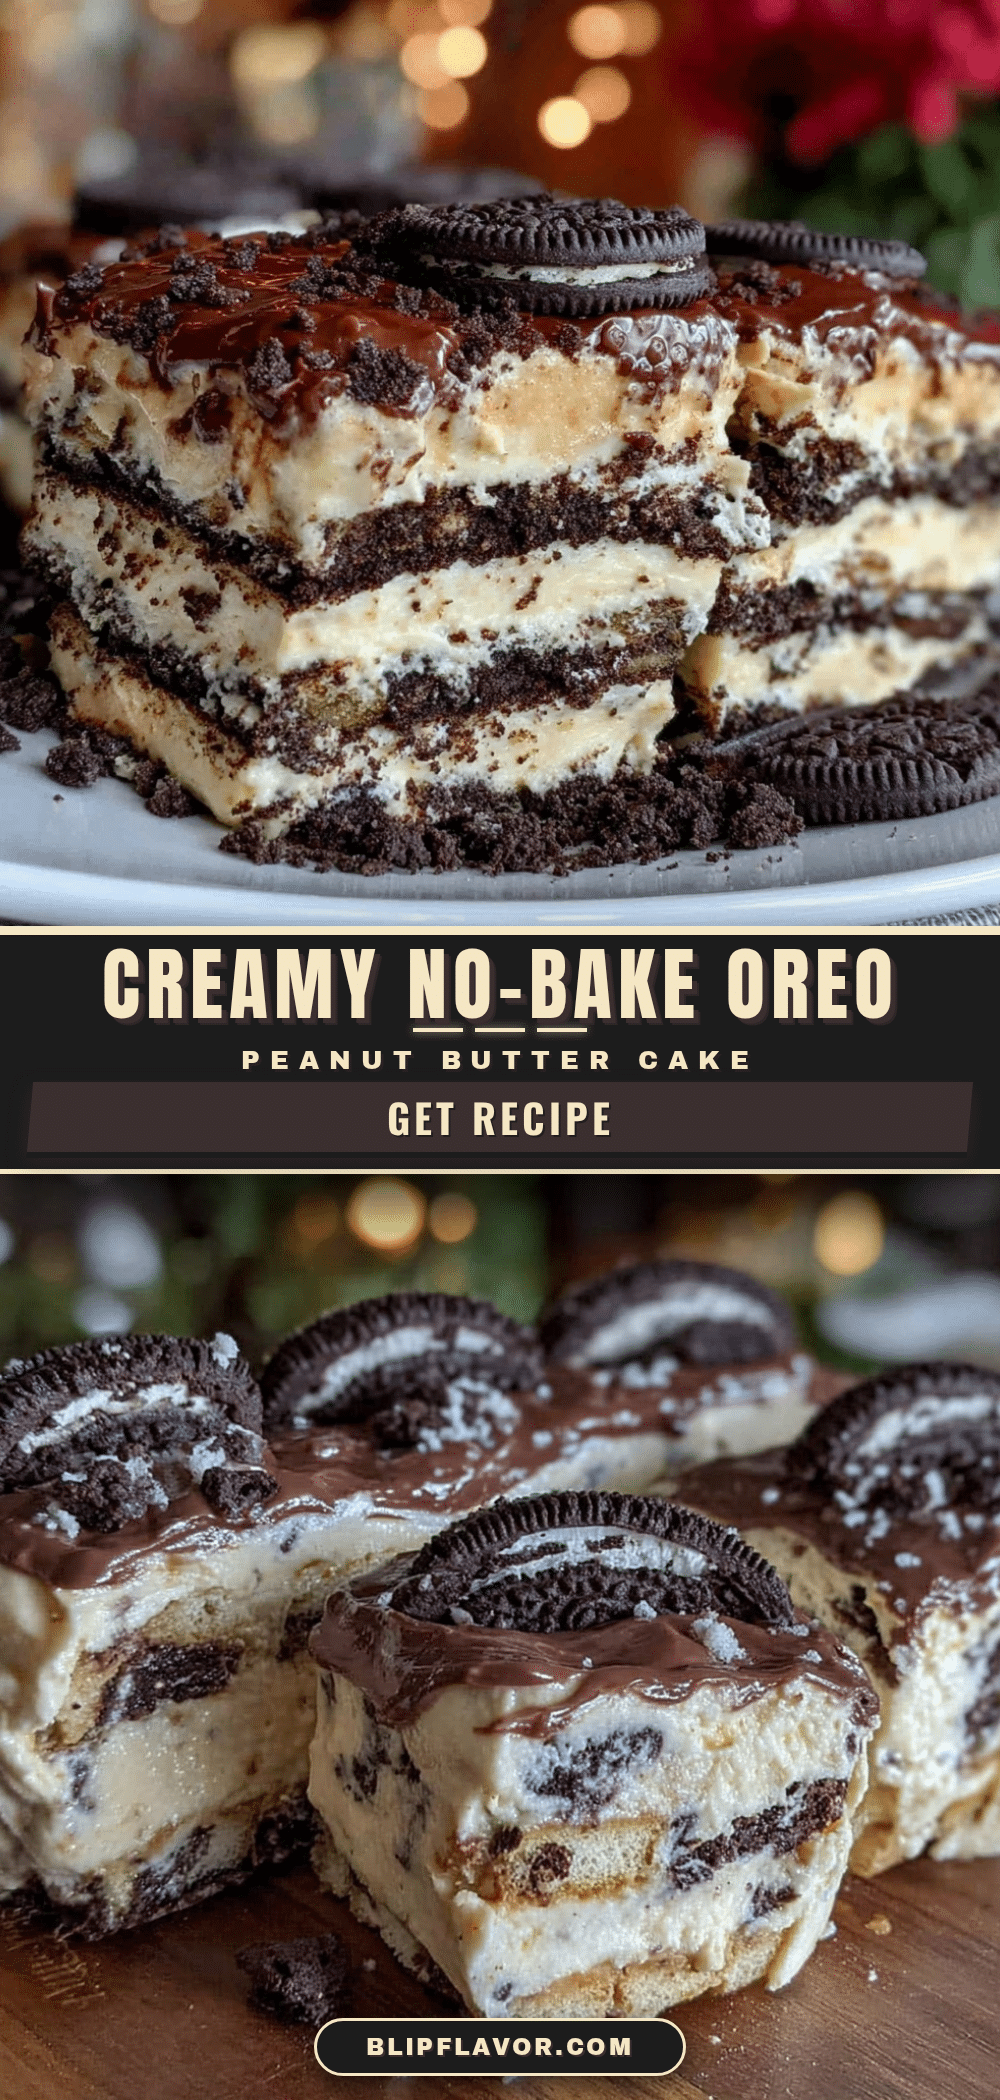
Creamy No-Bake Oreo Peanut Butter Icebox Cake
A quick and easy no-bake dessert featuring layers of crushed Oreos and whipped peanut butter cream, chilled to perfection for a creamy, crunchy treat.
- Prep Time: 15 minutes
- Cook Time: 0 minutes
- Total Time: 4 hours 15 minutes
- Yield: 12 servings 1x
- Category: Dessert
- Cuisine: American
Ingredients
- 36 whole Oreo cookies (about 3 sleeves), crushed
- 1 cup (250 grams) creamy peanut butter
- 2 cups (480 ml) cold heavy whipping cream
- 3/4 cup (90 grams) powdered sugar
- 1 teaspoon vanilla extract
- Pinch of salt
Instructions
- Roughly crush about 30 Oreos into chunks, leaving some larger pieces. Set aside 6 whole Oreos for garnish if desired.
- Pour 2 cups (480 ml) of cold heavy whipping cream into a chilled bowl and beat on medium-high speed until soft peaks form, about 3-4 minutes. Avoid overbeating.
- In a separate bowl, combine 1 cup (250 g) creamy peanut butter, 3/4 cup (90 g) powdered sugar, 1 teaspoon vanilla extract, and a pinch of salt. Mix until smooth.
- Gently fold the whipped cream into the peanut butter mixture in thirds using a spatula, keeping the mixture light and airy.
- Spread a thin layer of peanut butter cream on the bottom of a 9×13 inch (23×33 cm) dish. Add a layer of Oreo chunks evenly over the cream.
- Repeat layering cream and Oreos until all are used, finishing with a thick layer of cream on top.
- Cover the cake tightly with plastic wrap or foil and refrigerate for at least 4 hours, preferably overnight.
- Before serving, garnish with reserved whole Oreos or crushed cookie crumbs. Slice with a sharp knife, wiping between cuts for clean slices.
Notes
Chill mixing bowl and beaters ahead for better whipped cream texture. Do not overbeat cream to avoid graininess. Fold whipped cream gently to keep mixture airy. Chill cake at least 4 hours or overnight for best texture. Use a sharp knife dipped in hot water and wiped dry between slices for clean cuts.
Nutrition
- Serving Size: 1 slice (1/12 of cak
- Calories: 320
- Fat: 20
- Carbohydrates: 30
- Protein: 5
Keywords: no-bake, Oreo, peanut butter, icebox cake, easy dessert, creamy, quick dessert, layered cake


